FHB Logo Facebook LinkedIn Email Pinterest Twitter X Instagram Tiktok YouTube Plus Icon Close Icon Navigation Search Icon Navigation Search Icon Arrow Down Icon Video Guide Icon Article Guide Icon Modal Close Icon Guide Search Icon Skip to content
Subscribe
Log In
  • How-To
  • Design
  • Tools & Materials
  • Restoration
  • Videos
  • Blogs
  • Forum
  • Magazine
  • Members
  • FHB House
  • Podcast
Log In

Fine Homebuilding Project Guides

Finish & Trim Carpentry

Guide Home
  • Trim Design
  • Tools and Materials
  • Interior Trim Basics
  • Window and Door Casings
  • Baseboard and Crown Molding
  • Wainscot and Paneling
  • Mantels and Fireplace Surrounds
  • Coffered Ceilings
How-To

Beadboard Wainscot Made Easy

Carpenter Rick Arnold outlines his techniques for a solid, efficient, and good-looking paneling job.

By Rick Arnold Issue 173

Synopsis: Beadboard wainscot is one of those decorative details that can add a lot of charm to any room. But few people know how quickly and easily it installs. Fine Homebuilding contributing editor Rick Arnold shows us some trade secrets, such as how the trim covers up all the rough edges of the installation. Arnold uses a scribe guide to fit the beadboard around obstacles such as windows. You also get a peek at some of the myriad forms and materials that beadboard is available in.


I love to transform a room with wainscot. My favorite type and the easiest to install is beadboard. Whether in a Victorian house with stained-beadboard panels or in a cottage with painted beadboard, a room can morph from blah to beautiful quickly. By matching trim details such as the cap (chair rail) and baseboard with the rest of the millwork (casing, crown), wainscot can enhance the whole style.

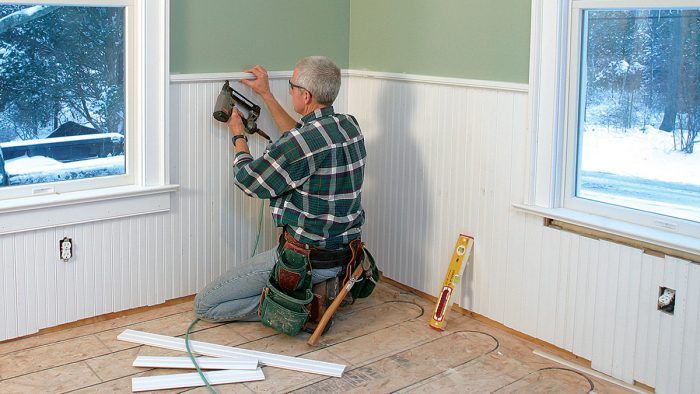
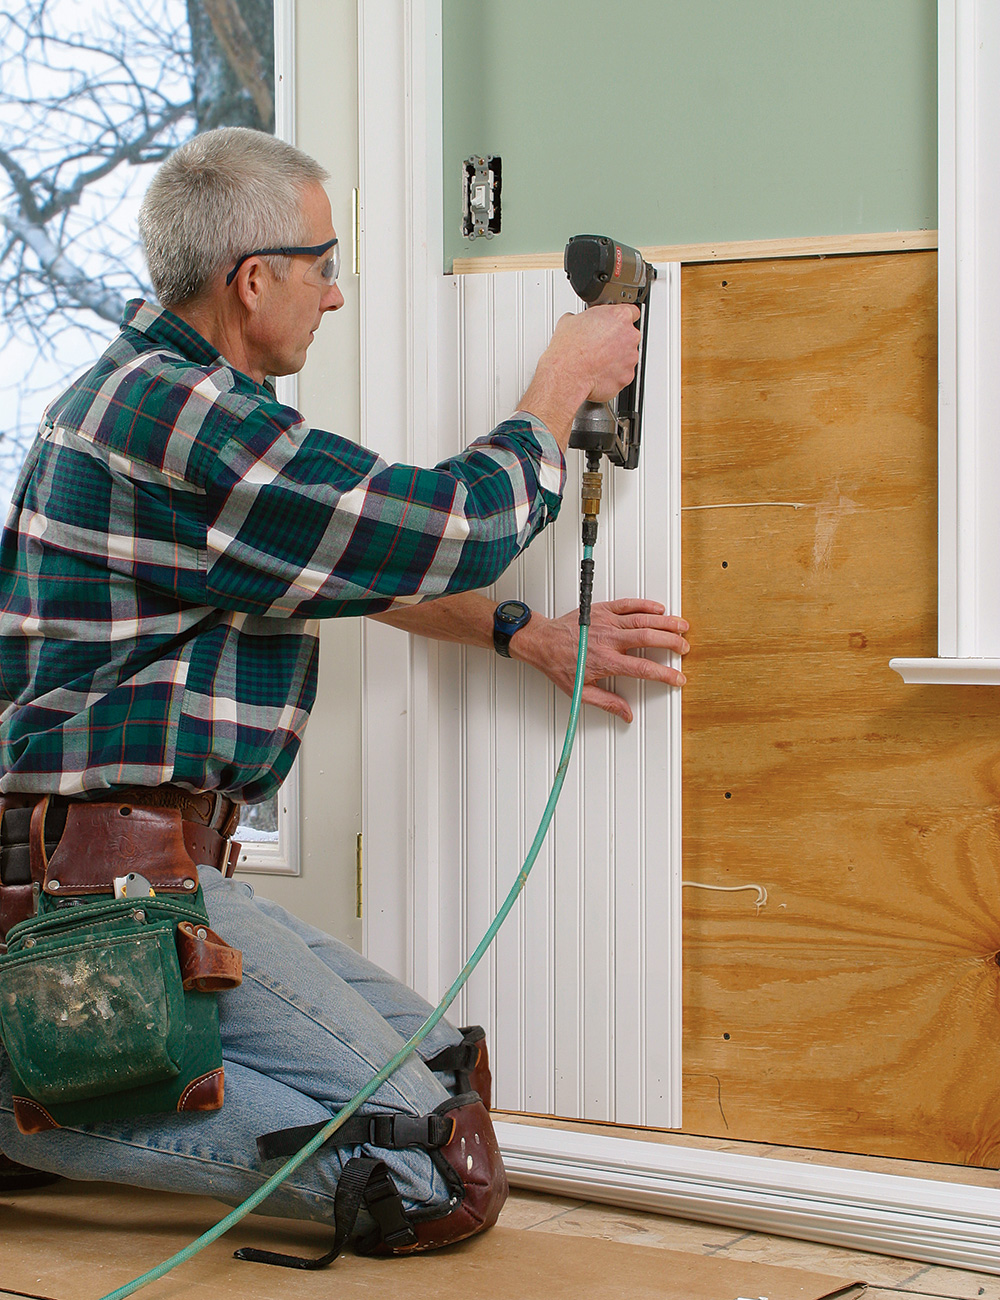
For this project, I installed paint-grade tongue-and-groove beadboard planks, which are the best type I’ve worked with. These 1/2-in.-thick preprimed boards, made from engineered lumber, have a finished width of about 3 in. After the first board is secured, the rest are mostly self-supporting, so whole walls can be dry-fit. And because baseboard hides the bottom ends of the boards in most cases, installation goes quickly, and I have to pay attention only to critical areas.

Forgiving installation

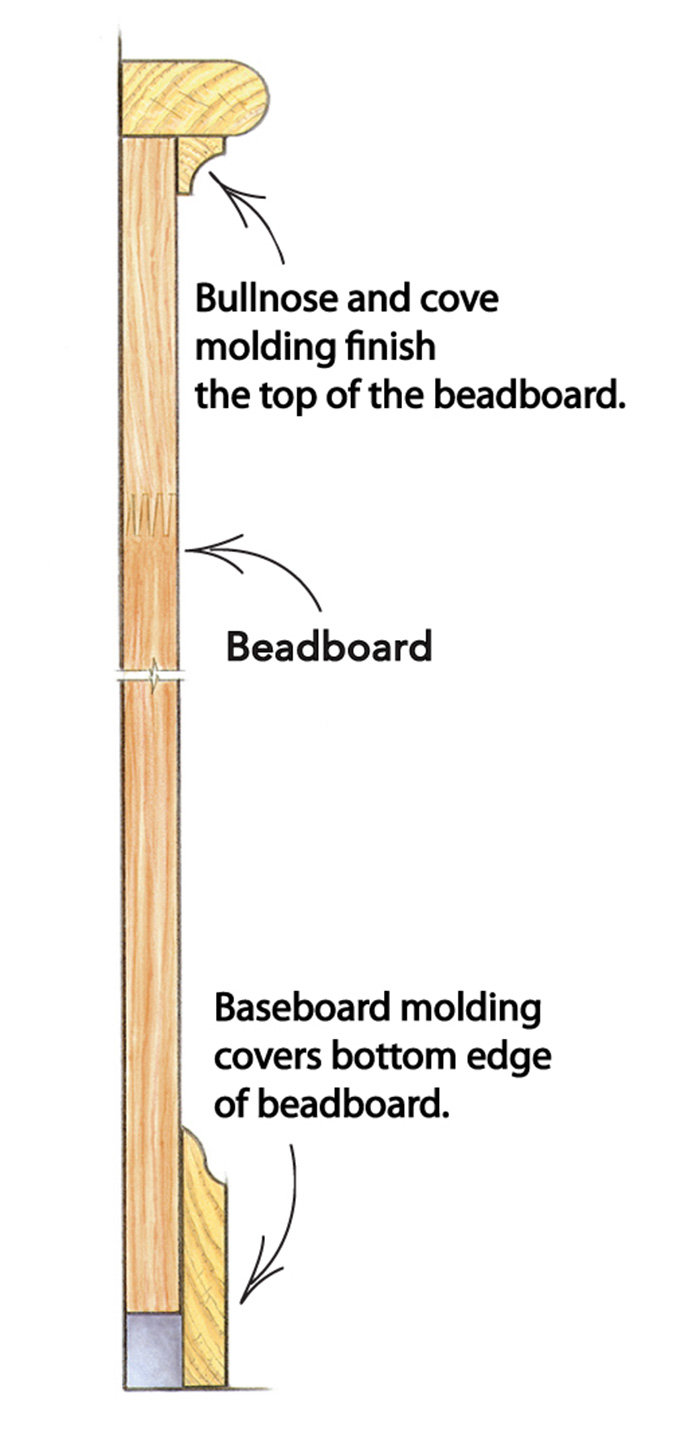
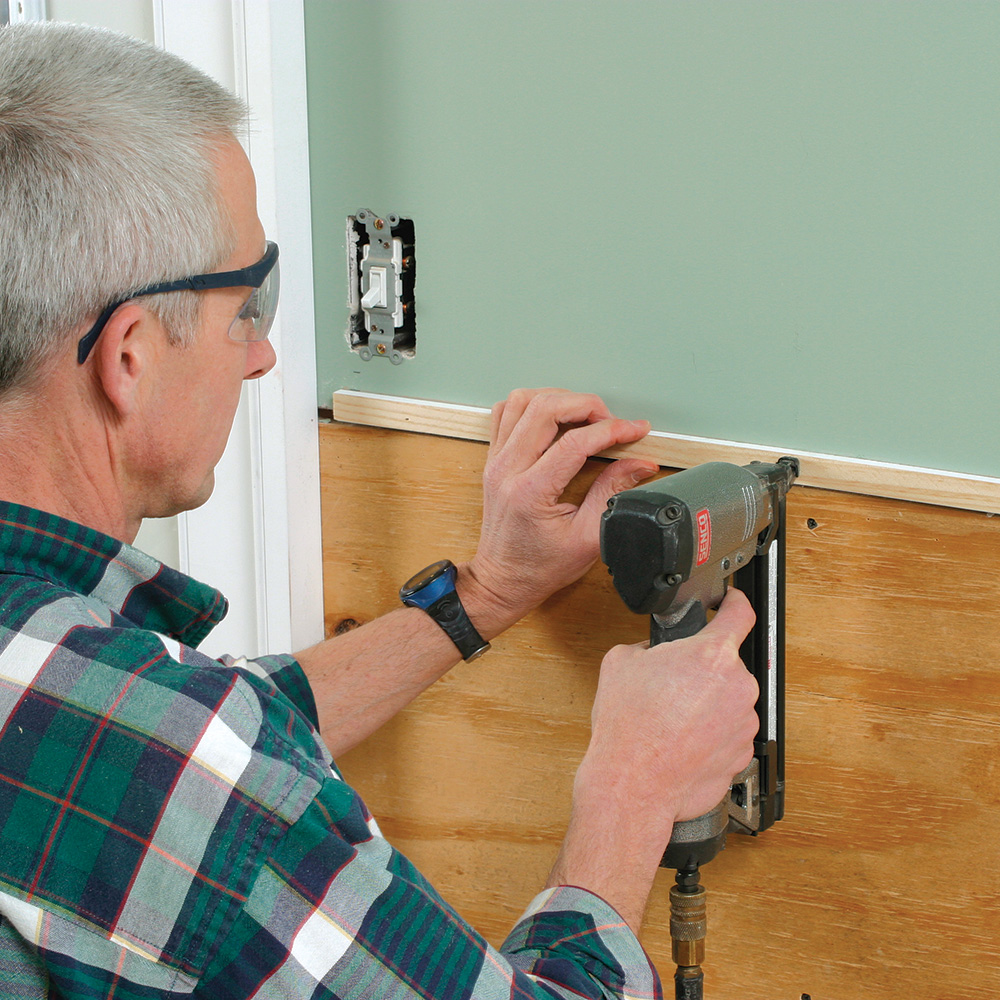
To complement the colonial trim in this house, the wainscot cap is a simple bullnose, which rests on top of the beadboard and is supported by a 3 ⁄ 4-in. cove molding. A standard 3-1 ⁄ 2-in. colonial base covers the bottom edges of the beadboard and returns at the edge of the casing.

colonial trim beadboard with bullnose and baseboard molding

Engineered lumber

For paint-grade beadboard, engineered lumber has all the benefits of both regular wood and medium-density fiberboard (MDF) stock. It has the feel, workability, and look of standard lumber, but it enjoys the stability of MDF. Also, its dimensional measurements stay consistent from one board to the next. On this project, I used WindsorONE SPBC4 beadboard (www.windsorone.com; 707-838-7101).

engineered lumber

Beadboard Basics

I like to glue beadboard to a clean substrate, so with existing drywall, I cut an inch or so below the top of the future wainscot cap and remove the drywall from there down. In older houses where removing lath and plaster would be messy and impractical, I clean the area as best as possible and make sure to attach the beadboard to the plaster with polyurethane glue.

wainscot baseboard

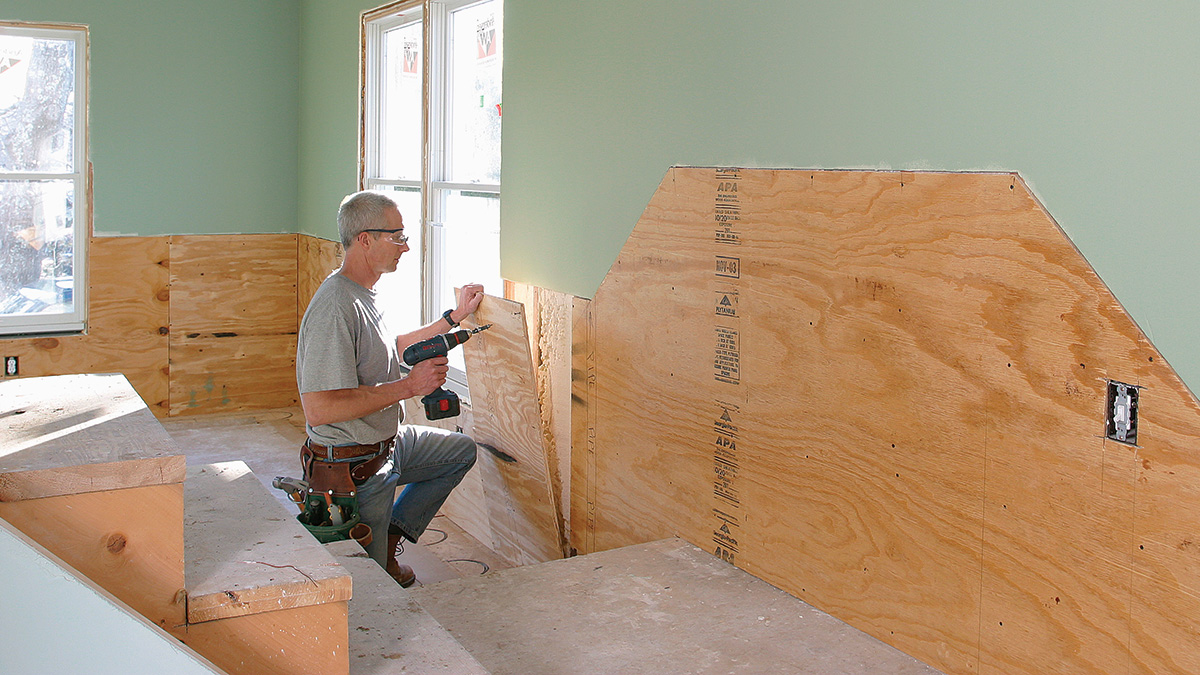
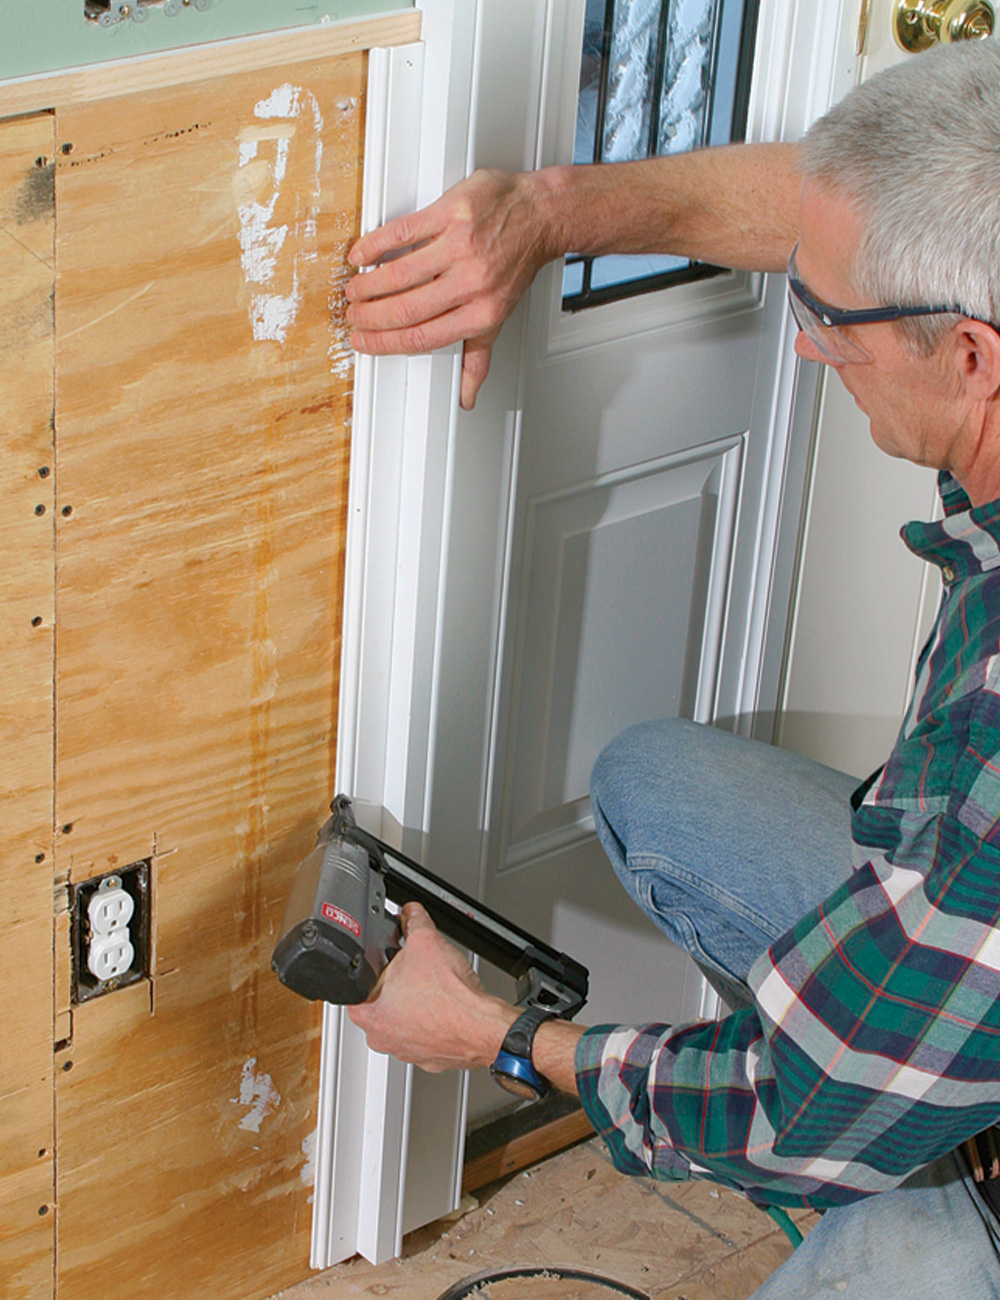
TIP: Make clear marks on the plywood to pinpoint nailing hazards behind the wall, such as plumbing feeds or wires.


snapping a level chalkline around the room
A guide strip keeps the top straight: Start by snapping a level chalkline around the room to indicate the top of the beadboard (usually about 35 in. from the floor). Then tack on a temporary straightedge with small brads. Keeping the top of the beadboard in a straight line provides an even edge for the cap to rest on.

checking board with level
Start plumb and stay plumb: Tack the first board in place, and check it with a level to make sure it’s plumb. If need be, plane the board on the casing side until the leading edge is plumb. Then check every couple of feet to make sure that the beadboard is staying plumb. You can correct for plumb in the field by opening a slight gap between two boards at the top or bottom.

nailing along length of board
Nail where it won’t show: In place of nailing along the length of the boards, run horizontal beads of construction adhesive about 16 in. apart on the plywood. Then face-nail the top and bottom of each board where trim will hide the nails.


TIP: If a correction of 1 ⁄ 8 in. or more is required, spread it out over a few boards.
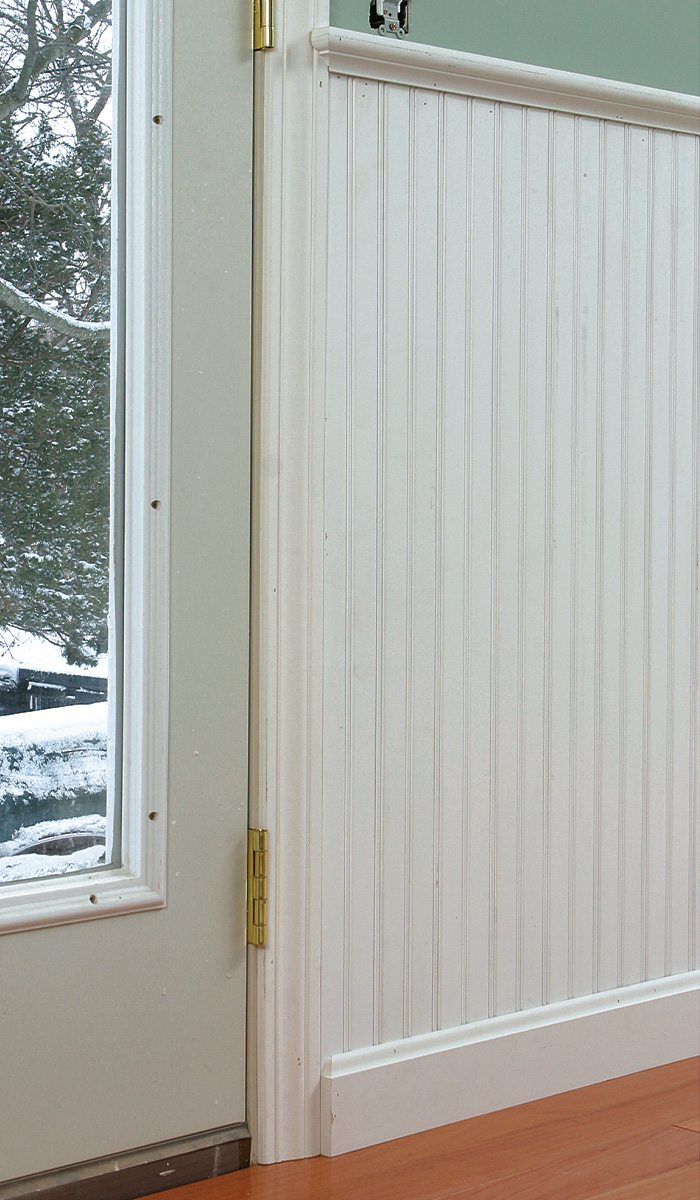
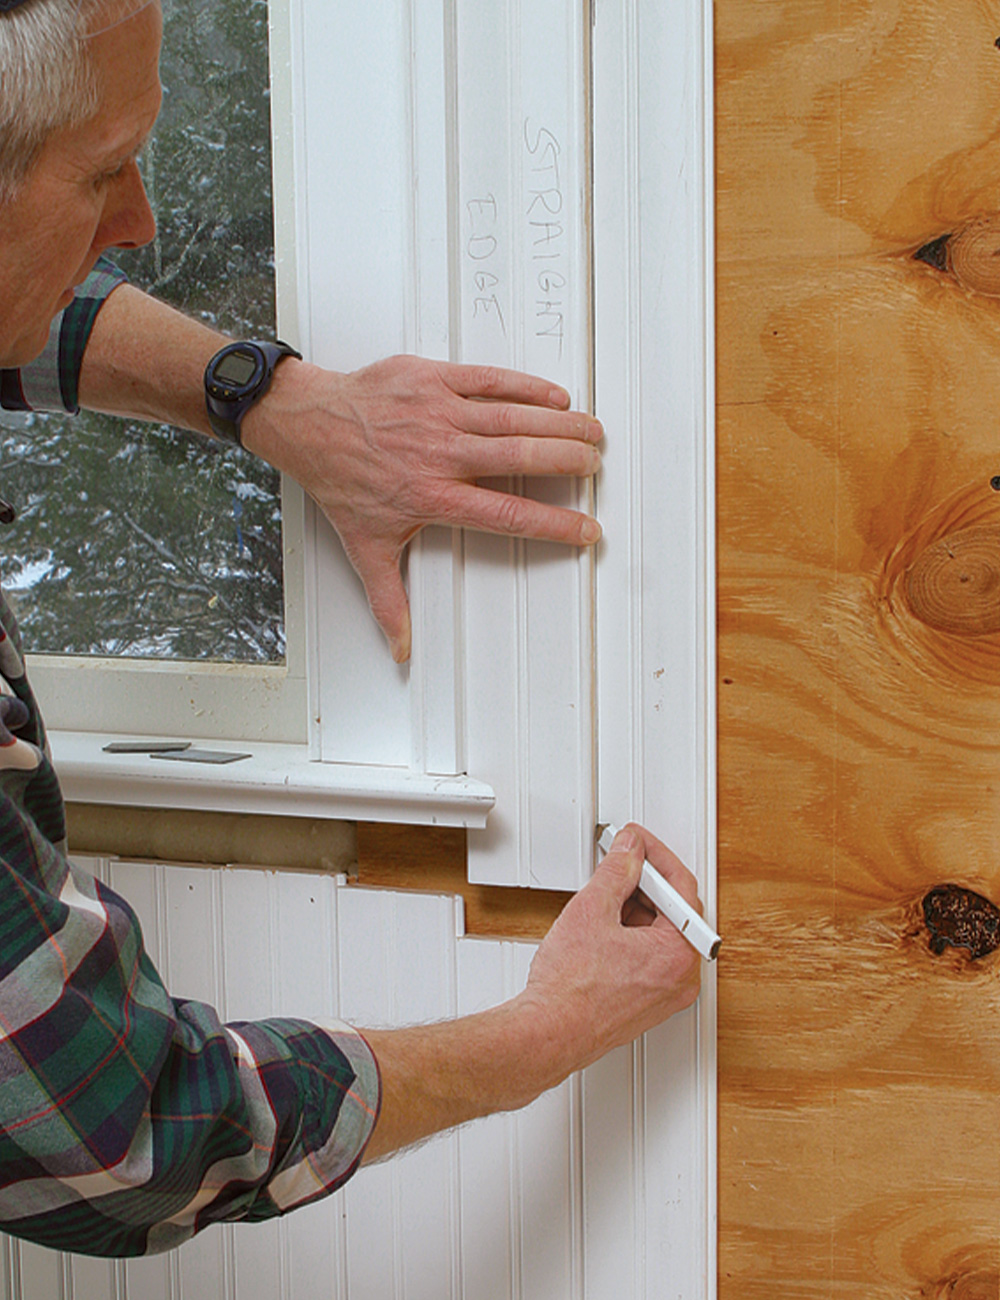
 

Fit around windowsscribe

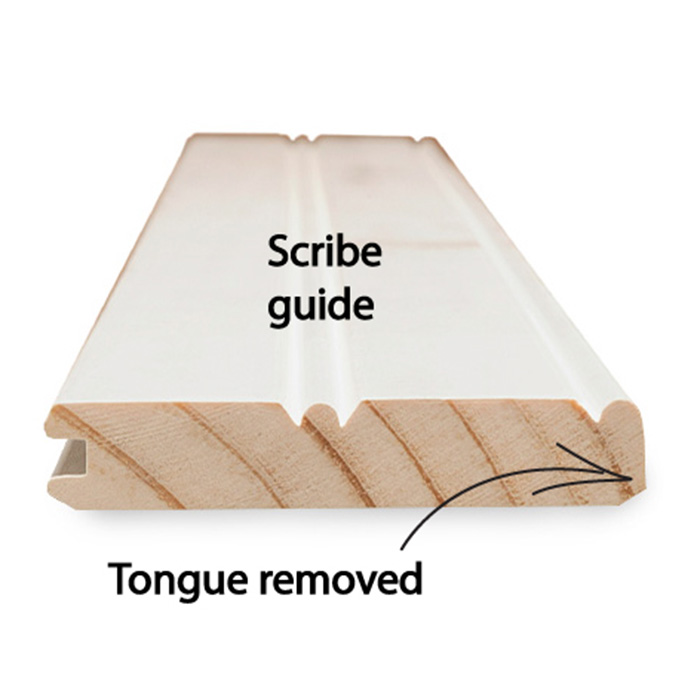
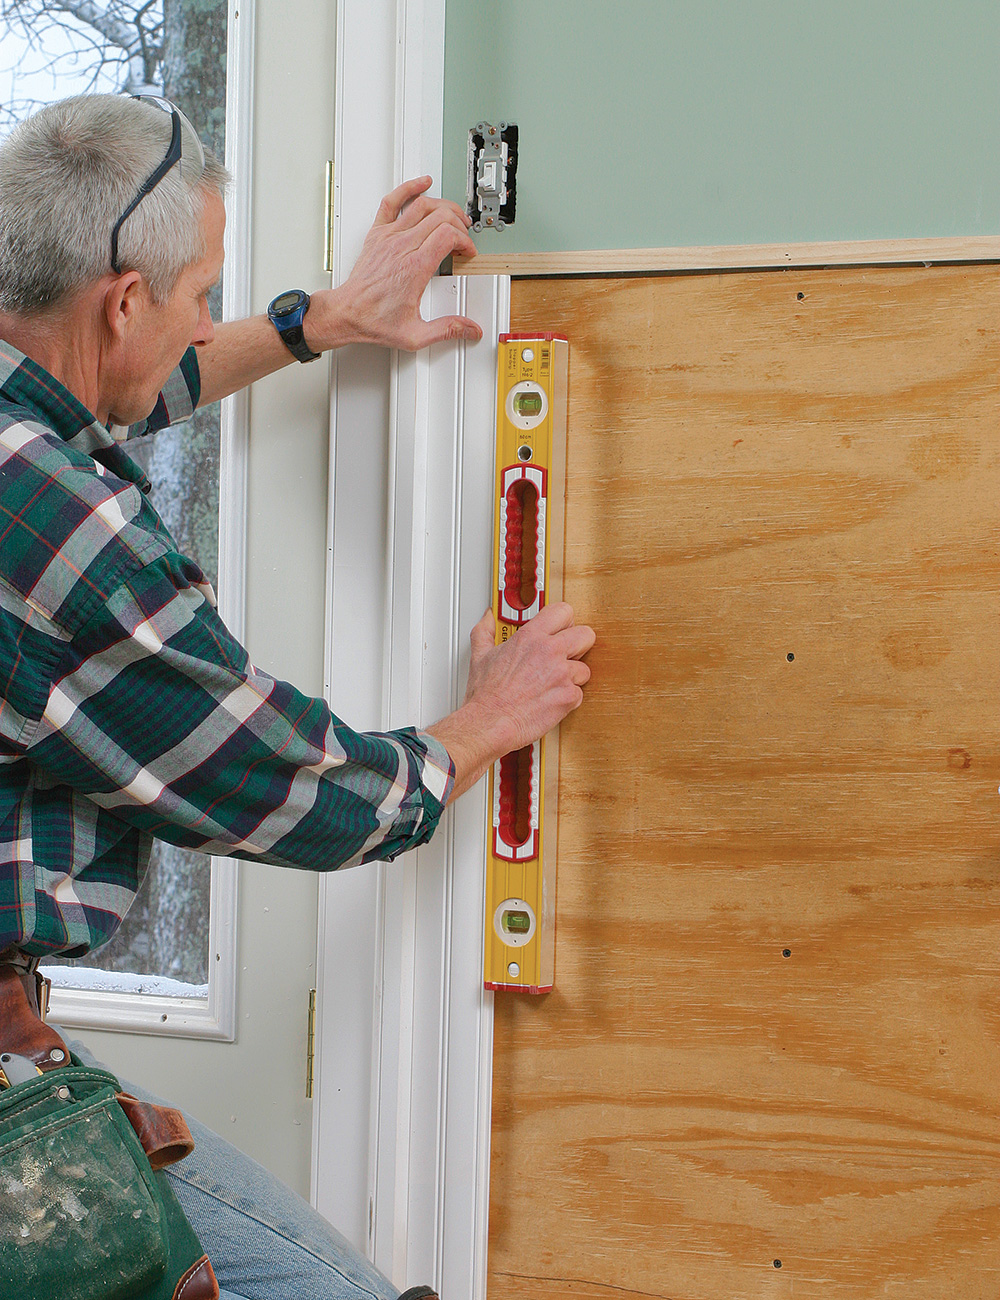
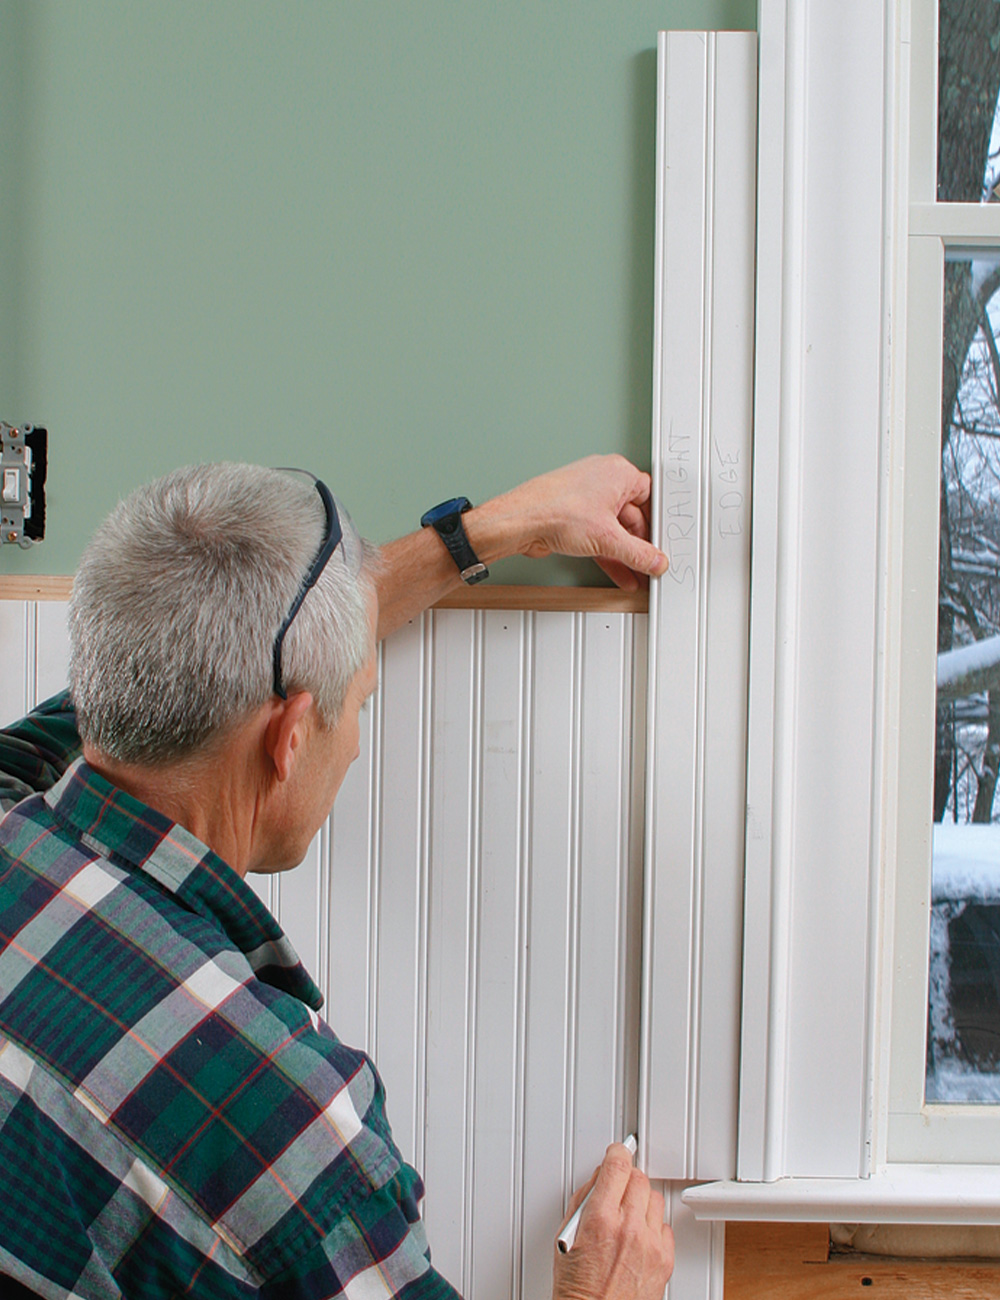
Before running the beadboard, I put in the casing and the stool (without returns) around each window. But I leave the apron off  until after the beadboard is installed. The ability to dry-fit tongue-and-groove beadboard is a real plus when installing it around a window.

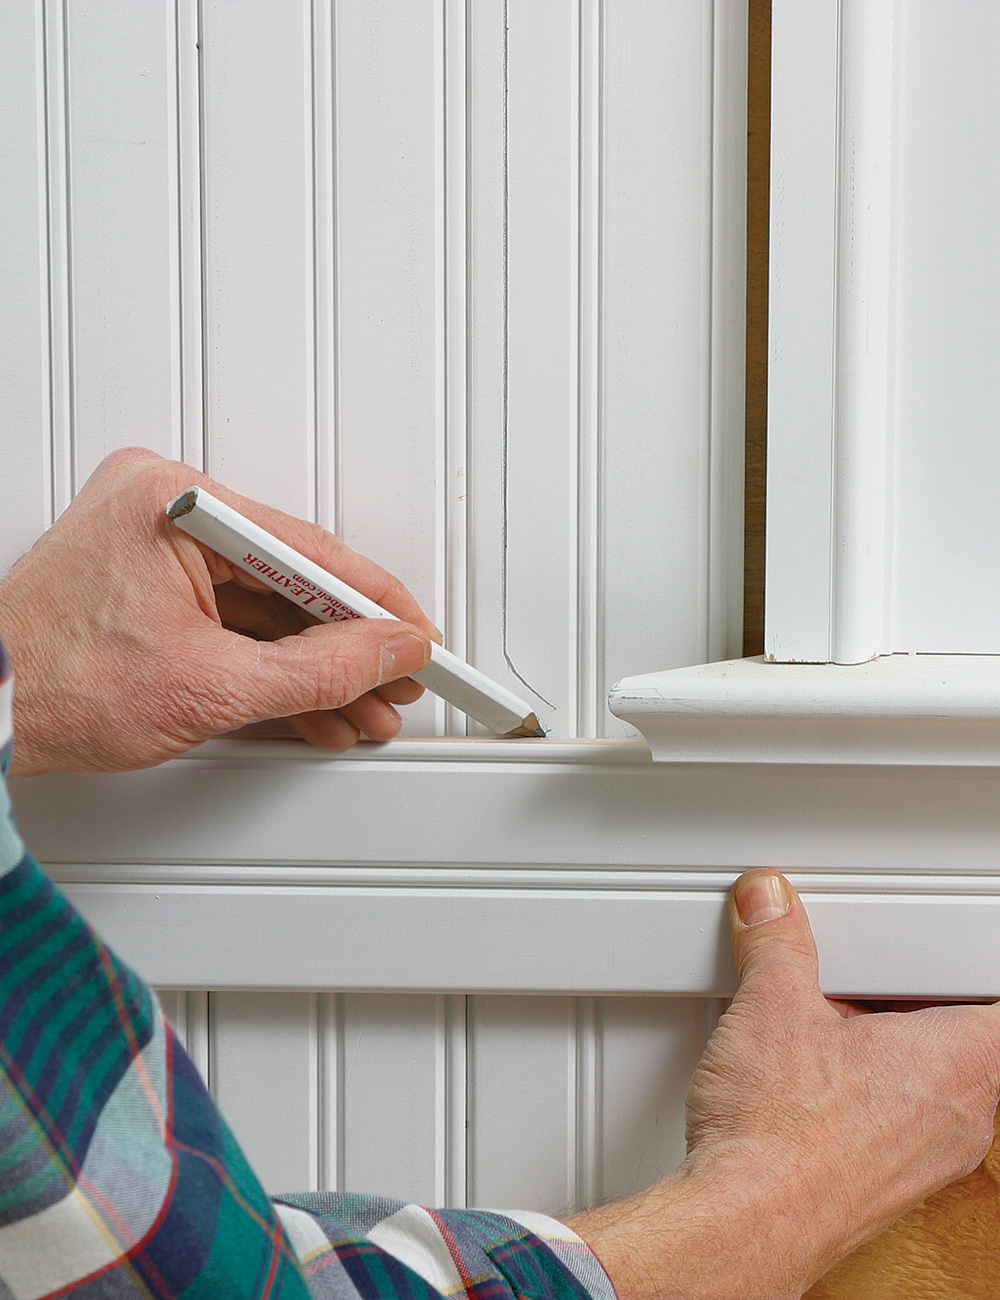
To get precise cutlines around window casing and other obstacles, I make a scribe guide by ripping the tongue off a length of beadboard. This gives me the exact finished width of a board. Each side of the window receives slightly different treatment depending on the direction I run the beadboard.

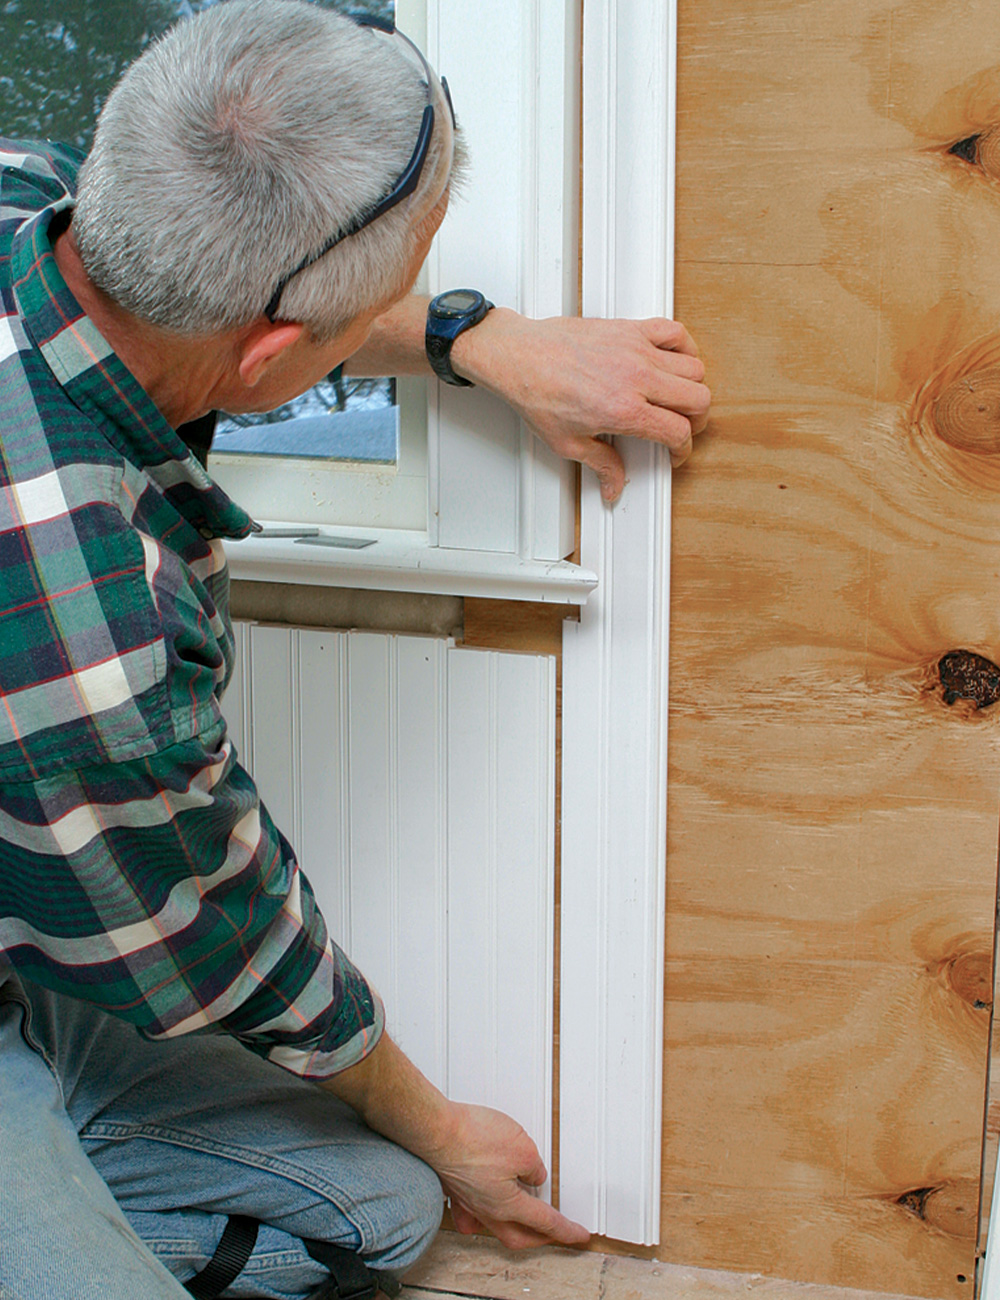
Approach side of the window

placing the scribe guide tight against the casing
Scribe the vertical line: First, dry-fit the last full board before the window casing. Then, placing the scribe guide tight against the casing, trace the cutline on the dry-fit board.

marking the horizontal cut on the dry-fit board
…Then the horizontal line: Holding the scribe guide against the bottom of the stool, mark the horizontal cut on the dry-fit board. The actual cut should be made about 1/8 in. below that line.

sliding the last full board into place from the top down
Slip in a sliver: Install the scribed board against the window casing first, then slide the last full board into place from the top down.

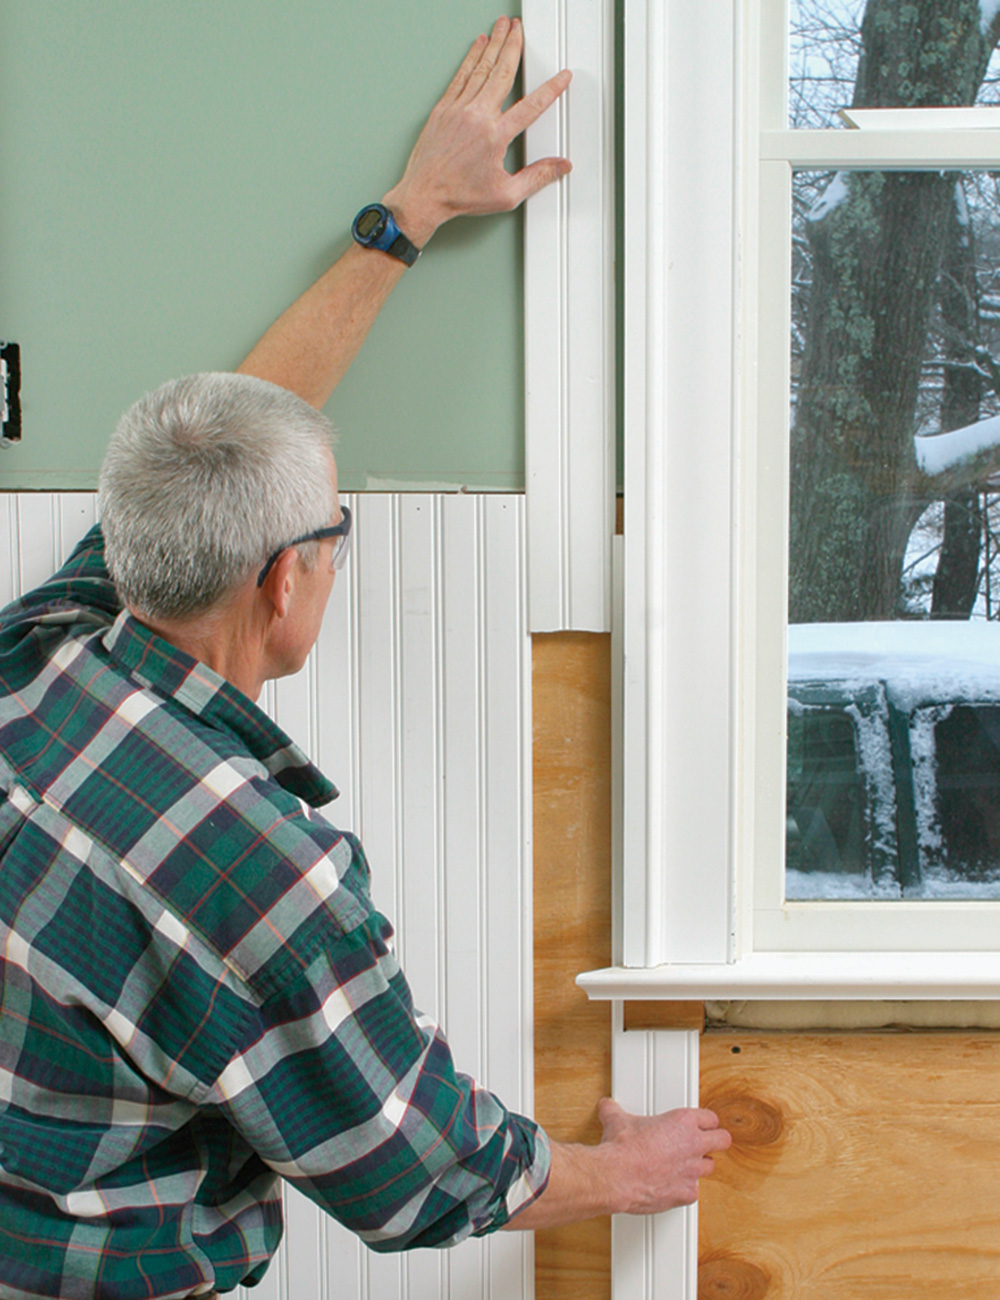
Exit side of the window

marking the vertical and horizontal cutlines
Scribe the lines: On the other side of the window, dry-fit an extra board under the window to space a full board properly for the scribe. Then use the scribe guide as before to mark the vertical and horizontal cutlines.

marking the vertical and horizontal cutlines
Scribed board completes wrap: After removing the extra dry-fit board, fasten the scribed board into position. Now you’re ready to continue down the wall.

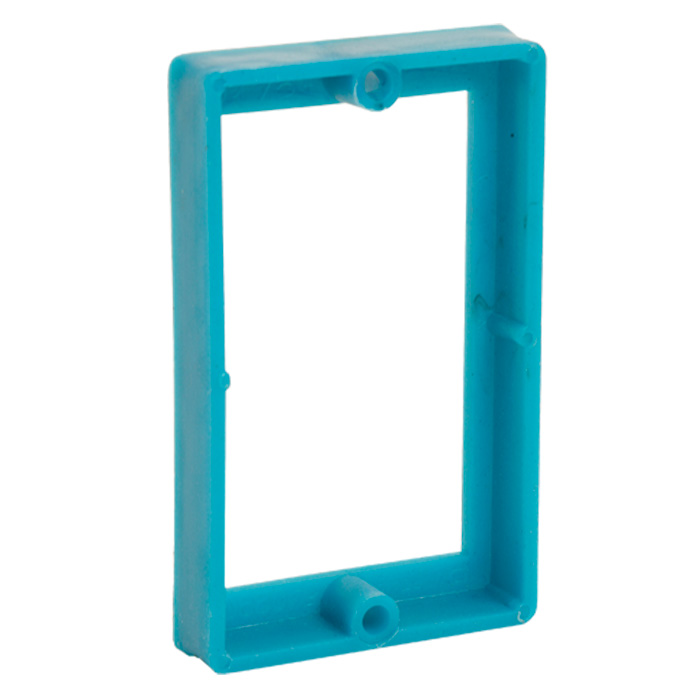
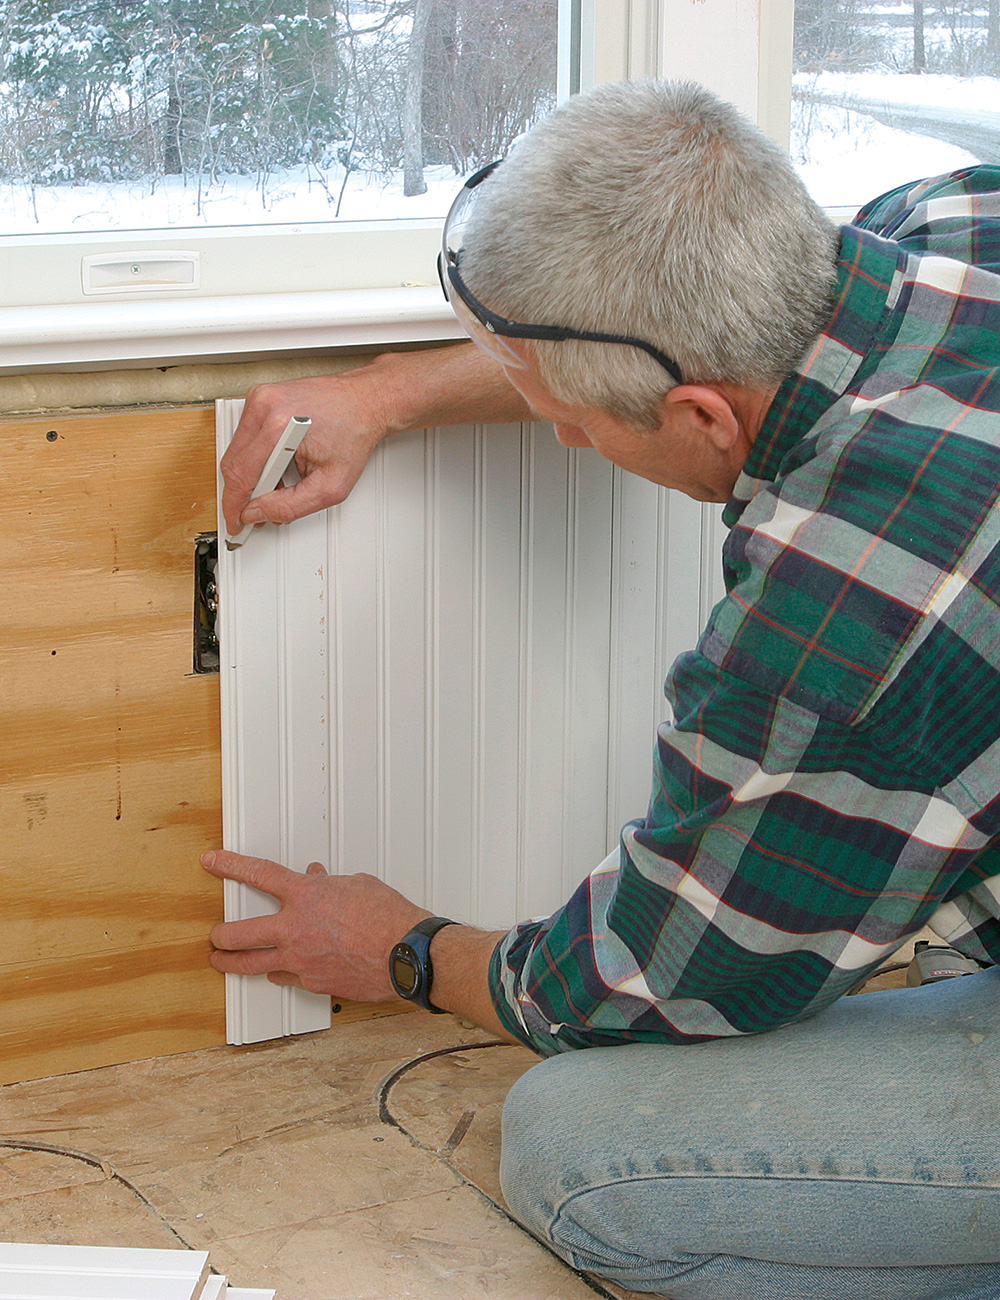
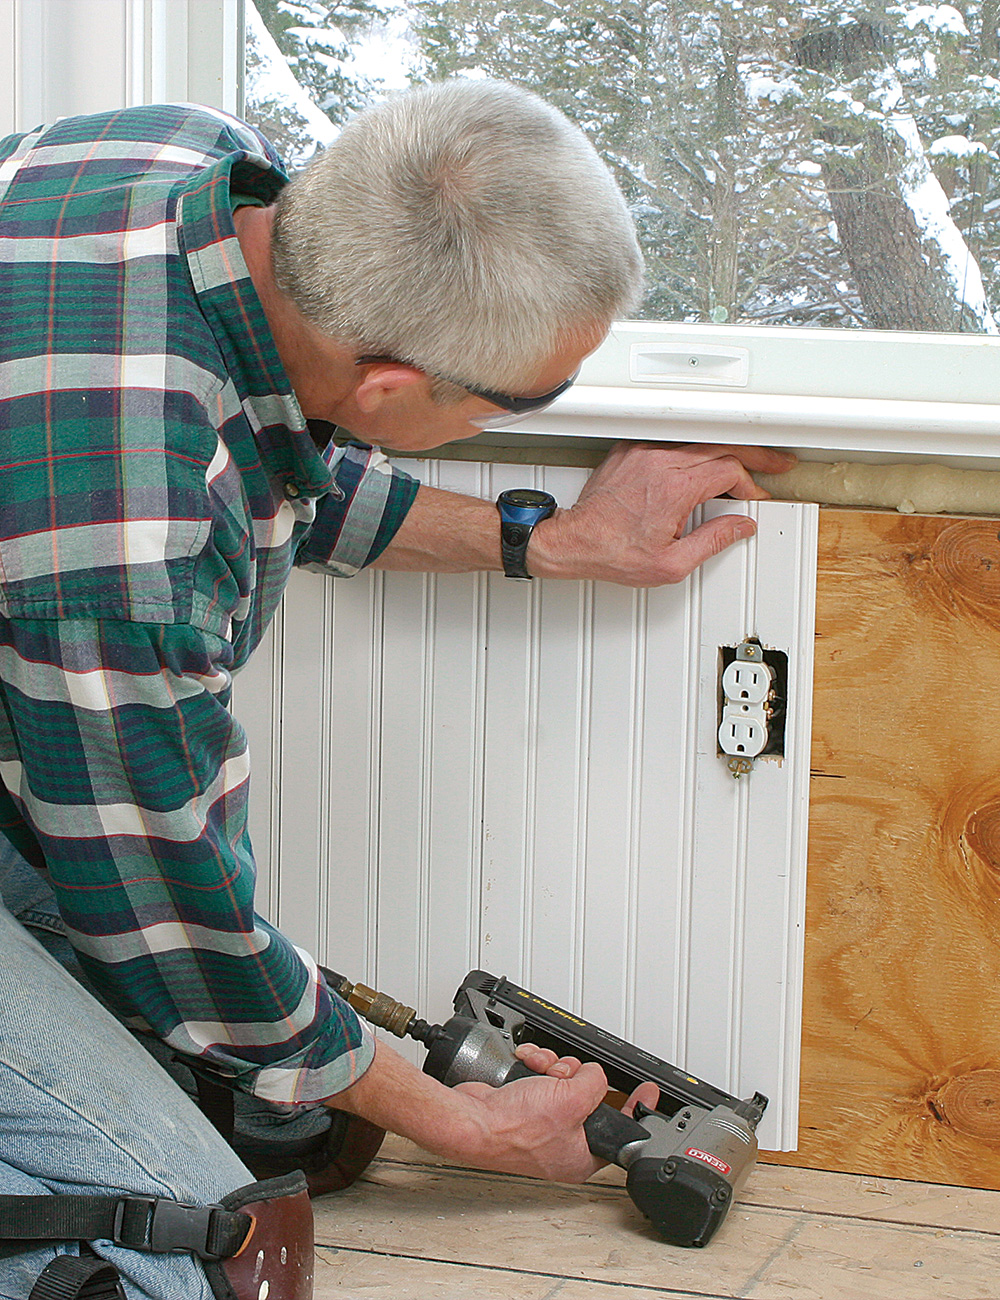
Electrical boxes: Two ways to measurebox extension

The electrical code prohibits any combustible material, such as wooden beadboard, from being inside the area of an electrical box. When beadboard is installed after the electrical boxes, a box extension (photo right) must be put in to avoid a code violation.


marking the cut
For electrical boxes that share a seam between boards: Simply dry-fit the first board, then mark and cut it accordingly. Once both sides are cut and checked for fit, fasten them to the wall.

transfering marks to dryboard
For a box that falls within a single board: Mark the top and bottom on the plywood, then transfer the marks to the dry-fit board. Measure from the adjacent board for the vertical cuts.

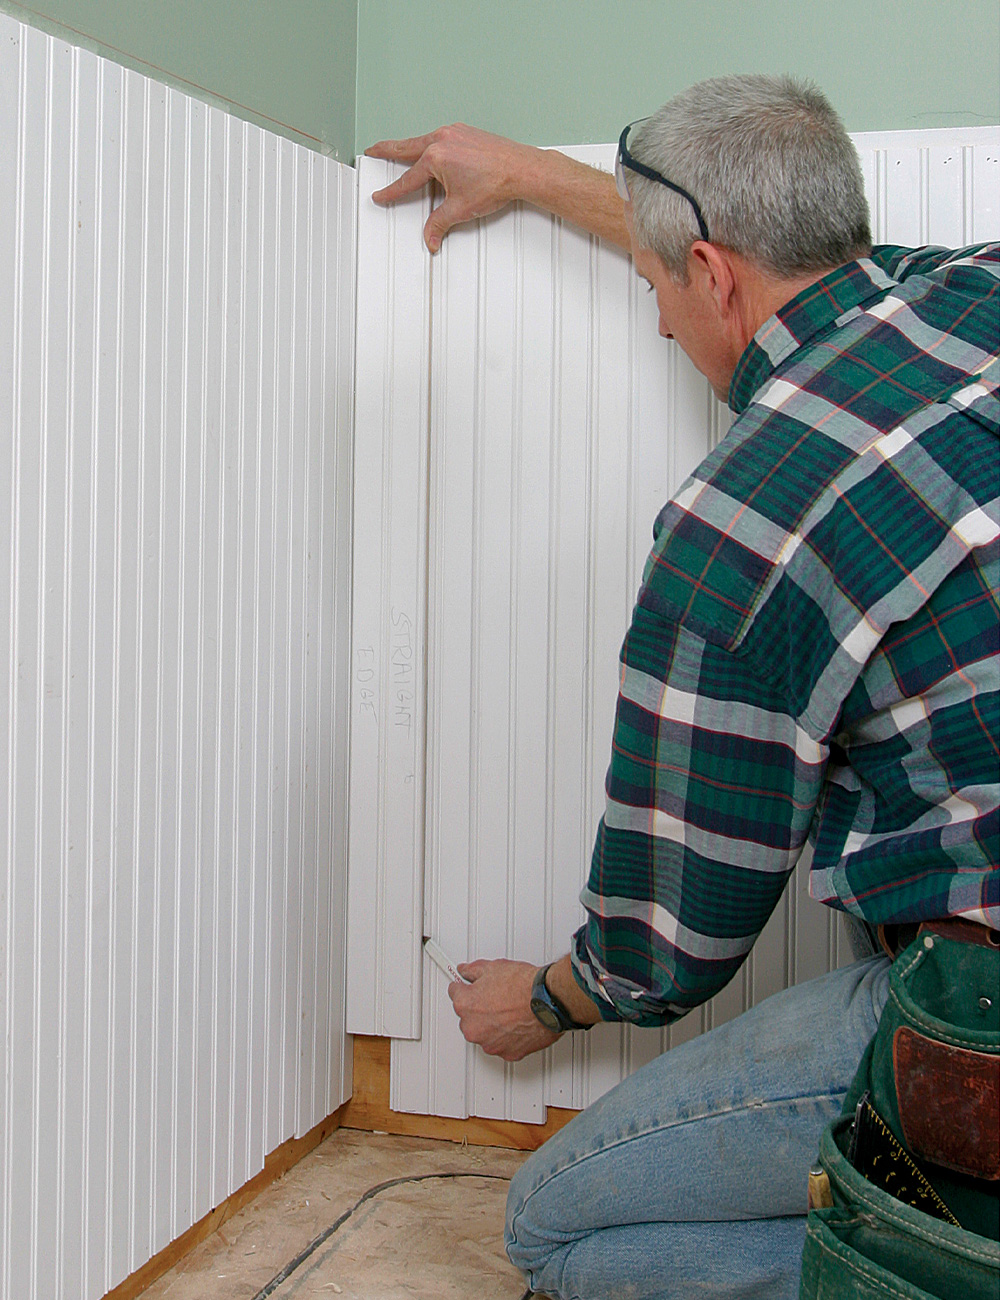
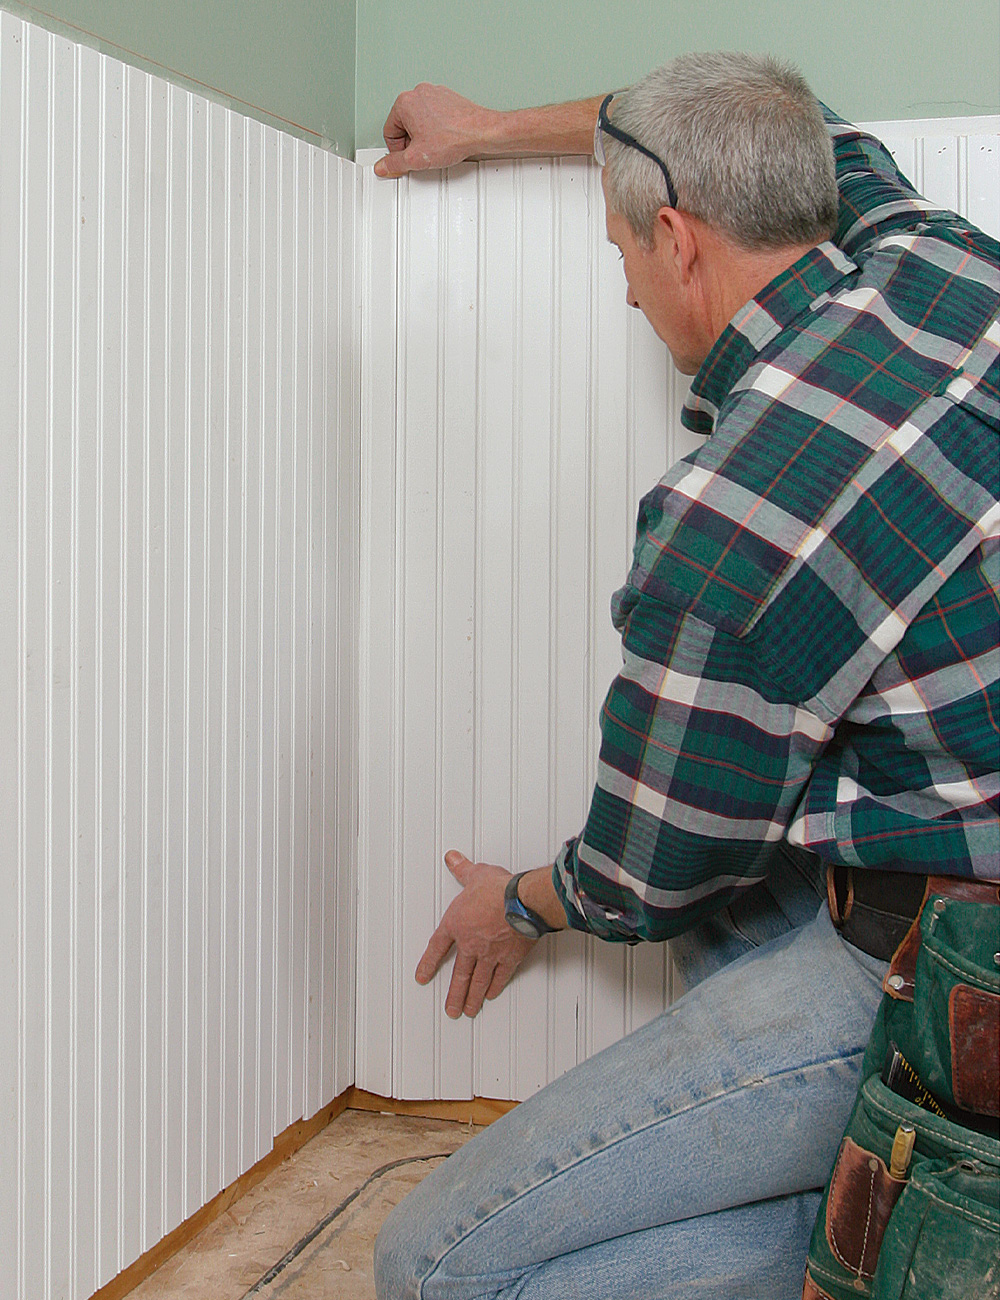
Folded finish in a corner

I don’t bother to fit the corner board precisely for the first wall because the edge is covered by the corner board from the other wall. To make sure that I don’t end up with a narrow sliver in the corner, I take a quick measurement of the wall. If need be, I start with a half-piece instead of a full board.

quick measurement on casing
A smart start: Narrow slivers of beadboard are difficult to install in a corner. To avoid them, a quick overall measurement will tell you whether to start at the casing with a full board or to rip the first board in half.

pushing the scribe guide hard into the corner and drawing the cutline
Dry-fit for a perfect corner: After dry-fitting the last full-width board, push the scribe guide hard into the corner and draw the cutline. Then cut the scribed board to become the final corner piece.

springing boards into place
Accordion fit: To complete the corner, pull the shared edge of the last full board and the scribed board out from the wall, seating their outside edges in place. Then spring the boards into place.

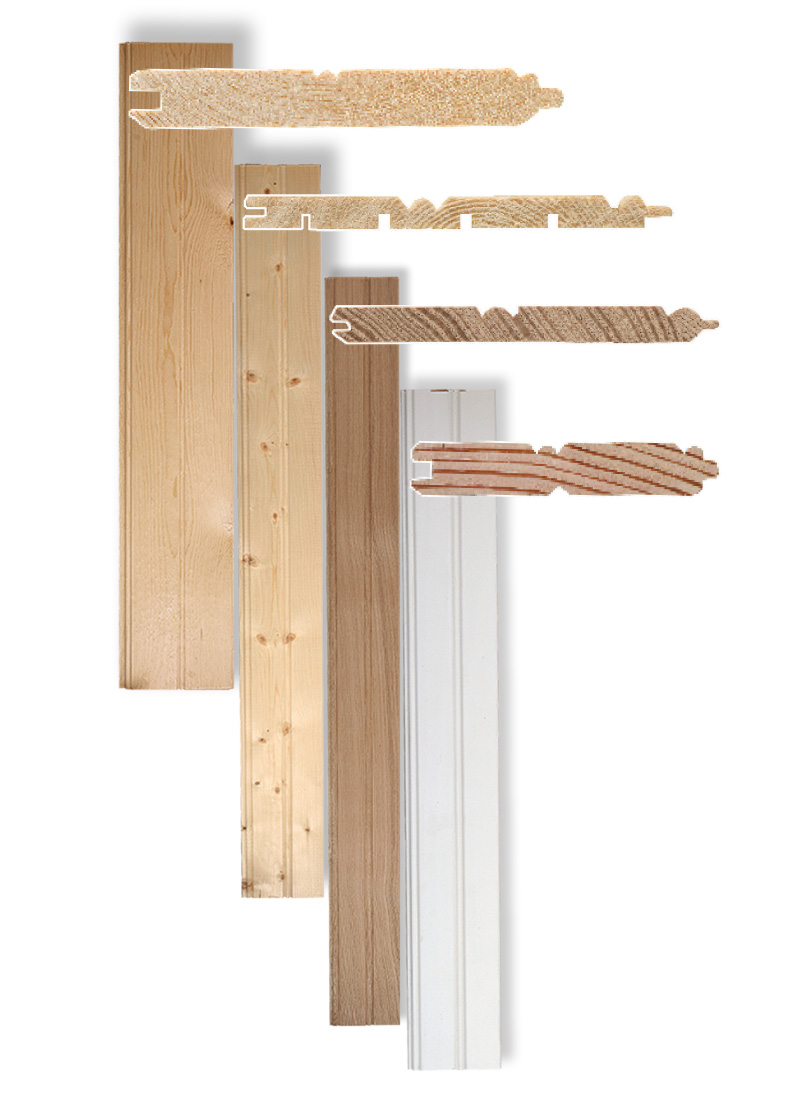
Other material choices for beadboard

Over the years, I have installed different types of beadboard. Some worked better in certain situations than others, and some I just should have avoided. A general rule of thumb is that the thinner the stock, the shallower the beaded profile. Shallower profiles fill with paint, and their shadowlines don’t look nearly as nice as deeper beads milled in thicker stock.
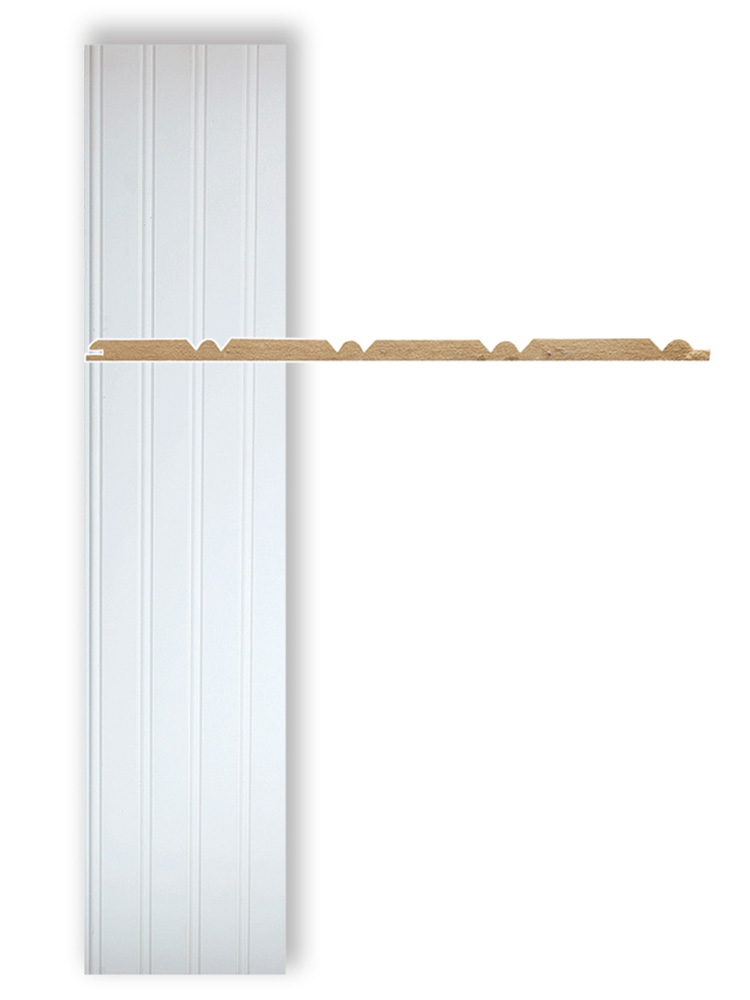
MDF sheets

Medium-density fiberboard (MDF) sheet-stock beadboard comes preprimed in 4-ft. widths. Take extra care to seal cut ends when installing it in moisture-prone areas such as bathrooms.
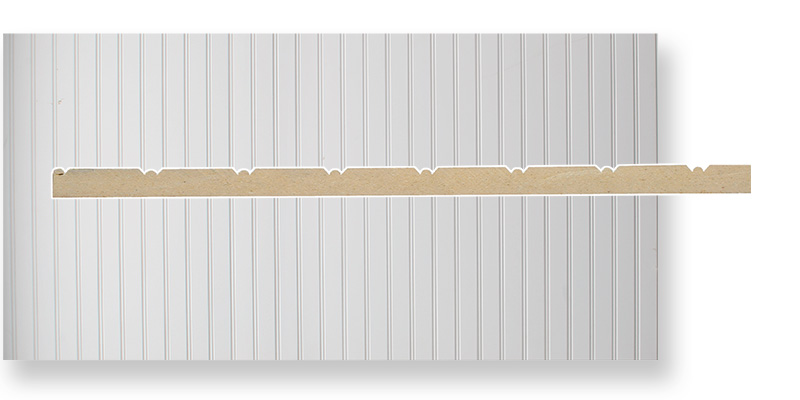
MDF sheets

MDF planks

Preprimed MDF planks are available in certain areas of the country and usually come either two beads or four beads wide. As with MDF sheet stock, I avoid using these planks in high-moisture areas, and I prime all cuts to keep the boards from absorbing moisture.
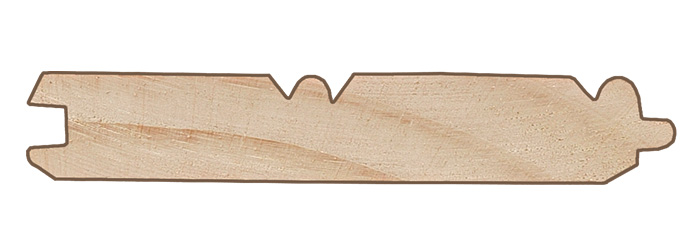
MDF planks

Wood planks

Beadboard planks are available in different wood species. Typical thicknesses are 1⁄4 in., 1⁄2 in., or 3⁄4 in., with finished widths of 3 in. or 5 in. Planks come with a primed or natural finish. Solid wood shrinks and swells in response to humidity changes, and unfinished pine beadboard is the worst; it never seems to stop moving. To minimize moisture absorption and wood movement, I stain or paint the boards before I install them.
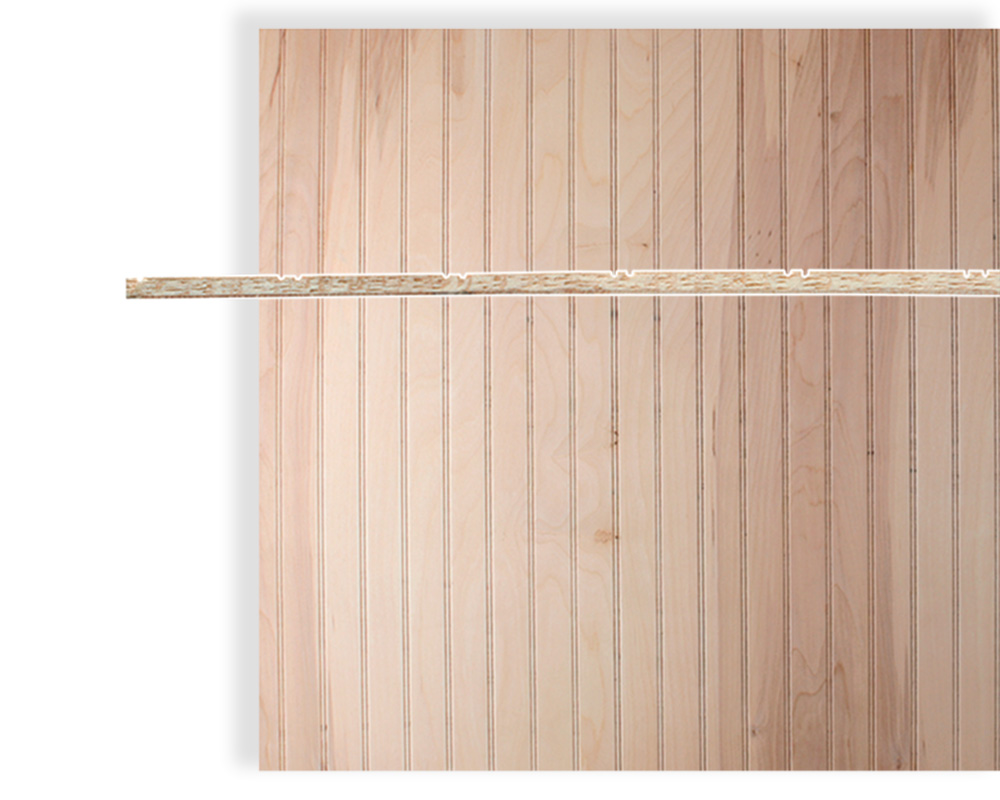
wood planks

Plywood sheets

Usually 1 ⁄ 4 in. thick, 4-ft.-wide plywood beadboard can be stained or painted. However, I’ve seen it split along a grain line and across bead lines occasionally, so it should be handled with care.

plywood sheets

Fine Homebuilding contributing editor Rick Arnold lives and works in Wickford, R.I. Photos by Roe A. Osborn.

From FineHomebuilding #173

Sign up for eletters today and get the latest how-to from Fine Homebuilding, plus special offers.

Signing you up...

This site is protected by reCAPTCHA and the Google Privacy Policy and Terms of Service apply.
See all newsletters
See all newsletters
Next: Rabbeted Baseboards and Top Rails for Beadboard Wainscot

Guide

Finish & Trim Carpentry

Chapter

Wainscot and Paneling

Log in or create an account to post a comment.

Sign up Log in

Become a member and get full access to FineHomebuilding.com

Finish & Trim Carpentry

Finish & Trim Carpentry

Trusted, comprehensive guidance from the pros for creating perfect trim details in any room of the house

View Project Guide

View All Project Guides »

Become a member and get unlimited site access, including the Finish & Trim Carpentry Project Guide.

Start Free Trial

Trim Design
  • Trim Style and Design
Tools and Materials
  • Tools
  • Materials
Interior Trim Basics
  • Tips and Tricks
  • Techniques
  • Using Jigs
Window and Door Casings
  • Windows
  • Doors
Baseboard and Crown Molding
  • Baseboard
  • Crown Molding
  • Specialty Crown Situations
Wainscot and Paneling
  • Beadboard Wainscot
  • Paneled Wainscot
  • Chair Rails
  • Wall Treatments
Mantels and Fireplace Surrounds
  • Design
  • Installing Mantels and Surrounds
Coffered Ceilings

Fine Home Building

Newsletter Sign-up

  • Fine Homebuilding

    Home building tips, offers, and expert advice in your inbox.

  • Green Building Advisor

    Building science and energy efficiency advice, plus special offers, in your inbox.

  • Old House Journal

    Repair, renovation, and restoration tips, plus special offers, in your inbox.

Signing you up...

This site is protected by reCAPTCHA and the Google Privacy Policy and Terms of Service apply.
See all newsletters

Follow

  • Fine Homebuilding

    Dig into cutting-edge approaches and decades of proven solutions with total access to our experts and tradespeople.

    Start Free Trial Now
    • Facebook
    • Instagram
    • X
    • LinkedIn
  • GBA Prime

    Get instant access to the latest developments in green building, research, and reports from the field.

    Start Free Trial Now
    • Facebook
    • YouTube
  • Old House Journal

    Learn how to restore, repair, update, and decorate your home.

    Subscribe Now
    • Facebook
    • Instagram
    • X

Membership & Magazine

  • Online Archive
  • Start Free Trial
  • Magazine Subscription
  • Magazine Renewal
  • Gift a Subscription
  • Customer Support
  • Privacy Preferences
  • About
  • Contact
  • Advertise
  • Careers
  • Terms of Use
  • Site Map
  • Do not sell or share my information
  • Privacy Policy
  • Accessibility
  • California Privacy Rights

© 2025 Active Interest Media. All rights reserved.

Fine Homebuilding receives a commission for items purchased through links on this site, including Amazon Associates and other affiliate advertising programs.

X
X
This is a dialog window which overlays the main content of the page. The modal window is a 'site map' of the most critical areas of the site. Pressing the Escape (ESC) button will close the modal and bring you back to where you were on the page.

Main Menu

  • How-To
  • Design
  • Tools & Materials
  • Video
  • Blogs
  • Forum
  • Project Guides
  • Reader Projects
  • Magazine
  • Members
  • FHB House

Podcasts

  • FHB Podcast
  • ProTalk

Webinars

  • Upcoming and On-Demand

Podcasts

  • FHB Podcast
  • ProTalk

Webinars

  • Upcoming and On-Demand

Popular Topics

  • Kitchens
  • Business
  • Bedrooms
  • Roofs
  • Architecture and Design
  • Green Building
  • Decks
  • Framing
  • Safety
  • Remodeling
  • Bathrooms
  • Windows
  • Tilework
  • Ceilings
  • HVAC

Magazine

  • Current Issue
  • Past Issues
  • Magazine Index
  • Subscribe
  • Online Archive
  • Author Guidelines

All Access

  • Member Home
  • Start Free Trial
  • Gift Membership

Online Learning

  • Courses
  • Project Guides
  • Reader Projects
  • Podcast

More

  • FHB Ambassadors
  • FHB House
  • Customer Support

Account

  • Log In
  • Join

Newsletter

Get home building tips, offers, and expert advice in your inbox

Signing you up...

This site is protected by reCAPTCHA and the Google Privacy Policy and Terms of Service apply.
See all newsletters
See all newsletters

Follow

  • X
  • YouTube
  • instagram
  • facebook
  • pinterest
  • Tiktok

Join All Access

Become a member and get instant access to thousands of videos, how-tos, tool reviews, and design features.

Start Your Free Trial

Subscribe

FHB Magazine

Start your subscription today and save up to 70%

Subscribe

We hope you’ve enjoyed your free articles. To keep reading, become a member today.

Get complete site access to expert advice, how-to videos, Code Check, and more, plus the print magazine.

Start your FREE trial

Already a member? Log in