FHB Logo Facebook LinkedIn Email Pinterest Twitter X Instagram Tiktok YouTube Plus Icon Close Icon Navigation Search Icon Navigation Search Icon Arrow Down Icon Video Guide Icon Article Guide Icon Modal Close Icon Guide Search Icon Skip to content
Subscribe
Log In
  • How-To
  • Design
  • Tools & Materials
  • Restoration
  • Videos
  • Blogs
  • Forum
  • Magazine
  • Members
  • FHB House
  • Podcast
Log In
How-To

Big Doors Have Big Challenges

Engineered materials and vacuum-press laminations prevent warping and keep a tall, flush-panel door from being excessively heavy.

By Casey Knips Issue 330 - April/May 2025

This article details the process of building oversized flush-panel doors, addressing common challenges like warping and weight. The doors are constructed with lightweight engineered materials to ensure stability while remaining manageable during installation.

The frame is assembled with precise joinery and the core is laminated using a vacuum press for even pressure. After adding solid red-oak edgebanding and veneering both sides, the author installs the doors on-site, where he adds pivot-door hardware and a finished veneered panel to complete the modern look.

Disappearing Doors

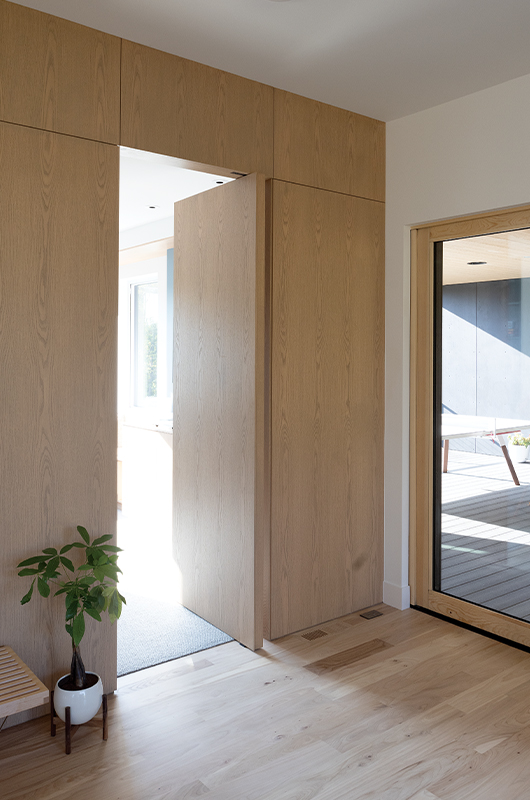
Hidden doors can’t just be hidden the day you install them—they need to stay hidden. When I thought about buying the doors for this project, and the fact that most manufacturers don’t warranty doors of this size, it was clear that I had to build them. Meant to disappear into a paneled wall, these doors needed to start and stay flat.

That Modern Look: While this door construction would work for a number of door styles and in many situations, these were designed to disappear into a modern veneered wall paneling, which Casey shared in “That Modern Look” (FHB #329 and FineHomebuilding.com). Photo by Chelsie Lopez.

Another concern was weight. Using high-quality pivot-door hardware would help manage the weight once the doors were installed, but I needed to be able to install and adjust them. Some of the construction details helped with both stability and keeping the doors from getting too heavy. I got the idea for the aluminum honey­comb core that I ordered from Flatiron Panel Products from Ken DeCost of NS Builders, who took a similar approach to some closet doors.

I’ve built many doors, but this project definitely required research and some novel approaches to ensure a true fit and a long-lasting door. These doors were built for a unique project and were given an applied veneered-MDF panel during installation. The assembly, however, could be modified for a number of different door styles. If stability and weight are concerns in your door project, consider adapting the materials and techniques I’m sharing here.

That Modern Look: While this door construction would work for a number of door styles and in many situations, these were designed to disappear into a modern veneered wall paneling, which Casey shared in “That Modern Look” from FHB #329.

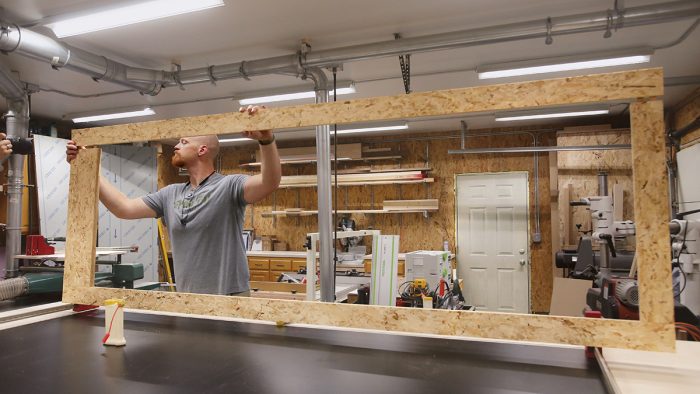
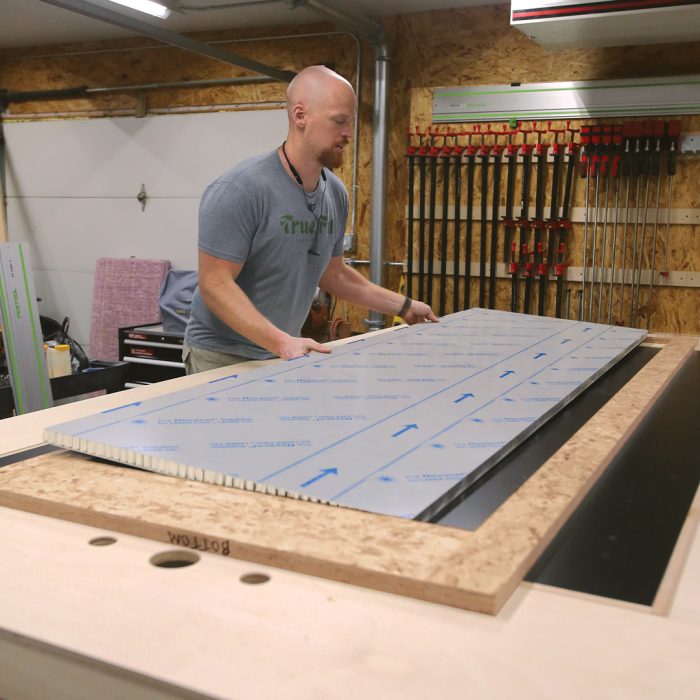
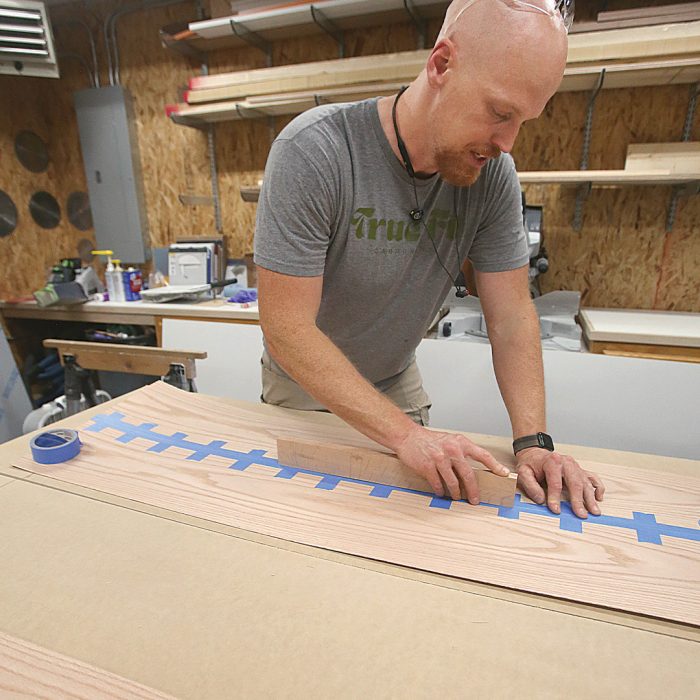
Layered Assembly With a Lightweight Core

These doors are over 8 ft. tall and nearly 3 ft. wide. A solid wood door would have been prohibitively heavy. I chose engineered materials and a layered assembly that starts with an LSL frame and a lightweight aluminum panel. The first glue-up was to apply an MDF panel to each side of the frame.

I added solid red oak all around the edges of the door before the second glue-up, which was to add red-oak veneer to both sides of the door. One side will have a red-oak-veneered panel applied when the doors are installed, but when building laminated doors like this, the layers need to be the same on both sides of the door. Equalizing the stresses on both sides makes the door more stable.
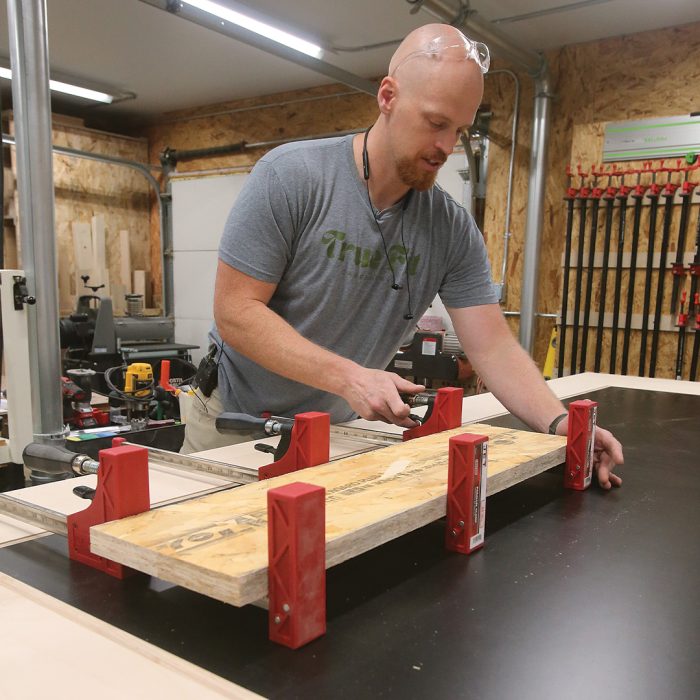
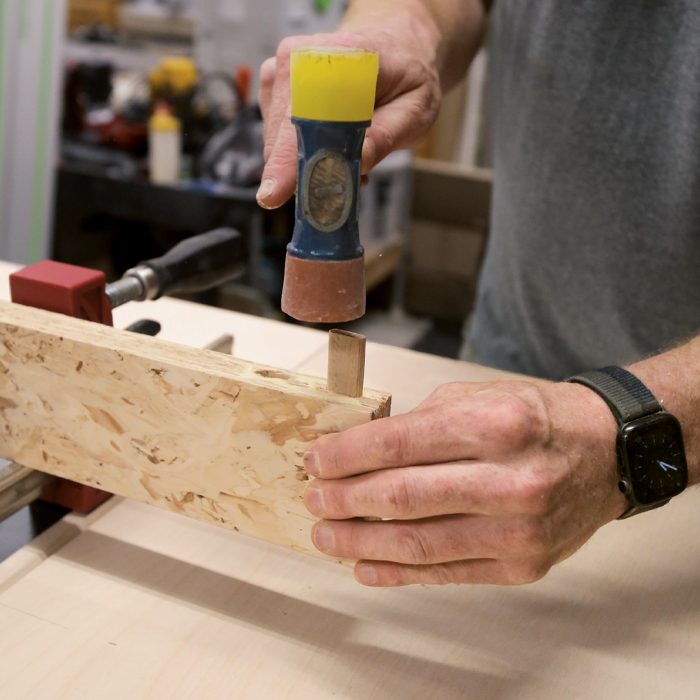
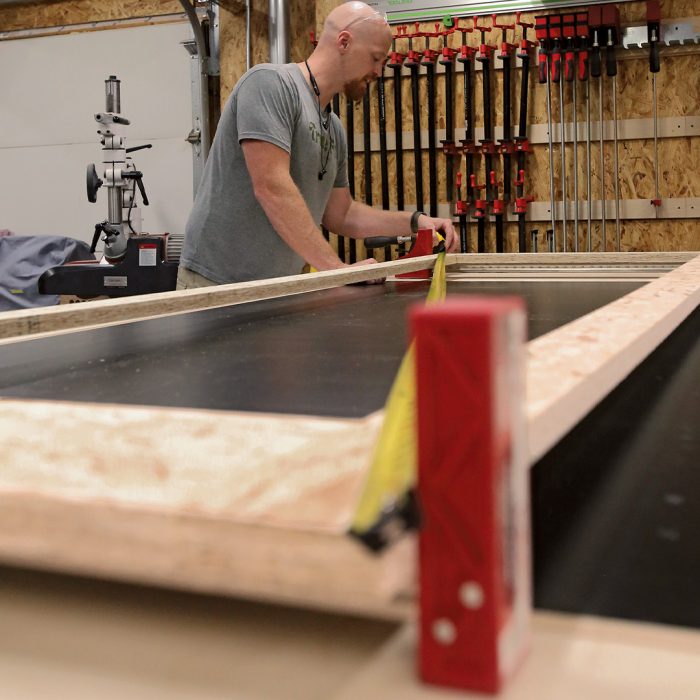
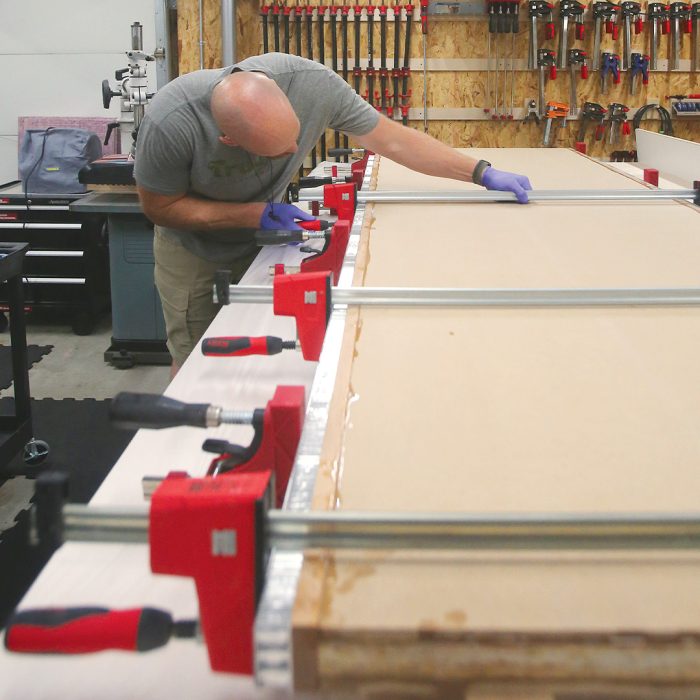
Click here to enlarge drawing. Drawing by Christopher Mills.

Prepare the Core

At the center of the doors is the LSL frame and the aluminum panel. I assembled the frame with loose tenons for alignment using the Festool Domino and then glued up the rails and stiles with yellow glue. It was important to start with a square frame, which I double-checked before clamping.

The doors would be cut to finished width in the shop, and the top squared, but I left the bottom long to be trimmed on-site. I put an aluminum-cutting blade in my track saw to cut the panel, tested the fit, and thoroughly vacuumed up the aluminum shavings before preparing to laminate the core with an MDF face on each side.
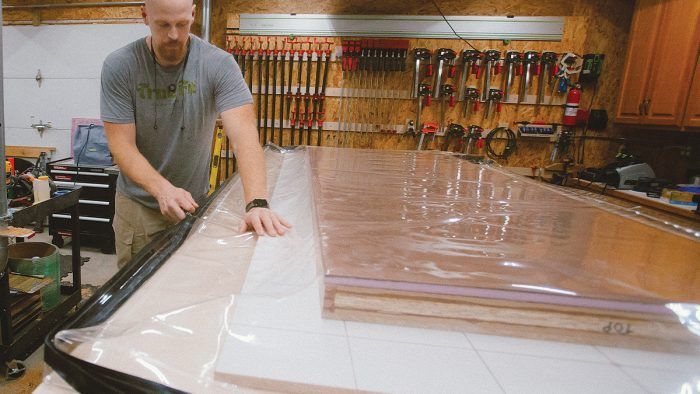
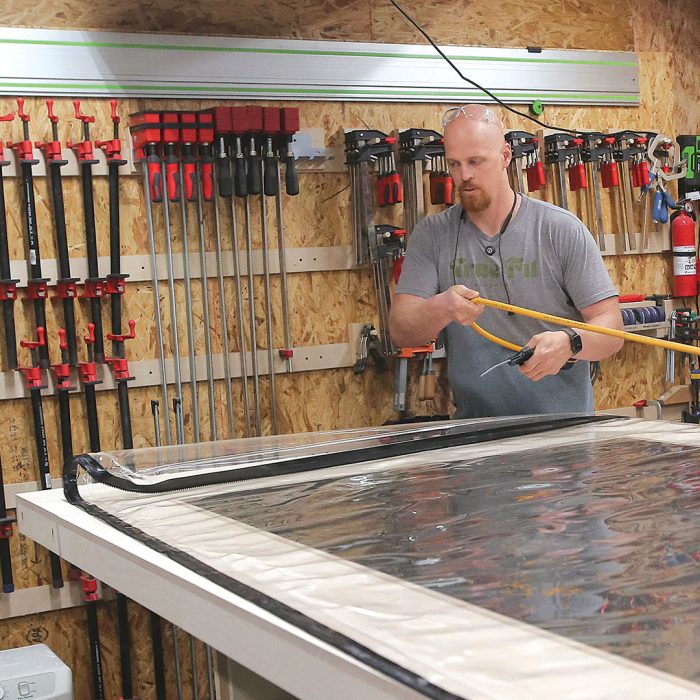
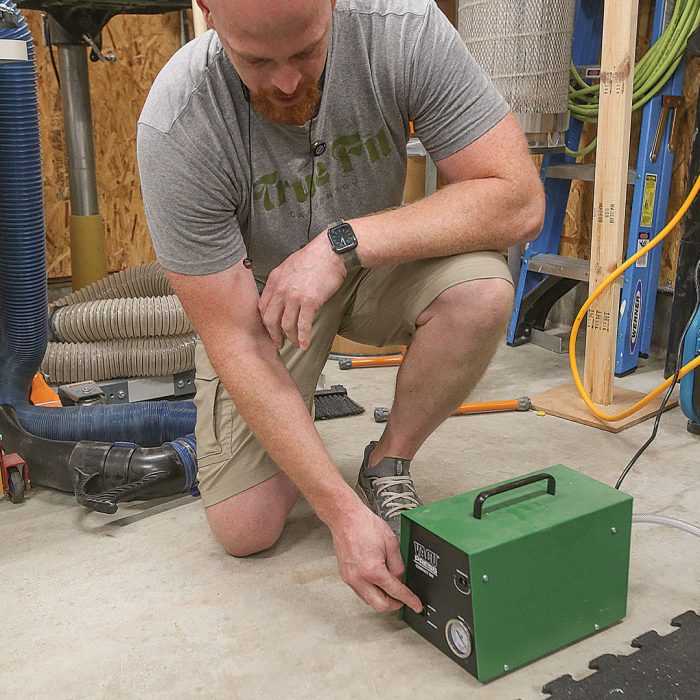
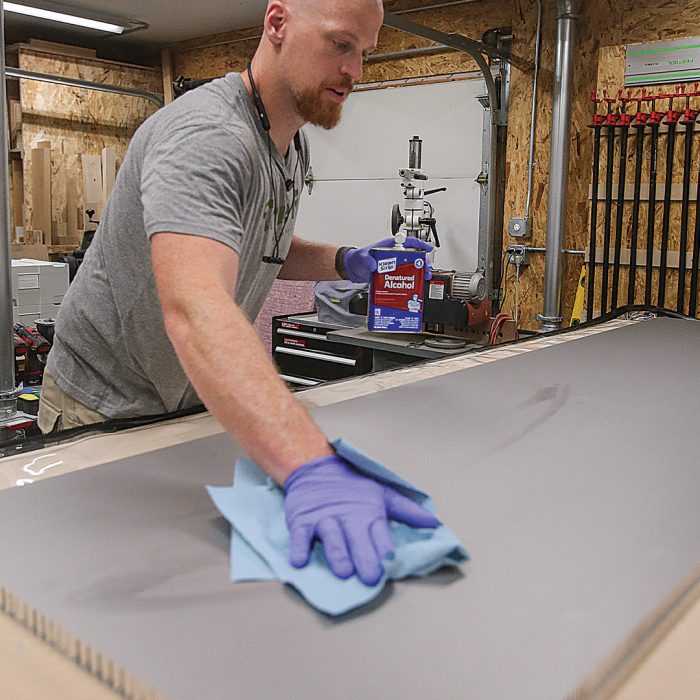
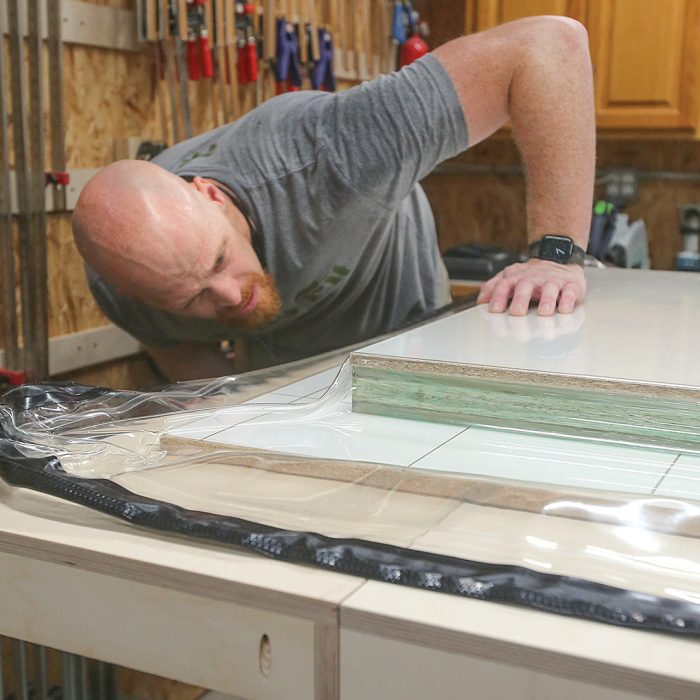
1.) Glue up the bottom rail.

2.) Cut the mortises.

3.) Inset the tenons.
4.) Assemble the frame.

5.) Clamp and check for square.

6.) Cut the panel.

7.) Test the fit.

Prepare the Press

I don’t use my vacuum press that often, and even if I did, I wouldn’t want to risk a glue up by not checking that it is working properly first. Before starting this glue up, I was careful to make sure all surfaces were very clean, including the bag, and I mostly used an air hose to do this. Not only does air need a path to evacuate the bag, but the glue up needs to be set on a flat surface.

A sheet of melamine with a grid of grooves serves both purposes. It’s called a platen, and it includes a port that I connect to the vacuum pump’s hose. (There’s also a hole in my table to connect the hose to the bag.) I slipped a dry-fit of the door assembly into the bag to test the pump and the seal before any glue was applied.
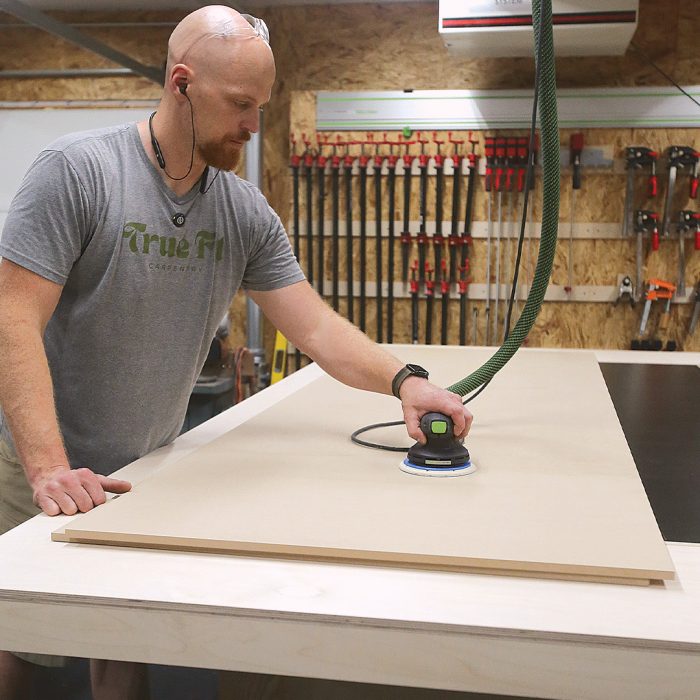
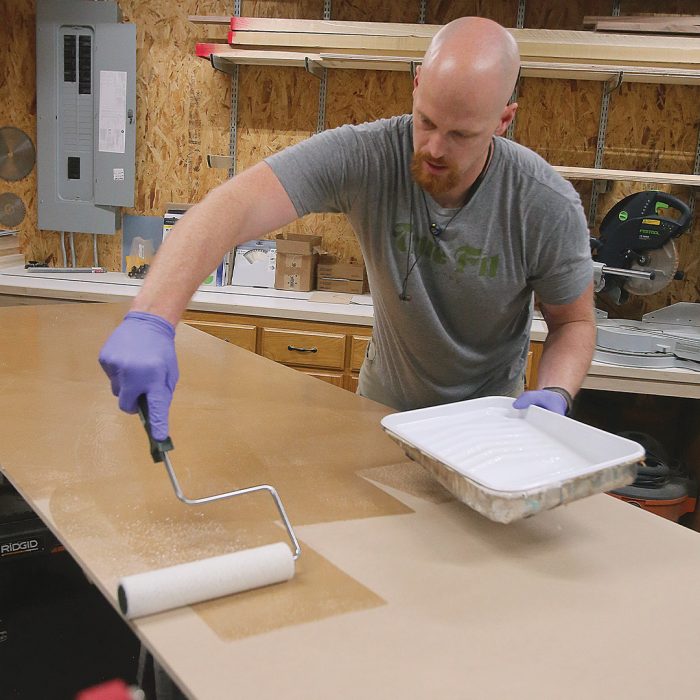
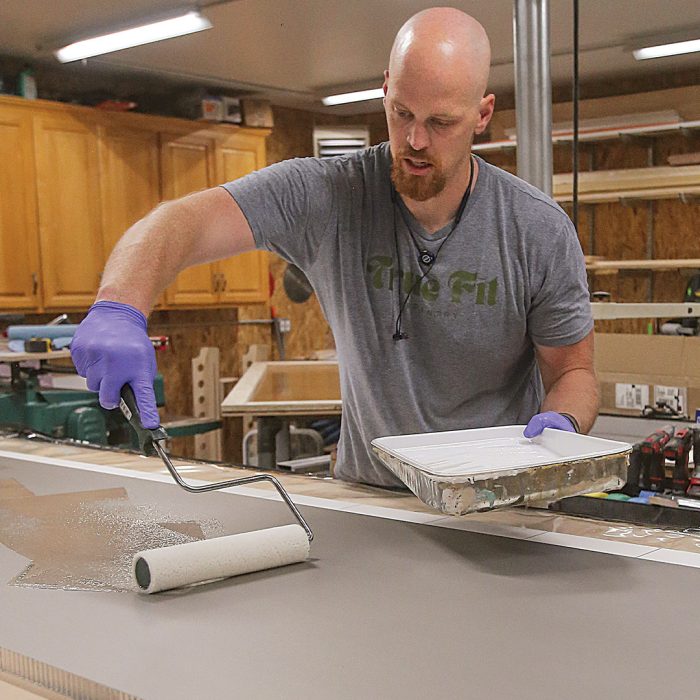
1.) Blow it off.

2.) Place the platen.

3.) Connect the hose.

4.) Turn it on.

5.) Check the seal.

Glue It Up

I used two-part West System epoxy for the first glue-up, which included skinning the LSL frame and aluminum panel with ½-in. MDF on each side. I sanded only the MDF to give it a bit of tooth for the epoxy to grab. The LSL material has plenty of texture, and the aluminum panel comes ready for epoxy. I just had to remove the protective plastic and give it a quick cleaning.

I applied epoxy to every surface using a paint roller and a special ¼-in. “adhesive and epoxy” nap. Once I had all the glue applied and all the layers stacked, I shot a few pin nails to keep everything aligned as I got it into the vacuum press. For even pressure, I put a melamine caul on top of the assembly. The caul also has rounded edges to protect the bag from puncture. I left the door in the vacuum press for 24 hours.

1.) Lightly sand.

2.) Wipe down the panel.

3.) Glue all surfaces.
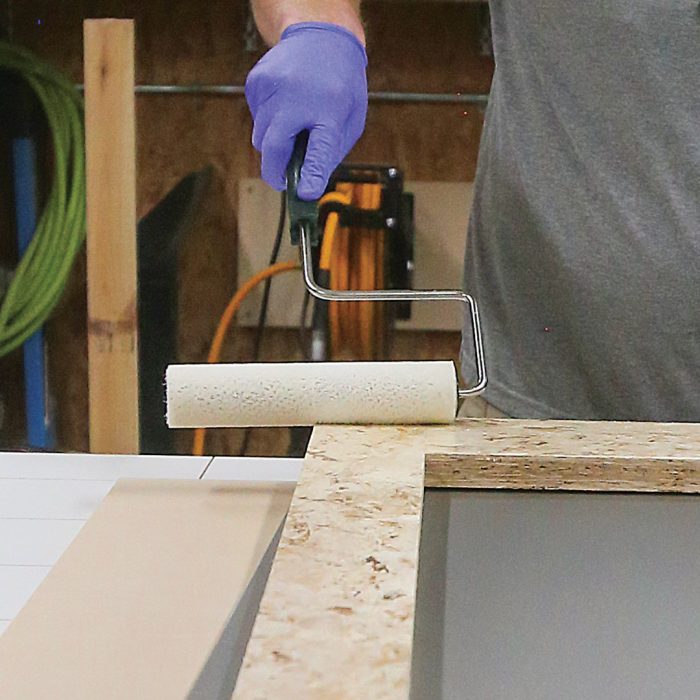
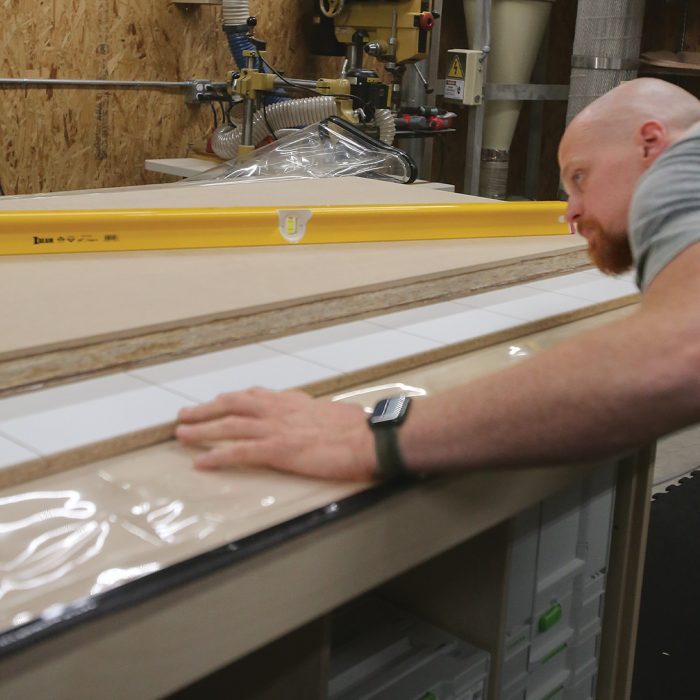
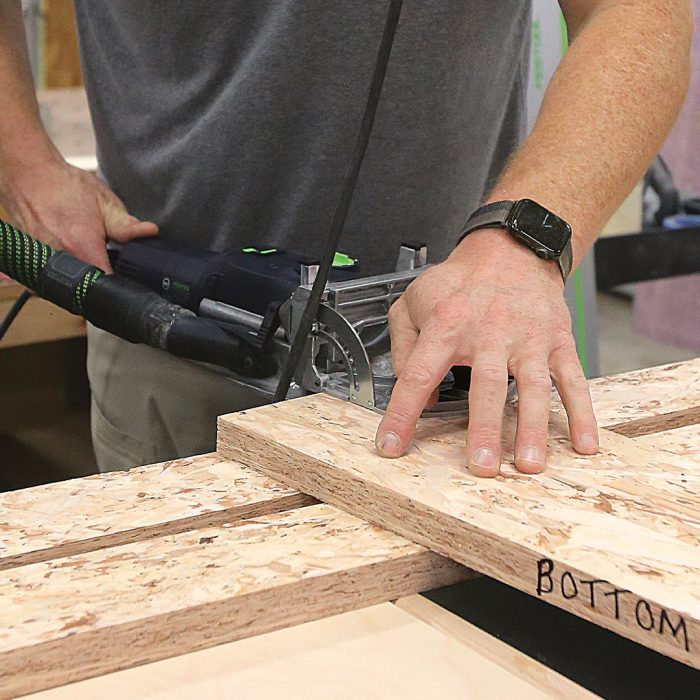
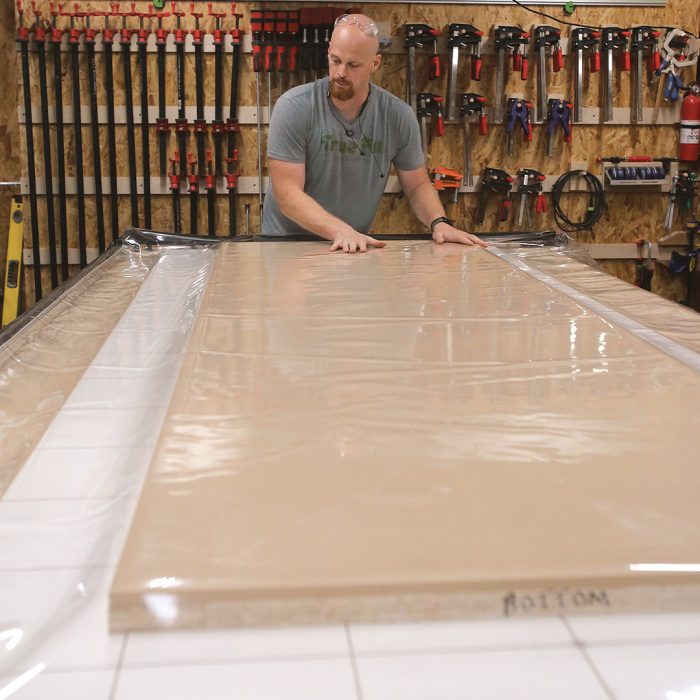
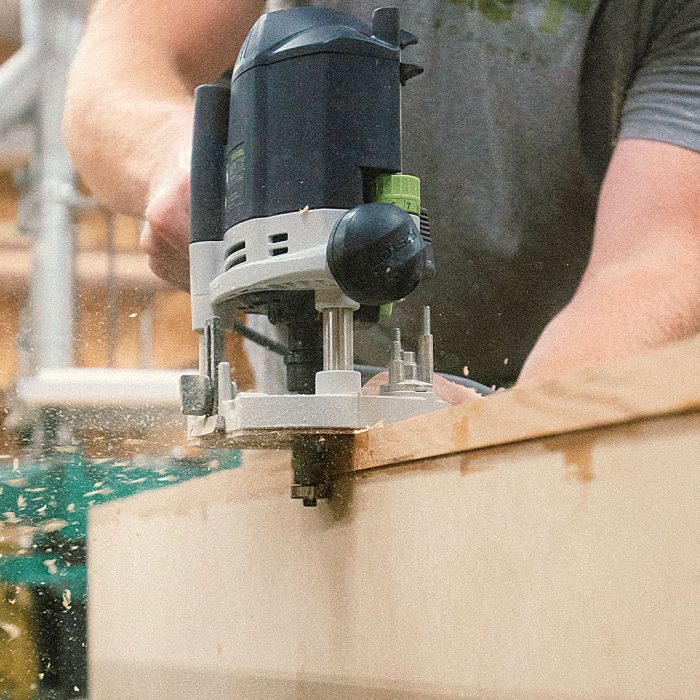
4.) Make sure it’s flat.

5.) Apply pressure.

Veneer Both Sides

When the first glue up was ready to come out of the vacuum press, I added solid red oak to the long edges of the door. Using solid material instead of veneer allowed me to trim the width of the door later and to add the hinge-side roundover needed for one of the doors to work with the pivot-door hardware. After that, I flushed up the edging with a router.

To glue up the veneer for the door, I matched the grain and trimmed and cut a straight edge on each piece. Even though one side of the door will be covered by a plywood panel that matches the wall paneling where these doors will be installed, it’s important to veneer both sides of the door. Even layers help keep the door from warping. When the veneer was ready, the door went back in the vacuum bag for another 24 hours.
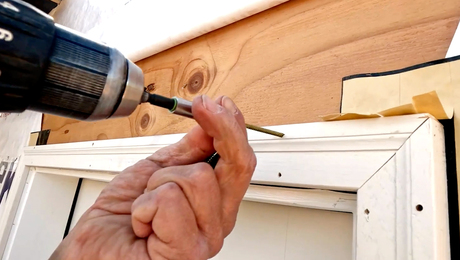
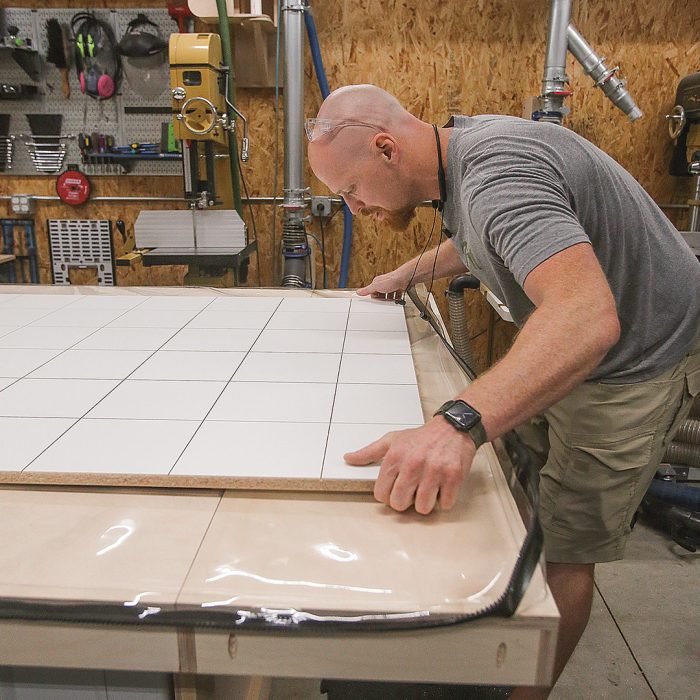
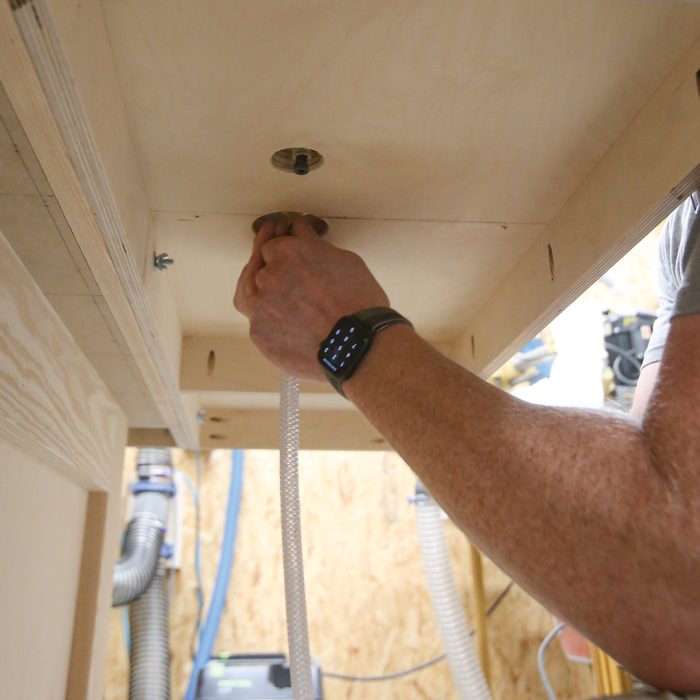
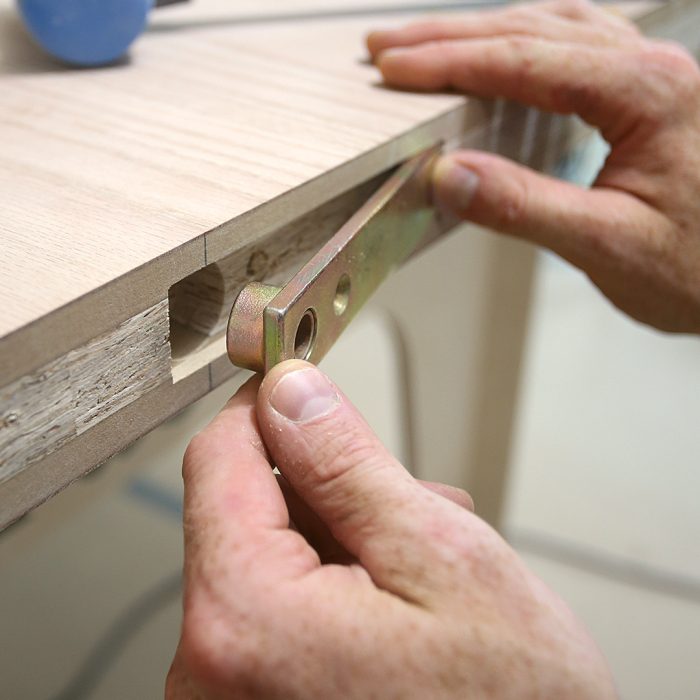
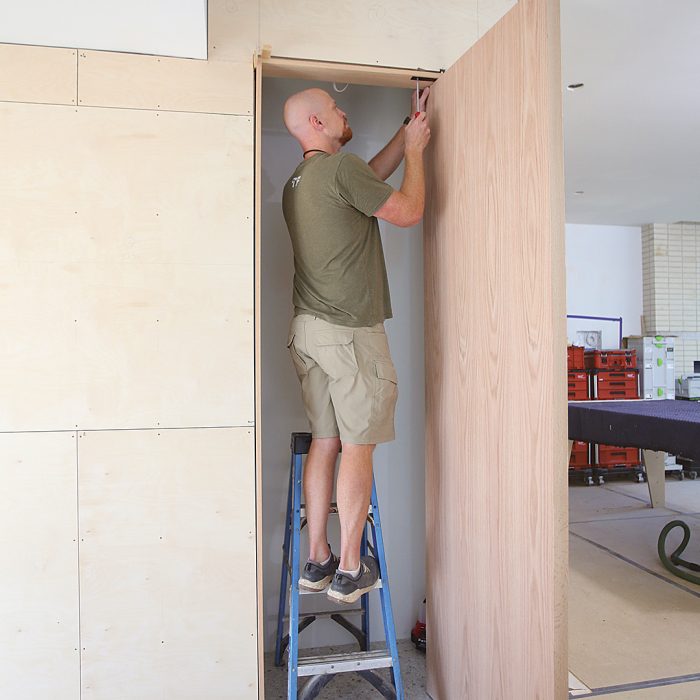
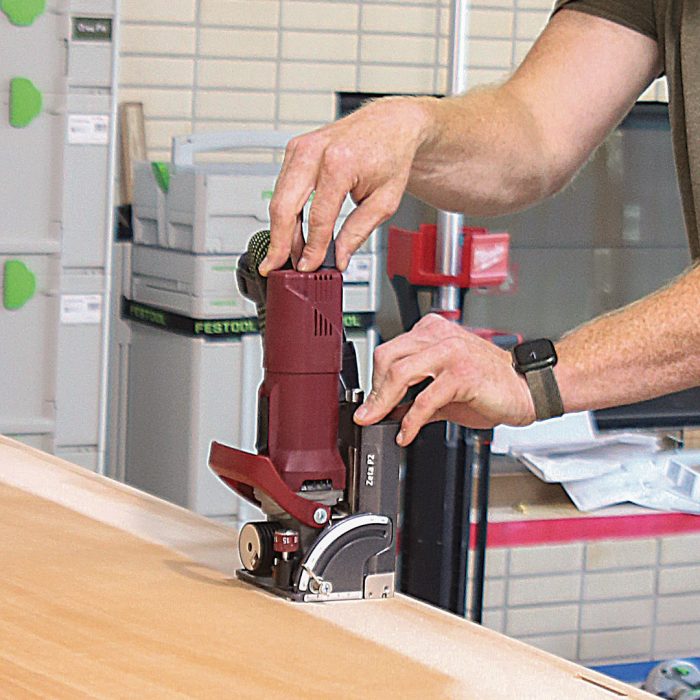
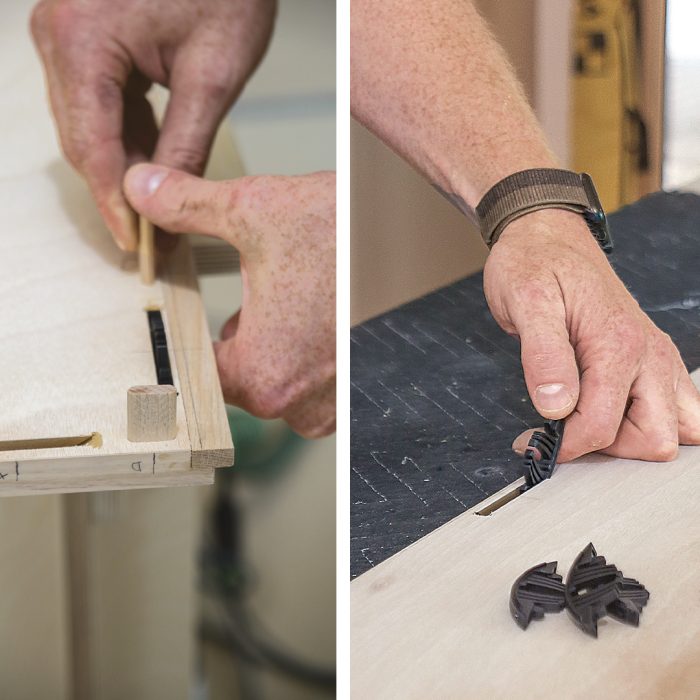
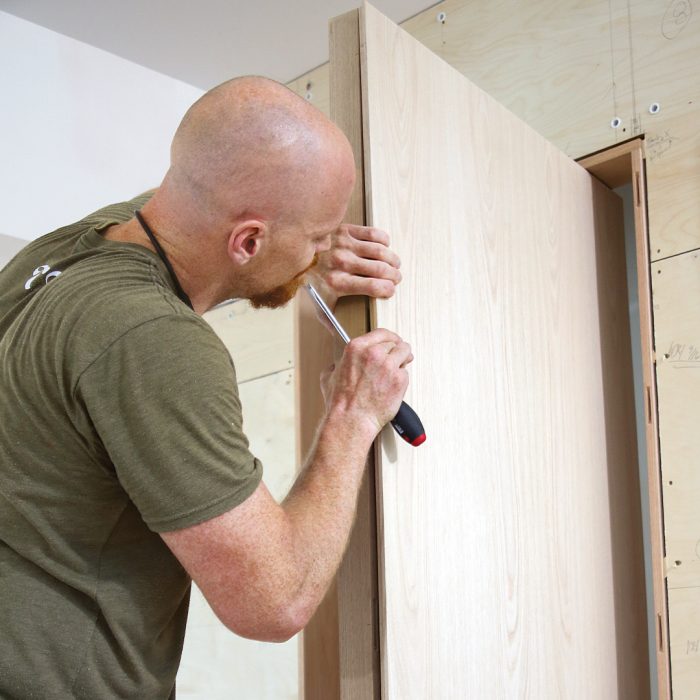
1.) Clamp up the edge banding.

2.) Rout it flush.

3.) Clamp veneer with tape.

4.) Put it Back in the bag.

Wrap It Up On-Site

I built these doors a bit taller than needed because they were to be installed in a house that was still under construction, and I was not able to verify the height of the finished flooring before I started. Not only did I trim the doors to final height on-site, but I also installed the Rixon pivot-door hardware on-site, as well as the finished veneered panel on one side of the door, which I fastened with a combination of Domino tenons for alignment and Lamello Tenso connectors for a sturdy hold.

1.) Install the pivot-door hardware.

2.) Hang and adjust the door.

3.) Cut panel grooves.

4.) Add fasteners.

5.) Fit the finished panel.

— Casey Knips; owner and operator of True Fit Carpentry, a custom trim and cabinetry company in the Twin Cities. Photos by Brian Pontolilo, except where noted.

From Fine Homebuilding #330

RELATED STORIES

  • Pocket Doors Never Looked So Good
  • Building a Flush Interior Door With Carpenter Casey Knips
  • That Modern Look

Sign up for eletters today and get the latest how-to from Fine Homebuilding, plus special offers.

Signing you up...

This site is protected by reCAPTCHA and the Google Privacy Policy and Terms of Service apply.
See all newsletters
See all newsletters
×

Get home building tips, offers, and expert advice in your inbox

Signing you up...

This site is protected by reCAPTCHA and the Google Privacy Policy and Terms of Service apply.
See all newsletters
See all newsletters

New Feature

Fine Homebuilding Forums

Ask questions, offer advice, and share your work

Log in or create an account to post a comment.

Sign up Log in

Become a member and get full access to FineHomebuilding.com

Up Next

Video Shorts

Featured Story

FHB Podcast Segment: Patching Drywall Near a Shower

Learn how to patch drywall above a fiberglass shower without totally redoing everything.

Featured Video

How to Install Cable Rail Around Wood-Post Corners

Use these tips to keep cables tight and straight for a professional-looking deck-railing job.

Related Stories

  • Precut Bottom Plates in Doorways
  • Mortising a Hinge without a Router
  • Fastening an Exterior Door With Brick Mold
  • Stop the Slam

Discussion Forum

Recent Posts and Replies

  • |
  • |
  • |
  • |
  • |
  • |
View More Create Post

Highlights

Fine Homebuilding All Access
Fine Homebuilding Podcast
Tool Tech
Plus, get an extra 20% off with code GIFT20

"I have learned so much thanks to the searchable articles on the FHB website. I can confidently say that I expect to be a life-long subscriber." - M.K.

Get home building tips, offers, and expert advice in your inbox

Signing you up...

This site is protected by reCAPTCHA and the Google Privacy Policy and Terms of Service apply.
See all newsletters
See all newsletters

Video

View All Videos
  • Fastening an Exterior Door With Brick Mold
  • Building a Flush Interior Door With Carpenter Casey Knips
  • Podcast Episode 627: Leaky Doors, Flashing, and Kneewalls
  • Podcast 380: 40th FHB-Anniversary-Edition Interview With Gary Katz
View All

Doors

View All Doors Articles
  • Big Doors Have Big Challenges
  • Stop the Slam
  • Sand Smooth Contours
View All Doors Articles

Fine Homebuilding Magazine

  • Issue 331 - June 2025
    • A More Resilient Roof
    • Tool Test: You Need a Drywall Sander
    • Ducted vs. Ductless Heat Pumps
  • Issue 330 - April/May 2025
    • Deck Details for Durability
    • FAQs on HPWHs
    • 10 Tips for a Long-Lasting Paint Job
  • Issue 329 - Feb/Mar 2025
    • Smart Foundation for a Small Addition
    • A Kominka Comes West
    • Making Small Kitchens Work
  • Issue 328 - Dec/Jan 2024
    • How a Pro Replaces Columns
    • Passive House 3.0
    • Tool Test: Compact Line Lasers
  • Issue 327 - November 2024
    • Repairing Damaged Walls and Ceilings
    • Plumbing Protection
    • Talking Shop

Fine Home Building

Newsletter Sign-up

  • Fine Homebuilding

    Home building tips, offers, and expert advice in your inbox.

  • Green Building Advisor

    Building science and energy efficiency advice, plus special offers, in your inbox.

  • Old House Journal

    Repair, renovation, and restoration tips, plus special offers, in your inbox.

Signing you up...

This site is protected by reCAPTCHA and the Google Privacy Policy and Terms of Service apply.
See all newsletters

Follow

  • Fine Homebuilding

    Dig into cutting-edge approaches and decades of proven solutions with total access to our experts and tradespeople.

    Start Free Trial Now
    • Facebook
    • Instagram
    • X
    • LinkedIn
  • GBA Prime

    Get instant access to the latest developments in green building, research, and reports from the field.

    Start Free Trial Now
    • Facebook
    • YouTube
  • Old House Journal

    Learn how to restore, repair, update, and decorate your home.

    Subscribe Now
    • Facebook
    • Instagram
    • X

Membership & Magazine

  • Online Archive
  • Start Free Trial
  • Magazine Subscription
  • Magazine Renewal
  • Gift a Subscription
  • Customer Support
  • Privacy Preferences
  • About
  • Contact
  • Advertise
  • Careers
  • Terms of Use
  • Site Map
  • Do not sell or share my information
  • Privacy Policy
  • Accessibility
  • California Privacy Rights

© 2025 Active Interest Media. All rights reserved.

Fine Homebuilding receives a commission for items purchased through links on this site, including Amazon Associates and other affiliate advertising programs.

X
X
This is a dialog window which overlays the main content of the page. The modal window is a 'site map' of the most critical areas of the site. Pressing the Escape (ESC) button will close the modal and bring you back to where you were on the page.

Main Menu

  • How-To
  • Design
  • Tools & Materials
  • Video
  • Blogs
  • Forum
  • Project Guides
  • Reader Projects
  • Magazine
  • Members
  • FHB House

Podcasts

  • FHB Podcast
  • ProTalk

Webinars

  • Upcoming and On-Demand

Podcasts

  • FHB Podcast
  • ProTalk

Webinars

  • Upcoming and On-Demand

Popular Topics

  • Kitchens
  • Business
  • Bedrooms
  • Roofs
  • Architecture and Design
  • Green Building
  • Decks
  • Framing
  • Safety
  • Remodeling
  • Bathrooms
  • Windows
  • Tilework
  • Ceilings
  • HVAC

Magazine

  • Current Issue
  • Past Issues
  • Magazine Index
  • Subscribe
  • Online Archive
  • Author Guidelines

All Access

  • Member Home
  • Start Free Trial
  • Gift Membership

Online Learning

  • Courses
  • Project Guides
  • Reader Projects
  • Podcast

More

  • FHB Ambassadors
  • FHB House
  • Customer Support

Account

  • Log In
  • Join

Newsletter

Get home building tips, offers, and expert advice in your inbox

Signing you up...

This site is protected by reCAPTCHA and the Google Privacy Policy and Terms of Service apply.
See all newsletters
See all newsletters

Follow

  • X
  • YouTube
  • instagram
  • facebook
  • pinterest
  • Tiktok

Join All Access

Become a member and get instant access to thousands of videos, how-tos, tool reviews, and design features.

Start Your Free Trial

Subscribe

FHB Magazine

Start your subscription today and save up to 70%

Subscribe

We hope you’ve enjoyed your free articles. To keep reading, become a member today.

Get complete site access to expert advice, how-to videos, Code Check, and more, plus the print magazine.

Start your FREE trial

Already a member? Log in