
Build Dry, Risk-Free Finished Basements
Capturing this additional living space correctly and confidently requires a careful approach to the site and foundation.
Synopsis: It’s no surprise that a finished basement is a popular project. It can add living space to a house at far less cost and complexity than building an addition. At the same time, because of the heightened threat from water and moisture, a basement remodel can create problems if it’s not done correctly. With that in mind, architect Steve Baczek shares his approach to finishing basements, which begins with an assessment of the risk from water and moisture. Drawings demonstrate typical strategies for detailing basements with low, medium, and high levels of risk, and a sidebar discusses code considerations. Through a drawing of the exterior of a house and its site, Baczek shows the steps to take for managing water before even beginning work on the basement.
Finishing a basement can create extra living space with far less cost and complexity than an addition that expands the home’s footprint. Perhaps for that reason alone, finishing a basement is a popular project for many homeowners. But a well-designed basement remodel is much more than an assembly of studs and drywall thrown up over a foundation wall, then trimmed and painted. Understanding and managing the risk of moisture and bulk water are imperative to developing a successful basement design, as is getting the insulation and air-sealing details right.
By assessing your site and basement accurately, and detailing your foundation floor and walls appropriately, not only can you improve the comfort, health, and efficiency of your home, but you can tackle the fit and finish of your basement with complete confidence in its durability and longevity.
Economics of performance
As with all construction projects, risk and performance in a basement remodel exist on a sliding rule of cost. Minimizing risk, providing durability, and ensuring proper performance come with a price. But when is good enough really good enough? It is easy to think of a basement as “cheap” space, but if the remodel is not well planned, it could easily be an inexpensive project that leads to expensive problems down the road. Improper water management can lead to health and durability risks; improper thermal management can lead to comfort risks. When it comes to considering the budget for a basement remodel, it’s helpful to follow the general guideline that as cost decreases, risk increases. The challenge is to find a suitable balance between cost and risk.
Rating the conditions
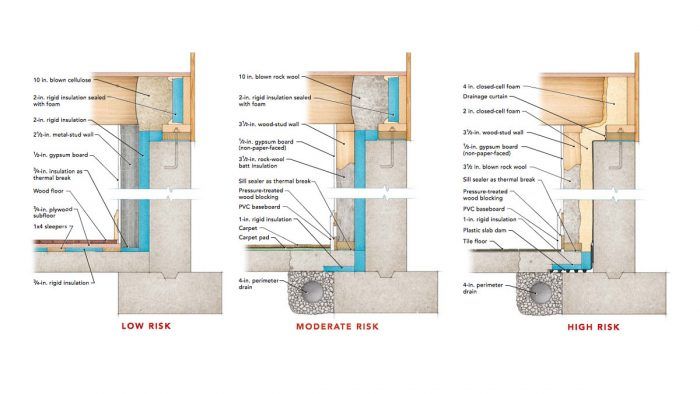
Because of the below-grade location of most basements, the existence of water is generally the measuring stick of risk. I typically rate existing foundations as having low, moderate, or high levels of risk. To me, low-risk foundations are not challenged at all by water infiltration. They are most often located in a high, well-drained area, and they have no evidence of water problems from the walls or the slab. Remodels should still be detailed carefully, though, since dramatic weather-related water events could occur at any time. I have also seen basements compromised because site conditions changed naturally, or more frequently, because neighboring properties were developed.
A basement with a moderate risk level has seasonal challenges. In colder climates, water from the spring thaw can saturate the ground. In warmer climates, water might become a problem during the rainy season. Regardless of the source, a moderate-risk scenario has water issues for up to half of the year. If you’ve lived in the house for a period of time, you certainly know if and when water issues are a problem. If you’re working on a home without historical context, look for evidence of bulk water in the basement in the form of staining on the slab and/or mineral streaks along the foundation walls. Your new neighbors might also be able to provide some insight into existing conditions, but keep in mind that every property is unique. Just because your neighbor’s basement is dry doesn’t mean yours is.
A high-risk basement faces water infiltration for more than six months of the year. Water might even be a daily challenge. High-risk basement remodels can be managed effectively, but demand a system of water management that requires a perpetual solution.
Site and foundation assessment
The initial steps in designing any finished basement are straightforward. First, if any water exists on the site, try to minimize the amount of water near the foundation as much as you can prior to beginning your work. The less water you have to deal with, the smaller the problem will be, and therefore, the smaller and less expensive the management system needs to be.
Once the site is analyzed and a plan for correction or improvement is developed, the foundation itself needs to be assessed. Different foundation types perform differently and can demand different approaches to management. Stone, brick, concrete block, and concrete all have specific characteristics that challenge a finished basement. Stone, brick, and concrete-block foundation walls are all mortared systems. The amount of mortar and the manner in which it was laid (neat and full vs. sloppy and spare) help determine the ability for water to penetrate the foundation wall. Because of their continuous casting, concrete walls offer a more formidable defense to the infiltration of groundwater. Make no mistake, though—if water exists, it will get in eventually.
Managing moisture
Moisture in its vapor form is usually not a cause for concern in a basement. It only becomes a problem when it is given the opportunity
to cool and compress to its saturation limit and condense on cool surfaces. For this reason, controlling surface temperatures in the basement is critical. For example, I recommend thermally breaking the framed walls from the concrete slab with a piece of rigid insulation under the bottom plate. This prevents vapor from permeating through the slab and condensing on the cool wood framing, where it could conceivably cause rot and mold growth.
Some builders try to control vapor by applying vapor barriers between the slab and finish flooring or between the foundation walls and the finished space. In some cases, this approach might be successful, but I tend to stay away from barrier systems in favor of management systems. I typically allow the vapor to migrate into the basement and then manage the level of moisture in the basement air with my mechanicals. A heat-pump water heater, for instance, provides partial dehumidification of the air as it heats the domestic water supply. This appliance, though, needs its own drain line for condensate.
When it comes to managing bulk water infiltrating the basement, the strategy is straightforward. The objective is to manage, collect, and discard water from the basement. Depending on the level of risk and the amount of water infiltration, an appropriate drainage plane must be employed to manage this water. With a moderate level of risk where water moves through the wall by capillarity or saturation, the drainage plane could be as simple as a layer of rigid insulation applied to the foundation wall and its seams taped. At a higher level of risk, where bulk water comes through the wall, a drainage curtain or drainage mat would be needed. A drainage curtain needs to be linked physically to a subslab perimeter-drain system in cases where a footing drain isn’t already in place. This is the “collect” part of the strategy. After the infiltrated water is collected, it is directed to a sump pump for discharge. If the exterior grade allows, however, the perimeter drain can be directed to daylight at some point on the property. By virtue of its subslab position, the perimeter drain handles any groundwater challenging the slab from below.
Insulation and air-sealing
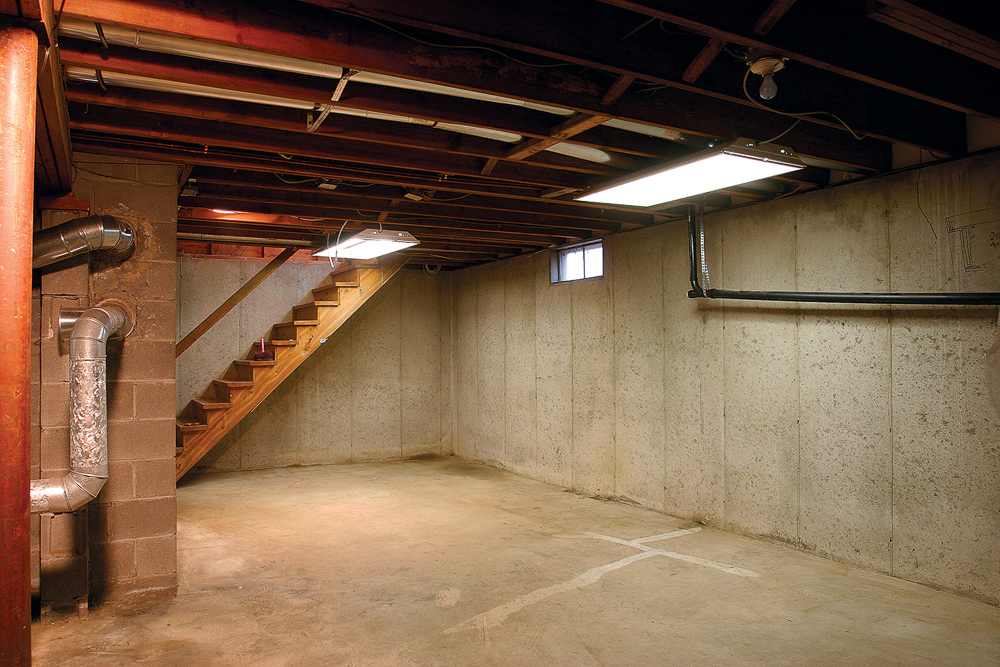
In most unfinished basements, moisture issues cause few problems because a leaky above-grade envelope allows the moisture to dry. In many homes, though, attempts have been made to separate the basement from the conditioned living space above with batt insulation installed in the first-floor joist bays. These attempts usually fail, since air movement between the floors goes unchecked. In addition, as the lowest point in the house, the basement is subject to the high test negative pressure (air infiltration) due to the stack effect. Whether the basement is insulated or not, the mechanical system located there is unavoidably tasked with conditioning the basement. In many cases, adding a proper thermal barrier in the basement allows the mechanical system to work less and still be able to provide the required heating or cooling of the insulated basement.
When it comes to insulating the basement, there are code-minimum R-values that vary based on where the home is located. My approach is to provide an R-value that is proportional to my thermal goals above grade. I typically strive for a basement-wall R-value that is at least half of my above-grade wall-insulation value. My target slab R-value is typically at least half of my basement-wall R-value. At a minimum, these numbers usually work out to an R-10 slab and an R-20 foundation.
Rigid insulation, spray foam, blown insulation, and batt insulation all have their place in certain basements. I typically consider batt or blown insulation to be an additional level of insulation rather than my primary insulating method. I refrain from putting any of them directly against the foundation wall for a couple of reasons. First, they allow air movement between the foundation and the wall assembly, making it more difficult to control the surface temperature of the framing and drywall. Second, water permeating the foundation can easily move through the insulation and damage the framing and drywall.
I like to control the surface temperature of the foundation wall with rigid foam or spray foam. After one of them has been installed, I determine the risk of adding batt or blown insulation. I tend to avoid batt or blown insulation in high-risk basements, and I use it sparingly or as bulk-fill insulation in lower-risk basements.
In terms of air leakage, the concrete walls and slab do a fine job of providing air-barrier continuity along their surfaces. With a stone, brick, or concrete-block foundation, the air barrier becomes more of a challenge. In these cases, I tend to use a drainage curtain, rigid insulation with sealed joints, or spray foam as the primary air barrier linking the slab to the mudsill.
Fit and finish
When it comes to finish materials in the basement, I have heard hundreds of opinions on which ones to use, where to use them, and why. I rely on my initial risk assessment to guide me in material selection with my clients, but I try to accommodate their wishes. In most cases, the installation methods of the selected materials are of prime importance, not the materials themselves. For example, if drywall is to be used in a moderate- or high-risk basement, then I will install a tall (8-in. or 10-in.) synthetic baseboard and hold the bottom edge of the drywall just under the top of the baseboard, which I will fasten to blocking. If the basement incurs a flood, the drywall is likely not to be part of the resulting problem. If a client desires carpet in a low-risk basement, I probably won’t have a problem with installing it wall-to-wall. In basements of moderate and high risk, a better option is either an engineered-wood floor or a tile floor with large area rugs. Area rugs are easy to remove, clean, and reuse if they are part of a flood.
In summary, my approach is pretty simple: As risk increases, materials used in a finish basement should be less permanent or more resistant to moisture and water.
Manage the risk and reap the rewards
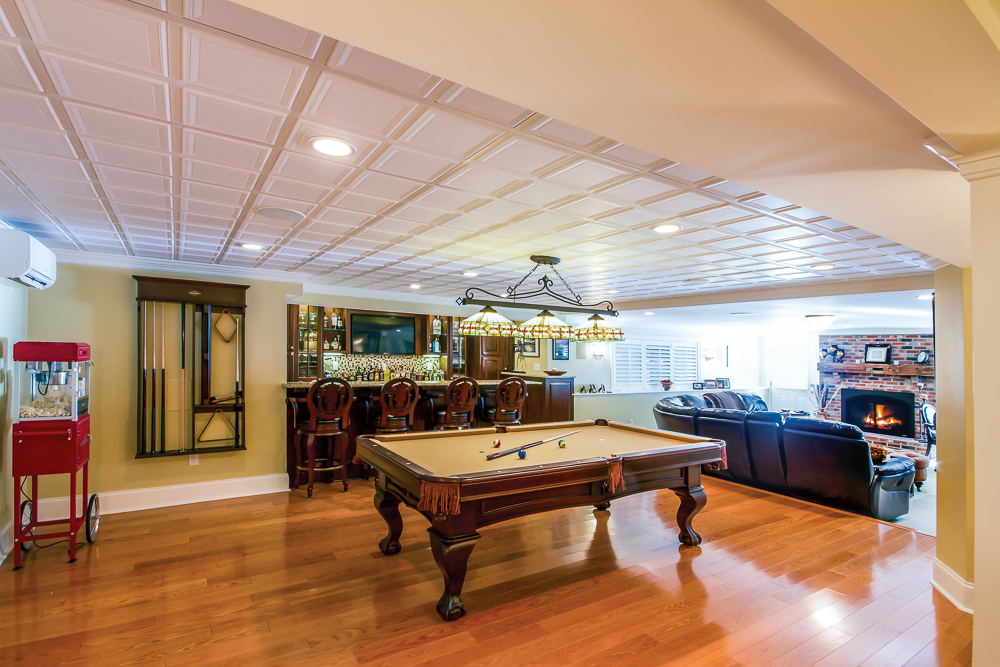
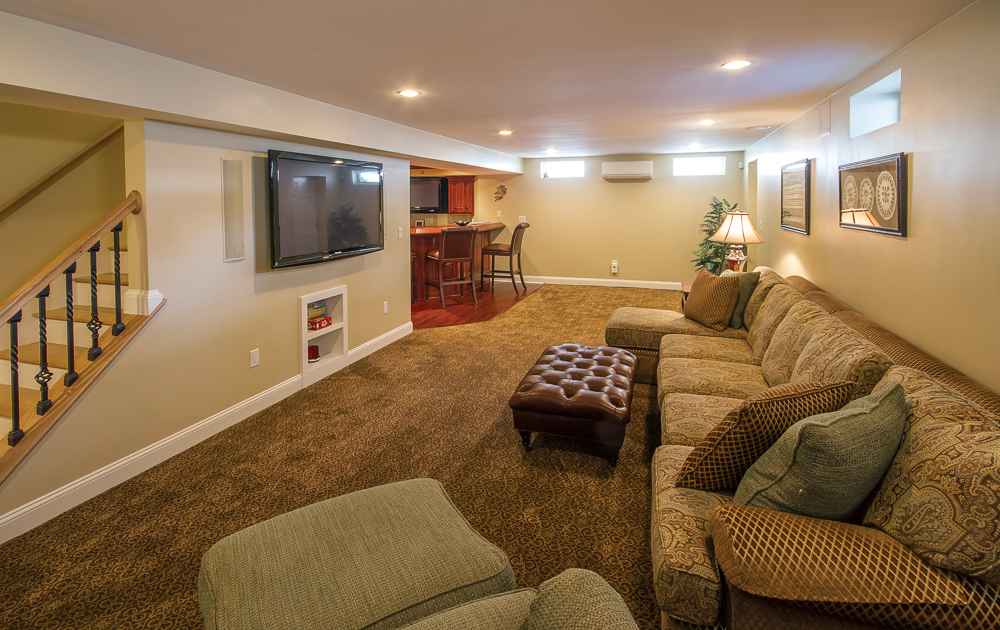
Risk is related directly to the threat of water and moisture in the basement. The more water challenging the foundation, the higher the risk level. Because no two basements are alike, each one demands its own method for keeping the space below grade dry and healthy. While finish and furniture selection can be inspired by other projects, it’s important to design your finished basement around your specific needs and challenges. The approach to low-, moderate-, and high-risk projects outlined here is not theoretical. It can be trusted in practice. Below are three of the author’s designs, built by Two Storey Building of Bolton, Mass., that afforded his clients the additional living space they dreamed of while also offering them peace of mind.

A Dry Basement starts with Site Management
Before beginning any basement remodeling work, make the effort to minimize the amount of water challenging the foundation walls. By keeping storm water, snowmelt, and runoff away from your home, you decrease the risk level of the basement renovation, which can help reduce the cost and complexity of the remodeling work. Here are the primary things to keep in mind as you create a strategy for keeping water away from the foundation.
Balance Risk with the right Design
here are two simple rules when it comes to designing a finished basement. First, water is never stopped, halted, or detained; it is managed. Second, Mother Nature and Father Physics are formidable opponents, with a very long history of success. Believing that we can win against their natural forces is simply a fantasy. Water management that aligns with their rules is the path to ultimate success.
Code Considerations
Many code requirements for basements apply directly to occupant health and safety. Here are a few worth investigating before moving forward in any basement design.
- Ceiling height or beam height is always a challenge in basements, especially in older homes. According to IRC R304.3, minimum ceiling height of a habitable space is 7 ft.
- Egress demands increase dramatically when the basement remodel includes adding bedrooms. Refer to IRC 310.1.
- Proper alarms for smoke, fire, and carbon monoxide should be installed and maintained in accordance with IRC R314 and R315.
- Sealed-combustion mechanical equipment that separates the combustion air within the device from the basement air is required in some jurisdictions and is a good idea in all of them.
- Natural ventilation is a calculated requirement in many jurisdictions. Start by researching section R303 in the IRC.
- Radon testing and mitigation are required in some jurisdictions. Radon can become a problem as a basement gets tighter.
Photos courtesy of David Fell; drawings by Christopher Mills
RELATED LINKS

View Comments
Why is the perimeter drain under the basement slab instead of outside the footer?
The perimeter drain that you see in the details is for an existing basement, not new construction. With new construction the perimeter drain would be outside the footing. Further, downspouts should NEVER be connected to the foundation drainage system as the potential for roof debris to enter and clog the foundation drain is high. Further, foundation drains are seldom installed with enough pitch to flush out any accumulation of silt or debris.