
Craftsman-Style Casing
Clean lines and balanced proportions are the key ingredients for this classic trim treatment.

Synopsis: The simple elegance of the Craftsman style has fueled its popularity for more than 100 years. Boston-area finish carpenter Tucker Windover outlines his method for installing Craftsman-style window casing, starting with a discussion (and illustrations) of how he develops an appropriate design; Craftsman style has no specific rules for window casing, only the need to keep the dimensions proportional to the room they’re in. Windover provides advice on the best way to choose and prepare lumber for stain-grade Craftsman-style casings, and how to solve construction problems that frequently become the trim carpenter’s headache.
Any cook will tell you that the fewer ingredients there are, the more important each one becomes. That’s especially true with Craftsman-style trim treatments. This style has its roots in England’s Arts and Crafts movement, which emphasized folk art and the workmanship of the individual craftsman. However, what developed in America as a residential Craftsman style was in many ways a reaction to over-adorned Victorian homes built during the late 1800s and early 1900s. Gustav Stickley, who founded the periodical The Craftsman in 1901, became the purveyor of a style that strove to strip away excessive ornamentation and instead celebrate functionality and pleasing proportions. In the best examples of the period, the look was both simple and elegant.
That was then. Most of the time nowadays, my crew and I trim out windows and doors with off-the-shelf primed finger-jointed moldings. Sometimes, however, a client hires me to create a specific look. This requires me to shift gears and dig into my bag of tricks, which is the most enjoyable part of being a trim carpenter. Recently, I was asked to install Craftsman-style window casing and door casing.
Good examples spawn better designs
To help me settle on a design for this project, I did four different drawings of a window to try variations of Craftsman-style casing. This allowed me to experiment with the size and the proportions of the elements before I did any cutting.
Ancient Greek and Roman temples established a proportional system that relates the horizontal entablature to the height and diameter of the columns that support it. Similar proportions can be brought to bear on Craftsman-style trim for windows and doors. While this is a good starting point, keep in mind that modern homes generally aren’t designed with classical proportions.
Lacking a ready-made template, I looked not only at Stickley’s work but also at casing treatments created by the Greene brothers, who were famous for the Craftsman-style homes they designed in California during the early 1900s. What I learned is that there’s no such thing as a one-size-fits-all casing for the Craftsman style. A room’s ceiling height and its window size affect decisions about casing dimensions. Formal areas such as a front entry door traditionally call for wider casing. In closets and small rooms, bold trim can be overdone. The challenge is to let the casing add strength, mass, and mood without becoming overbearing.
Guidelines for Craftsman DesignWhile there are some good books on Craftsman style, no pattern book or carpenters’ scripture provides exact. measurements. Unless there’s an architect involved, I design window trim myself based on my experience and a few guiding principles. Start simple, stay simple Use flat surfaces and square edges instead of molded profiles. Casing parts meet with basic butt joints. Subtle shadowlines are created by slight changes in thickness and overlapping elements. Wood grain is part of the effect For this job, I chose vertical-grain Douglas fir. When I selected the lumber, I chose boards with tight growth rings and consistent color. Oak (either rift-sawn or quartersawn) is another popular choice. Bold, balanced proportions are critical To get it right, I often mock up a full casing treatment to make sure all the pieces work well together. Also, to enhance a custom look, I avoid off-the-shelf dimensions where possible.
|


Choosing and processing lumber is a big part of the job
Because this job involved stain-grade trim, I carefully selected the wood myself at the lumberyard. The vertical-grain Douglas fir I used on this job isn’t a stock item at many lumberyards. The same can be said for straight-grained oak, another popular choice for Craftsman-style casing that will be stained or varnished rather than painted. When you are ordering and selecting boards, make sure that at least one edge is straight and square to register solidly against the tablesaw’s rip fence. Most full-service lumber dealers will joint one or both edges of each board for a slight upcharge.
Once I’m on site, I separate the wood into piles for stools, side casings, head casings, and other parts. Especially on a big job, it’s easy to waste time counting, resorting, and restacking wood that isn’t properly organized from the beginning.
After completing one window from start to finish and getting the client to approve the design, I can start mass-producing parts. It makes sense to keep the tablesaw’s rip fence at the same setting until all parts that need to be a given width are cut. Only then do I move on to another rip setting.
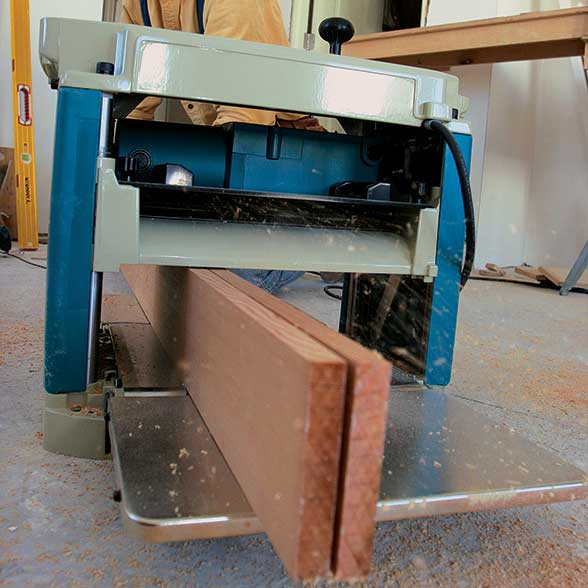
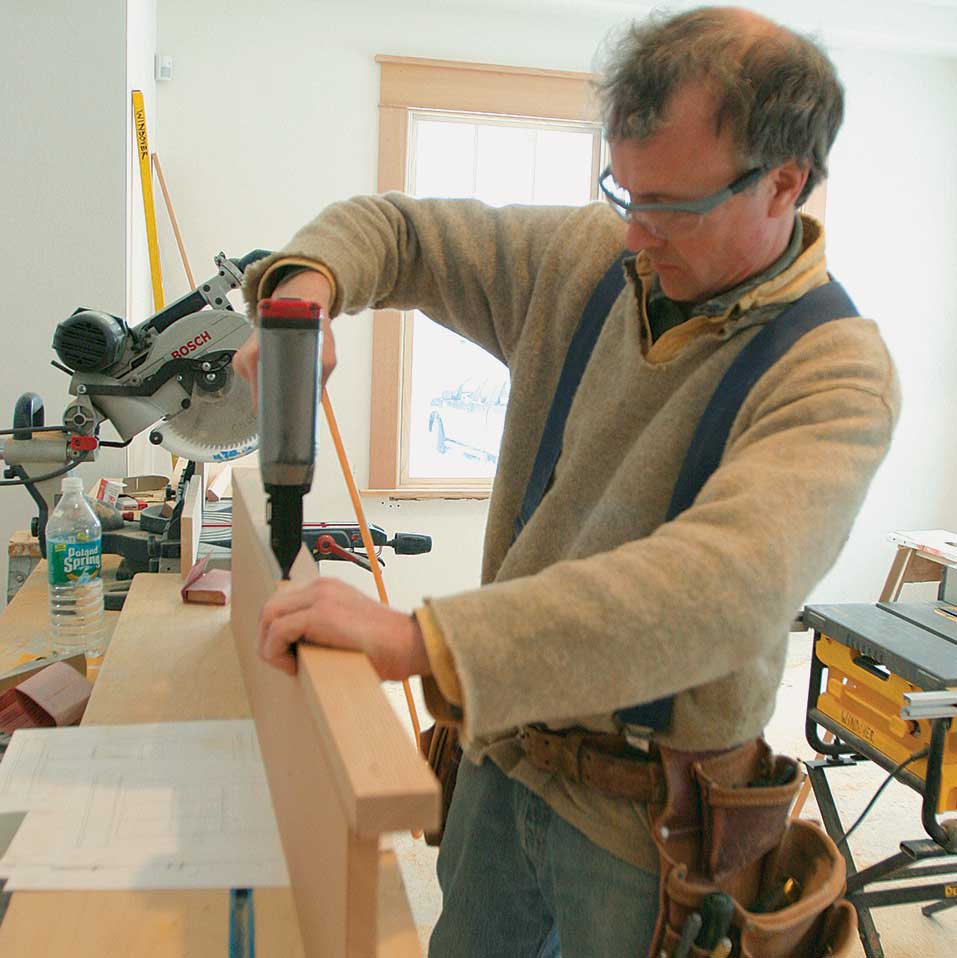
I rip trim elements to within 3 ⁄ 16 in. of their final widths. Then I use a thickness planer to remove the saw marks on the edges. If the face has any chatter from the mill, I use the thickness planer to take 1 ⁄ 32 in. off the side that faces out. I identify the more-attractive face of each piece and mark the back sides as I go. Once all the stock is separated into piles and cut to the final dimensions, I do a whole-house takeoff and cut the pieces to length. As I work my way through the cutlist, I pay attention to consistency of color and grain pattern so that I can match pieces as needed.
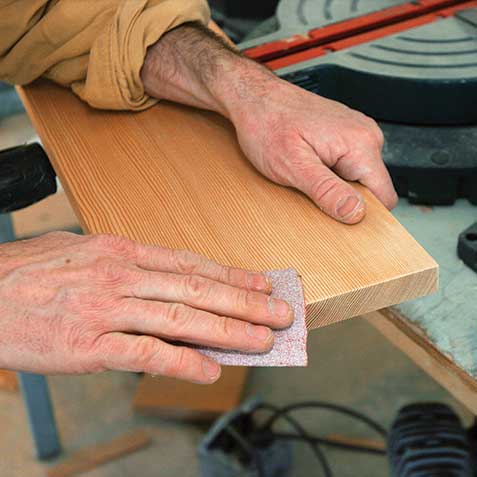
The milling process leaves all the edges sharp. Because sharp corners are unpleasant to brush against and don’t hold finish well, I ease the edges that will be exposed in the finished installation. A block plane is a great tool for easing edges, but it’s also possible to get the job done with 120-grit sandpaper.
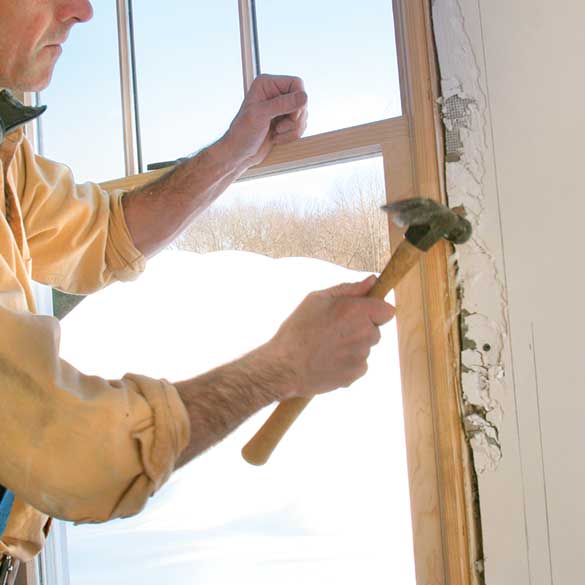
Solving problems that land on the trim carpenter’s plateBuilt-up compound, loose dry-wall, bulges in framing, and poor window installations are some reasons the window jamb and the drywall might not line up. Like it or not, these problems become the trim carpenter’s headache. If the drywall surface and the jamb edges aren’t made flush with each other, you’ll be fighting the trim through the rest of the project, and it might never look right.
(1) Apply force if necessary. Many times, the window is not set far enough inside the rough opening. Even if the trim and siding have already been installed, I can often move the window by yanking it.
|


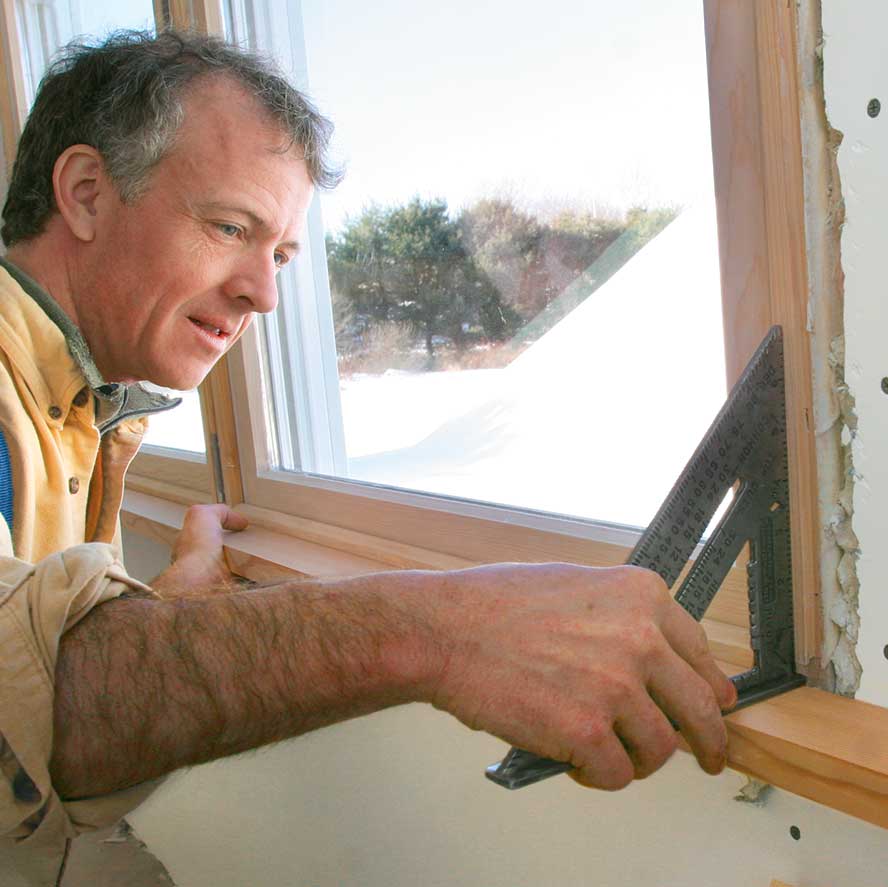
With a simple design, the details matter more
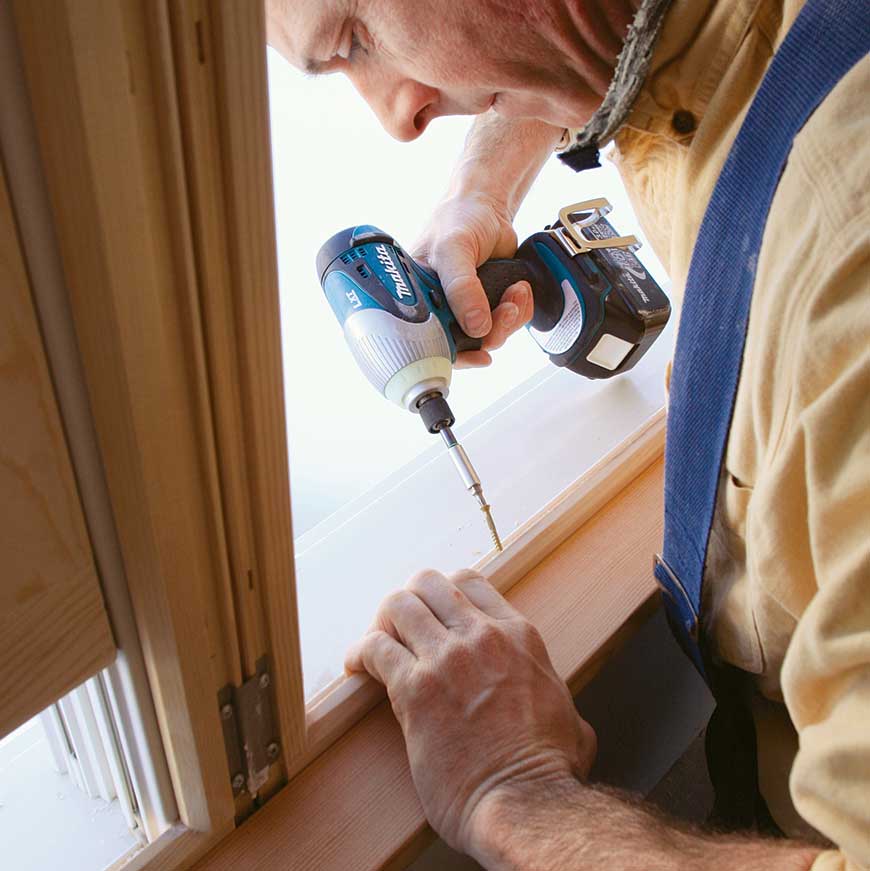
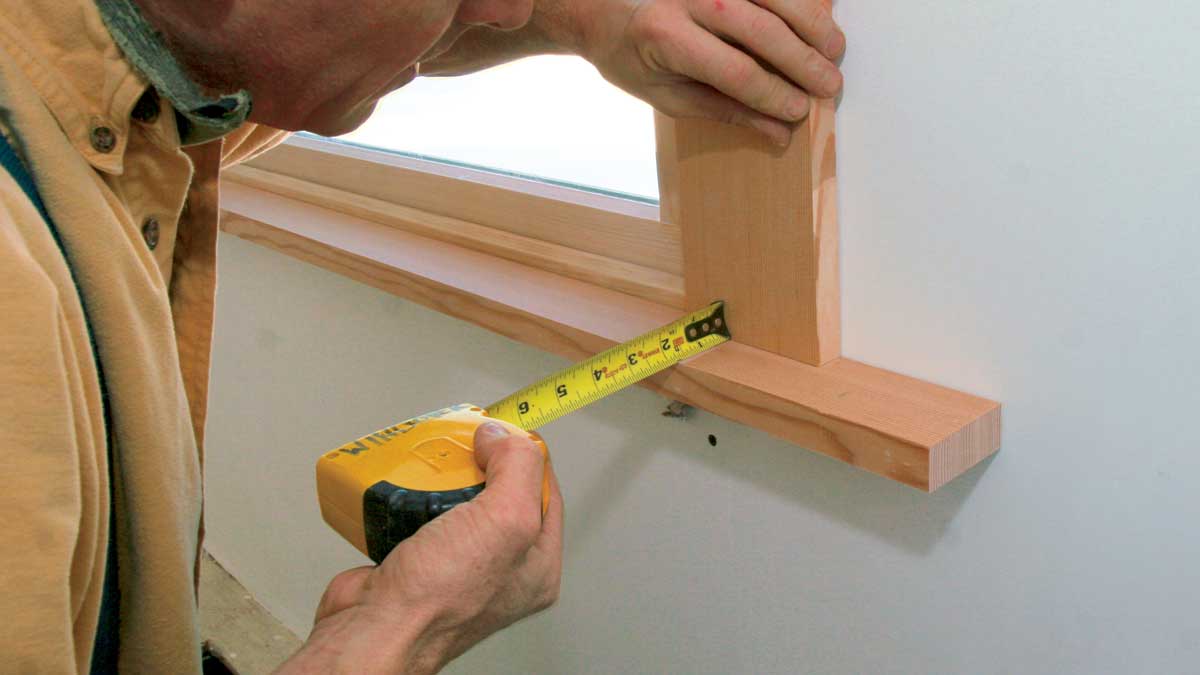
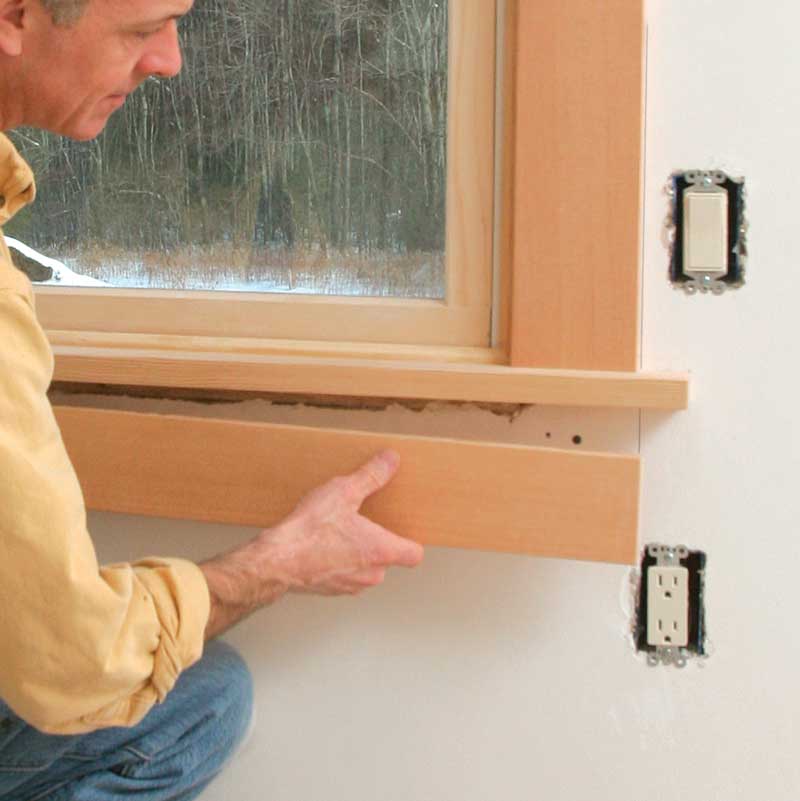
For any custom job, I take a little more time prepping the opening and the materials. For Craftsman casings, this is especially true. you can’t hide any flaws in a simplified design. If the window jamb and the drywall surface don’t line up perfectly, the side casing cants out. This flaw can be easily seen where the casing meets the stool or the head. Also, if the window is even a fraction out of square at the corners, the butt joints where casing pieces meet show visible gapsMost window manufacturers have their own details for frame and sash, so the connections have to be worked out on a case-by-case basis. On this job, the Andersen Windows moldings were thick enough behind the stool to allow trim-head screws to be driven from the back side of the window frame to secure the stool to the jamb. To lock this key piece in place, I nail it to the side casings and glue the top edge of the apron to the stool.
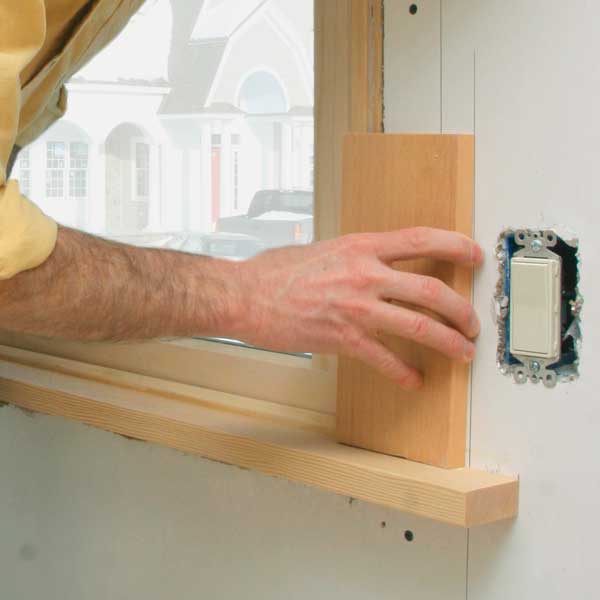
I use a rabbeted reveal block to mark the distance from the edge of the window jamb where the casing will land. This layout tool ensures a uniform reveal all around the window. On this job, the jamb stock was thick enough to allow a 1⁄4-in. reveal, which creates a pleasing shadowline. You can mark reveal offsets on the jambs with a utility knife or a sharp pencil. I often eliminate this step and simply measure up to the top of the block.
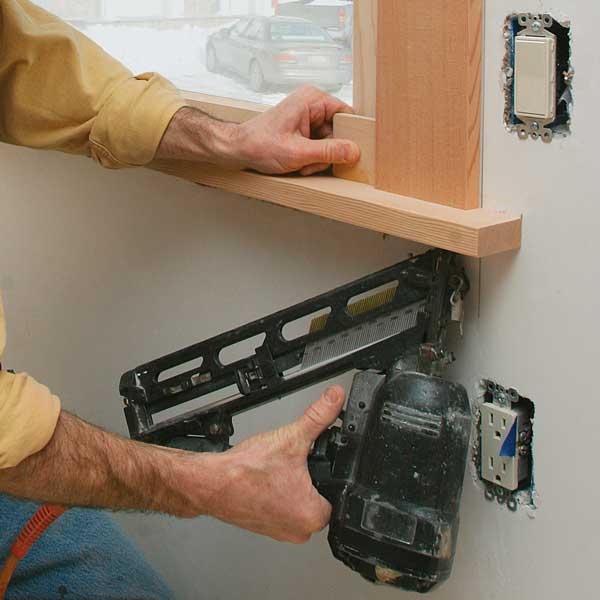
I am careful about where I put fasteners. As a habit, I like to maintain consistent distances between nails (16 in. is typical) and to keep the nails in horizontally or vertically aligned pairs on the casing. One goes into the jamb; the other goes into the rough framing. Even if the nail holes are filled with expertly matched putty, a random nailing pattern is a visual distraction that’s not acceptable on a stain-grade job.
I used 2-in.-long, 15-ga. finish nails to install this trim. Thinner 18-ga. nails are too liable to bend if they encounter wood grain that leans toward the face of a board. you don’t want to have to pull errant nails on a stain-grade project. I adjust my nail gun to set nails just over 1 ⁄ 8 in. below the surface. Any shallower, and the wood putty might not stay in place.
Many times, especially during production-oriented work, the final walk-through can get short shrift. On a custom job, however, I make a point of doing a thorough walk-through. One unfixed mistake can unnecessarily sour a client’s perception of the whole job.
The stool comes firstThe stool visually anchors the casings that rest on its top surface. It needs to fit well against the drywall, be square to the window, and be attached securely. I secure the stool temporarily to establish its length. 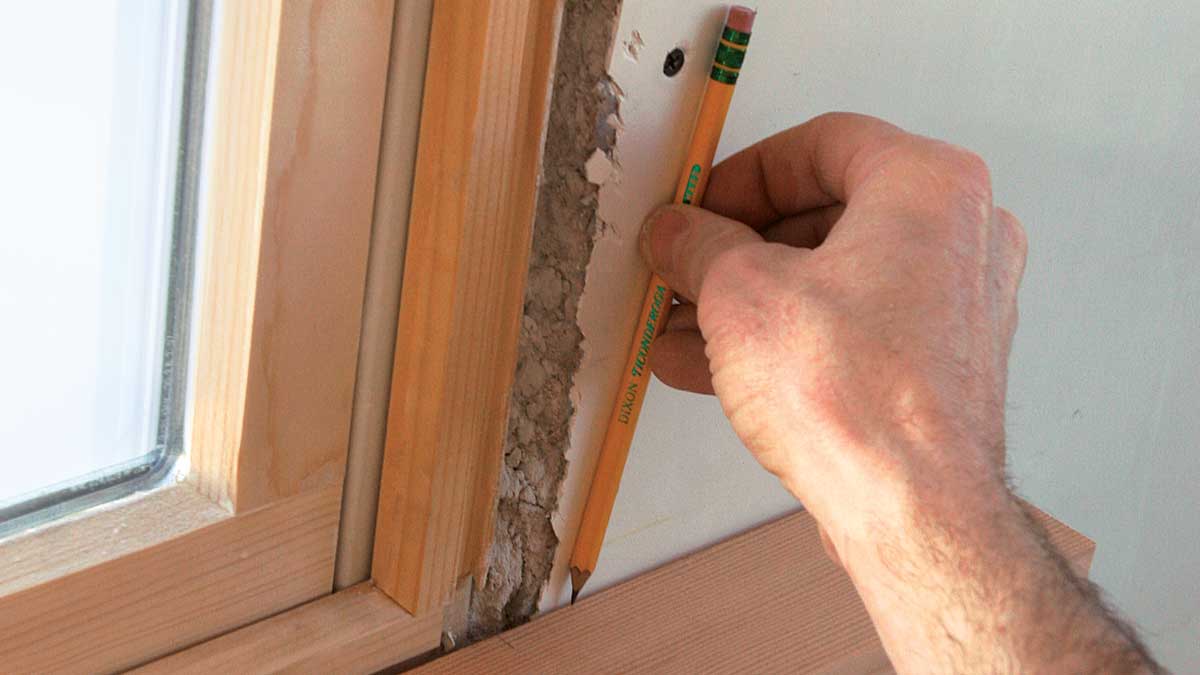
|
A thickness planer cleans up faces and edges
I use a thickness planer to take a light finishing pass on the show face of every piece of trim. This removes any chatter marks or other surface irregularities while also ensuring uniform thickness. I also use my planer to clean up the edges of boards after ripping them slightly wider (about 3⁄16 in.) than their finished widths. Ganging boards together and running them through the planer gets the job done quickly and cleanly. After I run stock through the planer, I knock down the edges with a block plane and ease the edge of exposed end grain with 120-grit sandpaper. |
Casings need a consistent revealSubtle details have a surprisingly dramatic impact on stain-grade trim. That’s why it’s important to establish a consistent reveal for the casing and to pay attention to where nails are driven. 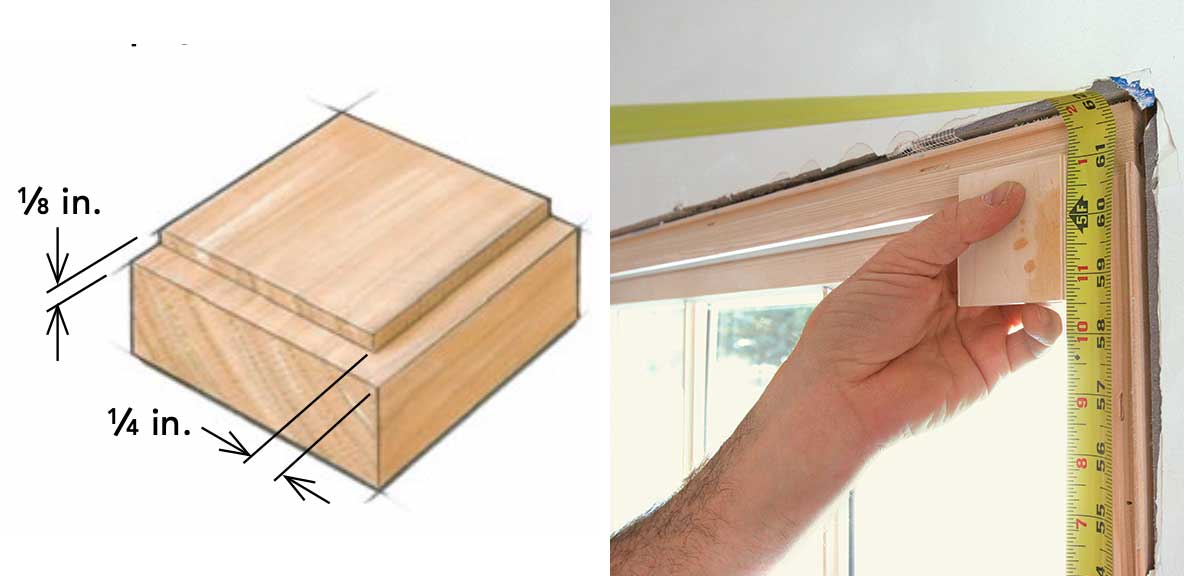
|
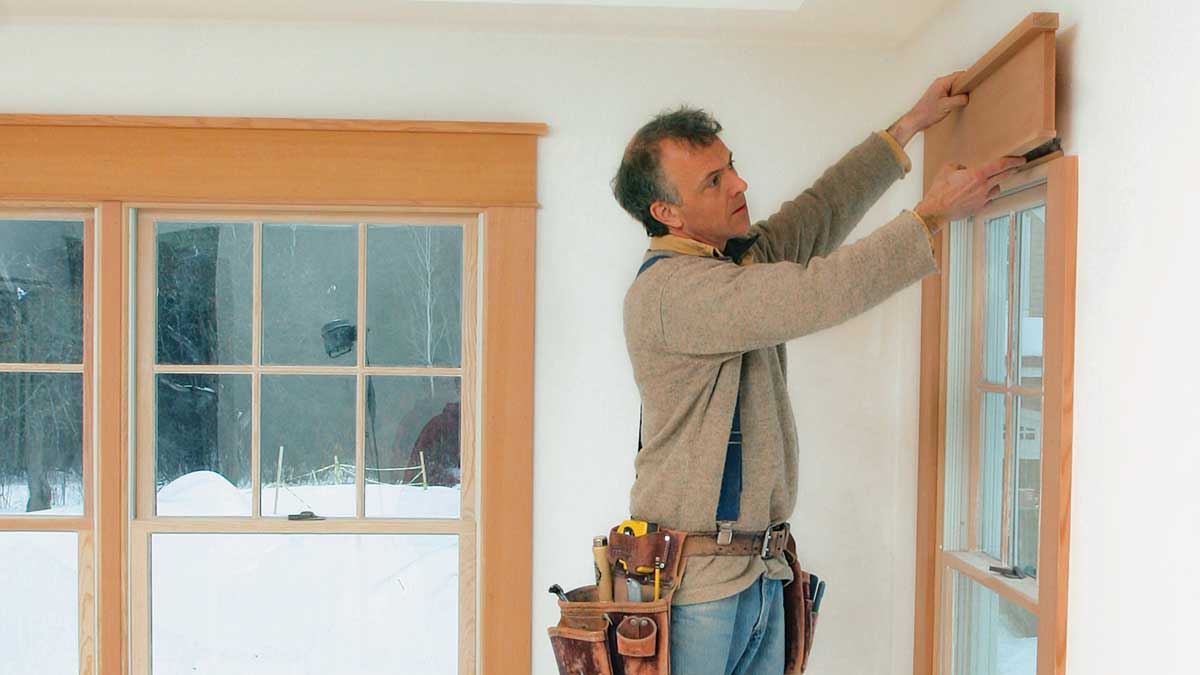
Frieze and apron align with side casingsPencil lines on the wall extend the side-casing layout, enabling me to size and position the frieze board and apron correctly. The frieze is part of a three-piece header that I assemble on the bench.
|
Craftsman style as a way of lifeCraftsman style reaches far beyond trim details. As the books here amply illustrate and explain, this style extends to home design, architectural details, furniture, and even a philosophy that advocates simplified living.
|
Tucker Windover is a finish carpenter in Arlington, Mass. Photos by John Ross, except where noted.
From Fine Homebuilding #196
