FHB Logo Facebook LinkedIn Email Pinterest Twitter X Instagram Tiktok YouTube Plus Icon Close Icon Navigation Search Icon Navigation Search Icon Arrow Down Icon Video Guide Icon Article Guide Icon Modal Close Icon Guide Search Icon Skip to content
Subscribe
Log In
  • How-To
  • Design
  • Tools & Materials
  • Restoration
  • Videos
  • Blogs
  • Forum
  • Magazine
  • Members
  • FHB House
  • Podcast
Log In

Fine Homebuilding Project Guides

Decks

Guide Home
  • Design & Planning
  • Tools & Materials
  • Footings & Foundations
  • Framing a Deck
  • Installing Decking
  • Installing Railings
  • Deck Stairs
  • Custom Details
  • Finishes, Repairs, and Maintenance
  • Complete Deck Builds
How-To

Pro Tips for Deck Refinishing

Use this foolproof strategy to rescue a worn, weather-beaten deck.

By Jim Grant Issue 237 - Aug/Sept 2013

Keeping decks looking good in a sunbaked climate can be a challenge, but it provides me plenty of work as a professional deck refinisher. In San Diego, where I live and work, outdoor living space is important, and my clients expect a deck to look as good as the interior of a house. Maintaining a deck can be a huge challenge. Poorly handled cleaning or refinishing usually results in a deck that has to be redone.

I was recently called to look at a hardwood deck in Solana Beach, Calif. This deck, which was about three years old, needed a good cleaning and refinishing. In addition, black streaks emerged from every fastener on the stairs, the privacy fence, and the glass-paneled walls that protect deck occupants from coastal winds.

The stains resulted from the nails’ rusting. Apparently, the builder had used galvanized nails to fasten everything but the decking. I see this black staining regularly despite the sound advice of distributors who suggest stainless-steel fasteners for tropical hardwoods. Fortunately, the deck surface was unaffected because the decking was attached with blind fasteners (ebty.com).

Begin With a Thorough Cleaning

This project was typical of the deck-refinishing work my crew undertakes. First, we clean the wood with a concentrated detergent. Then we follow up with a wood brightener. After each step, we power wash using a wide-angle (40°) nozzle.

A pressure washer in the hands of a novice can destroy landscaping, force water into a house, and ruin a wood deck. We’ve handled many projects where homeowners or contractors have damaged the deck surface with a power washer. Fixing the resultant gouges requires extensive sanding and sometimes new decking. Before I let new employees touch someone’s deck with a pressure washer, I teach them how to feather the stream of water onto the surface when starting out and how to let the cleaning chemicals do the majority of the work. We always use a wide-angle nozzle on decking, even if it takes a little longer to get the surface clean.

On this deck, once the wood was cleaned and brightened, we turned to the rusting fasteners. To prevent water from getting into the nail holes and causing a recurrence of staining, we filled the holes with a wax-based exterior filler. We heated the filler slightly with a tea-light candle and carefully pushed it into the 400-plus holes. Minor sanding with a medium-grit sanding sponge removed the excess filler. We used a light touch, because excessive sanding can result in a noticeable change in the wood texture that shows up later when the deck is finished.

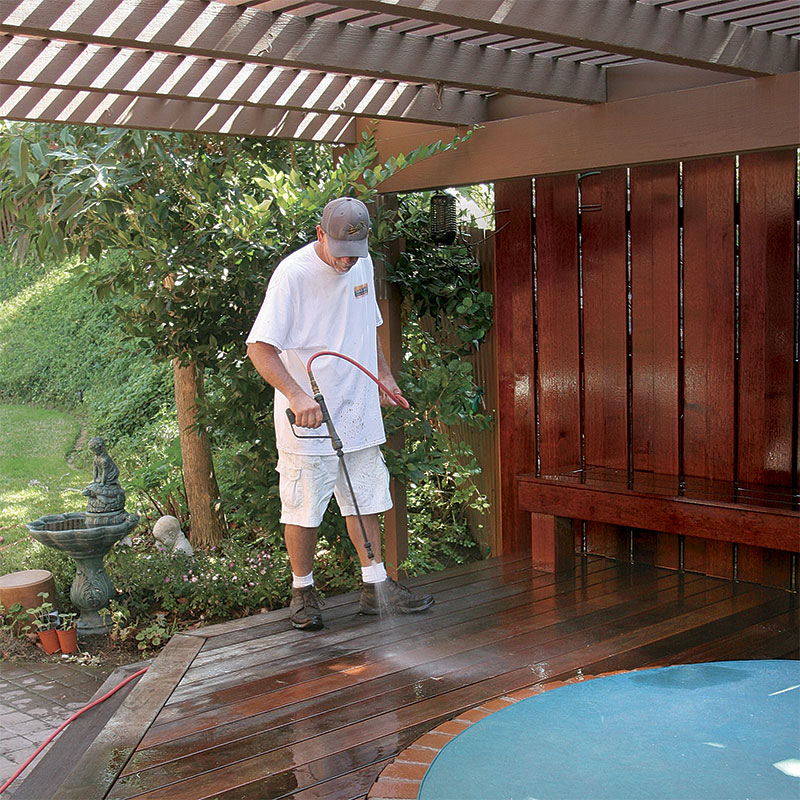
1. Spray on the cleaner. Starting with vertical surfaces and working from the top down, apply deck cleaner. Allow it to work for 10 to 15 minutes.

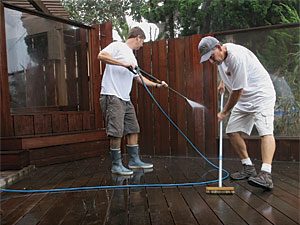
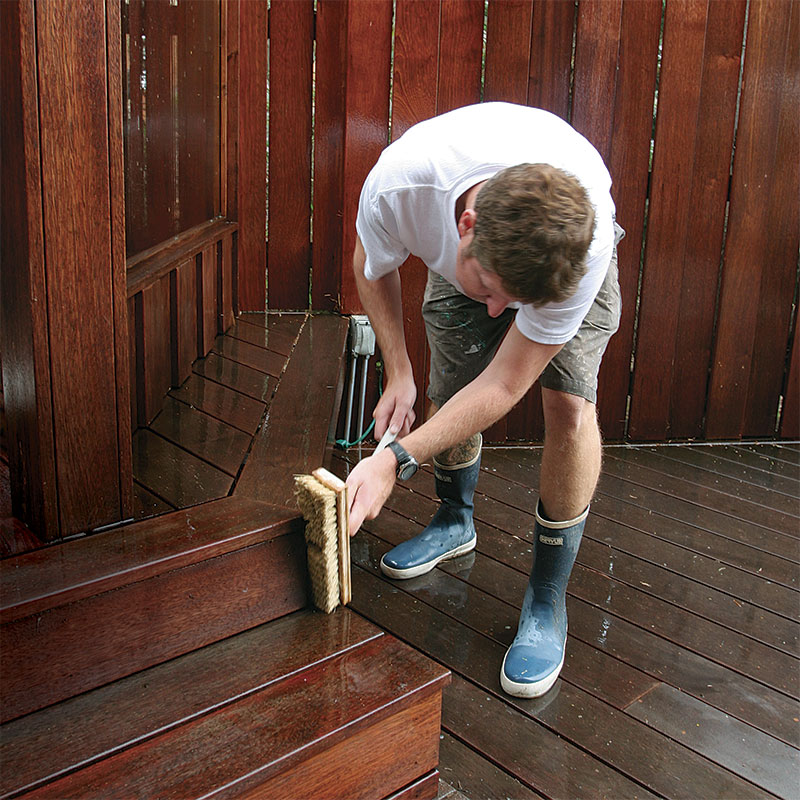
2. Scrub the surface. Moving in the direction of the wood grain, use a stiff-bristle brush on a telescopic pole to clean the wooden surfaces. Horizontal boards are usually the dirtiest. Use smaller handheld brushes for hard-to-reach areas.

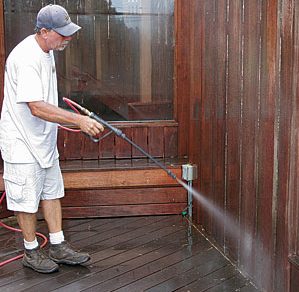
3. Power rinse. Starting with the vertical surfaces and working from the top down, rinse the deck clean with a pressure washer equipped with a wide-angle (40°) nozzle. Nozzles with a tighter spray pattern can strip out soft areas, leaving gouges.


Then Use Brightener to Make Old Wood Look New

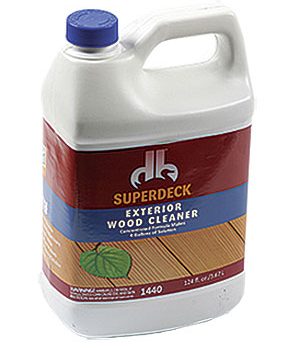
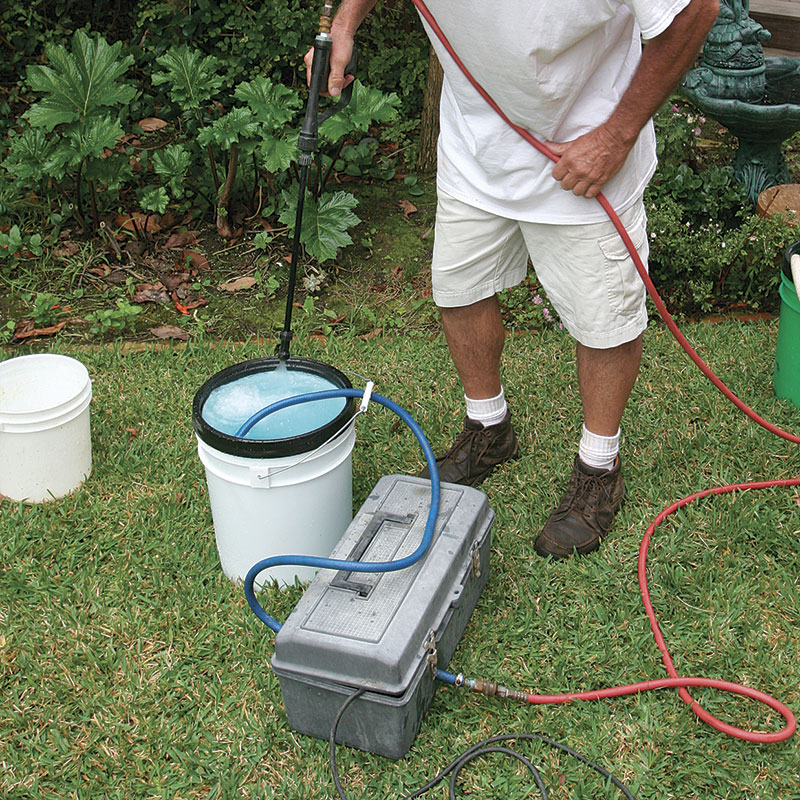
1. Brighten the clean wood. After allowing the wood to dry, apply an oxalic-acid-based wood brightener to all surfaces. Mix 1 gal. of the brightener with about 3 gal. of water. The author uses a homemade spray rig to apply it. Allow the brightener to work for about 15 minutes, then scrub the wood with a stiff brush and rinse it with a pressure washer.

2. Scrub again. Once the wood brightener has worked for about 15 minutes, scrub the surfaces with stiff-bristle brushes.

A long handle provides additional leverage.

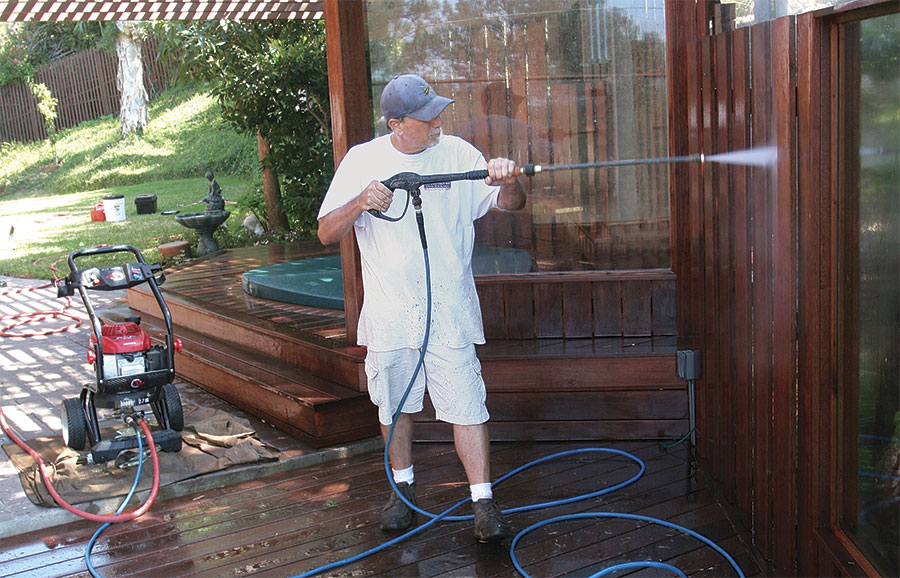
3. Rinse clean. A gas-powered pressure washer equipped with a wide-angle (40°) nozzle rinses and cleans the surface without damage. The pressure washer doesn’t apply the two cleaning chemicals; it sprays only water.
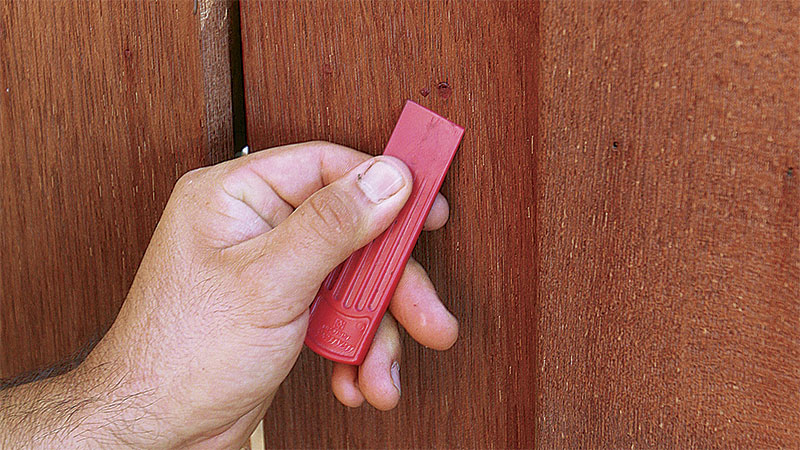

A Better Sprayer

Frustrated with constant pumping and all-too-frequent refills when using a garden sprayer, the tool commonly used to apply cleaner and wood brightener, the author devised his own spray rig. At its heart is a small AC-powered transfer pump.

The inlet has a short hose that’s dunked into a bucket of cleaning solution. The outlet side has a Tee Jet spray wand.

To make transport easier, the rig is contained in a plastic toolbox that holds the pump, cord, and inlet hose.


A Fix for Rusty Fasteners

Despite recommendations to use stainless-steel fasteners for hardwood decks, we often see decks built with galvanized fasteners. Unfortunately, it doesn’t take long for the nails to rust, leaving black streaks that can make an otherwise beautiful deck look really bad.

In most cases, the cleaner and brightener remove the marks, but in some badly stained areas, only a sander can remove them. This is a last resort, however, because it means sanding the whole board or having a board with an inconsistent appearance between sanded and unsanded areas.

Once the black marks are gone, we fill the holes with a color-matched, wax-based wood filler. It’s important to pick the right color, or the filled holes will be as obvious as the black stains.

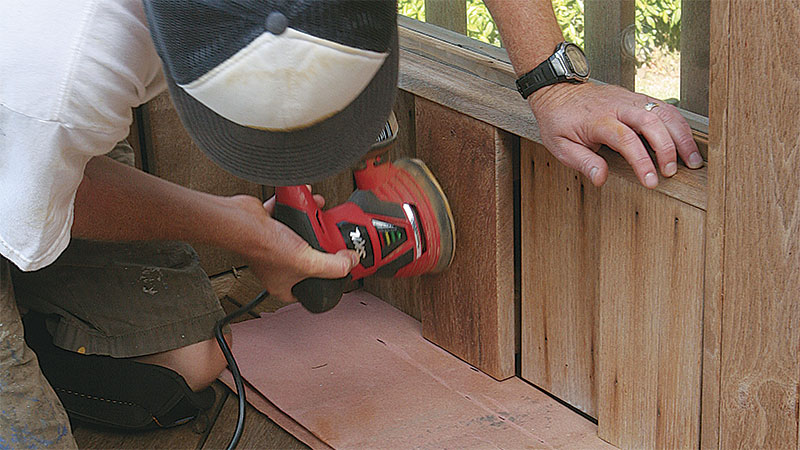
Sand away marks. In spots with the worst black staining, the cleaner and wood brightener are not fully effective at removing discoloration. In these spots, the only solution is to use a random-orbit sander equipped with 120-grit paper over the board.

Fill and smooth. Once a matching color has been found, the wax filler (fastcap.com) is applied with a plastic spatula included with the kit. The same tool scrapes away the excess.

Finally, Apply the Finish

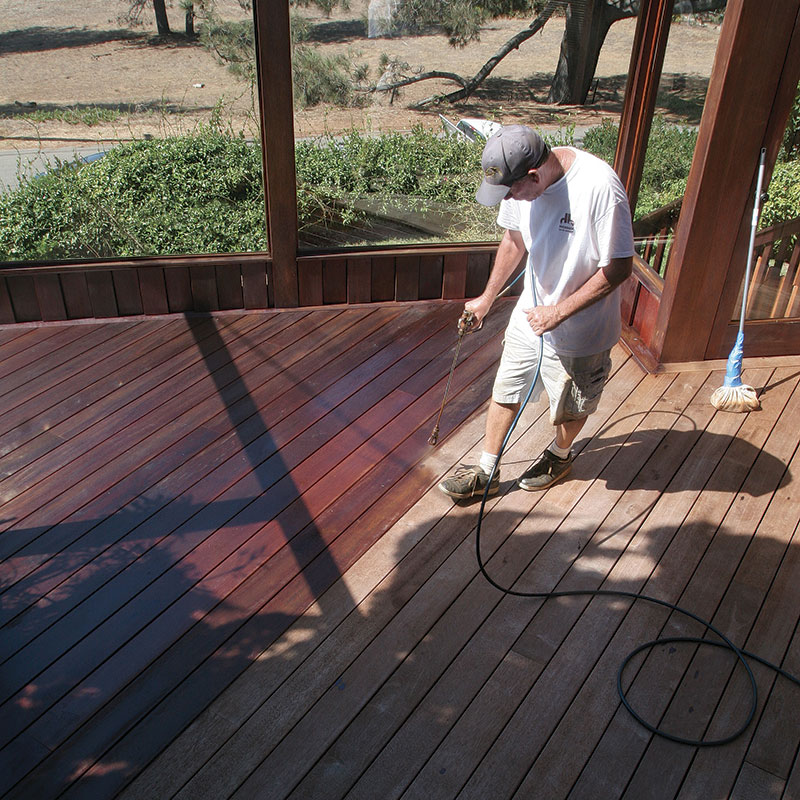
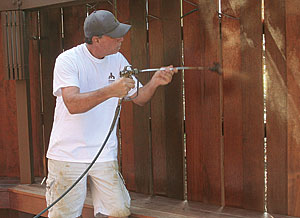
With the surface clean and free of rust stains, it was time to apply the coating. Choosing a coating can be confusing to homeowners and contractors alike, and mistakes in application can result in serious problems, including peeling from improper adhesion, blotchiness from improper surface prep, or the use of too much finish. Usually, the coating has to be chemically removed and the deck recoated.

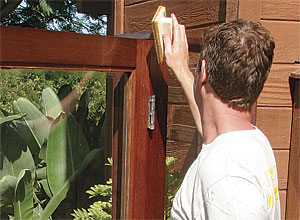
I’ve done my own testing on 50 products over the past 23 years and continue to test finishes. For this deck, I used an oil-based stain for hardwood decking from Superdeck (superdeck.com). This coating enhances the natural look of the wood with penetrating oils that protect the surface and prevent mildew and water damage. The high density of hardwood decking makes using the proper application method important. We use several different types of applicator pads and make long strokes to avoid leaving lap marks and applying too much coating. After the coating has fully penetrated (usually in 10 to 15 minutes), we use a lint-free cloth to remove the excess material.

For tight corners and other hard-to-reach areas, we use a natural-bristle brush and then wipe away the excess coating with a lint-free cloth. We also watch the amount of absorption, because the density of individual boards can vary. As a result, some boards need more finish than others.

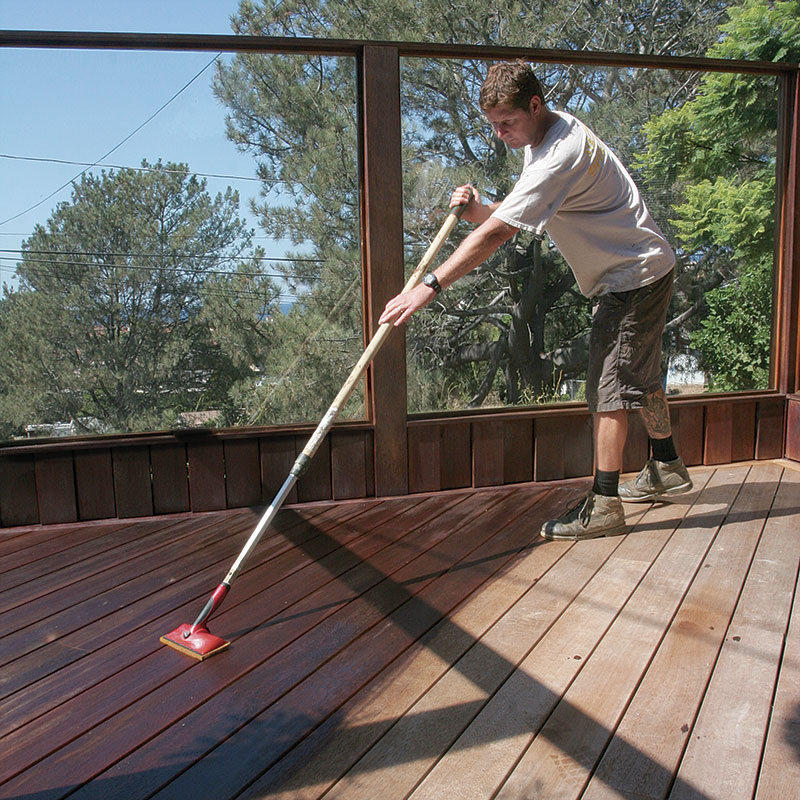
1. One board at a time. To prevent lap marks, coat the deck boards with finish individually. After covering each board, stop spraying, and wipe away excess coating as necessary. 2. Spray, then smooth.A painter’s pad on a long pole helps to smooth the layer of finish applied with the sprayer. The pad works the finish into the grain and evens the application so that it’s absorbed uniformly.

3. Wipe off the excess. Once the finish has had a chance to be absorbed fully by the decking (10 min.), remove the excess with a rag (small areas) or a rag-covered scrub brush (large areas).

Tips for a better finish

Mix thoroughly.

Stir the individual cans of finish so that any settled pigments are mixed with the solvent. Mix together all the cans for a uniform color.

Start at the top.

The author applies the finish with a Wagner 1075 airless sprayer, but you also can use a 7-in. painting pad. Cover with canvas drop cloths any surfaces and vegetation that could be damaged from overspray.

Brush tight spots.

Use a brush to cover stairs and other areas too awkward to spray. Allow the coating to penetrate for a few minutes, then wipe away the excess with a clean lint-free cloth.

Use a small pad for small spaces.

A disposable, handheld painting pad is good for applying finish to areas too small to spray and too big to brush.


Jim Grant is an outdoor wood-finishing expert from San Diego. Photos by Patrick McCombe.

Click the button below to download a full PDF of the article.

Fine Homebuilding Recommended Products

Fine Homebuilding receives a commission for items purchased through links on this site, including Amazon Associates and other affiliate advertising programs.

Jigsaw

When it comes to fitting and installing decking, a cordless jigsaw is a must-have for custom cuts — especially around posts.
Buy at Amazon

N95 Respirator

PPE is a must, especially when cutting and sanding. We recommend you always have a box of respirator masks on the job site.
Buy at Amazon

Metal Connector Nailer

This time-saving tool is the fastest way to install hardware. The tip is designed to locate the hole in the hardware, then all you have to do is pull the trigger.
Buy at Amazon

Sign up for eletters today and get the latest how-to from Fine Homebuilding, plus special offers.

Signing you up...

This site is protected by reCAPTCHA and the Google Privacy Policy and Terms of Service apply.
See all newsletters
See all newsletters
View PDF
Previous: Applying Stain to a New Deck Next: Prep a Deck for Finishing

Guide

Decks

Chapter

Finishes, Repairs, and Maintenance

View Comments

  1. MartinTheFixMan | Jan 16, 2017 02:08pm | #1

    I have just laid a merban deck and there are Water stains
    how do i get rid of them?

Log in or create an account to post a comment.

Sign up Log in

Become a member and get full access to FineHomebuilding.com

Decks

Decks

Hundreds of articles and videos by top deck-building pros on how to design and build a beautiful, sturdy, and safe deck

View Project Guide

View All Project Guides »

Become a member and get unlimited site access, including the Decks Project Guide.

Start Free Trial

Design & Planning
  • Basic Design Options
  • Generating Plans
  • Calculating Deck Loads
  • Code Compliance
Tools & Materials
  • Deck Building Tools
  • Foundation and Framing Materials
  • Decking Materials
  • Fasteners and Hardware
Footings & Foundations
  • Choosing a Foundation
  • Sizing and Laying Out Footings
  • Excavation
  • Pouring the Foundation
Framing a Deck
  • Framing Overview
  • Installing the Ledger
  • Setting Posts and Beams
  • Installing Joists
Installing Decking
  • Decking Basics
  • Installation Process
  • Adding Fascia and Other Decorative Elements
Installing Railings
  • Installing Deck Railing Posts
  • Building Wood Rails and Balustrades
  • Non-Wood Railing Options
  • Installing Nonwood Balustrades
Deck Stairs
  • Deck Stairs Overview
  • Laying Out, Cutting, and Installing the Stringers
  • Installing Treads, Risers, and Stair Railings
Custom Details
  • Benches, Planters, and Privacy Features
  • Pergolas
  • Lighting
Finishes, Repairs, and Maintenance
  • Deck Finishes
  • Cleaning and Refinishing
  • Inspection and Repair
Complete Deck Builds
  • Grade-Level Decks
  • Raised Decks

Fine Home Building

Newsletter Sign-up

  • Fine Homebuilding

    Home building tips, offers, and expert advice in your inbox.

  • Green Building Advisor

    Building science and energy efficiency advice, plus special offers, in your inbox.

  • Old House Journal

    Repair, renovation, and restoration tips, plus special offers, in your inbox.

Signing you up...

This site is protected by reCAPTCHA and the Google Privacy Policy and Terms of Service apply.
See all newsletters

Follow

  • Fine Homebuilding

    Dig into cutting-edge approaches and decades of proven solutions with total access to our experts and tradespeople.

    Start Free Trial Now
    • Facebook
    • Instagram
    • X
    • LinkedIn
  • GBA Prime

    Get instant access to the latest developments in green building, research, and reports from the field.

    Start Free Trial Now
    • Facebook
    • YouTube
  • Old House Journal

    Learn how to restore, repair, update, and decorate your home.

    Subscribe Now
    • Facebook
    • Instagram
    • X

Membership & Magazine

  • Online Archive
  • Start Free Trial
  • Magazine Subscription
  • Magazine Renewal
  • Gift a Subscription
  • Customer Support
  • Privacy Preferences
  • About
  • Contact
  • Advertise
  • Careers
  • Terms of Use
  • Site Map
  • Do not sell or share my information
  • Privacy Policy
  • Accessibility
  • California Privacy Rights

© 2025 Active Interest Media. All rights reserved.

Fine Homebuilding receives a commission for items purchased through links on this site, including Amazon Associates and other affiliate advertising programs.

X
X
This is a dialog window which overlays the main content of the page. The modal window is a 'site map' of the most critical areas of the site. Pressing the Escape (ESC) button will close the modal and bring you back to where you were on the page.

Main Menu

  • How-To
  • Design
  • Tools & Materials
  • Video
  • Blogs
  • Forum
  • Project Guides
  • Reader Projects
  • Magazine
  • Members
  • FHB House

Podcasts

  • FHB Podcast
  • ProTalk

Webinars

  • Upcoming and On-Demand

Podcasts

  • FHB Podcast
  • ProTalk

Webinars

  • Upcoming and On-Demand

Popular Topics

  • Kitchens
  • Business
  • Bedrooms
  • Roofs
  • Architecture and Design
  • Green Building
  • Decks
  • Framing
  • Safety
  • Remodeling
  • Bathrooms
  • Windows
  • Tilework
  • Ceilings
  • HVAC

Magazine

  • Current Issue
  • Past Issues
  • Magazine Index
  • Subscribe
  • Online Archive
  • Author Guidelines

All Access

  • Member Home
  • Start Free Trial
  • Gift Membership

Online Learning

  • Courses
  • Project Guides
  • Reader Projects
  • Podcast

More

  • FHB Ambassadors
  • FHB House
  • Customer Support

Account

  • Log In
  • Join

Newsletter

Get home building tips, offers, and expert advice in your inbox

Signing you up...

This site is protected by reCAPTCHA and the Google Privacy Policy and Terms of Service apply.
See all newsletters
See all newsletters

Follow

  • X
  • YouTube
  • instagram
  • facebook
  • pinterest
  • Tiktok

Join All Access

Become a member and get instant access to thousands of videos, how-tos, tool reviews, and design features.

Start Your Free Trial

Subscribe

FHB Magazine

Start your subscription today and save up to 70%

Subscribe

We hope you’ve enjoyed your free articles. To keep reading, become a member today.

Get complete site access to expert advice, how-to videos, Code Check, and more, plus the print magazine.

Start your FREE trial

Already a member? Log in