Putting Drywall Sanders to the Test: Power, Precision, and Dust Control
A pro painter evaluates a variety of drywall sanders and dust collection systems for quality of finish, user fatigue, and more.
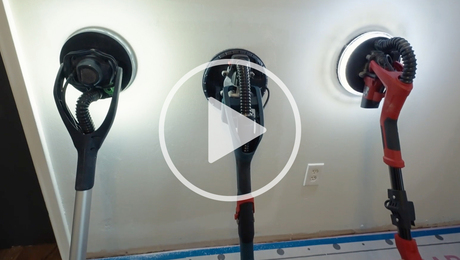
Investing in a high-quality drywall sander with dust-extraction capabilities can boost productivity, enhance client satisfaction, and improve overall results. With that in mind, Noah Kanter, owner of Nth Degree Painting, compares three drywall sanders, testing their aggressive material removal and fine finish sanding. These sanders range in price from $500 to $2200, and every option offers its own unique benefits.
Here’s the Transcript
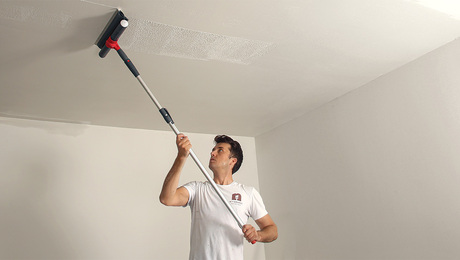
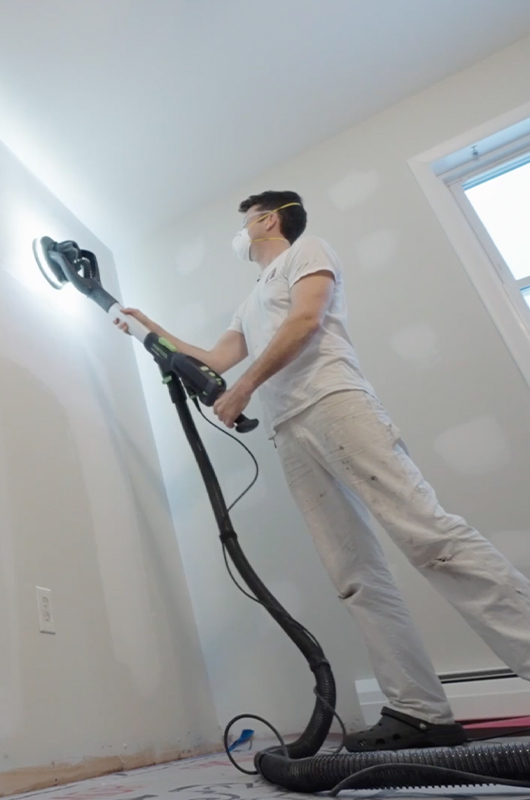
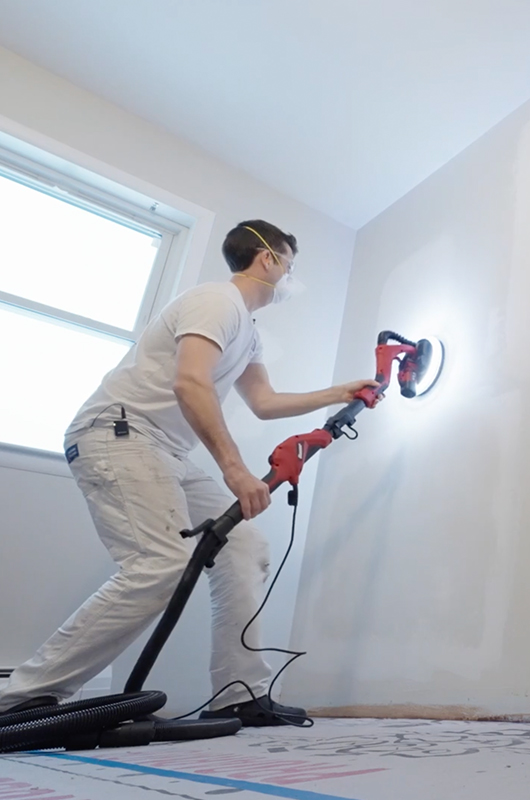
Hi, I’m Noah Kanter. I own Nth Degree Painting in Burlington, Vt., and today we are comparing three different drywall sanders. I only do interiors in my business, so I’m excited to see how these three compare. The two biggest things we’re going to look at with these models is how well they do finish sanding, so sheetrock joints, as well as how well they remove material like popcorn ceilings and overly textured walls. Let’s hop in.
Sander Options
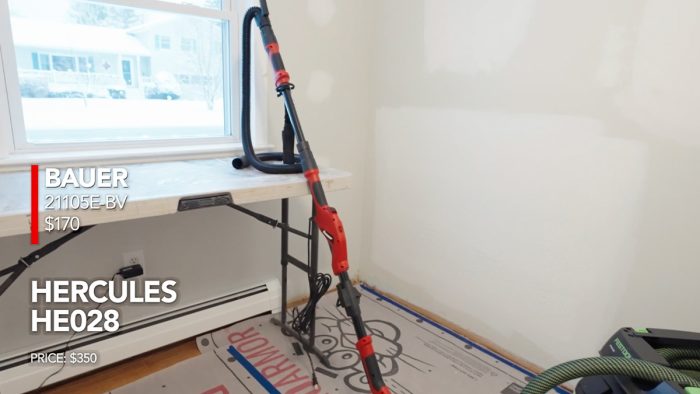
The Bauer is the lowest-priced option. There are three main things we’re going to talk about. The first is extendability. There is an extension if you want to go higher for ceilings. The second is light. This sander has a built-in light at the top, but not all do. The third is the motion of the head; this is a rotary tool, not a fine finish tool.
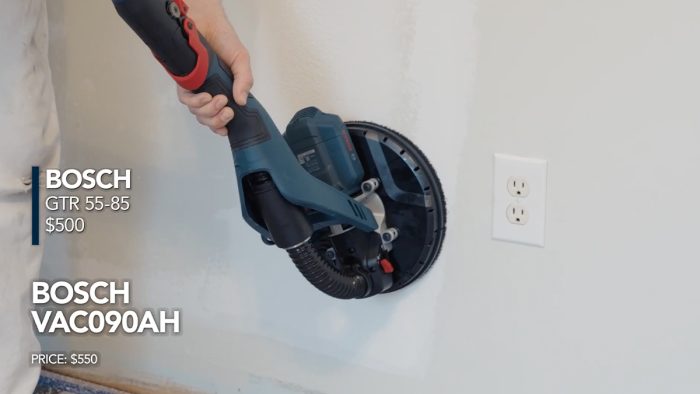
The Bosch is priced in the middle. It is also extendable, and there is another piece for tall ceilings. There is no light at the top of this tool, so you’ll have to bring your own, and there is also a rotary motion at the head.
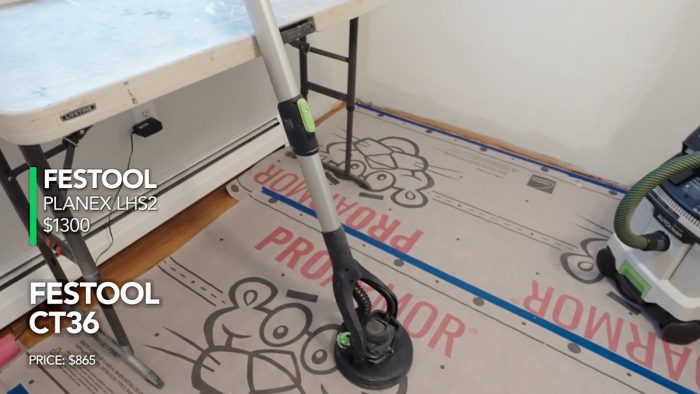
The Festool Planex is the highest-priced sander. It is also extendable for tall ceilings. There is a nice LED light up top, and it has a random orbit motion, which is a little more suited to finish sanding.
Dust Collection Options
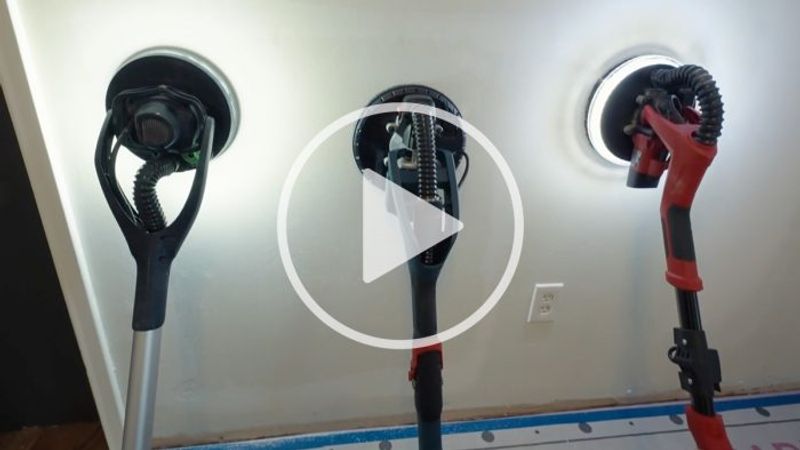
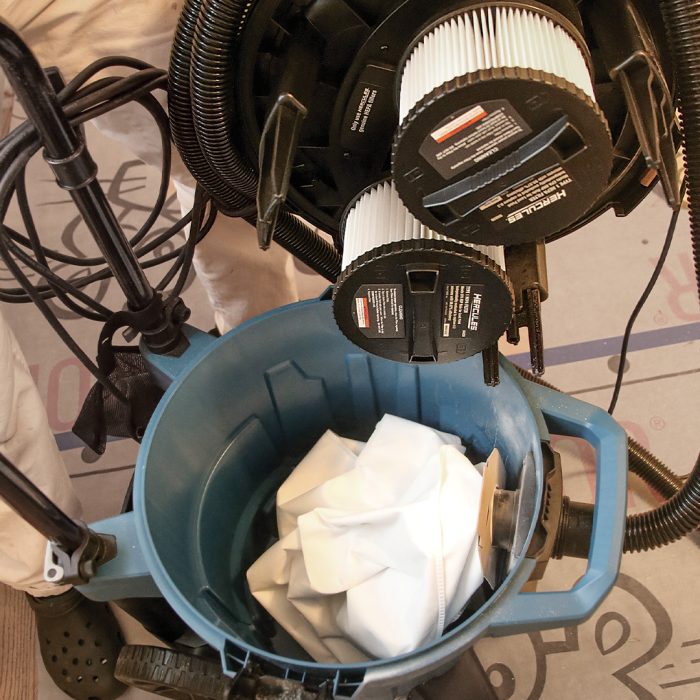
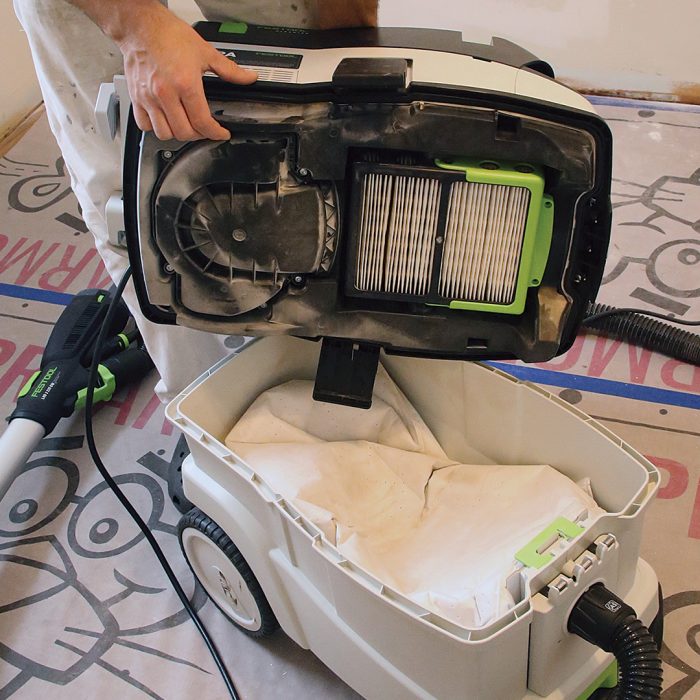
The sanders are only half of the equation. The other half are the dust extractors. All three of these models have tool-triggered operation, auto-clean enabled HEPA filters, and mobility on the job site. The Hercules vacuum has 3-in. wheels in the front and 8-in. wheels in the back, and it moves around the job site pretty well. When you take the top off, you’ll see HEPA filters up top and the general vacuum bag.
The Bosch has 1.5-in. wheels up front and 7-in. wheels in the back, and they tend to get hung up on small ridges a little easier. When you open it up, you’ll see the HEPA filter and the main particulate bag. The Festool has 4-in. wheels in the front and 8-in. wheels in the back. It moves around the job site very well, and both the HEPA and the main particulate bag are under the same hood.
|
|
|
|

Testing Time
One of our tests is aggressive material removal, so I have simulated a rough, textured ceiling and painted a heavy body acrylic paint on it. The Bauer with 60 grit does heavy material removal really well. The dust collection, while it was sanding, was excellent. It took down heavy, sharp drywall mud with acrylic paint over it very evenly. It was only until we turned it off that it dumped dust everywhere.
After it took down a bunch of texture, I looked inside the vacuum and saw that it was reasonably clean. The one thing I noticed was the bag starting to come off. I wondered if it loads a little heavier, a little unevenly — that could be a liability. Now that most of the material has been removed with the 60, I’m going to try 120 for smoothing the rest of the wall out.
It’s more subtle; I don’t want to tear through the paint layer and into the drywall. The 120 finishing of this patch is much better on a lot of fronts. Less dust was trapped in it, presumably because there was less material removal. Once I learned to work with it and slowed down a little bit, it really did a respectable job at finishing the coarse removal of the whole area. It is very smooth and primer ready.
Another thing we’re going to test is something I do every day, which is grinding down walls with too much paint texture and boogers all over it. So I loaded up this area here with a heavy body acrylic paint that I didn’t strain intentionally. The Bauer with 120 grit did well at knocking down ridges, boogers, and over-application of heavy-bodied acrylic paint.
Heavy Material Removal
This test is heavy material removal with the Bosch sander at 60 grit on a coarsely applied joint compound with a heavy body acrylic paint over it. Material removal was really good for this heavy texture. Very little was left in here when the vacuum shut off.
In terms of workability, the ergonomics of this one really nicely balanced. There was a learning curve with the three different dials and variables for suction and airflow, but once we got that dialed, it was moving really well on this tough substrate.
So the Bosch’s ergonomics and balance and control were enough that 60 grit actually took all of this down with no spots that I need to buzz off with a higher grit like 120. So this half that I just did, we’re calling that done. It’s prime ready.
Over-Applied, Textured Walls
The next test is Bosch 120 grit on orange peel overapplied booger walls. The Bosch made quick work with this simple task, knocked down heavy texture, simple boogers. It’s ready for primer.
The next test is the Planex with 60 grit on coarse texture with a heavy-bodied acrylic rolled over it. I sanded the left half of this at 75% suction in the vacuum, and there was still some debris left in the sanding head.
For the right half, I cranked it up to 100% and the debris was very minimal. So the ergonomics and the extraction on this one are excellent, but as with any tool you’re going to have to dial it in as you use it.
The next test is the Planex 120 grit on the heavy orange peel booger section. The Planex at 120 provided a really nice, dead-flat, clean finish.
Soft Compounds
This is phase 2, the finish-work testing. Phase 1 was heavy-duty removal; that’s relatively easy. It just needs to take stuff off. Now we’re asking it to feather edges, to float over soft compounds; this is the harder test. What I’ve simulated here are a few different patch situations that I run into a lot: a 2×2 patch, some horizontal and vertical joints meeting each other, and some basic screw pops.
We’re going to begin with the Bauer with 220 grit on drywall joints. First, calibration, rotary control, had to go down to nothing; it was way too aggressive for finish sanding. I also turned the vacuum down because at full suction it was really chattering and was hard to move across the surface.
After I calibrated it, it was moving OK. I got a respectable finish even though there was a rotary head, so there are a lot of scroll marks. The dust extraction — I did have to turn it down so I could actually use the tool, and as you can see, there’s a decent amount on the floor. This one did have a lot of leakage, but most of it is in the vacuum.
Drywall Patches, Joint Repair, and Nail Holes
For this next test, we are using the Bosch with 220 paper on our simulated drywall patches, some joint repair, and some nail holes. The results are a mixed bag.
Overall, the dust extraction is really good and the control is pretty good. I lowered the suction on all of the different ways to do that, but it still felt chattery. The lack of a light also made it harder to get a consistent finish and knock every single ridge down. Lastly, the rotary motion of this tool left a bit more sanding texture and swirls in the finish than the Festool random orbit one did.
The next test is the Festool Planex 220 grit with our simulated joints, patch, and some screw holes. Finish sanding with the Planex is a great experience. You have to tame the suction a little bit and turn down the motor speed because this is a soft substrate and you don’t want to over-sand or gouge. You have to dial it, you have to move carefully, but it’s going to work great for you.
The Big Picture
We spent the day testing all three of these vacuums and sanders in different scenarios, and let’s talk about big picture thoughts for each.
Bauer 21105E-Bv Drywall Sander
Minimum length 45 in. • Maximum length 65.25 in. • Weight at maximum length 9.4 lb. • dB level 85.5 • Price $170
The Bauer is a pretty good value. There’s a little bit of dust that spills out after you do big sections with a lot of particulate, but overall it moves through aggressive material removal very well.
On the finish-sanding side, it does leave something to be desired. You have to dial it a lot for it to be controllable going across joint compound and softer substrates. But with the light attached at the head, it does help you get a pretty respectable finish for a rotary head at this price point.
BOSCH GTR 55-85 Drywall Sander
Minimum length 45 in. • Maximum length 90.55 in. • Weight at maximum length 12.2 lb. • dB level 83.5 • Price $500
For the Bosch, fast material removal is great. It chews through heavy texture and acrylic paints with no problem. Where you start to see its limitations is the finish sanding of joint compound. The fact that there’s no light makes it really hard to see your work.
And yes, you can have work lights, but if you’re moving around a big space constantly, you don’t want to be moving those. Other models have those attached, which makes it hard to like the Bosch for lighting. The other thing is the rotary motion. It’s hard to tame and finish sand in situations, especially because you can’t see and really slow down and go back for things. It’s hard to recommend this one for finish sanding, but for aggressive material removal it does just fine.
Festool Planex LHS2 Drywall Sander
Minimum length 48 in. • Maximum length 84 in. • Weight at maximum length 12.7 lb. • dB level 74 • Price $1300
The Festool Planex is the best performer overall. It plows through aggressive texture, material removal is wonderful as well as the dust extraction, and because it has the random orbit head, its finish sanding of softer substrates is wonderful. This was the best in class. This is our favorite.
To learn more about the drywall sanding test we did, check out the full article “Tool Test: You Need a Drywall Sander” here on FineHomebuilding.com or in issue #331 of the magazine.
— Noah Kanter is the owner of Nth Degree Painting in Burlington, Vt.
Featured in Fine Homebuilding #331
RELATED STORIES