An Easier Method for Mitered Head Casings
Making mitered head casings is a breeze with this simple system.
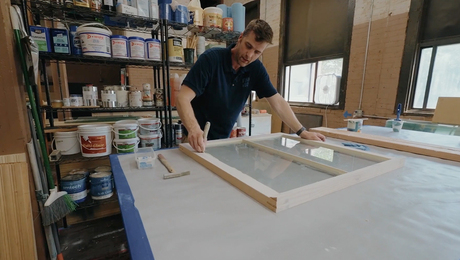
Jack Bassett, one half of Hammer and Bell Design-Build, shares an easy, repeatable method for cutting curved head casings. Drawing on lessons from years of hands-on experience and mentors, he breaks down a seemingly complex task into clear, manageable steps. The approach reflects a core belief: Good work doesn’t require fancy tools—just a sharp eye and a steady hand.
Clear and Simple
The way that I was brought up in the trades was extremely simple. Not that the skills I was taught were basic per se, but rather that any seemingly ridiculously complicated task could be broken down with simple tools into clear, manageable steps. For example, when I ran base for the first time at the age of 12, my only tools were a random piece of material drop, a pencil, an old handheld circular saw that had seen better days, a battered plastic square, and a coping saw.
In my late teens, I apprenticed under a Chilean stair-and-boat builder whose approach to geometry and calculations was intuitive rather than technical. He could build majestic curved stairs and boats with the most basic understanding and tools that often barely functioned, much less functioned properly.
Next, I apprenticed with a furniture maker who had all of the finest tools and orthodox training imaginable but used Harbor Freight chisels as his go-to set. He taught me to cut dovetails in 5 minutes by haphazardly hacking through scraps from the trash and pounding them together with his fist.
Through a long, humbling, and agonizing journey, I’ve come to realize that no matter how grand, the work is nothing more than “Draw the line, cut the line” over and over and over. No trade knowledge I have found before or since has ever been more liberating or compelling. While most folks seem to be getting more and more complex, “Simplify, simplify, simplify!” is my mantra. This method for cutting curved head casing is emblematic of that shift in my thinking and approach to the trades.
Curved Head Casings Made Easy
The tutorial below is part of a system I have developed for doing complex work called “Nailing stuff to other stuff in order to cut stuff.” As its name implies, it is at times a shamefully simple system, requiring only scraps of ply or 1x material, the skills and tools required to cut basic trim, and occasionally some basic knowledge of geometry. For mitered head casings, the method is approached in the following way.
Step 1
Calculate the length of the head piece as if it were a normal straight casing scenario: the door opening + the reveal × 2 + the width of the casing leg × 2. For our example, we have a 36-in. opening, a ¼-in. reveal, and a 3½-in. casing leg. Add it up and that’s 36 + (¼ × 2) + (3½ × 2)= 43½ .
Step 2
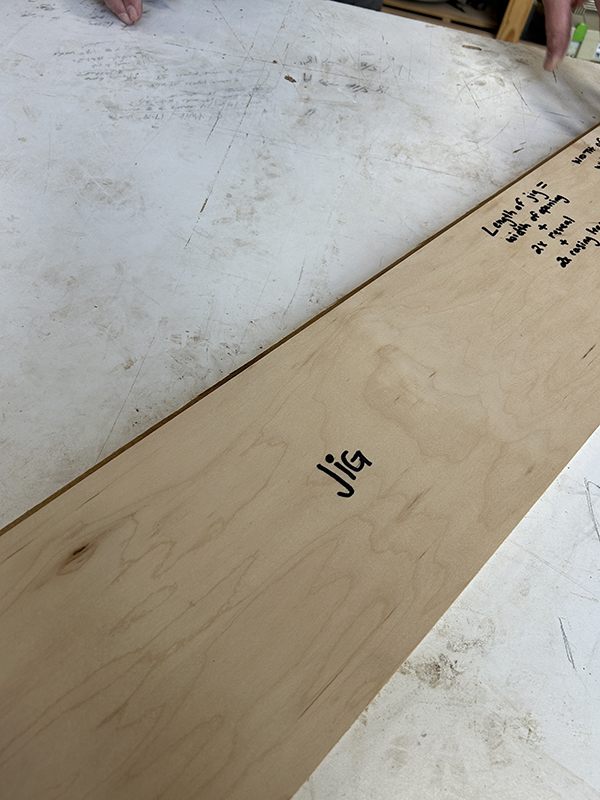
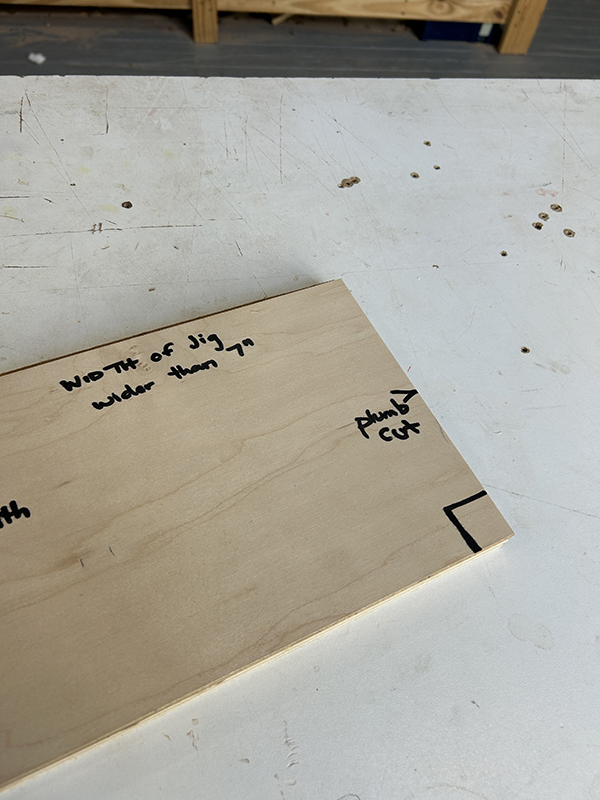
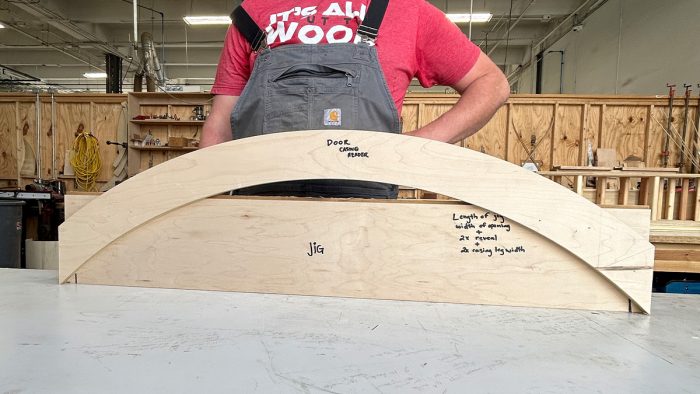
Find a rip of plywood or 1x (preferably around 10 to 12 in. wide, but as thin as 7 in. will do in a pinch) that is at least the length of your piece from step 1. This will be your jig.
 |
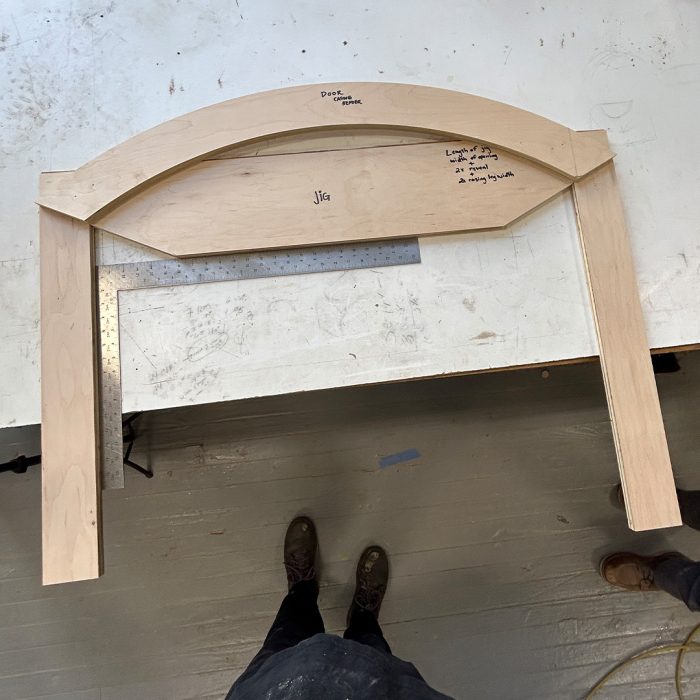
Step 3
Cut the wood for your jig to the length of your straight head piece square on both ends.
 |
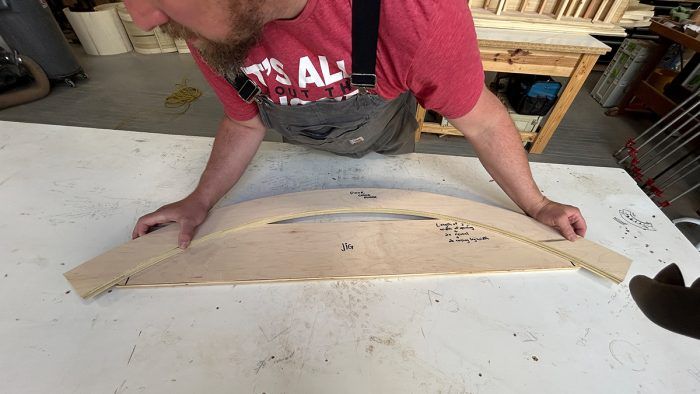
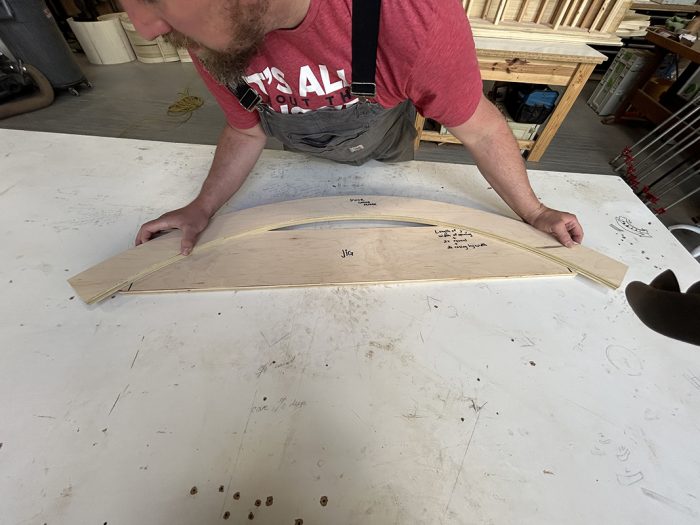
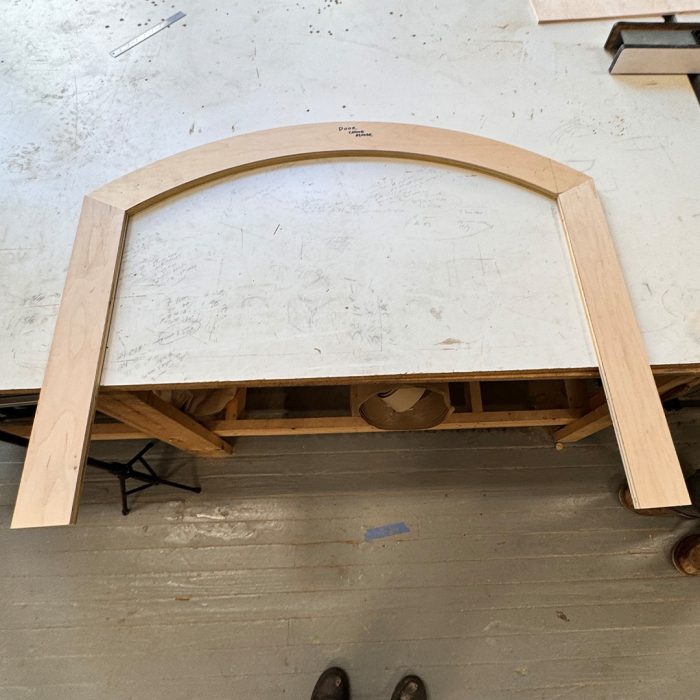
Step 4
Attach the curved head piece to the jig so that the bottom edge of the curved casing intersects the bottom corner of the plumb cut on the jig on both sides. Two-sided tape is good, or pin nails, or screws—whatever you like. At the end of this step, you will have a rectangle jig with a curved piece attached and running wild past the edges.
 |
Step 5
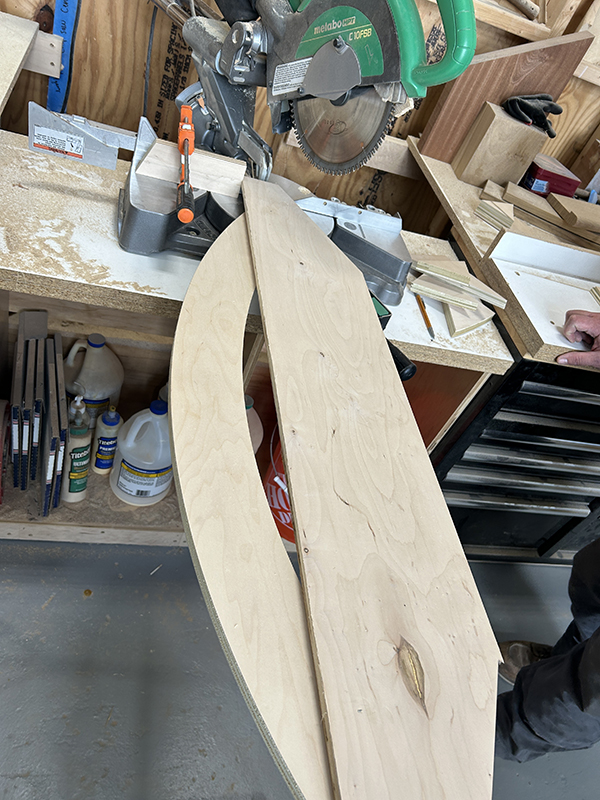
Cut the casing flush with the end cuts of the jig that you made in step 3 (and keep the drops). What you have just done is made plumb cuts on the curved trim, at the finished length. Now that you have the length, you need the miter.
Step 6
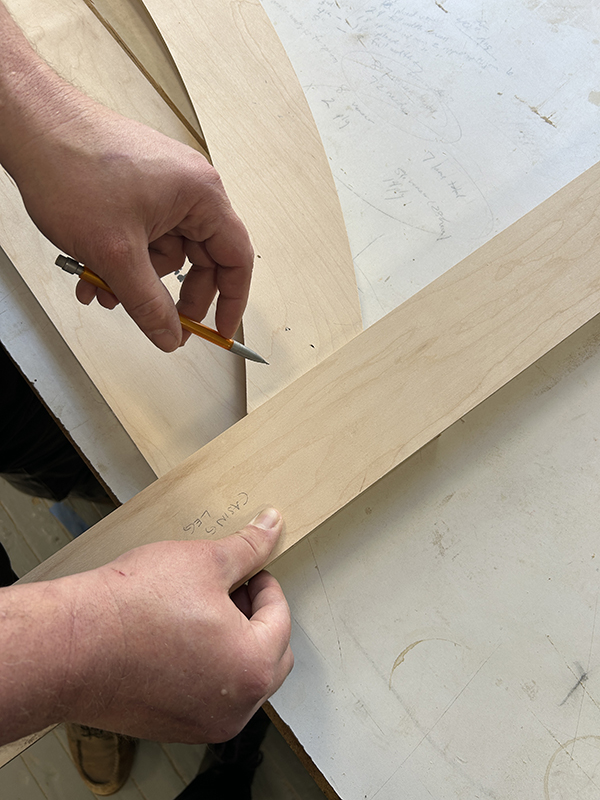
To find the miter on the curved trim, start by flushing the straight casing leg with the plumb cut (the cut you made from step 5) and mark the width of the trim leg where it intersects the “inside” of the curve on the face of the casing piece.
 |
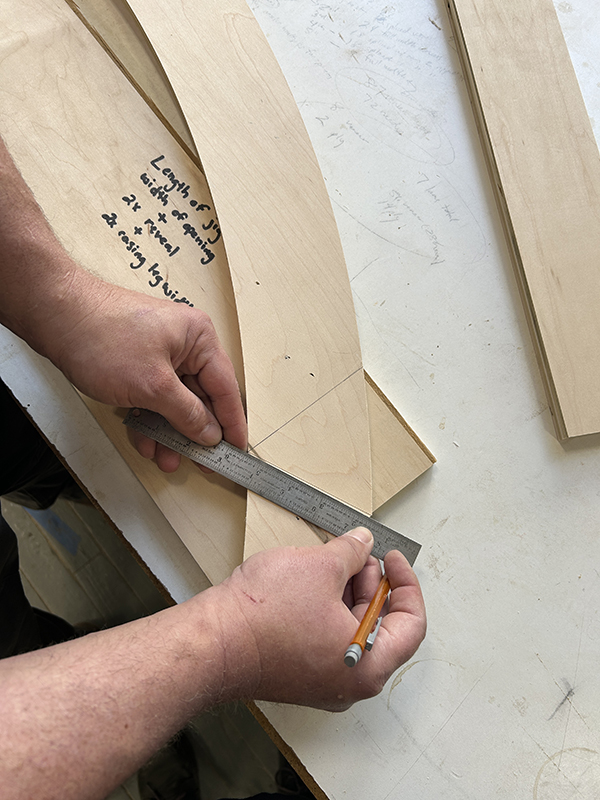
Now connect the top outside edge of the trim at the plumb cut to the mark you just made on the inside of the curve. This is your cut line.
 |
Step 7
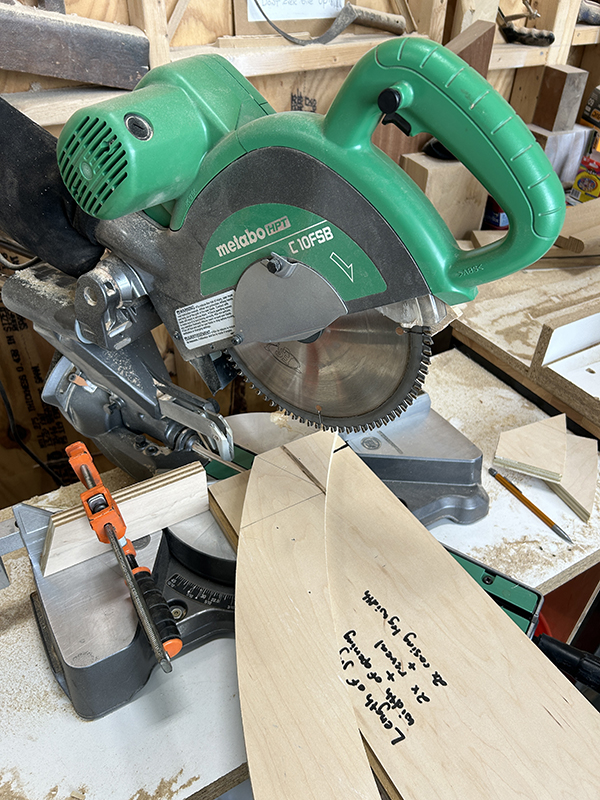
Set the jig with the curved trim attached on the saw, 90° to the normal way of cutting with the assistance of a material stand/outfeed stand. Next, sight the cut line and adjust, and set a stop to the back edge.
 |
Step 8
Now you can simply make the cut and then flip the jig end for end and cut the other side with no adjustment. If you saved the drops from step 5, you can use them to pad out the upside-down side of the jig for stability.
 |
Step 9
Now place your casing leg on the saw and cut without moving the miter angle but 90° to the previous orientation (the ordinary way one uses the saw).
 |
 |
I have found one feature of this method for cutting arched casings that surpasses any other: the ease of repeatability. If you have multiples of that same curved assembly, just remove the trim and attach the new one, lining up the casing to where the long point of the miter intersects the plumb cut on the jig. Attach, and cut away.
RELATED STORIES
About the AuthorsKatie Williams and Jack Bassett co-own and operate Hammer and Bell Design-Build out of Charleston, South Carolina. Together they have more than 40 years of experience as Housewrights and have worked, taught and consulted throughout the world. Jack has a degree in Philosophy from the College of Charleston. Katie has a degree from Eastern Kentucky University where she studied Art History and later majored in fine carpentry at ACBA. Hammer and Bell Design-Build has been running since 2021 with the goal of educating, inspiring, and leaving the trades better than they found it. |