FHB Logo Facebook LinkedIn Email Pinterest Twitter X Instagram Tiktok YouTube Plus Icon Close Icon Navigation Search Icon Navigation Search Icon Arrow Down Icon Video Guide Icon Article Guide Icon Modal Close Icon Guide Search Icon Skip to content
Subscribe
Log In
  • How-To
  • Design
  • Tools & Materials
  • Restoration
  • Videos
  • Blogs
  • Forum
  • Magazine
  • Members
  • FHB House
  • Podcast
Log In

Fine Homebuilding Project Guides

Decks

Guide Home
  • Design & Planning
  • Tools & Materials
  • Footings & Foundations
  • Framing a Deck
  • Installing Decking
  • Installing Railings
  • Deck Stairs
  • Custom Details
  • Finishes, Repairs, and Maintenance
  • Complete Deck Builds
How-To

How to Install and Flash a Deck Ledger, Start to Finish

Follow the complete deck ledger installation process from prep to fastening to flashing.

By Mike Guertin

Jump to all the videos in this series

The deck ledger to the house is an unusual connection in home building.  Most house framing relies on building elements (floors, walls, roofs) being stacked one atop another.  A ledger relies on the fasteners and strength of the wood ledger board and rim board of the house to carry the deck live and dead loads.

Attaching a deck ledger securely is only half the work of installing a ledger.  The other half is flashing the ledger to prevent water from getting behind it, which would lead to decay of the wall sheathing, rim joist, and wall plate or mudsill.
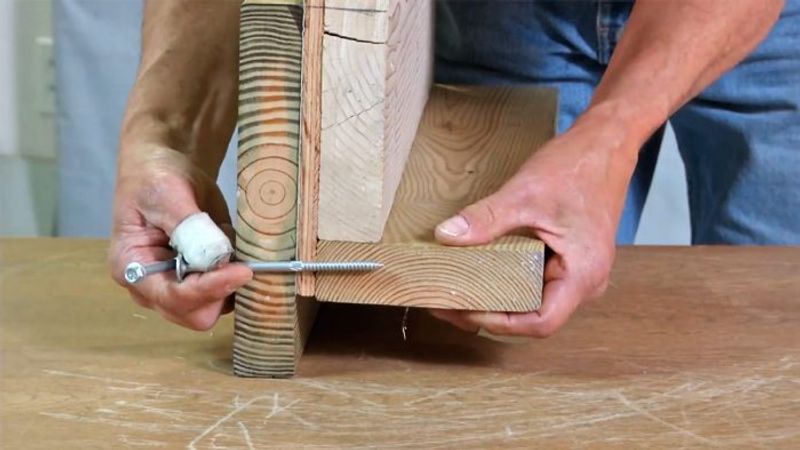
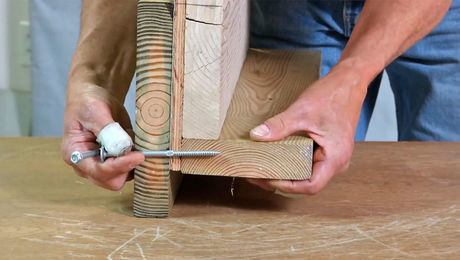
Attaching Ledgers

In order to get a deck ledger secured properly, you need to refer to published resources recognized by your local building department to guide the selection and installation of fasteners.  Common resources recognized by building departments are the International Residential Code (IRC); fastener manufacturer’s installation instructions and ICC evaluation reports; DCA-6 (Prescriptive Residential Wood Deck Construction Guide); and a guide provided by the building department.  For more on ledger attachment options, see “Options for Fastening a Deck Ledger”.

Flashing Ledgers

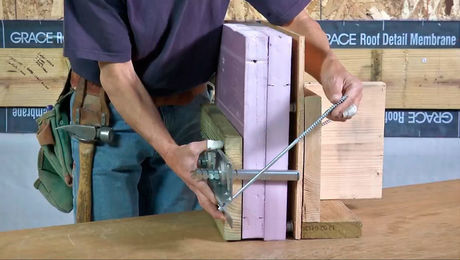
The level of water resistance you need to achieve when flashing a deck ledger will depend on the rainfall and how dry your climate generally is.  A simple metal or plastic cap flashing is probably adequate to flash a deck ledger in a dry climate, while the 3-layer system described in this video is suitable for high rainfall and damp climates.  The IRC doesn’t provide prescriptive measures for flashing other than the minimum thickness for metal flashing (0.019 in). The code does list performance criteria: “Ledgers shall be flashed … to prevent water from contacting the house band joist.”  The code leaves it to you–and your code official–to decide how to approach the flashing suitable for your climate.

My approach is to apply a self-adhering, self-sealing membrane to the wall where the ledger will be installed that extends at least an inch above the top of the ledger, two inches below and four inches past the ends.  You can cut a piece to width from a roll of ice-barrier waterproof roof underlayment or use a flashing tape membrane that’s wide enough.  I prefer to use the plastic-surfaced membrane because they fold tight into the ledger to wall corner and over the edge of the ledger.

After the ledger is installed a second strip of membrane/tape is applied over the top of the ledger and about 1/2 in. down the face.  The wall leg is at least 7 in. tall.  This may seem excessively tall but is needed in order for the water-resistive barrier (WRB) and siding to overlap the top.  The decking is usually 1 in. thick and some siding types require there be a 2 in. air space between the decking surface and bottom of the siding course.  This leaves only 4 in. (of the 7 in. wall leg) covered by the WRB and siding.

Metal or plastic cap flashing covers the top of the ledger with a drop leg of 1/2 in. or more on the face of the ledger and a 6 in. or taller wall leg.  Galvanized steel and aluminum flashing can experience accelerated corrosion when in contact with treated lumber.  The membrane capping the top of the ledger serves as an isolation membrane to keep the metal away from the lumber.


Sign up for eletters today and get the latest how-to from Fine Homebuilding, plus special offers.

Signing you up...

This site is protected by reCAPTCHA and the Google Privacy Policy and Terms of Service apply.
See all newsletters
See all newsletters

Videos in the Series

  • How to Install and Flash a Deck Ledger, Start to Finish

    Follow the complete deck ledger installation process from prep to fastening to flashing.

  • Options for Fastening a Deck Ledger

    Learn the pros, cons, and proper placement of ledger bolts, lags, and structural screws.

  • Attach a Deck Ledger Over Brick, Foam, and Other Thick Claddings

    A trio of hardware options for installing a ledger-supported deck over non-structural claddings.

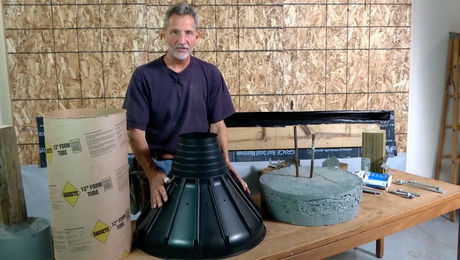
  • Deck Footing Options

    Mike Guertin provides a comprehensive overview of code-approved solutions for supporting the structure and loads of a deck.

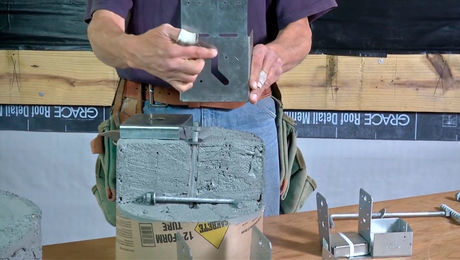
  • Options for Fastening Deck Posts to Footings

    These hardware and fastener options are as much about lateral loads and uplift as they are about solid bearing surfaces.

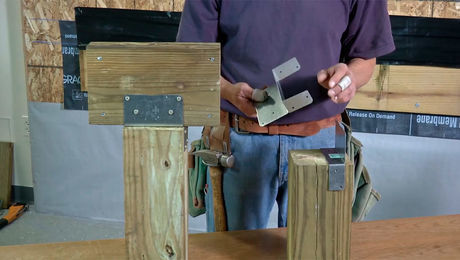
  • Options for Fastening Beams to Deck Posts

    Get an overview of post-to-beam hardware choices for single, double, and triple beams.

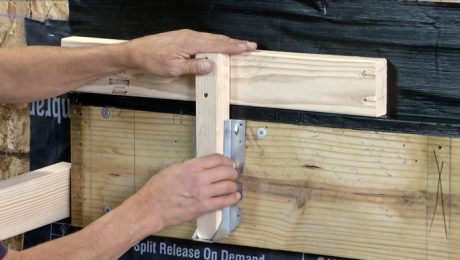
  • Installing Deck Joists

    With joist hangers, it’s all about placement, flange style, and proper fastening.

  • Lateral Load Deck Connector Options

    Get to know the options for this structural insurance policy, meant to tie the deck to the house without relying on the ledger.

  • Options for Fastening Deck Guardrails

    See all the fastening options for rock-solid deck railings: inside the rim, outside the rim, and surface mounted.

  • Building Strong Deck Stairs

    Learn several fool-proof methods for supporting and connecting stringers and guardrails when building an outdoor staircase.

Previous: Build a Grade-Level Deck: Layout for Framing and Footings Next: Expert Session: Flashing a Deck Ledger

Guide

Decks

Chapter

Framing a Deck

View Comments

  1. tsmall85 | May 25, 2020 02:26pm | #1

    Can a ledger be installed over 5/8” exterior gypsum sheathing? My house was constructed in 1958 and was not sheathed in plywood.

Log in or create an account to post a comment.

Sign up Log in

Become a member and get full access to FineHomebuilding.com

Decks

Decks

Hundreds of articles and videos by top deck-building pros on how to design and build a beautiful, sturdy, and safe deck

View Project Guide

View All Project Guides »

Become a member and get unlimited site access, including the Decks Project Guide.

Start Free Trial

Design & Planning
  • Basic Design Options
  • Generating Plans
  • Calculating Deck Loads
  • Code Compliance
Tools & Materials
  • Deck Building Tools
  • Foundation and Framing Materials
  • Decking Materials
  • Fasteners and Hardware
Footings & Foundations
  • Choosing a Foundation
  • Sizing and Laying Out Footings
  • Excavation
  • Pouring the Foundation
Framing a Deck
  • Framing Overview
  • Installing the Ledger
  • Setting Posts and Beams
  • Installing Joists
Installing Decking
  • Decking Basics
  • Installation Process
  • Adding Fascia and Other Decorative Elements
Installing Railings
  • Installing Deck Railing Posts
  • Building Wood Rails and Balustrades
  • Non-Wood Railing Options
  • Installing Nonwood Balustrades
Deck Stairs
  • Deck Stairs Overview
  • Laying Out, Cutting, and Installing the Stringers
  • Installing Treads, Risers, and Stair Railings
Custom Details
  • Benches, Planters, and Privacy Features
  • Pergolas
  • Lighting
Finishes, Repairs, and Maintenance
  • Deck Finishes
  • Cleaning and Refinishing
  • Inspection and Repair
Complete Deck Builds
  • Grade-Level Decks
  • Raised Decks

Fine Home Building

Newsletter Sign-up

  • Fine Homebuilding

    Home building tips, offers, and expert advice in your inbox.

  • Green Building Advisor

    Building science and energy efficiency advice, plus special offers, in your inbox.

  • Old House Journal

    Repair, renovation, and restoration tips, plus special offers, in your inbox.

Signing you up...

This site is protected by reCAPTCHA and the Google Privacy Policy and Terms of Service apply.
See all newsletters

Follow

  • Fine Homebuilding

    Dig into cutting-edge approaches and decades of proven solutions with total access to our experts and tradespeople.

    Start Free Trial Now
    • Facebook
    • Instagram
    • X
    • LinkedIn
  • GBA Prime

    Get instant access to the latest developments in green building, research, and reports from the field.

    Start Free Trial Now
    • Facebook
    • YouTube
  • Old House Journal

    Learn how to restore, repair, update, and decorate your home.

    Subscribe Now
    • Facebook
    • Instagram
    • X

Membership & Magazine

  • Online Archive
  • Start Free Trial
  • Magazine Subscription
  • Magazine Renewal
  • Gift a Subscription
  • Customer Support
  • Privacy Preferences
  • About
  • Contact
  • Advertise
  • Careers
  • Terms of Use
  • Site Map
  • Do not sell or share my information
  • Privacy Policy
  • Accessibility
  • California Privacy Rights

© 2025 Active Interest Media. All rights reserved.

Fine Homebuilding receives a commission for items purchased through links on this site, including Amazon Associates and other affiliate advertising programs.

X
X
This is a dialog window which overlays the main content of the page. The modal window is a 'site map' of the most critical areas of the site. Pressing the Escape (ESC) button will close the modal and bring you back to where you were on the page.

Main Menu

  • How-To
  • Design
  • Tools & Materials
  • Video
  • Blogs
  • Forum
  • Project Guides
  • Reader Projects
  • Magazine
  • Members
  • FHB House

Podcasts

  • FHB Podcast
  • ProTalk

Webinars

  • Upcoming and On-Demand

Podcasts

  • FHB Podcast
  • ProTalk

Webinars

  • Upcoming and On-Demand

Popular Topics

  • Kitchens
  • Business
  • Bedrooms
  • Roofs
  • Architecture and Design
  • Green Building
  • Decks
  • Framing
  • Safety
  • Remodeling
  • Bathrooms
  • Windows
  • Tilework
  • Ceilings
  • HVAC

Magazine

  • Current Issue
  • Past Issues
  • Magazine Index
  • Subscribe
  • Online Archive
  • Author Guidelines

All Access

  • Member Home
  • Start Free Trial
  • Gift Membership

Online Learning

  • Courses
  • Project Guides
  • Reader Projects
  • Podcast

More

  • FHB Ambassadors
  • FHB House
  • Customer Support

Account

  • Log In
  • Join

Newsletter

Get home building tips, offers, and expert advice in your inbox

Signing you up...

This site is protected by reCAPTCHA and the Google Privacy Policy and Terms of Service apply.
See all newsletters
See all newsletters

Follow

  • X
  • YouTube
  • instagram
  • facebook
  • pinterest
  • Tiktok

Join All Access

Become a member and get instant access to thousands of videos, how-tos, tool reviews, and design features.

Start Your Free Trial

Subscribe

FHB Magazine

Start your subscription today and save up to 70%

Subscribe

This exclusive content is for members only

Get complete site access to expert advice, how-to videos, Code Check, and more, plus the print magazine.

Start your FREE trial

Already a member? Log in