FHB Logo Facebook LinkedIn Email Pinterest Twitter X Instagram Tiktok YouTube Plus Icon Close Icon Navigation Search Icon Navigation Search Icon Arrow Down Icon Video Guide Icon Article Guide Icon Modal Close Icon Guide Search Icon Skip to content
Subscribe
Log In
  • How-To
  • Design
  • Tools & Materials
  • Restoration
  • Videos
  • Blogs
  • Forum
  • Magazine
  • Members
  • FHB House
  • Podcast
Log In

Fine Homebuilding Project Guides

Framing

Guide Home
  • Introduction to Framing
  • Framing Tools, Techniques, and Materials
  • Framing Floors
  • Framing Walls
  • Framing Stairs
  • Framing Roofs
  • Efficient Framing Methods
  • Timber Framing
How-To

Installing T&G Floor Sheathing

Glue and nail the sheathing to the joists for a solid, flat base for wall framing and finish flooring.

By Roe Osborn

When floor sheathing is glued and nailed to the joists, the result is a strong, flat, and stiff structural system. Sheathing also provides a base for the wall framing and the finish flooring. In most cases, carpet and wood strip flooring can be installed directly over the sheathing without additional underlayment.

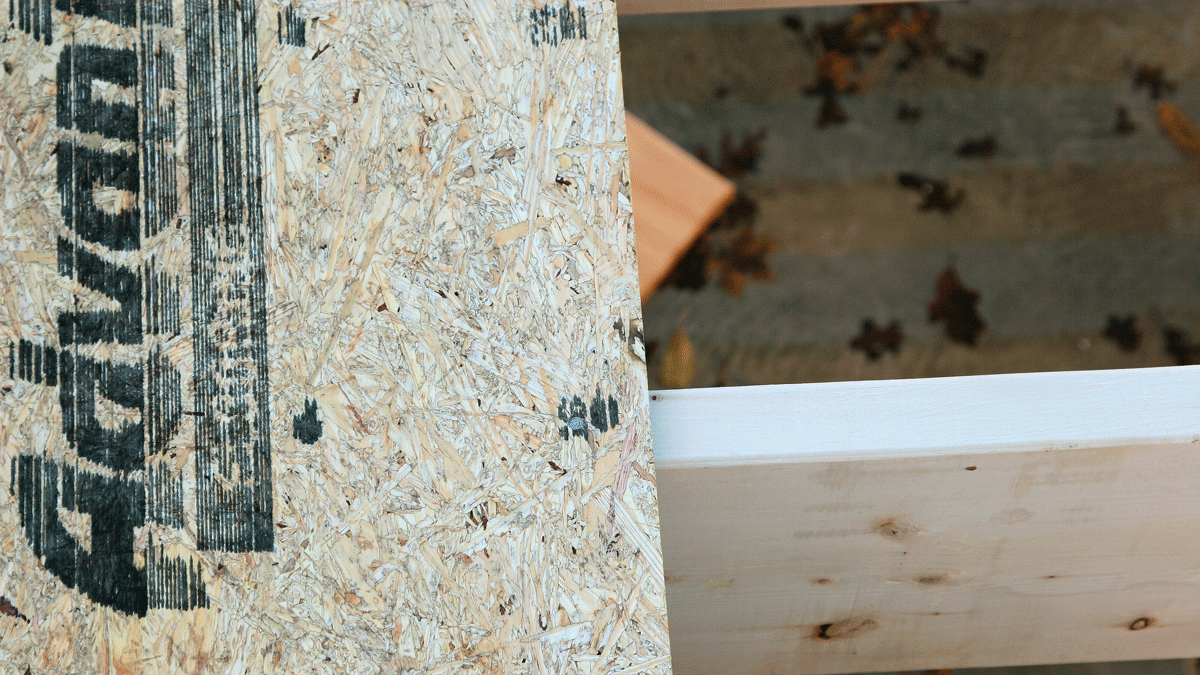
Deck sheathing is typically plywood or, as it was in this case, ¾-in.-thick tongue-and-groove (T&G) OSB. The T&G edges are on the long sides of the panels so that each course interlocks with the next. The ends of the panels do not have T&G edges, so they must always fall on a joist or on solid lumber blocking.

Running the first course

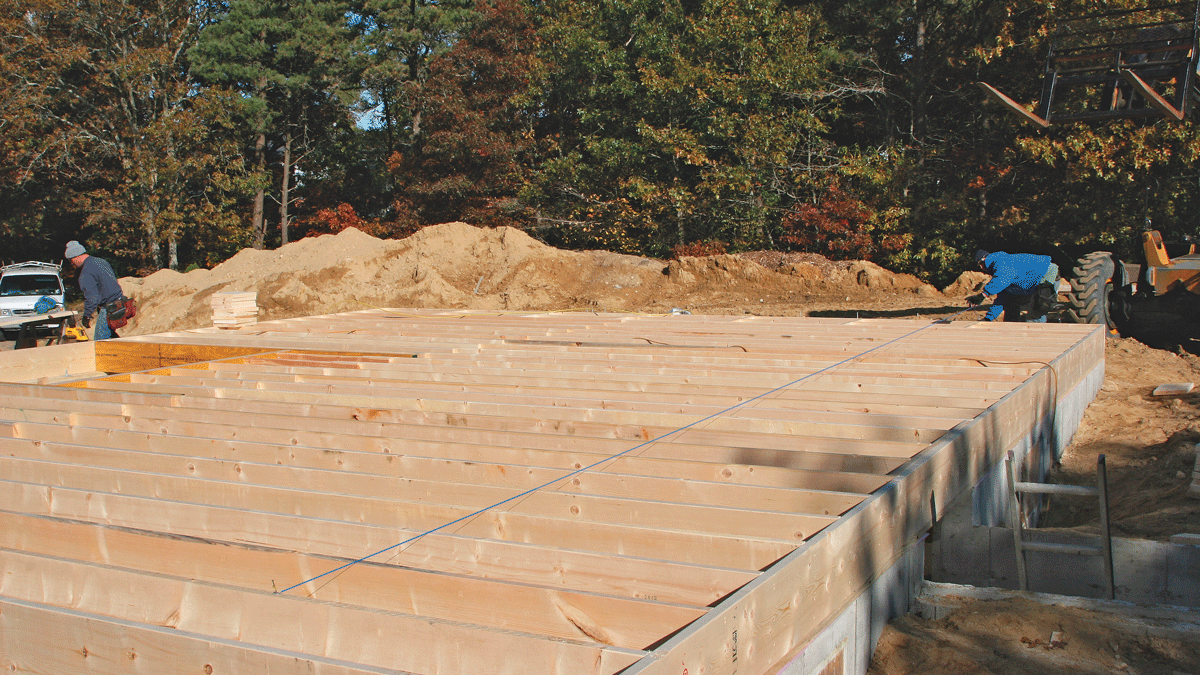
Take quick diagonal measurements across the joists to make sure the framing assembly is still square. Where this house was built, the building code required that solid blocking be installed in the two outermost joist bays every 4 ft. (another wind-related requirement). Before sheathing began, the crew made layout marks every 4 ft. for the blocking and installed it.

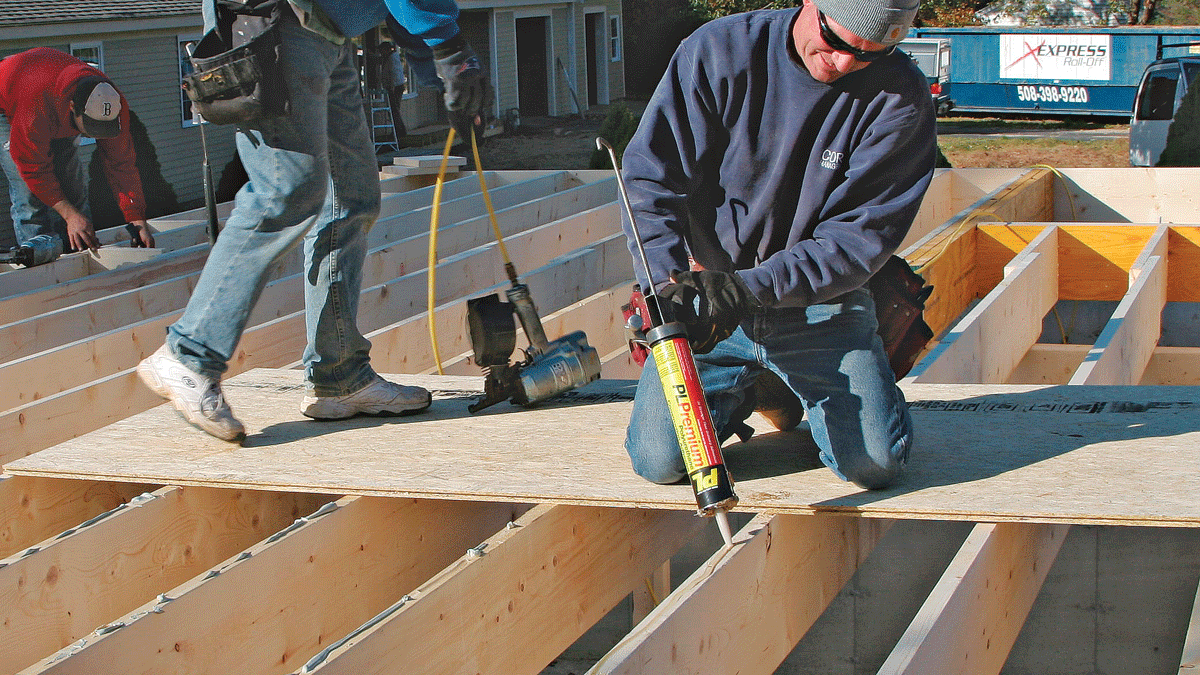
It doesn’t usually matter where sheathing starts, but in this case we opted to start at the back of the house. A chalkline snapped across the floor system 4 ft. from the outer edge of the rim joists served as a guide for the first course of sheathing. To install sheathing, run a bead of construction adhesive on the top of each joist, stopping just short of the chalkline. (Don’t put adhesive on the rim joists because you may have to adjust their position later.) If you spread the adhesive beyond the layout line, it can be a slip hazard (and it gums up work boots something fierce). If you have a large enough crew, one person can spread adhesive as others place sheathing. Otherwise, spread adhesive for one sheet at a time to prevent it from drying out. Remember that a double bead of glue is needed where sheets of sheathing meet at a butt joint.

Mark the layout every 4 ft. to identify spacing for the blocking and sheathing. A line snapped at the first mark guides the first course of sheathing.
Construction adhesive prevents squeaks and stiffens the floor system. A sheet of floor sheathing provides a safe and comfortable platform from which to work.
The first piece of sheathing should be placed carefully to avoid smearing the adhesive. It’s a job for two people.

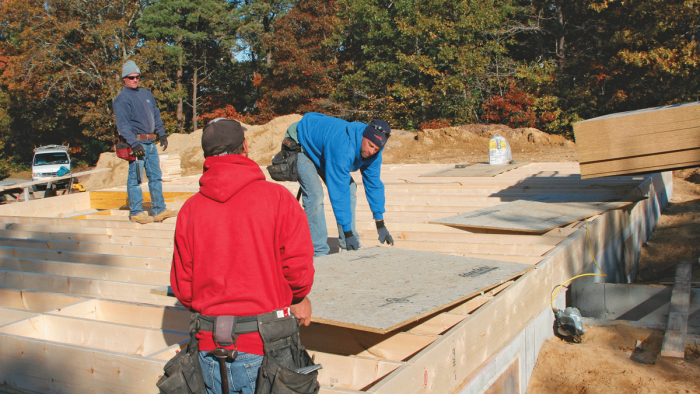
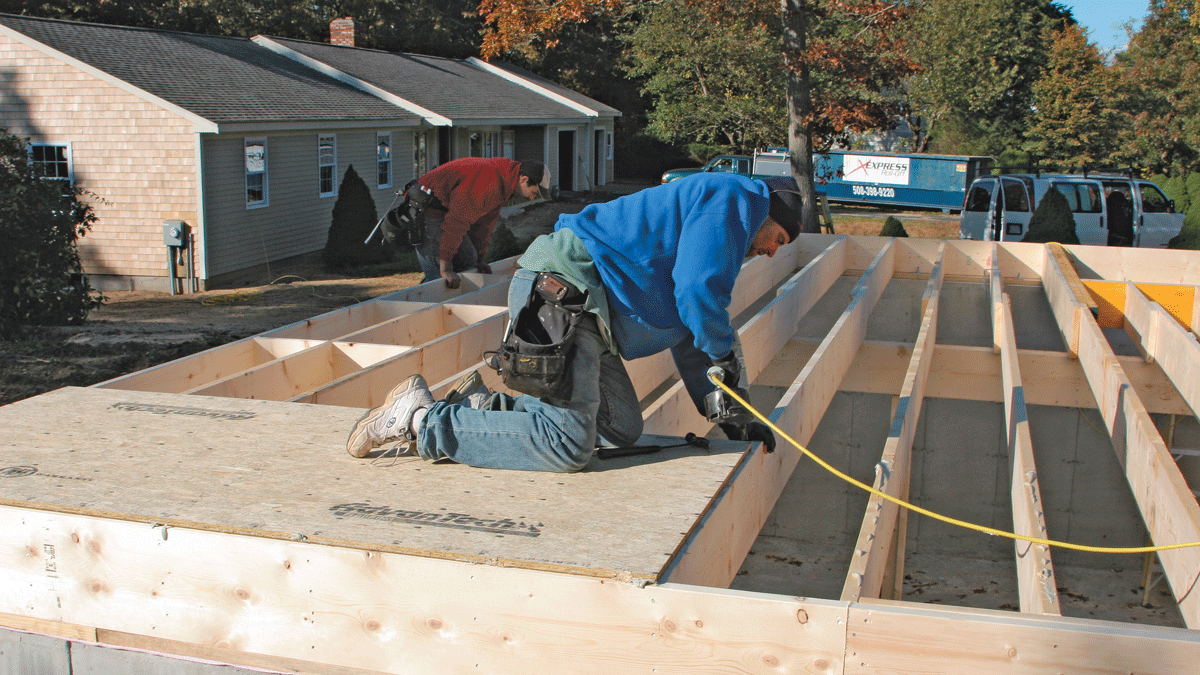
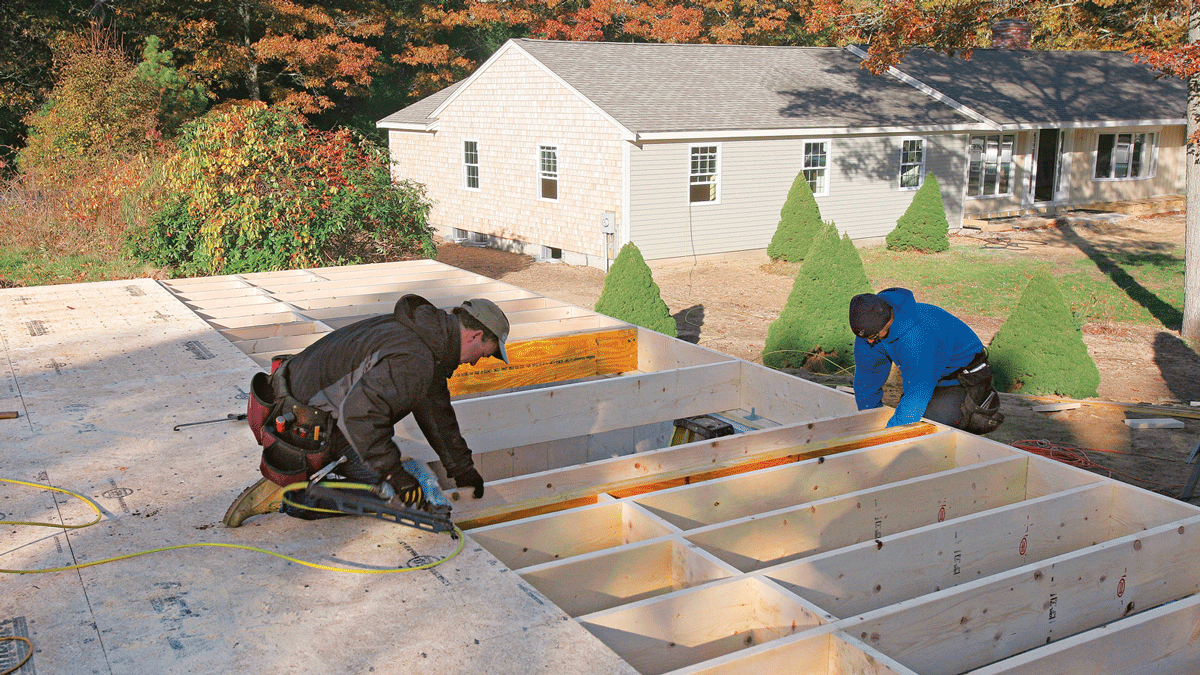
Carefully drop the first full sheet in place with the tongue facing the rim joist (subsequent courses will be driven into place with a sledge, which would damage the tongue). Don’t just flip a panel haphazardly onto the joists and slide it into position, because this smears the glue and makes it useless. Instead, two people should drop the sheet gently onto the joists as close to final position as possible. Move the sheet slightly to the snapped line and align it to the center of the last joist it lands on. Tack the sheet in place and double-check its alignment before nailing it. Drive nails at the ends of each joist but don’t nail into the rim joist just yet (this happens later). To make sure the joists stay straight, measure from the end of the sheet and nail the first joist exactly on its layout spacing. Now you can hook the tape on the secured joist and nail the rest of the joists at their proper spacing. Many manufacturers now print a centering mark every 16 in. on floor sheathing to make it easier to keep the joists in line.

Install the rest of the sheets in the first row in the same manner. If necessary, cut the last sheet to fit before installing it. This house was 36 ft. long, so a half sheet worked perfectly to complete the courses on the back of the house. Nail off the first course completely (except for the rim joists) before moving to the next course. That course has to be securely in place before the next course can be driven against it.
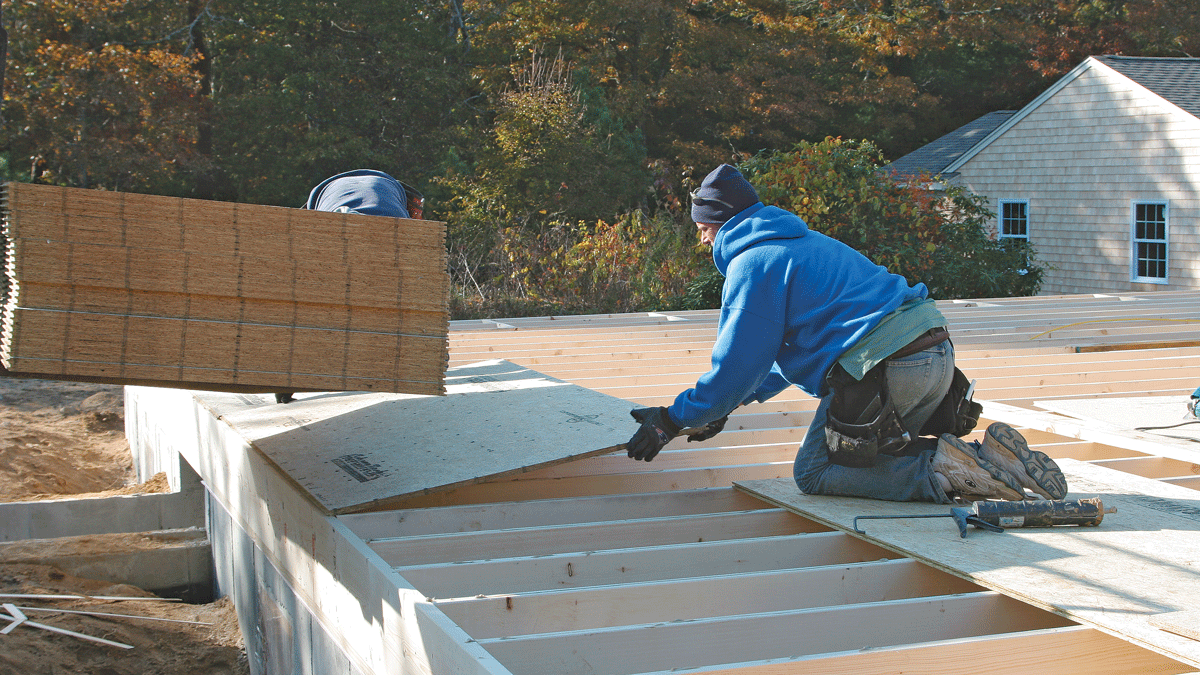
When the first sheet is in place, tack a corner to hold it at the centerline of the joist (photo 66). Then nail it to the remaining joists, guided by the layout marks printed on the sheathing (photo 67). This prevents the joists from wandering off course as subsequent sheets are installed.

When the first sheet is in place, tack a corner to hold it at the centerline of the joist (photo 66). Then nail it to the remaining joists, guided by the layout marks printed on the sheathing (photo 67). This prevents the joists from wandering off course as subsequent sheets are installed.
The rest of the first row of sheathing goes on in the same way as the first sheet. Nail the first course completely so the sheets will bond to the adhesive and withstand the pounding needed to get the subsequent rows into place.

Temporary Work Platform

It’s tempting to balance on open joists when installing sheathing, but it’s not a good habit to get into. Any joist can wobble unexpectedly and toss you into the basement. Whenever possible, lay sheathing over the joists to serve as a temporary work platform, as shown in the top right photo on the facing page. Just make sure the ends of the sheet are fully supported.

Completing the sheathing

Butt joints in successive courses of sheathing should be staggered so that they don’t line up, and in practice this means offsetting them by a half sheet. So we started the second course with the 4-ft. length of sheathing left over from the end of the first course. Whenever possible, use the factory edge of a cut sheet to butt against the adjacent sheet to provide the tightest fit.

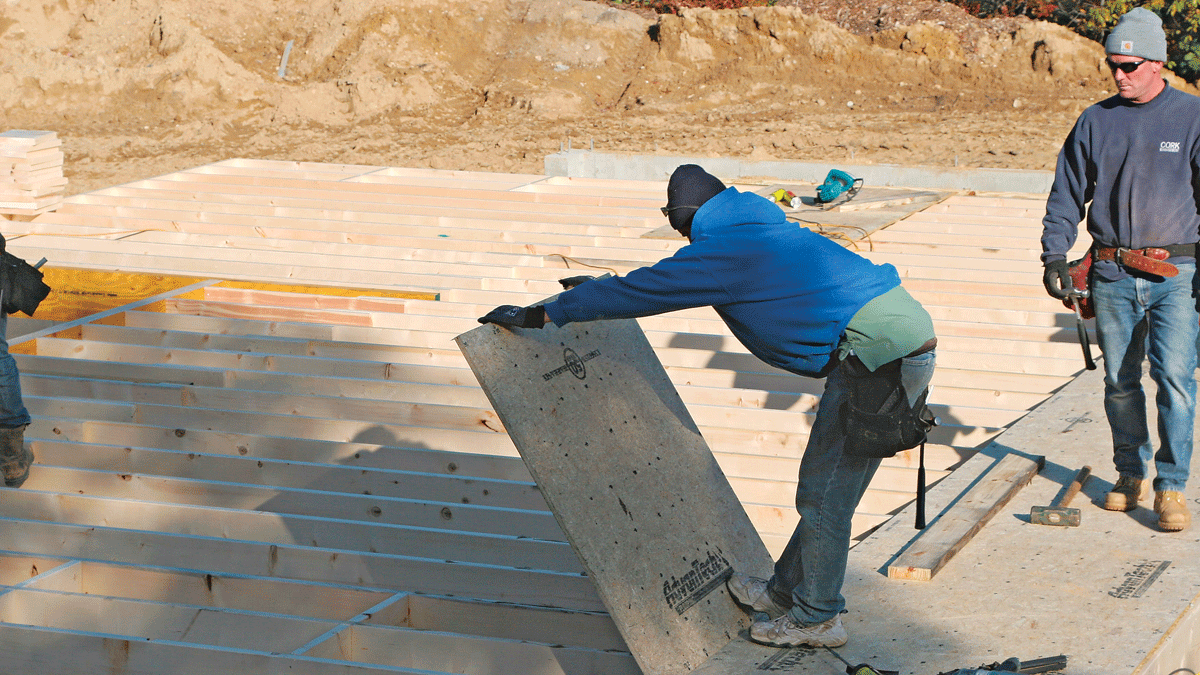
Snap a chalkline for the second course to indicate where the adhesive should stop, then run a bead of adhesive on the tops of the joists and squeeze a bead into the groove of the mating sheet on the first course. Experienced framers have an interesting technique for placing sheets for successive courses. They hold a sheet vertically to start, resting it on the tongue edge. Next they lower the sheet with their arms extended and with one foot up on the lower portion. When they finally let go of the sheet, they maintain pressure with their foot to keep the sheet from bouncing out of position or sliding forward. This process, more ballet than carpentry, effectively gets the sheet ready to be driven into place without smearing the adhesive.

Begin the second row with a half sheet so that the seams of subsequent sheets won’t line up with those in the first row. As the sheet drops, keep a foot on it to keep it from sliding out of position.
To mate the tongue and groove edges, have a helper stand on the edges as you drive the sheet into place. When working solo, hold the edges in line with one foot as you tap with the sledge hammer.

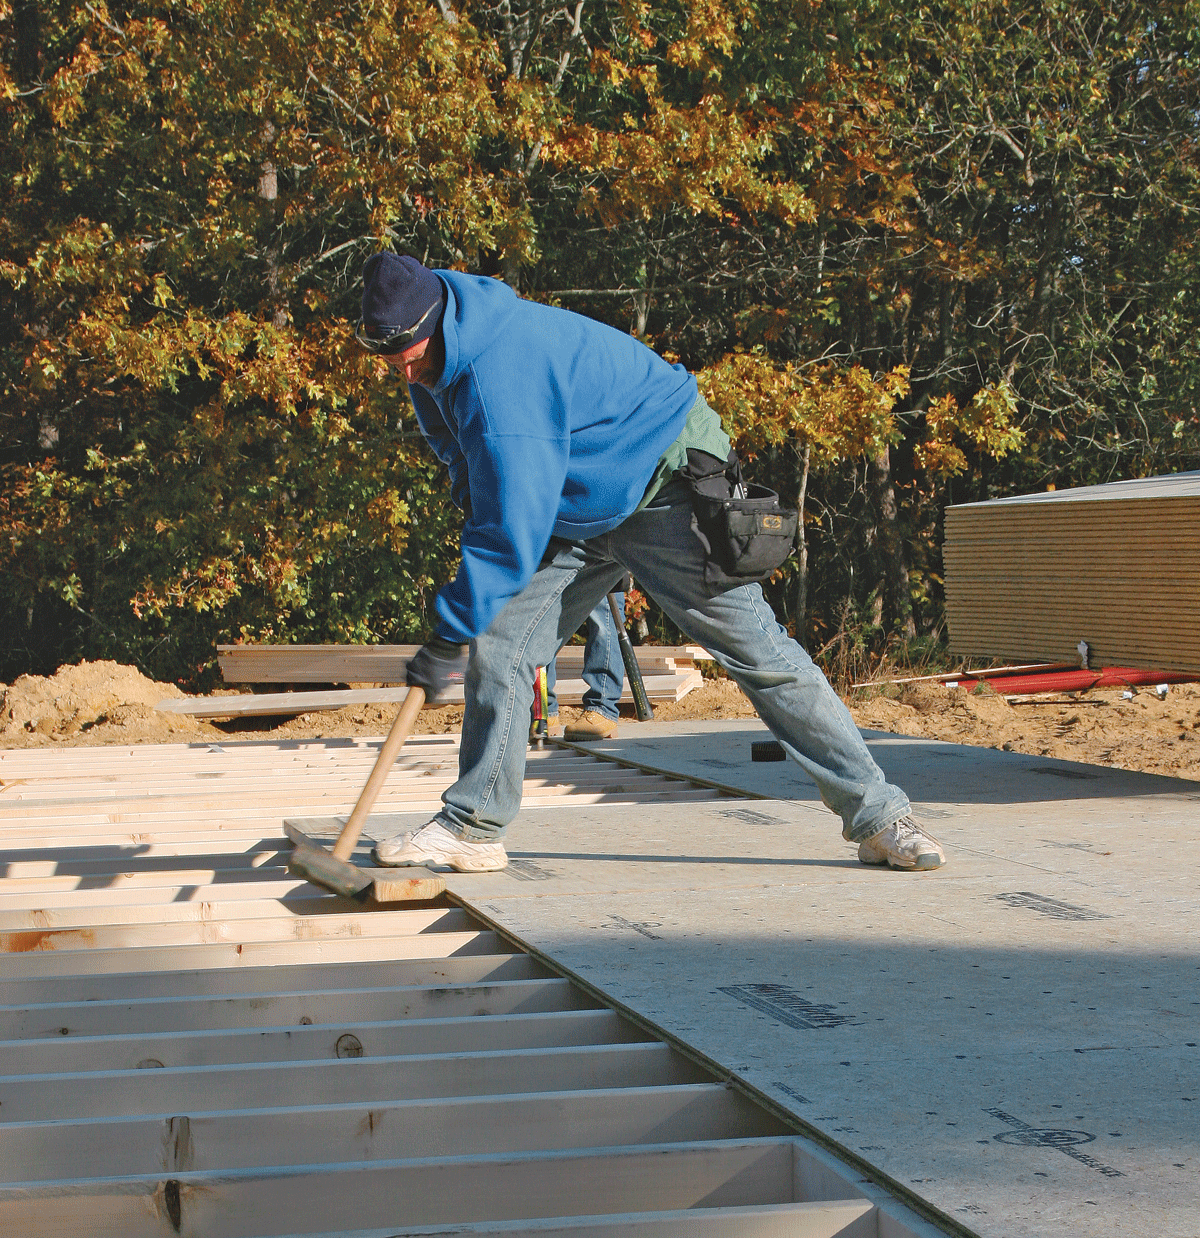
When the sheet is down, drive it gently into place with the sledge hammer until the tongue mates with the groove of the previous course. A 2× scrap keeps the sledge from damaging the groove. Quite often the sheets don’t sit perfectly flat and the tongue can’t find the groove without help. By standing on the tongue edge, one person can align the edges while the sheet is being driven. If you’re working alone, stretch one foot to the mating edge while tapping with the sledge.

If the sheet bounces out of alignment as you nudge it with the sledge, drive one corner into position and tack it with a nail, then tap along the edge of the sheet until the rest of the tongue slips into place. Pay attention because tapping one end of a sheet can make the other end separate from its neighbor. Before nailing off the sheet, make sure each end seam is tight. If it isn’t, just tap the sheet gently until the gap disappears. Continue adding sheets and courses until you reach the other side of the house. By working one complete course before starting others, you can correct small misalignments before they snowball into big ones.

Once the back half of the house is fully sheathed, start on the front half. However, remember that the floor joists don’t usually run in continuous lengths from the front of the house to the back: They overlap at the support beam. That calls for a slight change of sheet layout. At the start of the first course for the front of the house, simply let the end of the sheet overhang the rim joist by 1½ in. so that the other end will fall properly on the centerline of a joist. You can trim off the overhang later. The alternative? You’d have to nail 2× scrap stock to every joist in order to support the ends of each sheet in that course, a time-consuming and wasteful exercise.

At openings in the floor system (such as for stairs), you can let the sheathing overhang a corner, nail it in place, and cut it to fit later, or you can cut it to fit before nailing it. If you cut first, be sure to resume the course on the other side of the opening in the same pattern and layout as the rest of the floor system.

Most likely you’ll need to rip sheets for the final course of sheathing. If the rip is less than the width of the wall framing that will fall on it (less than 5½ in. for 2×6 walls), it doesn’t need a tongue or groove.

Preventing Accidental Falls

At this project, the stair chase left a very large opening in the floor system. We opted to sheathe over it entirely so nobody would accidentally fall through it as framing continued. To support the sheathing we added a couple of temporary joists to span the opening.

Sheathing the Floor

Adjusting the rim joists

The joist ends are square, so the rims nailed to the ends of the joists have to be plumb and straight, right? Not necessarily. All the pounding during the process of nailing off the joists and sheathing the floor can move the rims slightly, and there are always slight variations in the ends of the joists themselves. If you want the wall sheathing to fit properly later on, the rims have to be in the same plane as the first-floor wall studs. That means they have to be straightened and plumbed before you nail the edge of the sheathing.

Start the process by sighting the rim joist. If it’s not perfectly straight, plumb up with your rafter square from the framing at each end of the rim, then measure in a couple of inches and snap a chalkline on the sheathing. Now at every third or fourth joist location, place the edge of your square against the rim joist and measure to the line. If the rim needs to move out, pry it with a flat bar. If it needs to move in, bang it with your framing hammer. When the measurement is right, nail the sheathing into the rim at that point (there’s no need to squirt construction adhesive between the two). Work your way down the entire rim in that manner before going back and nailing off the whole rim. If you find a large section where the rim needs to be moved a lot (⅛ in. to ¼ in.), you may have to straighten and nail the rim at each joist location.

On this project, blocking in the outer joist bays kept the rims fairly straight, but sheathing hung over the rims in a few places. So we snapped a line to guide a circular saw and then cut back the sheathing before straightening and nailing off the rims.

To straighten the rim joist, snap a straight line and measure over to the line from the face of the rim. Adjust the rim in or out as necessary, and then nail it to the edge of the sheathing.

Fine Homebuilding Recommended Products

Fine Homebuilding receives a commission for items purchased through links on this site, including Amazon Associates and other affiliate advertising programs.

Tajima Chalk Rite Chalk Line

Snapping a line should be quick, clean, and accurate, and the Tajima certainly doesn’t disappoint. It’s pro-grade and works as advertised.
Buy at Amazon

QuikDrive PRO300s

Whether you're installing floor sheathing or decking, this tool will keep the installer upright, putting less stress on workers while saving time and energy.
Buy at Amazon

Protective Eyewear

Eye protection is a must, and these are designed for comfort so you can can wear them all day long without pain or fatigue.
Buy at Amazon

Sign up for eletters today and get the latest how-to from Fine Homebuilding, plus special offers.

Signing you up...

This site is protected by reCAPTCHA and the Google Privacy Policy and Terms of Service apply.
See all newsletters
See all newsletters
Previous: Save Time with Factory-Framed Floors Next: Installing a Subfloor

Guide

Framing

Chapter

Framing Floors

Log in or create an account to post a comment.

Sign up Log in

Become a member and get full access to FineHomebuilding.com

Framing

Framing

Trusted, in-depth guidance from the pros for framing a durable, code-compliant house

View Project Guide

View All Project Guides »

Become a member and get unlimited site access, including the Framing Project Guide.

Start Free Trial

Introduction to Framing
  • House Framing Concepts, Tips, and More
Framing Tools, Techniques, and Materials
  • Tools
  • Techniques
  • Framing Lumber
  • Steel
Framing Floors
  • Floor Framing
  • Engineered Floors
  • Floor Sheathing
Framing Walls
  • Wall Framing Basics
  • Layout
  • Wall Assembly
  • Raising and Straightening Walls
  • Framing Rough Openings
  • Blocking
Framing Stairs
  • Stair Layout
  • Building Stairs
Framing Roofs
  • Roof-Framing Basics
  • Roof Design
  • Laying Out and Cutting Rafters
  • Framing Valleys
  • Working with Trusses
  • Dormers
  • Special Situations
Efficient Framing Methods
  • Advanced Framing
  • Double-Stud Walls
Timber Framing
  • Timber-Frame Construction
  • Timber-Frame Design

Fine Home Building

Newsletter Sign-up

  • Fine Homebuilding

    Home building tips, offers, and expert advice in your inbox.

  • Green Building Advisor

    Building science and energy efficiency advice, plus special offers, in your inbox.

  • Old House Journal

    Repair, renovation, and restoration tips, plus special offers, in your inbox.

Signing you up...

This site is protected by reCAPTCHA and the Google Privacy Policy and Terms of Service apply.
See all newsletters

Follow

  • Fine Homebuilding

    Dig into cutting-edge approaches and decades of proven solutions with total access to our experts and tradespeople.

    Start Free Trial Now
    • Facebook
    • Instagram
    • X
    • LinkedIn
  • GBA Prime

    Get instant access to the latest developments in green building, research, and reports from the field.

    Start Free Trial Now
    • Facebook
    • YouTube
  • Old House Journal

    Learn how to restore, repair, update, and decorate your home.

    Subscribe Now
    • Facebook
    • Instagram
    • X

Membership & Magazine

  • Online Archive
  • Start Free Trial
  • Magazine Subscription
  • Magazine Renewal
  • Gift a Subscription
  • Customer Support
  • Privacy Preferences
  • About
  • Contact
  • Advertise
  • Careers
  • Terms of Use
  • Site Map
  • Do not sell or share my information
  • Privacy Policy
  • Accessibility
  • California Privacy Rights

© 2025 Active Interest Media. All rights reserved.

Fine Homebuilding receives a commission for items purchased through links on this site, including Amazon Associates and other affiliate advertising programs.

X
X
This is a dialog window which overlays the main content of the page. The modal window is a 'site map' of the most critical areas of the site. Pressing the Escape (ESC) button will close the modal and bring you back to where you were on the page.

Main Menu

  • How-To
  • Design
  • Tools & Materials
  • Video
  • Blogs
  • Forum
  • Project Guides
  • Reader Projects
  • Magazine
  • Members
  • FHB House

Podcasts

  • FHB Podcast
  • ProTalk

Webinars

  • Upcoming and On-Demand

Podcasts

  • FHB Podcast
  • ProTalk

Webinars

  • Upcoming and On-Demand

Popular Topics

  • Kitchens
  • Business
  • Bedrooms
  • Roofs
  • Architecture and Design
  • Green Building
  • Decks
  • Framing
  • Safety
  • Remodeling
  • Bathrooms
  • Windows
  • Tilework
  • Ceilings
  • HVAC

Magazine

  • Current Issue
  • Past Issues
  • Magazine Index
  • Subscribe
  • Online Archive
  • Author Guidelines

All Access

  • Member Home
  • Start Free Trial
  • Gift Membership

Online Learning

  • Courses
  • Project Guides
  • Reader Projects
  • Podcast

More

  • FHB Ambassadors
  • FHB House
  • Customer Support

Account

  • Log In
  • Join

Newsletter

Get home building tips, offers, and expert advice in your inbox

Signing you up...

This site is protected by reCAPTCHA and the Google Privacy Policy and Terms of Service apply.
See all newsletters
See all newsletters

Follow

  • X
  • YouTube
  • instagram
  • facebook
  • pinterest
  • Tiktok

Join All Access

Become a member and get instant access to thousands of videos, how-tos, tool reviews, and design features.

Start Your Free Trial

Subscribe

FHB Magazine

Start your subscription today and save up to 70%

Subscribe

We hope you’ve enjoyed your free articles. To keep reading, become a member today.

Get complete site access to expert advice, how-to videos, Code Check, and more, plus the print magazine.

Start your FREE trial

Already a member? Log in