
Prepping the Jobsite for Tile Installation
Protect the area around your tile project to avoid damage and control dust as you get ready for tiling.

Preparing an area for tile work always generates lots of dust and debris, especially if you must remove an old counter, floor, or backsplash. Protecting the area around your project will save the rest of your home from accidental damage and will make cleanup much faster, too. Rolls of plastic and plastic tarps come in different thicknesses and are great for keeping dust off appliances and furniture. Plastic also works well to seal doorways to keep dust out of rooms and areas adjacent to your work space. Just measure the plastic to fit the doorway and tape it down to the floor 1.
Then add a towel at the floor for added protection 2. The towel will add additional weight to hold the plastic in place in case air drafts cause the plastic to billow in and out.
When taping down plastic tarps or protective paper, use blue painter’s tape 3, which is easier to remove than regular masking tape and usually doesn’t damage the underlying surface. However, we have seen blue tape damage wallpaper, paint, and even tile sealer, so to be safe, test tape surfaces before application. Duct tape is the right tape to use in areas that may get wet or that require heavy-duty protection, as in high- traffic areas. Duct tape can leave a residue over time so don’t leave it (or any other tape) in place for a prolonged period.
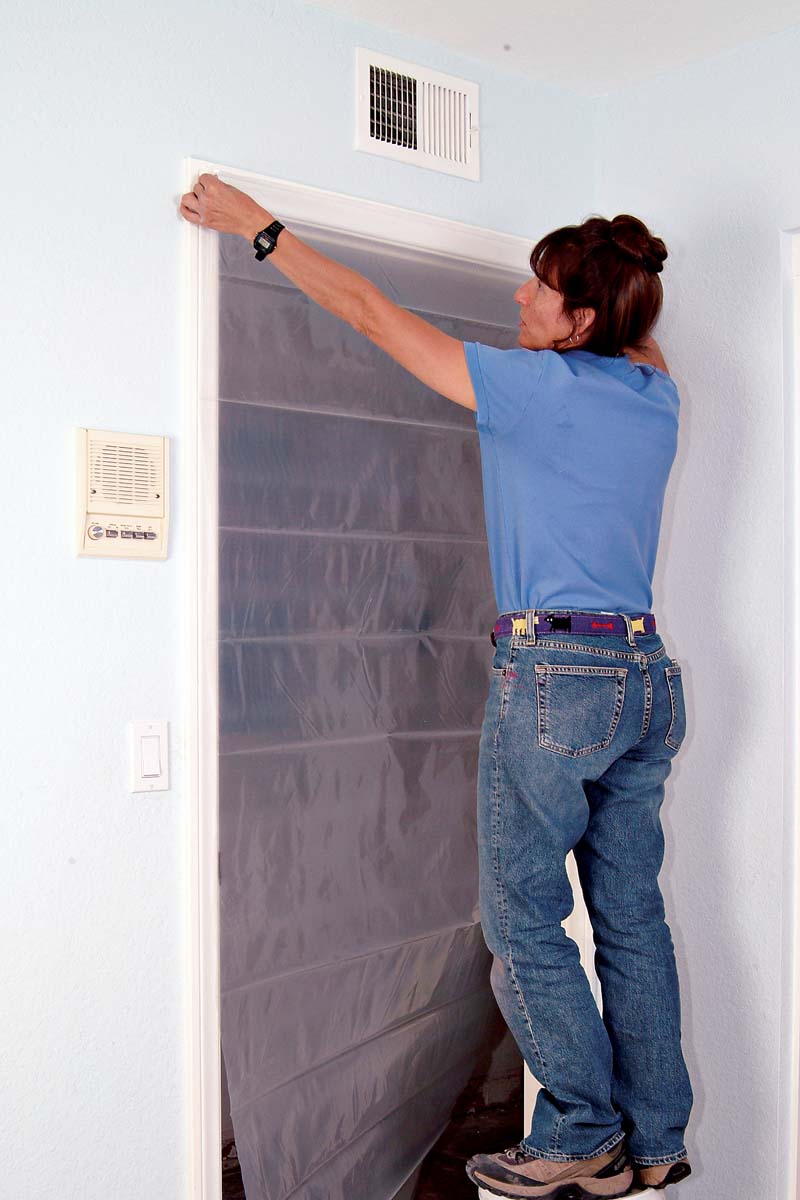 |
1. Taping plastic sheeting over a doorway keeps out dust |
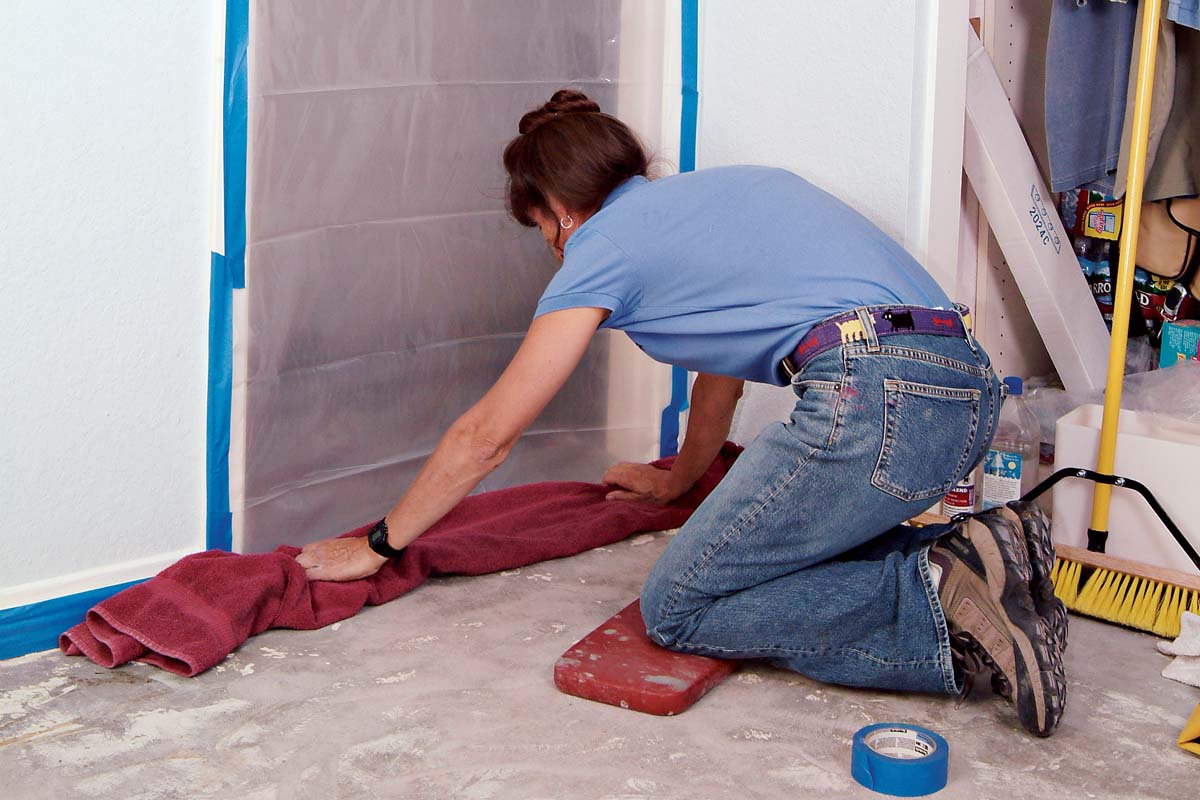 |
2. A towel at the doorway will secure the plastic sheeting. |
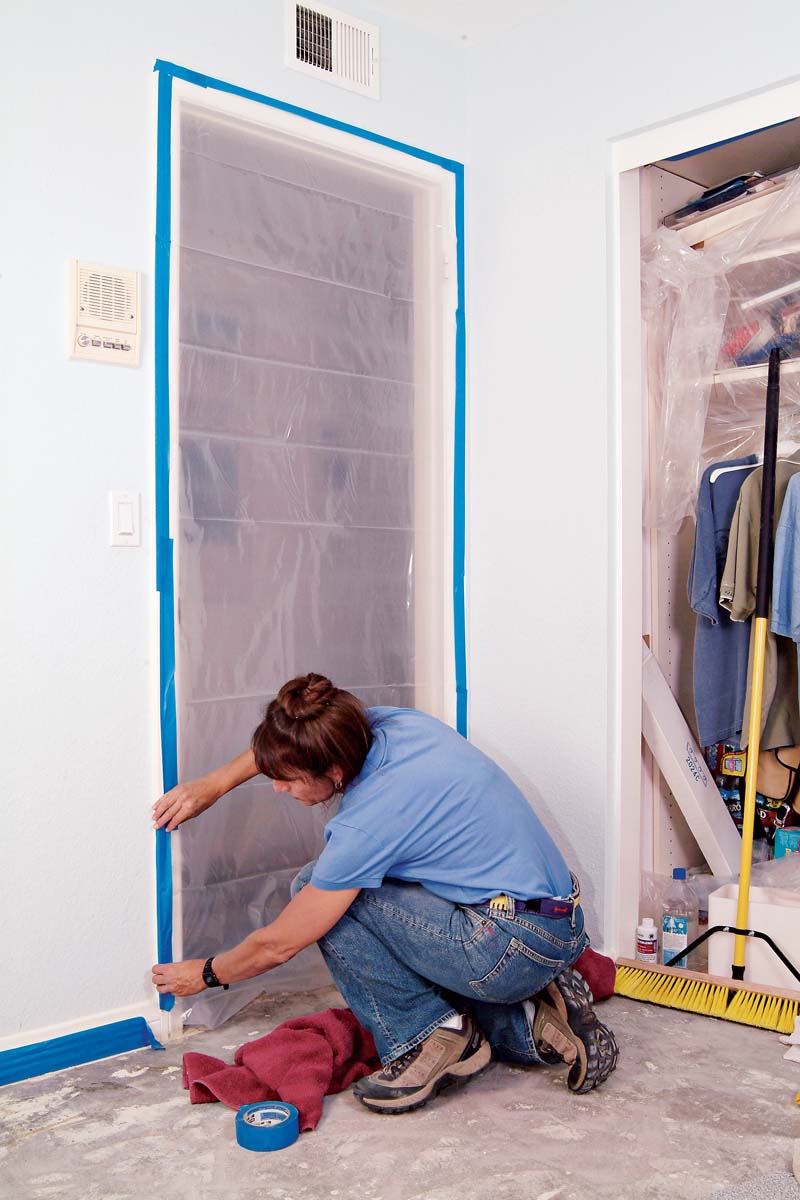 |
3. Tape plastic sheeting to the door frame using blue painter’s tape. |
Trade secretIt’s a good idea to remove any paintings, china plates, and other objects that are hanging in the demo area, or leaning against the other side of the wall. When in doubt, move it out. |
Setting up a Work Space
A garage can be an ideal place to set up a work space and staging area. It gives you a spot to safely store tile, tools, and materials, with easy access to both the outdoors (for mixing and cleanup) and the job area inside your home.
Just remember that many tile materials (grout, caulk) must be kept at moderate temperatures. Move them inside if garage temperatures get too hot or too cold. Use large plastic tarps to protect the walls and floors from spills and water spray (if you set up a water saw).
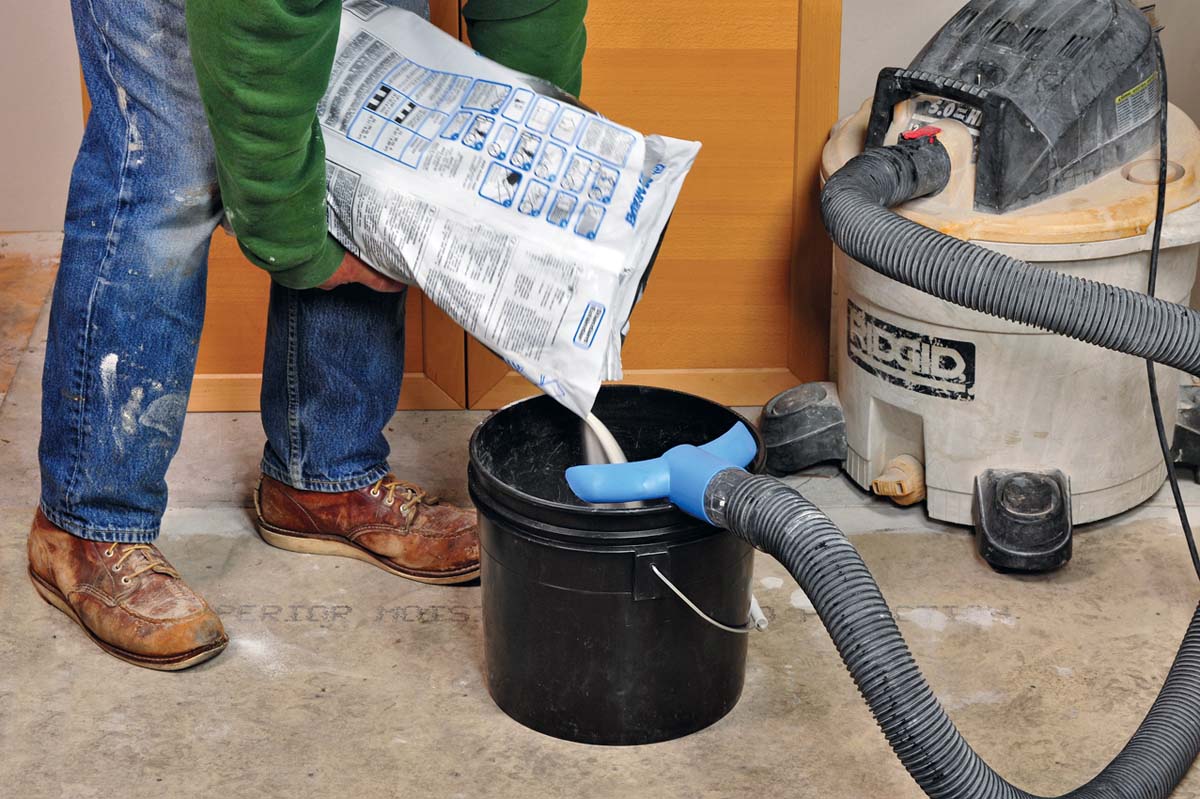
Although better done outside, you can mix powdered materials, such as thinset and grout, inside your garage as long as you wear a dust mask and leave the garage door open. Just keep in mind that mixing and cutting will layer the area with fine dust.
Protecting Floors
It’s surprising how easy it is to track even the smallest amount of dust or dirt around on the bottoms of your shoes. Cloth tarps are a great invention to keep you from trailing things in and out of your work area, especially over carpeted areas. We like the tarps that painters use, which come in long strips 4 ft. wide. They work well down hallways and are wide enough to provide protection for walkways leading to your job area A. To protect finished floors, put down rosin paper (a heavy-duty rose-colored paper that comes in rolls), then cover it with sheets of Masonite®, thin plywood, or other paneling B. The Masonite also provides good protection if you need to roll out heavy appliances, such as refrigerators and dishwashers. The rosin paper helps protect the underlying floor from debris that gets trapped underneath the Masonite.
To prepare for a kitchen floor demo, first unplug all appliances and disconnect stoves and ranges from gas lines. Before moving a refrigerator, disconnect the water line for the refrigerator’s icemaker. When moving appliances out of the room, use a sturdy dolly or hand truck covered with a blanket (to prevent scratches) C. Set the appliances atop plywood to prevent damage to the storage area’s floor. Always tape down a tarp or towel at the doorway of the room you’re working in to protect the flooring, catch debris, and give you a place to wipe your feet as you leave the area D.
WarningMake sure to cover smoke alarms within range of your demolition area with a plastic bag or plastic sheeting wrapped with blue tape. The dust raised can trigger false alarms. |
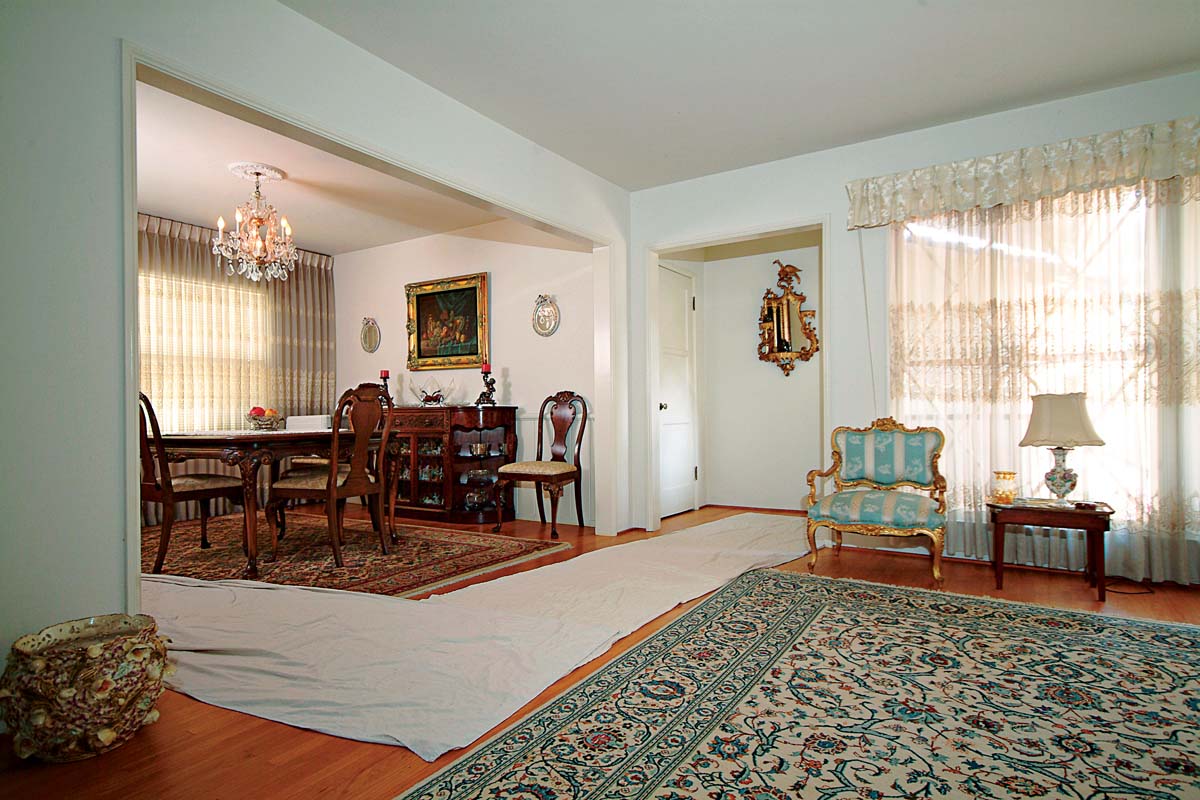 |
A. Cloth tarps can provide invaluable protection for finished floors when walking back and forth to the job area |
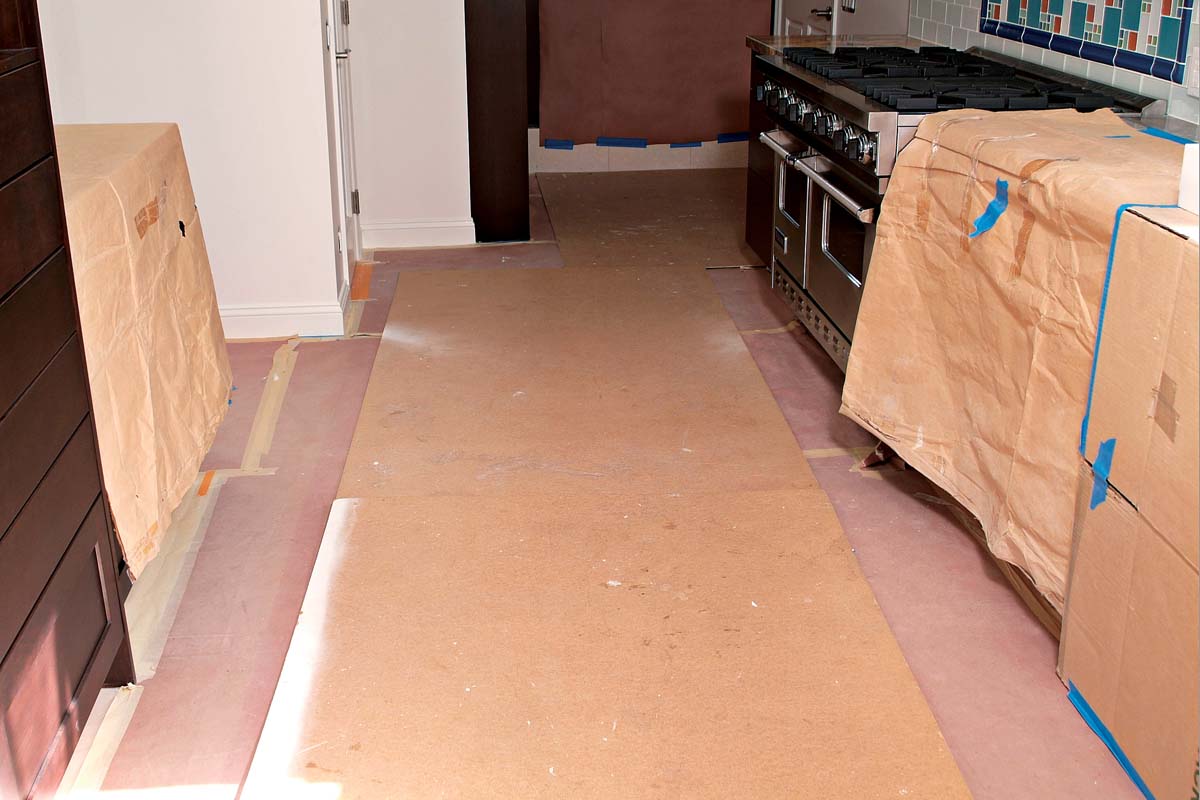 |
B. Rosin paper covered by Masonite provides thorough protection for any finished floor. |
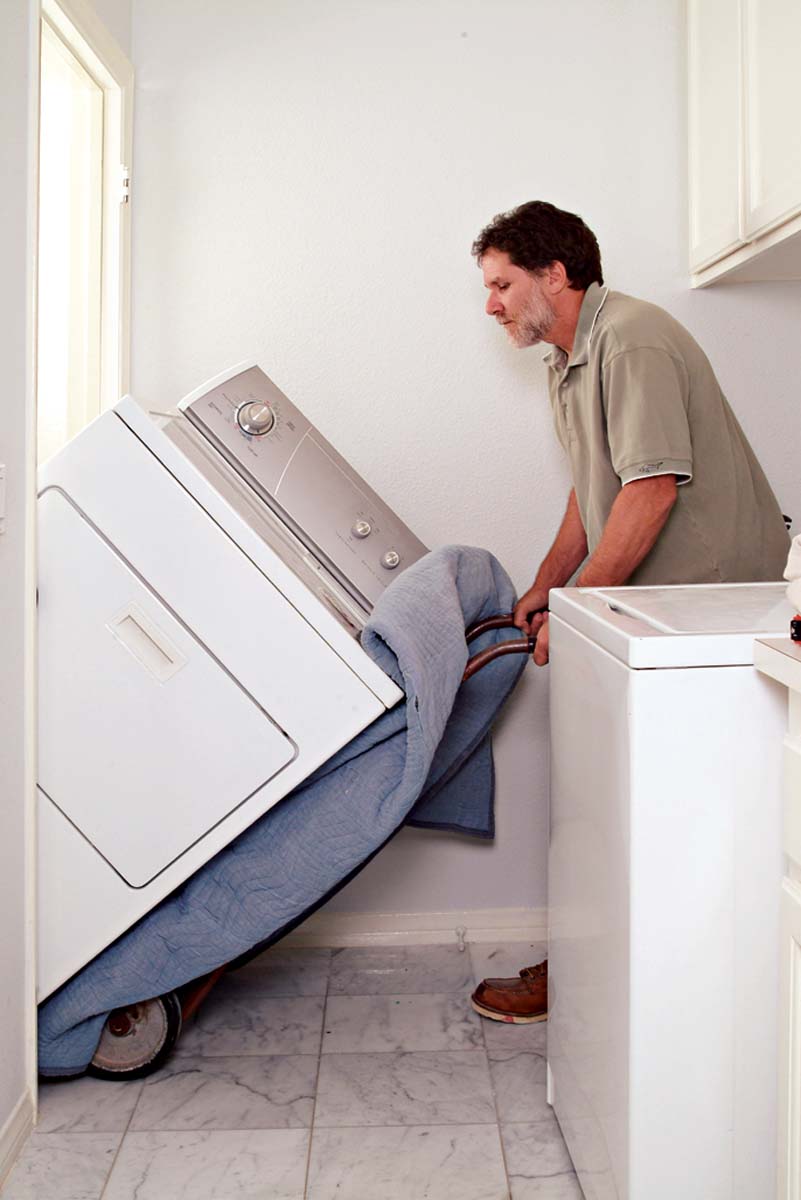 |
C. Hand trucks make it easy to lift heavy, awkward objects. |
 |
D. Tape a towel or tarp to the carpeting to prevent soiling it. |
Popular protection products
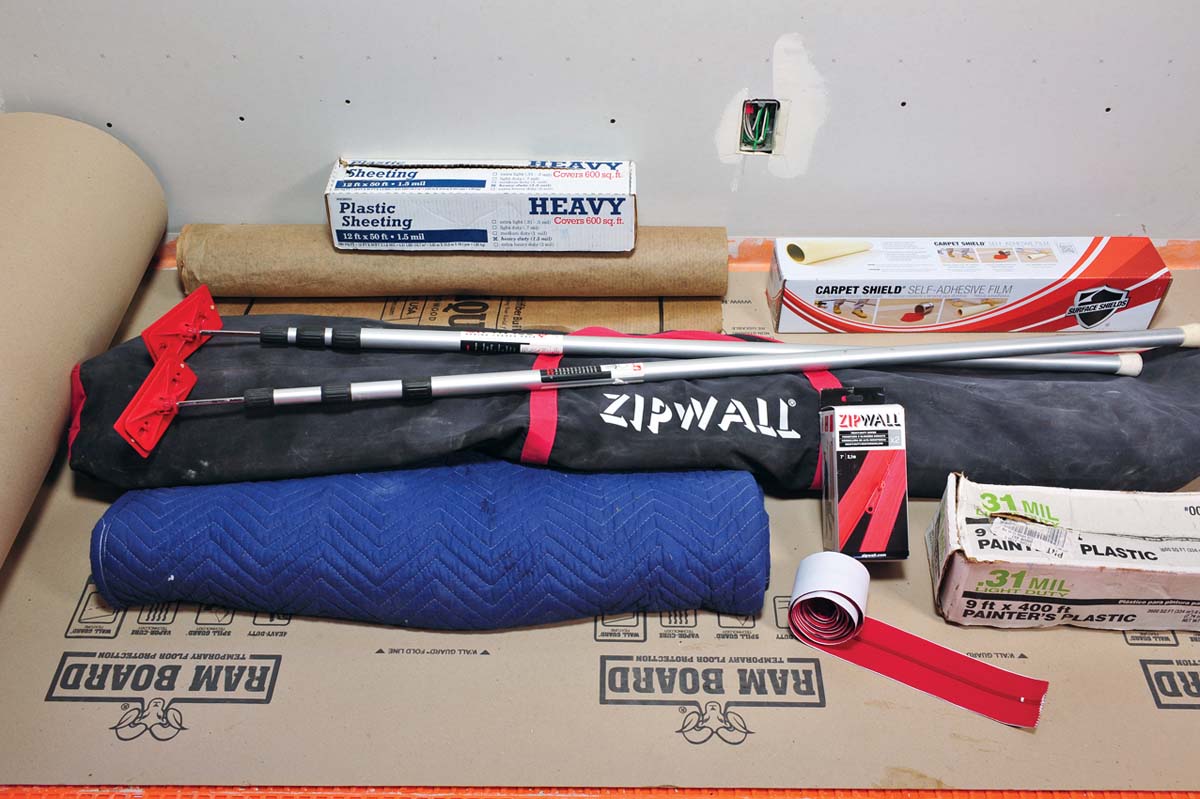
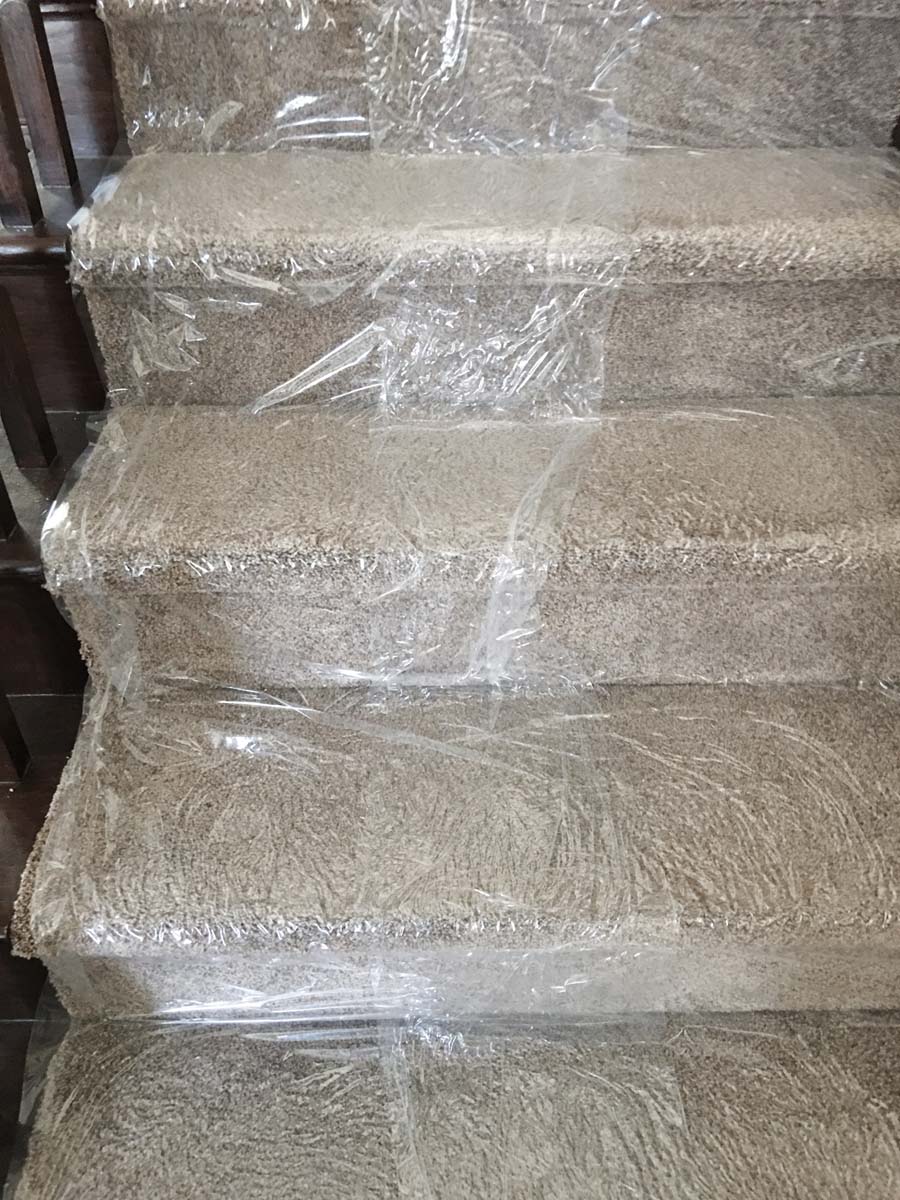
Ram Board Ram Board® is a pressed cardboard product 36 mil to 46 mil thick that provides excellent protection over tile, wood, and other flooring that might be damaged irreparably by the drop of a tool. It is packaged in a roll and must be taped or weighted down to keep the ends in place. This type of protection is worth every penny over the standard cotton tarps and construction paper because Ram Board also helps keep dust and dirt away from finished areas. Plastic sheet protection over carpet and wood flooring There are various types of plastic sheeting with a light adhesive—one type is for carpet, another for wood floors. They work well to cover and protect stairs too. ZipWall ZipWall® dust barriers are a system of spring-loaded aluminum poles that create a barrier wall of plastic (reusable barrier panels are also available) to keep dust out of an area. They protect painted walls by eliminating the need for tape to hold up the plastic and remain in place due to the sturdy poles. There is also a proprietary zipper you can attach to the plastic and cut through to provide a zippered door to allow access to a dusty area, and an exit into a clean area.
|

Prepping to Demo Counters and Backsplashes
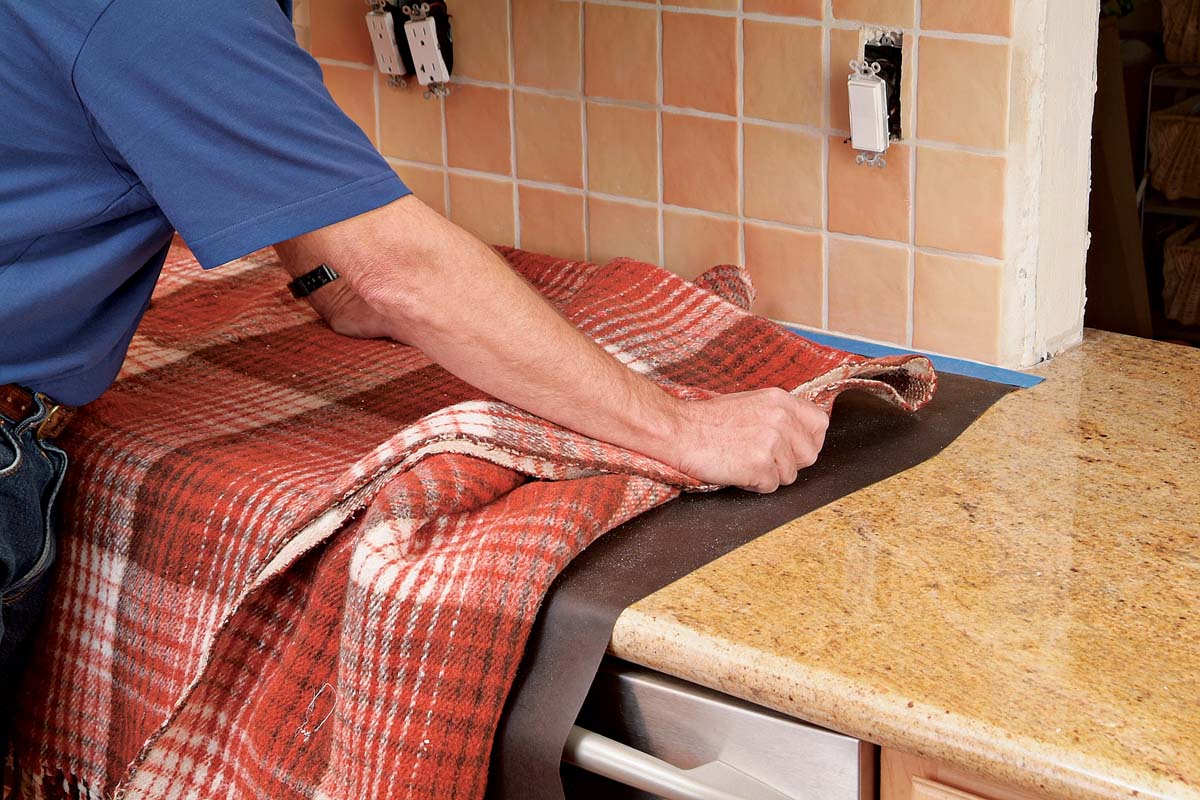
Remove all appliances and empty all drawers and the contents of the lower cabinets. This will help make cleanup a breeze. Unplug and remove anything that’s plugged in. Before removing plates for electrical switches and outlets in the work area, make sure to switch off the power to those circuits. Save the screws and switch plates in a plastic bag or other safe place 1. If you are going to be tearing out a backsplash, cover the outlets and switches with electrical tape 2. To protect finished counter surfaces against damage from tools and debris that results from demolition, sweep them clean 3 and then tape rosin paper over them. Finally, layer old blankets or worn towels on top, to add a cushion of protection 4.
Next, disconnect all sink-related piping and fixtures (faucets, garbage disposals, water filters) 5. You’ll need slip-joint pliers, a crescent wrench, screwdrivers, and a bucket with a sponge for this task. After turning off the water, disconnect each fixture at its supply hose—not at the valve. If there are drips, open the valve all the way, then shut it off again. This may dislodge the debris that prevented the valve from closing fully. If you can’t stop the drip, either use a bucket to catch the water or shut off your home’s water supply and replace the valve. If you’re keeping your old sink and fixtures, remove them carefully and store them safely until you’re ready for reinstallation. If you’re going to save the garbage disposal, run it before removing it to eliminate food and odors.
If your counter or vanity has an overmount sink (its lip sits on top of the counter surface), remove it by unscrewing any metal bracing holding it in place, cutting the caulking around its perimeter with a razor knife, and then lifting it out. Use a prybar if necessary. If you have an undermount sink (its lip sits under the counter surface), remove it after the countertop has been demolished.
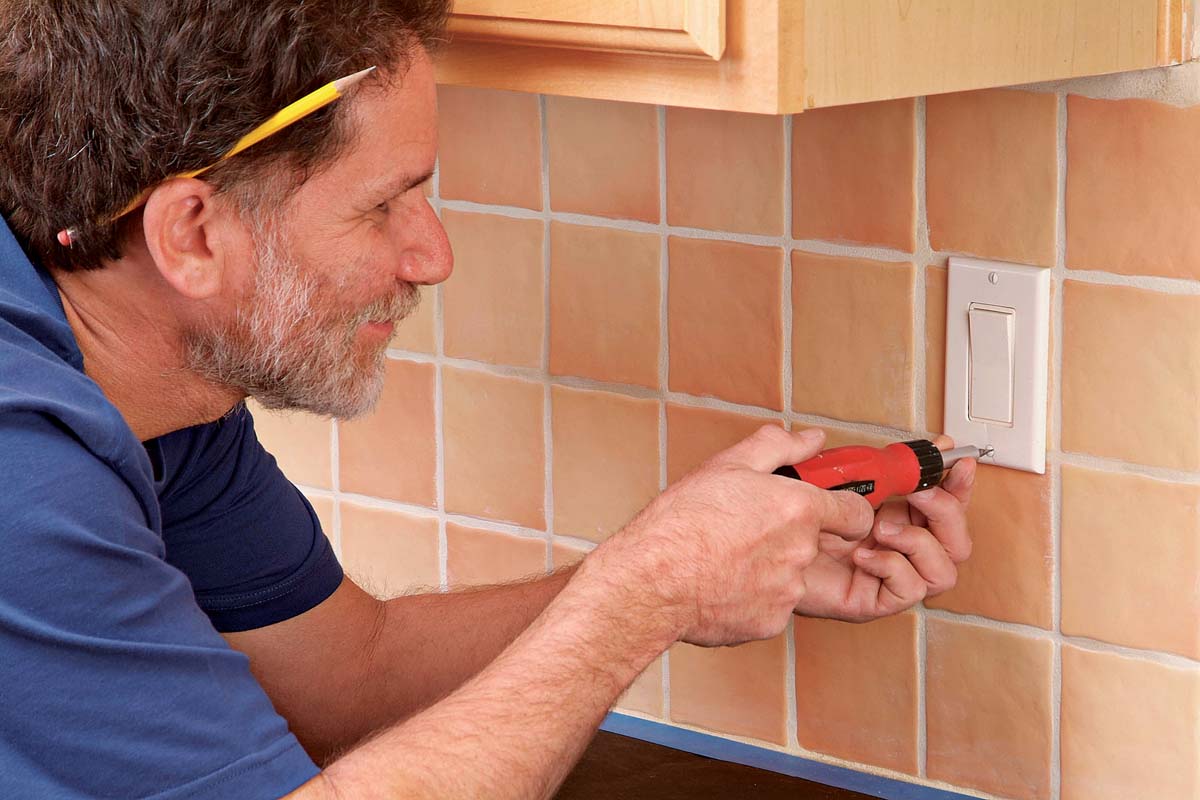 |
1. Remove electrical outlet faceplates, saving the screws in a labeled, plastic bag. |
 |
2. Wrap the terminals of plugs and switches with electrical tape to prevent shocks. |
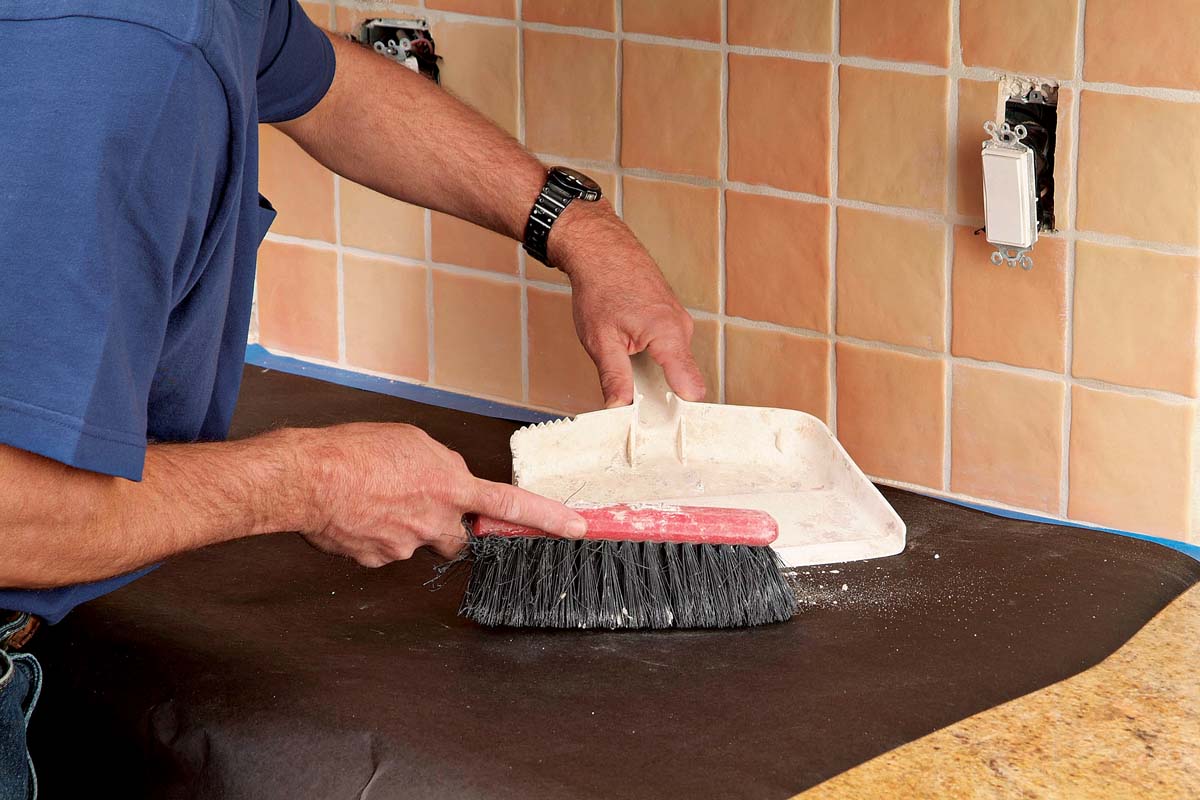 |
3. Sweep up debris before covering counters for further demolition. |
 |
4. Cover countertops with towels or blankets for protection. |
 |
5. Disconnect and remove all plumbing fixtures before beginning demolition. |
| Warning
Before disconnecting outlets, make sure the power is off. Turn off the breakers to the circuits in your work area, then plug a portable work lamp into each outlet just to be sure. |
Removing a Toilet
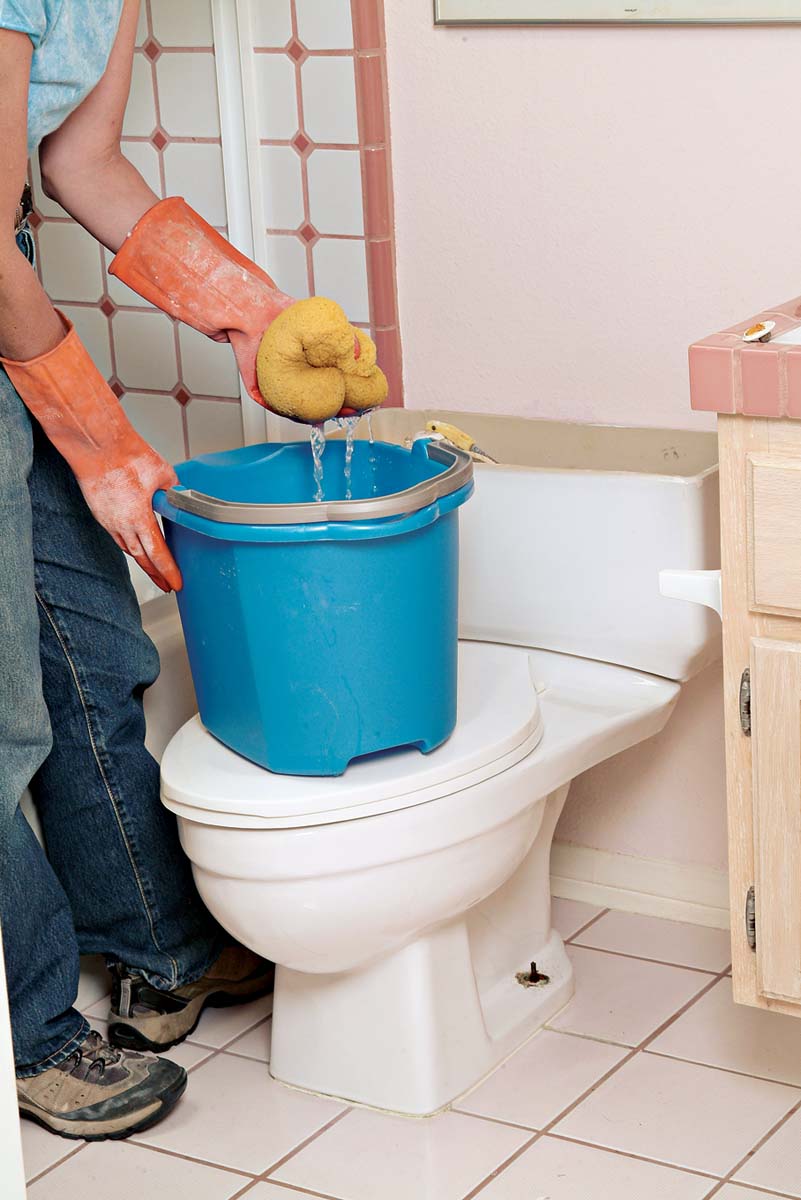
Before you can replace a bathroom floor, you’ll need to remove the toilet. Start by turning the toilet’s supply water off at the shutoff valve, then flush the toilet to empty the tank. Use a sponge to remove any remaining water from the bowl or tank 1.
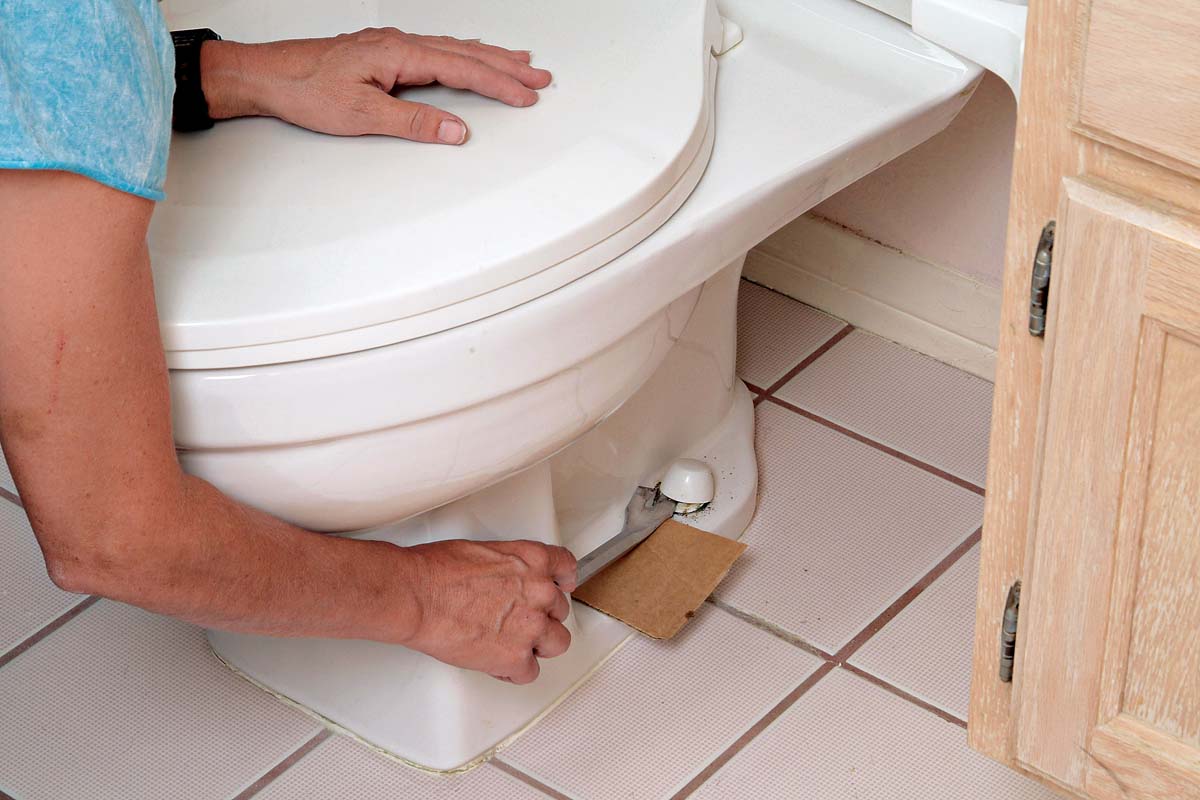
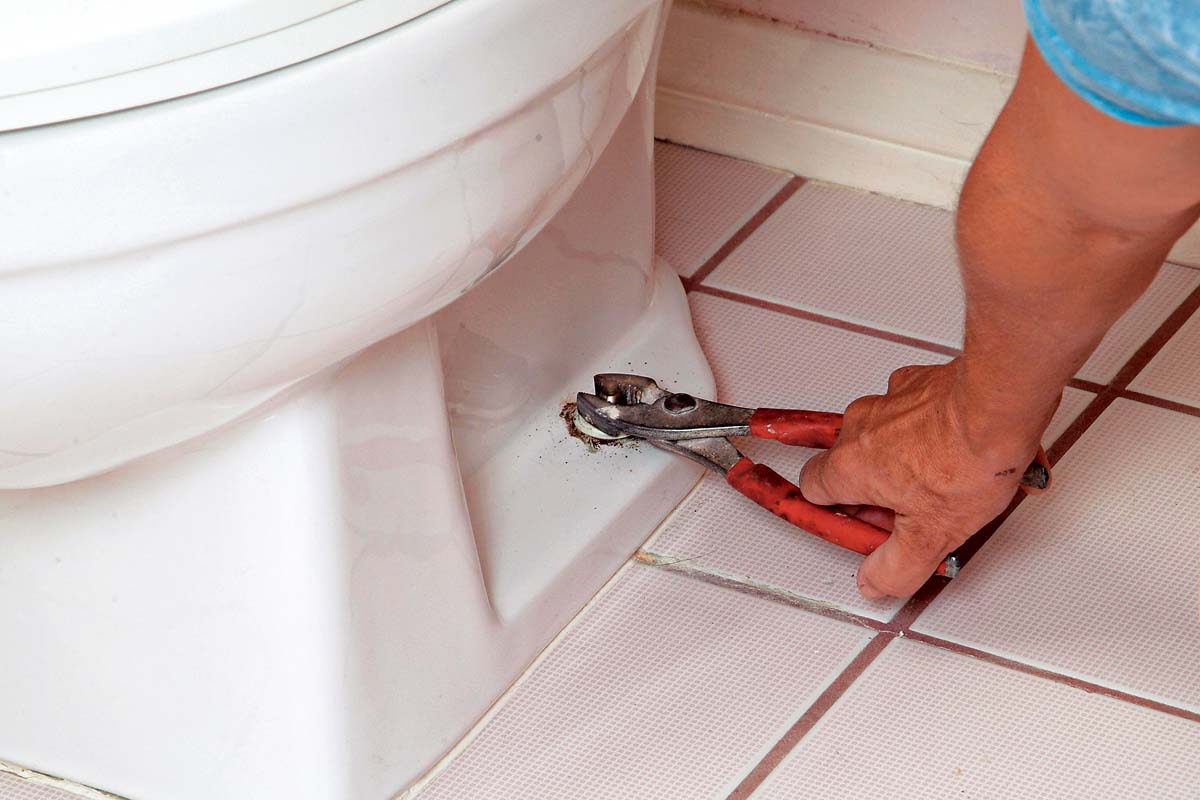
Pry off the toilet bolt caps with a screwdriver, using a piece of cardboard to protect the porcelain 2. Use pliers to remove the mounting bolts on both sides of the toilet 3. Now rock the toilet from side to side or pull up from each side 4 until the base has loosened. Have a place ready to set the toilet, preferably atop a piece of waterproof paper or plastic. Straddling the toilet, lift it straight up 5, then walk it over and set it down on the paper. Use a margin trowel to remove any remnants of the wax ring 6. Finally, plug the drain opening with crumpled newspaper 7 to prevent the awful scent of sewer gas from escaping.
 |
1. Sponge the water out of the toilet tank. |
 |
2. Use a piece of cardboard to protect the toilet as you pop off the bolt caps. |
 |
3. Use pliers or a wrench to remove the toilet hold-down nuts from the flange bolts. |
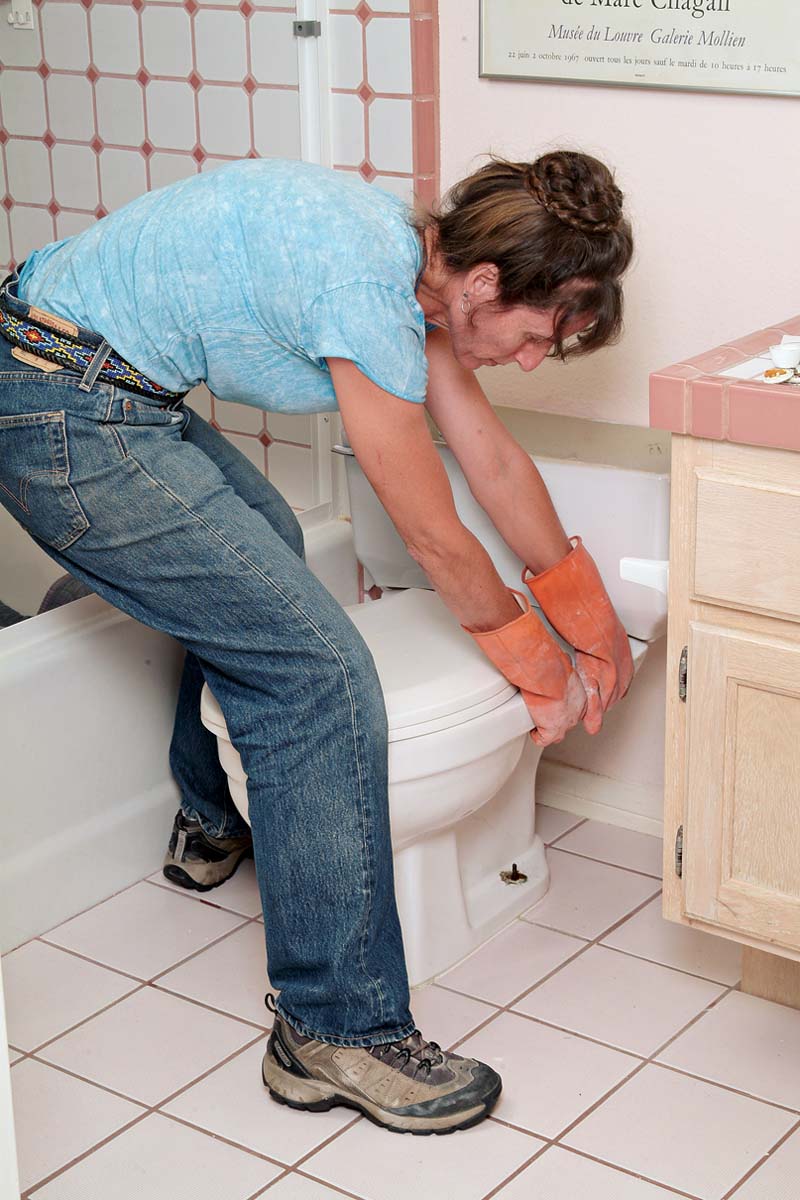 |
4. Rock the toilet side to side carefully to loosen the seal, grout, and caulking. |
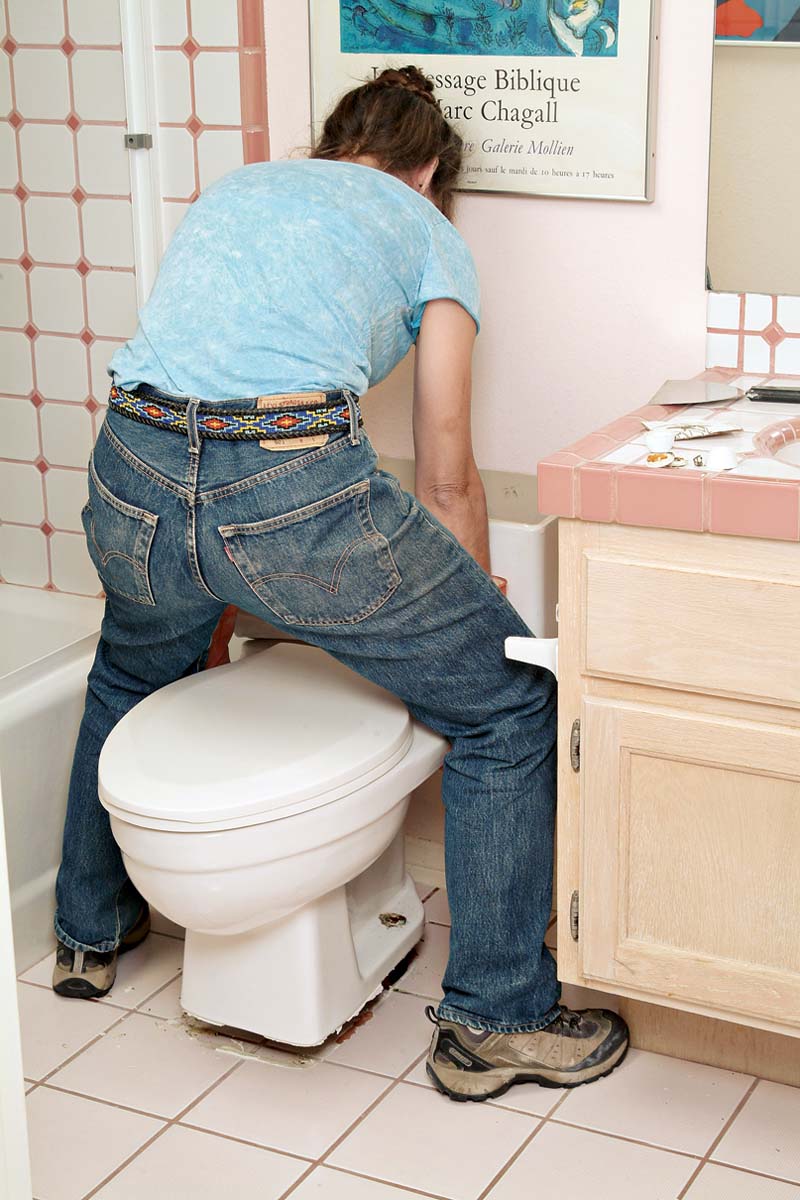 |
5. Straddle the toilet and lift straight up and off the sewer flange and bolts. |
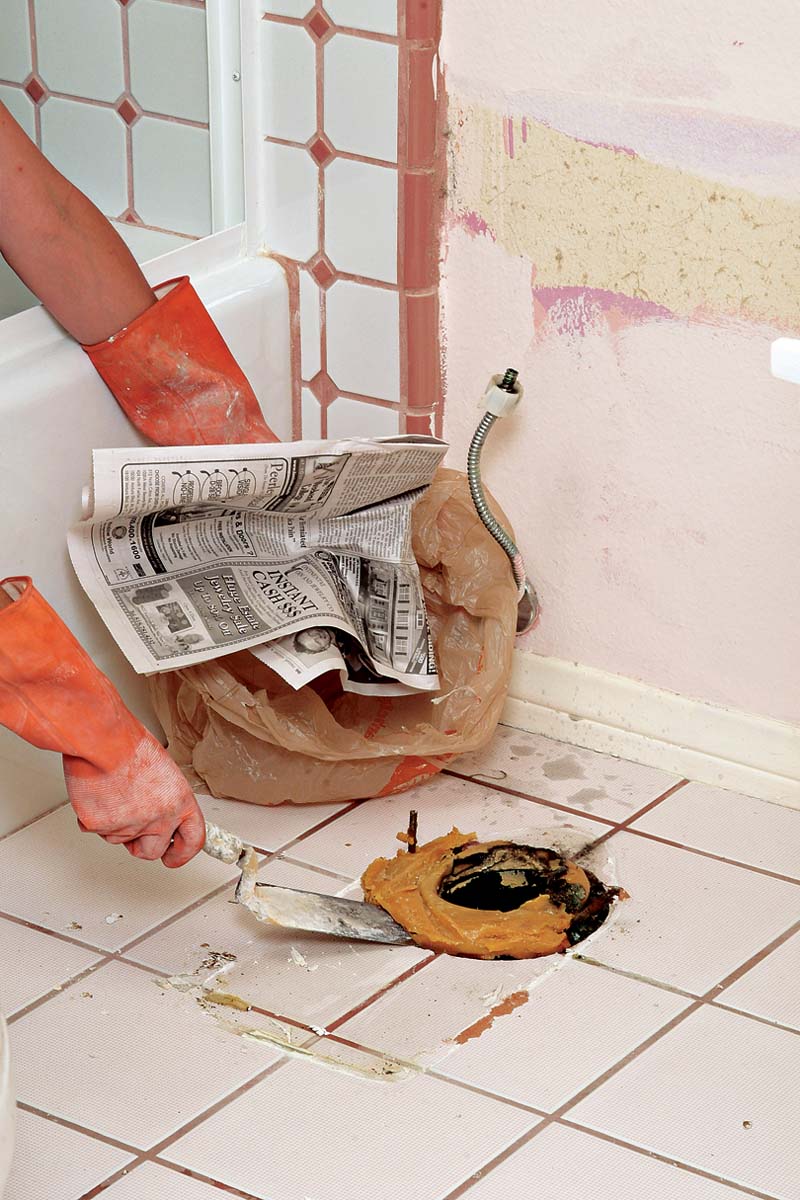 |
6. Use a margin trowel or putty knife to remove the old wax ring. |
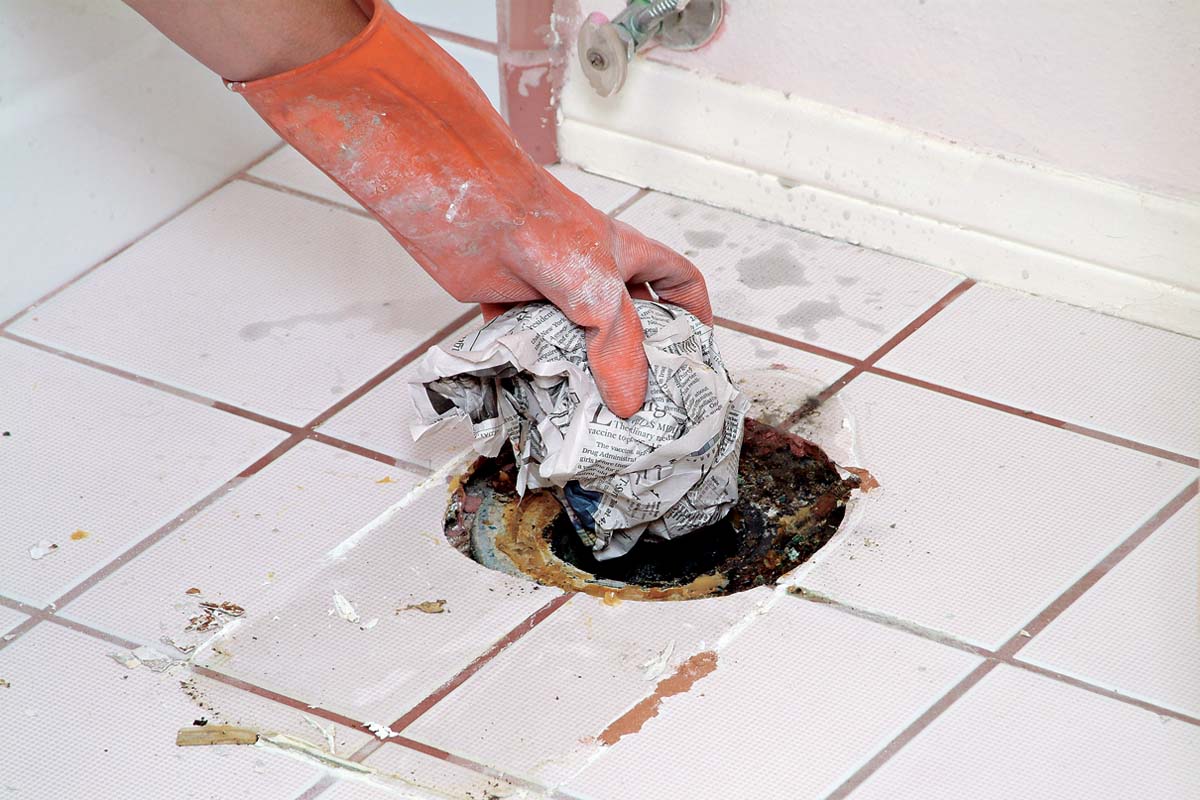 |
7. Plug the sewer line with a wad of newspaper to prevent the escape of gases. |
 Excerpted from Tiling Complete, 2nd Edition by Robin Nicholas and Michael Schweit.
Available in the Taunton Store and at Amazon.com.
