FHB Logo Facebook LinkedIn Email Pinterest Twitter X Instagram Tiktok YouTube Plus Icon Close Icon Navigation Search Icon Navigation Search Icon Arrow Down Icon Video Guide Icon Article Guide Icon Modal Close Icon Guide Search Icon Skip to content
Subscribe
Log In
  • How-To
  • Design
  • Tools & Materials
  • Restoration
  • Videos
  • Blogs
  • Forum
  • Magazine
  • Members
  • FHB House
  • Podcast
Log In

Fine Homebuilding Project Guides

Insulation

Guide Home
  • Energy Efficiency
  • Air-Sealing
  • Choosing Insulation
  • Installing Insulation
  • Water Management
How-To

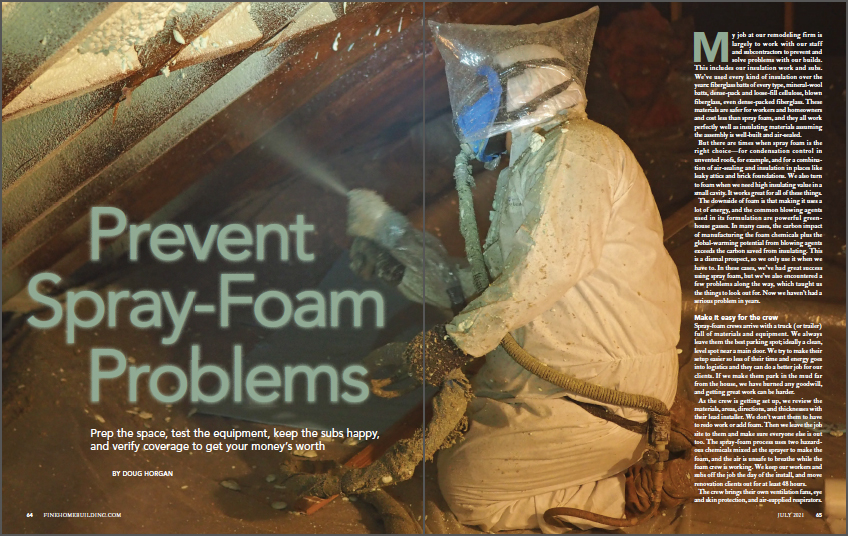
How To Prevent Spray-Foam Problems

Prep the space, test the equipment, keep the subcontractors happy, and verify coverage to get your money's worth when installing polyurethane foam insulation.

By Doug Horgan Issue 300 - July 2021

Author Doug Horgan’s full time job is identifying and communicating best practices for construction projects. That’s why we asked him to write a comprehensive guide to executing a spray-foam insulation job—something that has to be done carefully and meticulously in order to keep the job site clean, ensure that the foam adheres to the surfaces you’re applying it to, and make sure it cures properly to create a healthy, well-insulated home.


My job at our remodeling firm is largely to work with our staff and subcontractors to prevent and solve problems with our builds. This includes our insulation work and subs. We’ve used every kind of insulation over the years: fiberglass batts of every type, mineral-wool batts, dense-pack and loose-fill cellulose, blown fiberglass, even dense-packed fiberglass. These materials are safer for workers and homeowners and cost less than spray foam, and they all work perfectly well as insulating materials assuming the assembly is well-built and air-sealed.

But there are times when spray foam is the right choice—for condensation control in unvented roofs, for example, and for a combination of air-sealing and insulation in places like leaky attics and brick foundations. We also turn to foam when we need high insulating value in a small cavity. It works great for all of these things.

The downside of foam is that making it uses a lot of energy, and the common blowing agents used in its formulation are powerful greenhouse gasses. In many cases, the carbon impact of manufacturing the foam chemicals plus the global-warming potential from blowing agents exceeds the carbon saved from insulating. This is a dismal prospect, so we only use it when we have to. In these cases, we’ve had great success using spray foam, but we’ve also encountered a few problems along the way, which taught us the things to look out for. Now we haven’t had a serious problem in years.

Make it easy for the crew

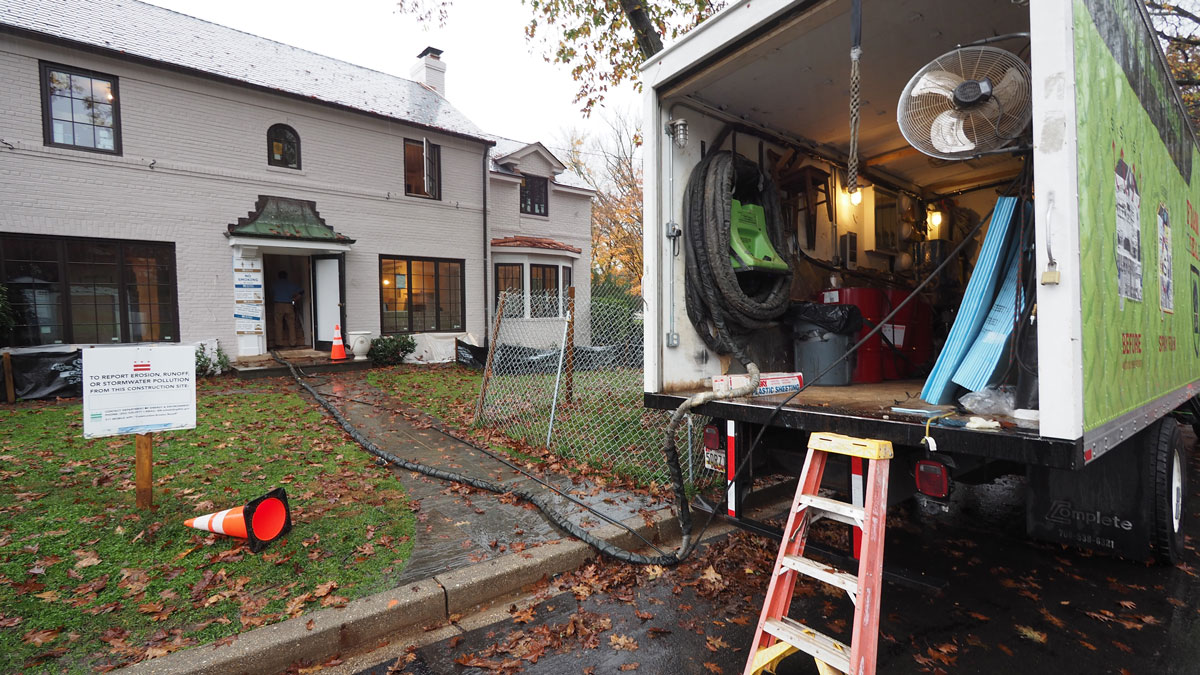
Spray-foam crews arrive with a truck (or trailer) full of materials and equipment. We always leave them the best parking spot; ideally a clean, level spot near a main door. We try to make their setup easier so less of their time and energy goes into logistics and they can do a better job for our clients. If we make them park in the mud far from the house, we have burned any goodwill, and getting great work can be harder.

As the crew is getting set up, we review the materials, areas, directions, and thicknesses with their lead installer. We don’t want them to have to redo work or add foam. Then we leave the job site to them and make sure everyone else is out too. The spray-foam process uses two hazardous chemicals mixed at the sprayer to make the foam, and the air is unsafe to breathe while the foam crew is working. We keep our workers and subs off the job the day of the install, and move renovation clients out for at least 48 hours.

Solid, safe scaffolding is needed for spraying any high areas, because the crew has to get close to the work to do a good job. A framer can climb around a truss system, but a spray tech with a Tyvek suit, full-face respirator, and heavy hose needs better access. We often do thick layers of closed-cell spray foam. Most closed-cell foams must be sprayed in 1-in. to 2-in. layers (called “lifts”) with a cooling-off period between lifts. The cooling period prevents a dangerous amount of heat buildup within the insulation as the chemicals react, which can start a fire if the installers aren’t careful. Most crews are aware of this hazard, but a few years back we had a close call, so we now make sure everyone knows the fire risks before spraying starts.
Prioritize parking. We leave an accessible parking area right in front of the house for the foam contractor’s truck. This makes their setup easier, allowing them to spend more time on the job. We also make sure signs are posted at every door, alerting visitors and clients that the house is being spray-foamed and entry is prohibited.

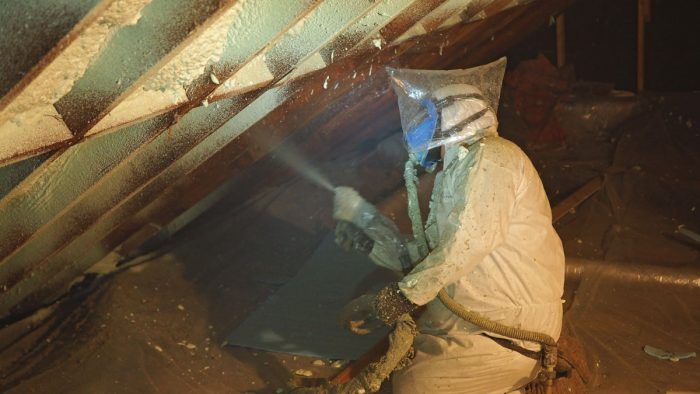
The crew brings their own ventilation fans, eye and skin protection, and air-supplied respirators.

Solid, safe scaffolding is needed for spraying any high areas, because the crew has to get close to the work to do a good job. A framer can climb around a truss system, but a spray tech with a Tyvek suit, full-face respirator, and heavy hose needs better access.

We often do thick layers of closed-cell spray foam. Most closed-cell foams must be sprayed in 1-in. to 2-in. layers (called “lifts”) with a cooling-off period between lifts. The cooling period prevents a dangerous amount of heat buildup within the insulation as the chemicals react, which can start a fire if the installers aren’t careful. Most crews are aware of this hazard, but a few years back we had a close call, so we now make sure everyone knows the fire risks before spraying starts.

Prevent Spray-Foam Problems Article Front CoverFrom Fine Homebuilding #300

To read the entire article, please click the View PDF button below.


RELATED LINKS

  • Spray-Foam Insulation
  • Open-Cell vs. Closed-Cell Foam Insulation
  • Insulation Project Guide

Fine Homebuilding Recommended Products

Fine Homebuilding receives a commission for items purchased through links on this site, including Amazon Associates and other affiliate advertising programs.

Utility Knife

This utility knife is well-made and comes in handy when cutting rigid foam insulation. You can extend the snap blade to cut through a 2-inch foam board.
Buy at Amazon

Loctite Foamboard Adhesive

When foam board installations require an adhesive, it’s important to use compatible products like this adhesive from Loctite.
Buy at Amazon

Disposable Suit

This suit provides full body protection to help you stay clean from head to toe when installing insulation. We recommend wearing sweats underneath for additional coverage.
Buy at Amazon

Sign up for eletters today and get the latest how-to from Fine Homebuilding, plus special offers.

Signing you up...

This site is protected by reCAPTCHA and the Google Privacy Policy and Terms of Service apply.
See all newsletters
See all newsletters
View PDF
Previous: Insulating Behind Kneewalls Next: Sliding Insulation between Rafters from Above

Guide

Insulation

Chapter

Installing Insulation

View Comments

  1. Windy_Ridge | Nov 30, 2021 11:15pm | #1

    Keep in mind that the blowing agents used in these chemicals are continually being changed to be more and more environmentally friendly.

Log in or create an account to post a comment.

Sign up Log in

Become a member and get full access to FineHomebuilding.com

Insulation

Insulation

Trusted, comprehensive guidance from the pros for a home that is healthy, comfortable, and energy efficient

View Project Guide

View All Project Guides »

Become a member and get unlimited site access, including the Insulation Project Guide.

Start Free Trial

Energy Efficiency
  • Understanding Energy and Houses
  • Building Energy-Efficient Homes
Air-Sealing
  • Air-Sealing Basics
  • Air-Sealing Tools and Materials
  • Foundations and Floors
  • Walls, Windows, and Doors
  • Attics and Roofs
Choosing Insulation
  • Insulation Basics
  • Material Choices
Installing Insulation
  • Insulating Attics and Roofs
  • Insulating Walls
  • Insulating Floors, Footings, and Slabs
  • Insulating Foundation Walls
Water Management
  • Water-Management Principles
  • Materials
  • Installation Methods

Fine Home Building

Newsletter Sign-up

  • Fine Homebuilding

    Home building tips, offers, and expert advice in your inbox.

  • Green Building Advisor

    Building science and energy efficiency advice, plus special offers, in your inbox.

  • Old House Journal

    Repair, renovation, and restoration tips, plus special offers, in your inbox.

Signing you up...

This site is protected by reCAPTCHA and the Google Privacy Policy and Terms of Service apply.
See all newsletters

Follow

  • Fine Homebuilding

    Dig into cutting-edge approaches and decades of proven solutions with total access to our experts and tradespeople.

    Start Free Trial Now
    • Facebook
    • Instagram
    • X
    • LinkedIn
  • GBA Prime

    Get instant access to the latest developments in green building, research, and reports from the field.

    Start Free Trial Now
    • Facebook
    • YouTube
  • Old House Journal

    Learn how to restore, repair, update, and decorate your home.

    Subscribe Now
    • Facebook
    • Instagram
    • X

Membership & Magazine

  • Online Archive
  • Start Free Trial
  • Magazine Subscription
  • Magazine Renewal
  • Gift a Subscription
  • Customer Support
  • Privacy Preferences
  • About
  • Contact
  • Advertise
  • Careers
  • Terms of Use
  • Site Map
  • Do not sell or share my information
  • Privacy Policy
  • Accessibility
  • California Privacy Rights

© 2025 Active Interest Media. All rights reserved.

Fine Homebuilding receives a commission for items purchased through links on this site, including Amazon Associates and other affiliate advertising programs.

X
X
This is a dialog window which overlays the main content of the page. The modal window is a 'site map' of the most critical areas of the site. Pressing the Escape (ESC) button will close the modal and bring you back to where you were on the page.

Main Menu

  • How-To
  • Design
  • Tools & Materials
  • Video
  • Blogs
  • Forum
  • Project Guides
  • Reader Projects
  • Magazine
  • Members
  • FHB House

Podcasts

  • FHB Podcast
  • ProTalk

Webinars

  • Upcoming and On-Demand

Podcasts

  • FHB Podcast
  • ProTalk

Webinars

  • Upcoming and On-Demand

Popular Topics

  • Kitchens
  • Business
  • Bedrooms
  • Roofs
  • Architecture and Design
  • Green Building
  • Decks
  • Framing
  • Safety
  • Remodeling
  • Bathrooms
  • Windows
  • Tilework
  • Ceilings
  • HVAC

Magazine

  • Current Issue
  • Past Issues
  • Magazine Index
  • Subscribe
  • Online Archive
  • Author Guidelines

All Access

  • Member Home
  • Start Free Trial
  • Gift Membership

Online Learning

  • Courses
  • Project Guides
  • Reader Projects
  • Podcast

More

  • FHB Ambassadors
  • FHB House
  • Customer Support

Account

  • Log In
  • Join

Newsletter

Get home building tips, offers, and expert advice in your inbox

Signing you up...

This site is protected by reCAPTCHA and the Google Privacy Policy and Terms of Service apply.
See all newsletters
See all newsletters

Follow

  • X
  • YouTube
  • instagram
  • facebook
  • pinterest
  • Tiktok

Join All Access

Become a member and get instant access to thousands of videos, how-tos, tool reviews, and design features.

Start Your Free Trial

Subscribe

FHB Magazine

Start your subscription today and save up to 70%

Subscribe

We hope you’ve enjoyed your free articles. To keep reading, become a member today.

Get complete site access to expert advice, how-to videos, Code Check, and more, plus the print magazine.

Start your FREE trial

Already a member? Log in