
Removing a Damaged Tile
First you need to remove the grout around the tile, and then use a hammer and chisel or a grinder to break out the damaged tile.
Removing Grout
Before tile removal begins, you need to remove the grout surrounding the tile A. This greatly lowers the risk of chipping the glaze on adjacent tiles. The grout found in old tile jobs laid on a mortar bed is often too hard to remove, in which case you can proceed with the hammer and chisel removal (see below).
Softer grout can be removed either with a razor knife, a grout saw, or with a portable electric tool. A razor knife fitted with a sharp blade works great on grout, especially if the joints are no wider than 1/8 in. Simply work the tip of the knife carefully into the grout and slice along both sides of the joint, cutting and removing the grout a little at a time all the way around the damaged tile B.
A grout saw can be used for removing grout in joints that are 1/8 in. or wider. Hold the grip of the saw firmly in your hand and use a back-and-forth motion to remove the old grout. Hold the saw steady so you won’t risk nicking or chipping the adjacent tiles C. This is the slow way to go but dust is minimal. For faster grout removal on more extensive repairs, you can fit a standard reciprocating saw with a special grout-cutting blade D.
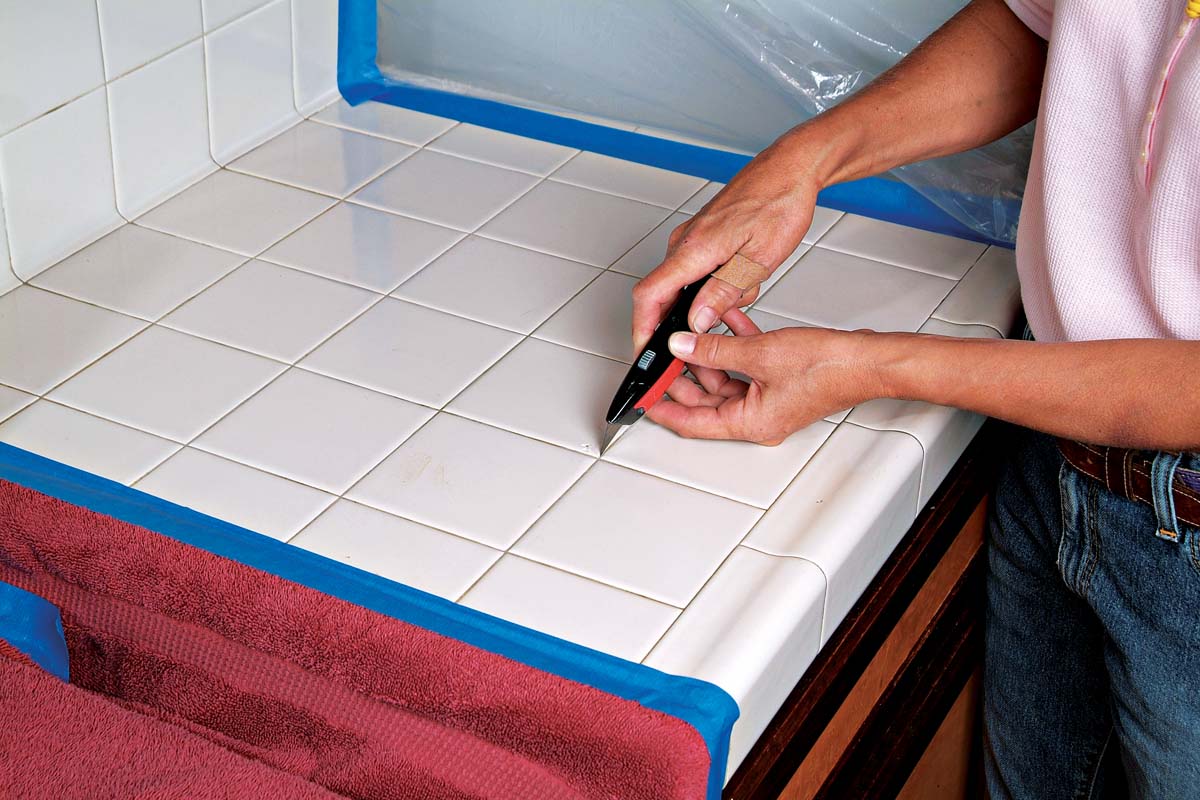 |
A. A utility knife can remove softer grout. Use both hands to steady the knife. |
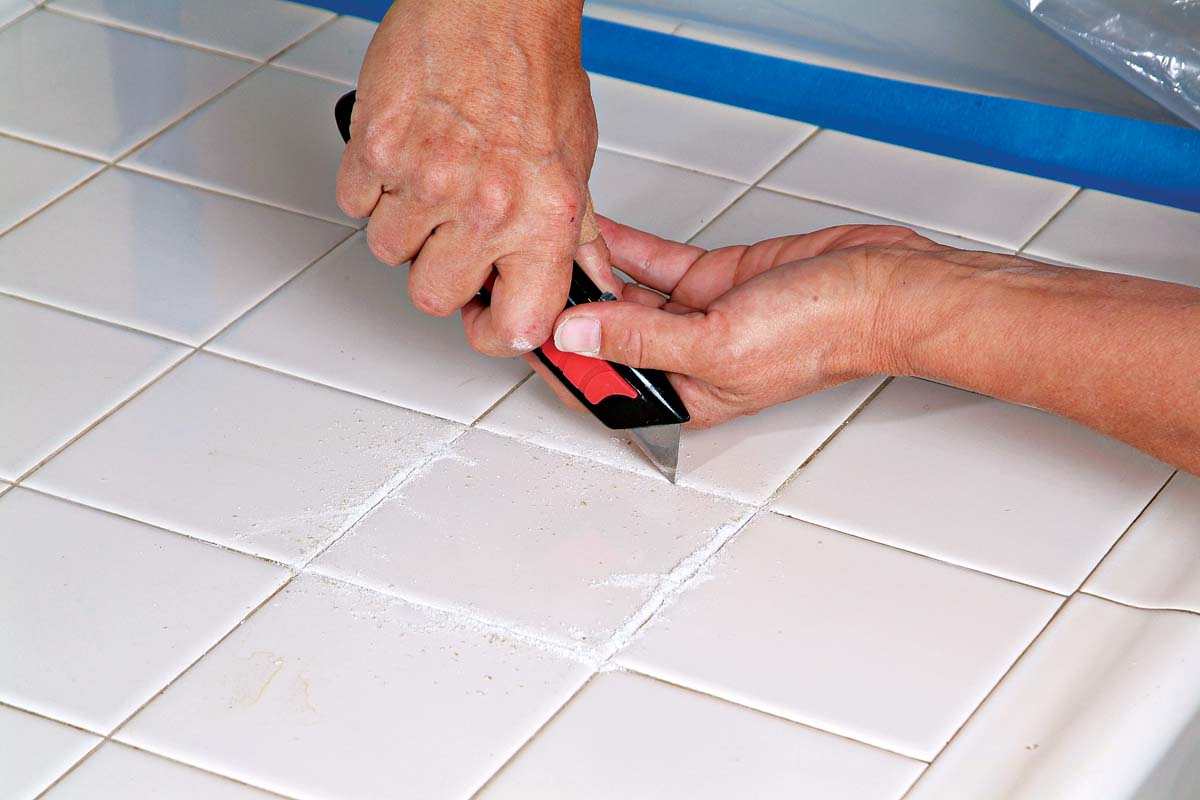 |
B. Remove down to the setting bed with the knife. |
 |
C. A hand-held carbide grout saw can be used to remove grout around a cracked or chipped tile. |
 |
D. A carbide grout blade attached to your reciprocating saw quickly removes grout from around tiles. |
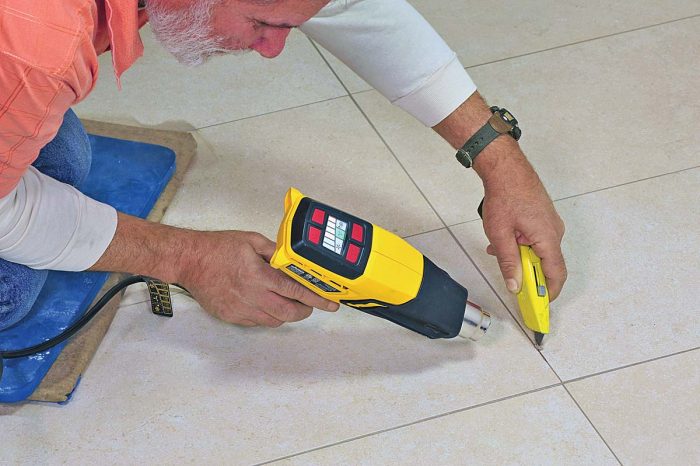 |
To replace a tile grouted with epoxy grout, you’ll first need to soften the grout with a heat gun. It can then be scraped out with a utility knife. |
Removing Tile with a Hammer and Chisel
Once the grout is removed around the tile you’re replacing, place some towels or tarps around the work area, as tile chips can fly far.
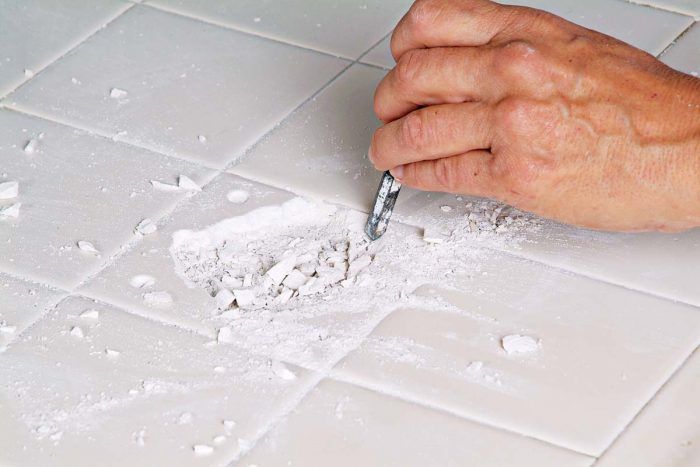
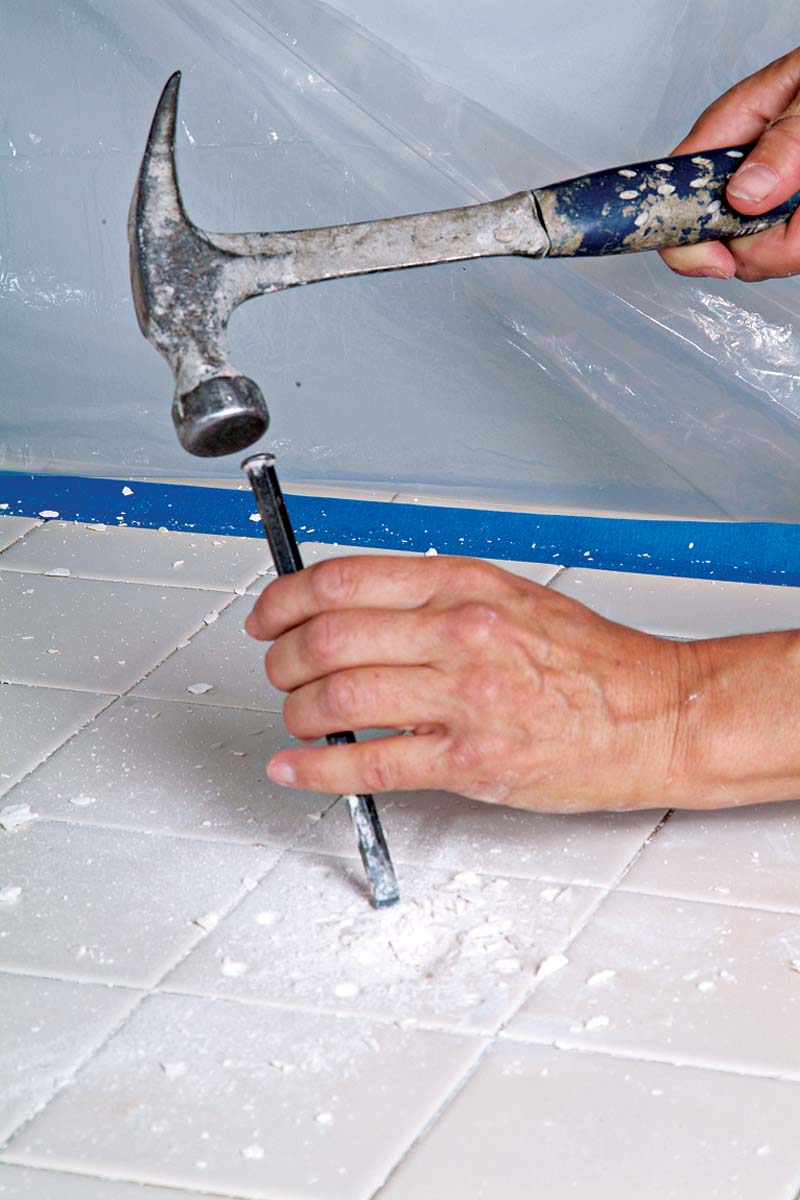
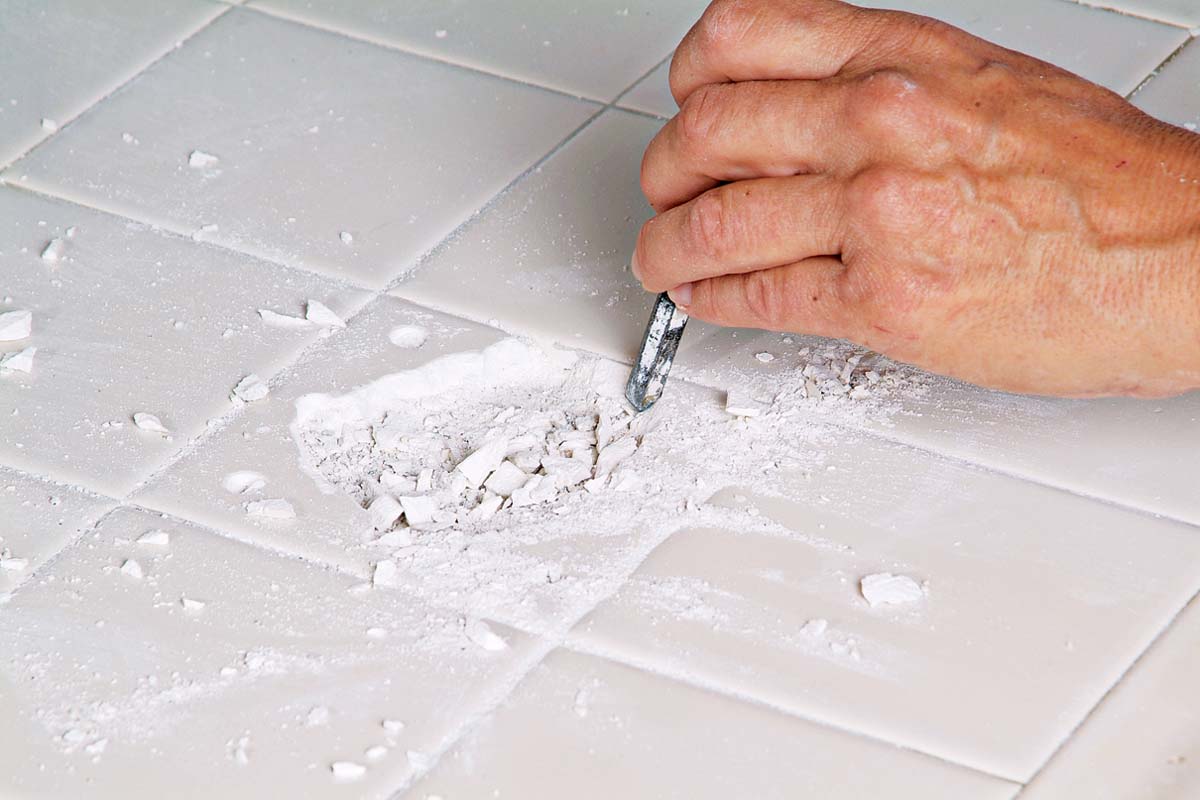
First, use the corner of a carbide-tipped chisel to create a series of small dimples 1, which will keep the drill bit from skipping across the tile. Use a masonry bit in an electric drill to bore a series of holes in the center and along the edges of the damaged tile, staying about 1/2 in. away from the grout joints 2. The holes will help the tile break out in small pieces and protect adjacent tiles from cracking. Using a hammer and carbide-tipped chisel, break the tile into small pieces, working carefully from the center to the outside of the tile 3. Hammer as gently as you can; pounding may cause cracks in the tile’s substrate (backerboard, mortar bed) to travel, damaging additional tiles. Do not worry about cleaning off the substrate at this time. As you near the edge, chisel the remaining tile carefully and break it away from the grout joints 4. Do not hammer in the grout joints themselves, or you’re likely to chip adjacent tiles. After all the tile pieces have been removed, carefully carve off any remaining grout with a razor knife 5.
 |
1. Use a hammer and chisel to nick the top part of the glaze to create a divot. |
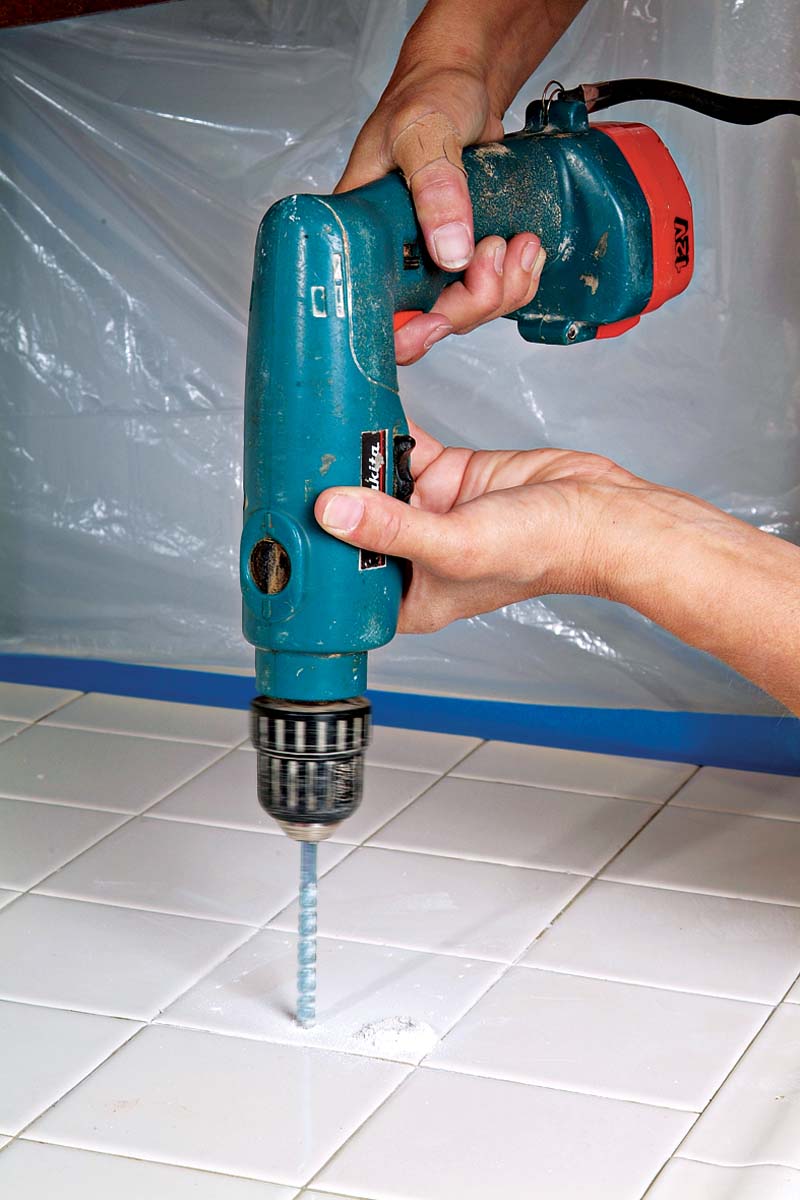 |
2. Drill holes in the surface of the tile to give the chisel some starting points. |
 |
3. Use the chisel to remove small fragments of tile. |
 |
4. Hammer and chisel out the remaining parts of the tile with great care. |
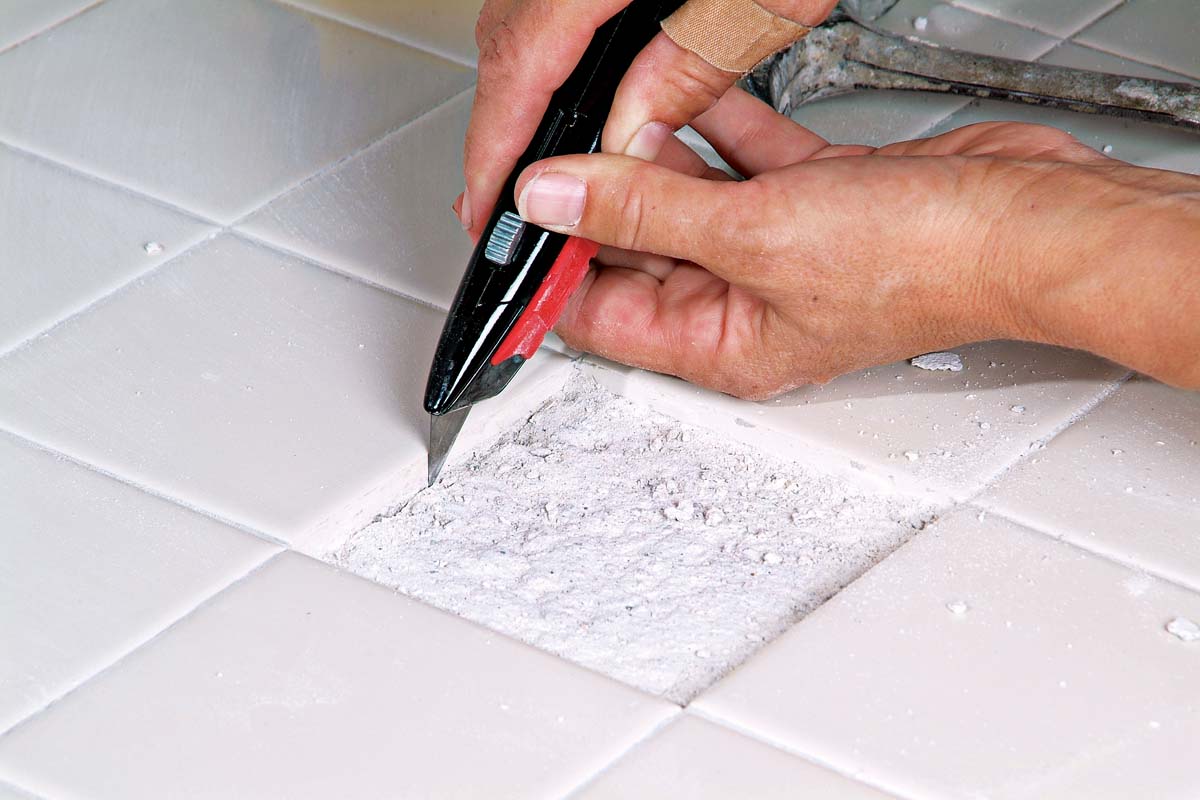 |
5. Use a razor knife to remove any remaining grout with caution. The cleaner the area, the easier it will be to fit the new tile. |
| Warning
Wear safety glasses when breaking tile with a hammer and chisel. Chips can fly, causing permanent eye damage if you get hit. |
Removing Tile with a Grinder
If you are comfortable using an angle grinder and you don’t mind the mess, you can remove tiles more quickly by first grinding slots in the tiles, then using a hammer and chisel to knock the pieces free. This method works best with bigger, more durable tiles (porcelain, granite) with larger grout joints, as it’s more difficult to control the grinder on smaller tiles.
Start by sealing doorways and covering adjacent areas and furniture with plastic sheeting as necessary.
Using a special tile-and-stone cutting blade mounted in the grinder, cut along the inside of the damaged tile, about 1/2 in. in from the edges. Next, cut an X in the center of the tile, extending the legs almost all the way to the corners 1. Be sure to hold the grinder carefully as the tool’s torque can take you by surprise. Cut slowly to avoid binding and skittering into the next tile. To reduce the grinding mess, you or a friend may hold the end of a vacuum hose right behind the grinding wheel to suck up the dust while cutting 2. Now use a carbide-tipped chisel and a hammer to break the tile up, starting at the center and working outward. The edges will fall away from the grout joints as you work. As mentioned before, never chisel near adjacent tiles, as you’ll likely chip or break them.
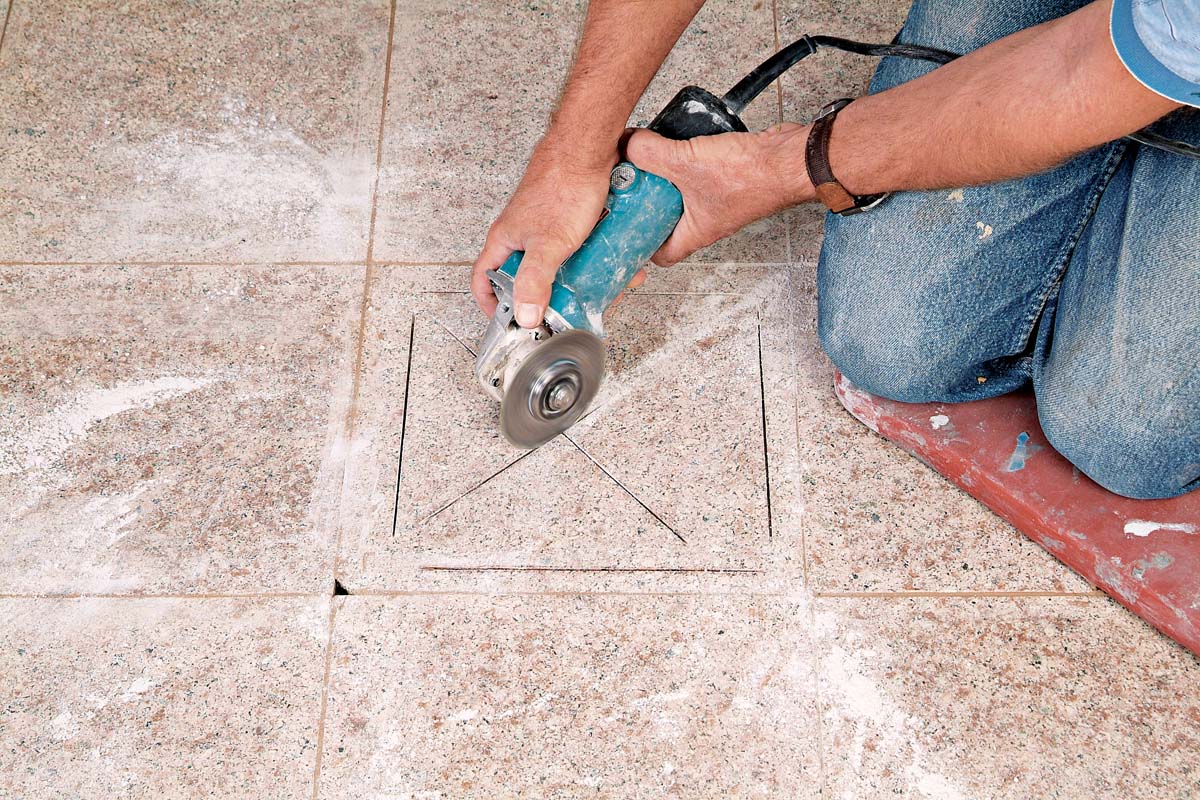 |
1. Use an angle grinder to cut an X before removing the rest of the tile. |
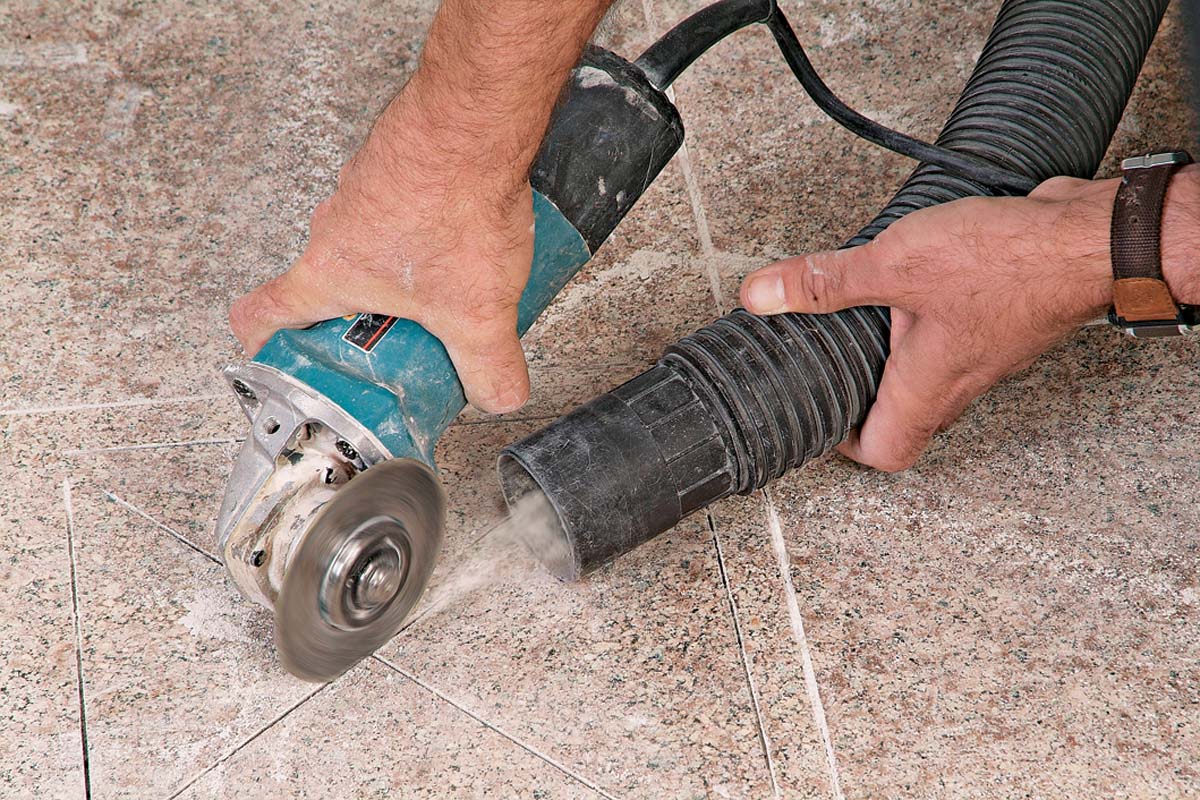 |
2. A vacuum held near the grinder will reduce the amount of airborne dust. |
| Warning
Grinding generates lots of fine dust that is dangerous to your health. Protect yourself by wearing safety glasses, ear protection, gloves, a respirator, and work clothes. |
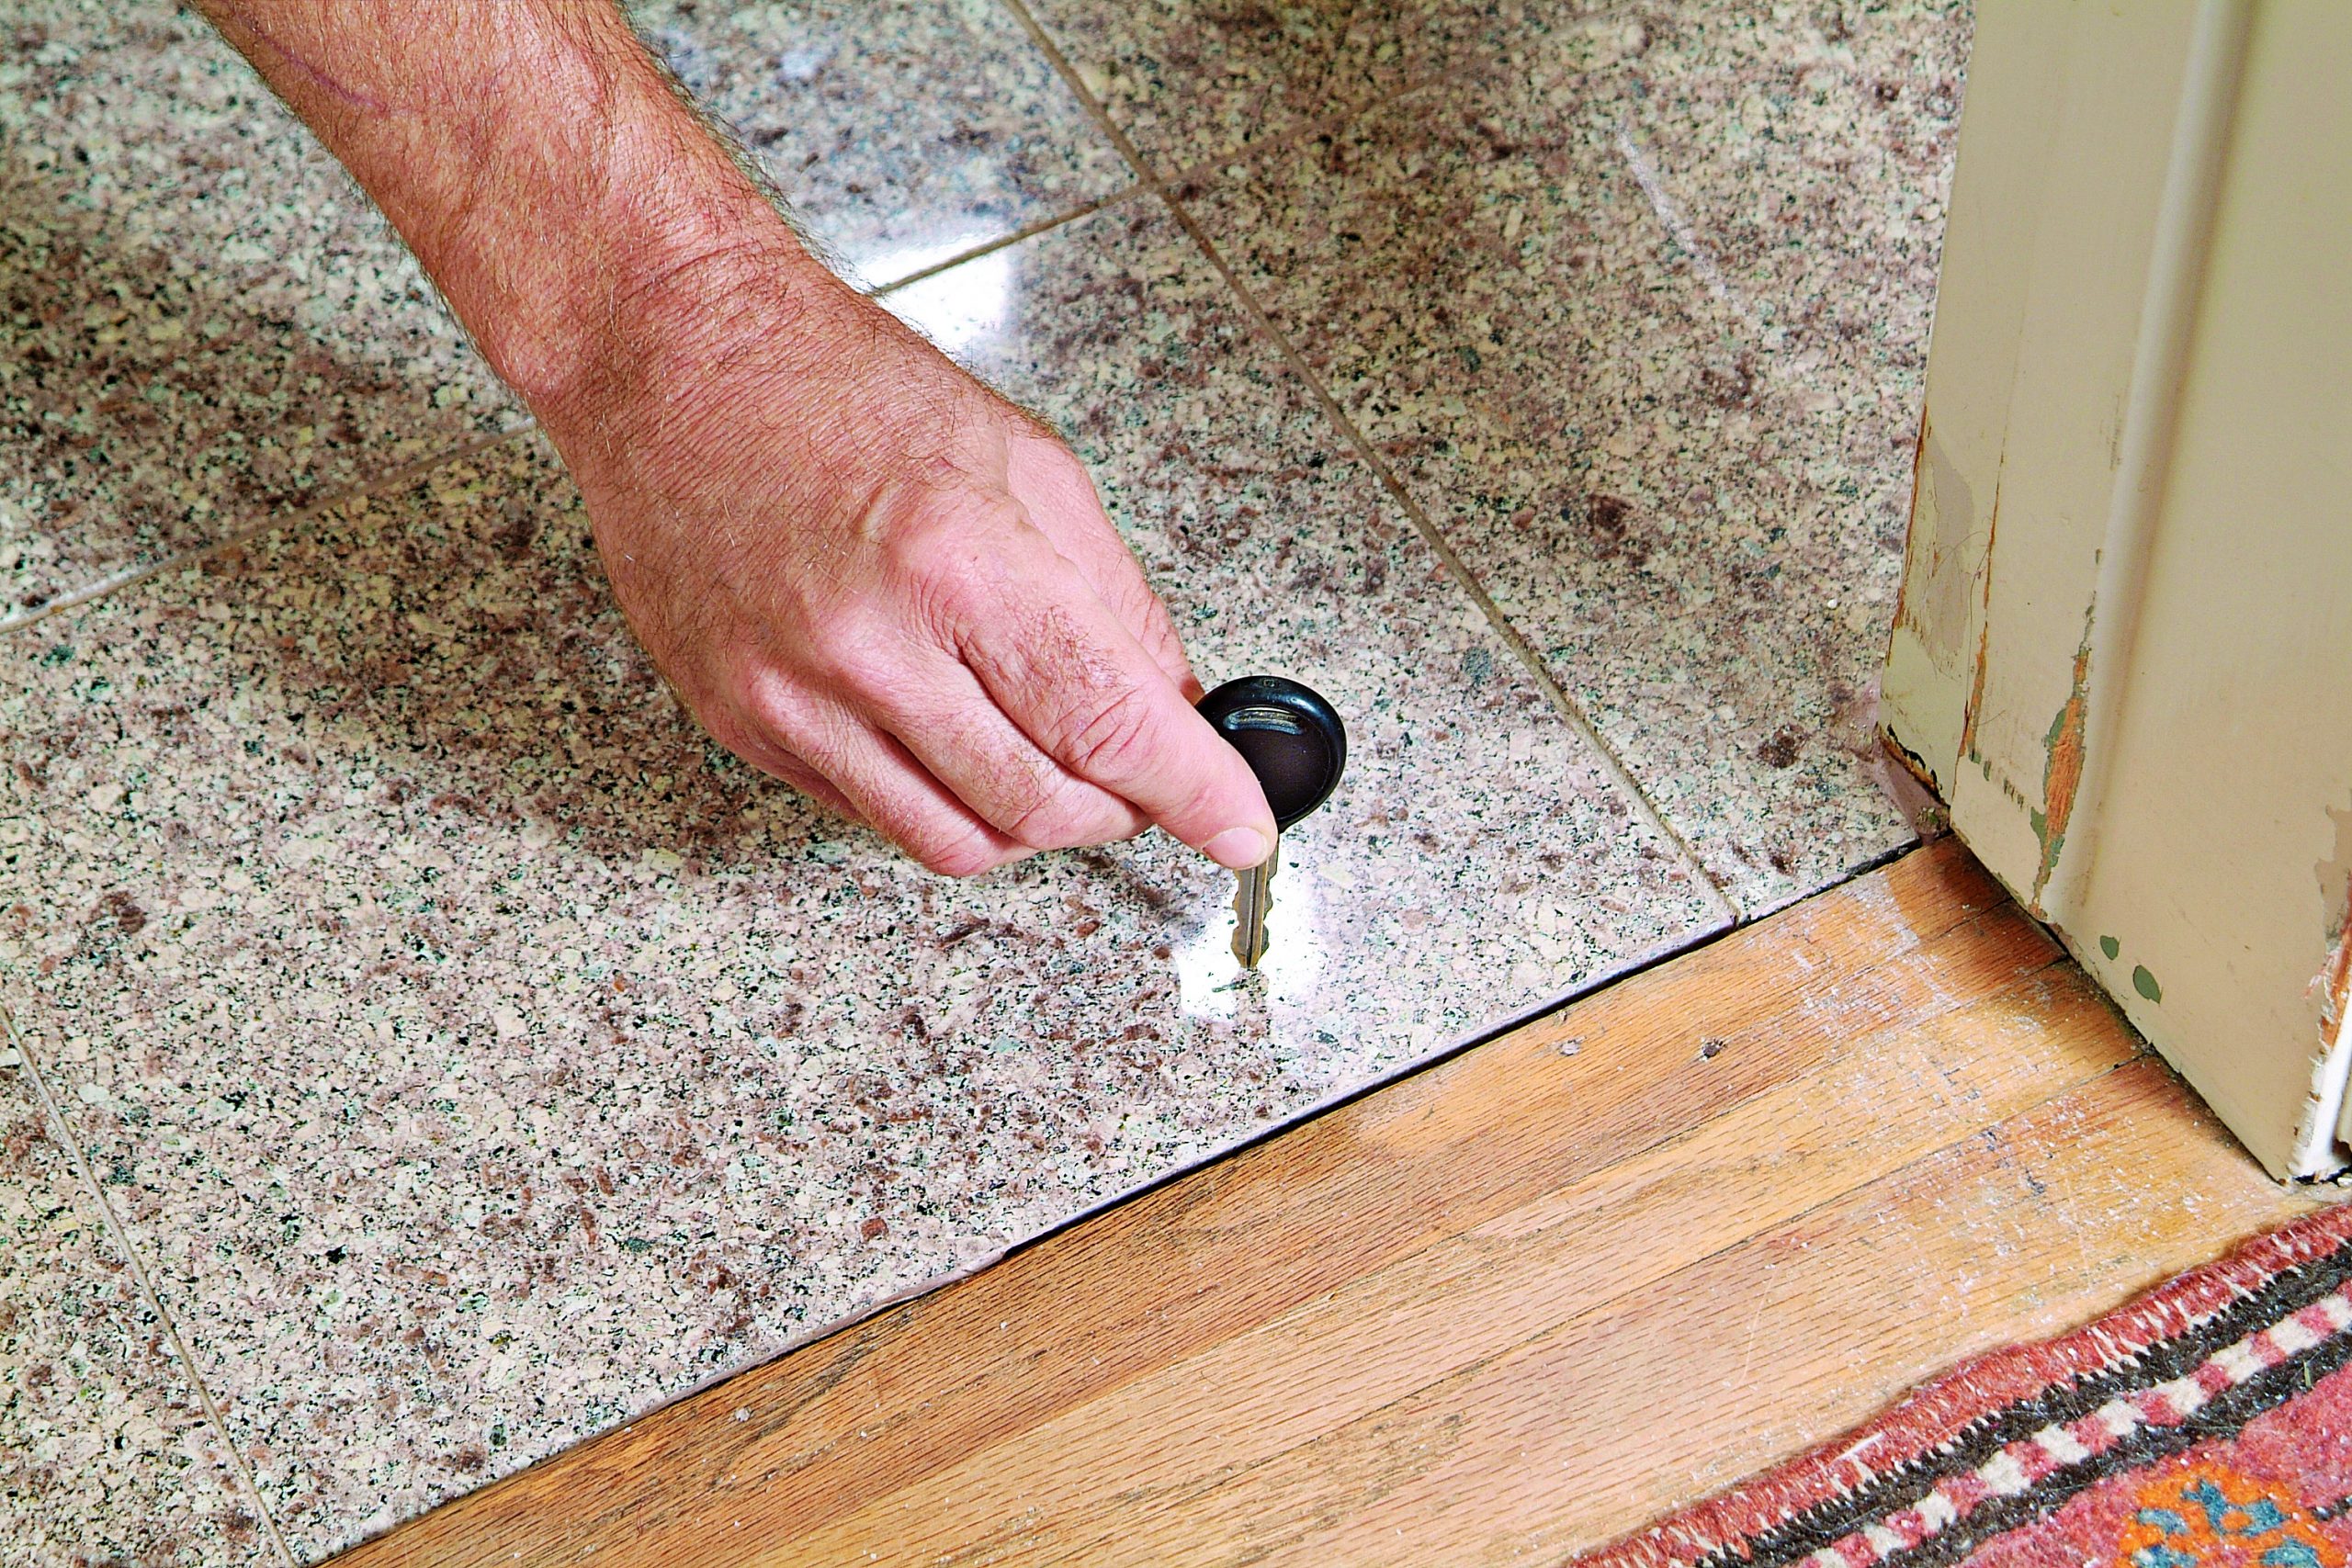
| The Tap Test
Large areas of missing or cracked grout in older tile installations often indicate that the tile is no longer properly bonded to the substrate, possibly due to poor workmanship or other problems. The easiest way to detect a tile-bonding problem is to perform the tap test. Take a coin or key and tap on and around the offending tile. The sound difference will be obvious: Well-bonded tiles produce a very solid sound. A hollow sound usually indicates either missing thinset or a loose tile. If you detect a small hollow area, perhaps around just the corner of a tile, and everything else seems solid, it usually means that the tile needed a bit more thinset when it was installed. If the tile isn’t cracked, leave it alone. If the tile seems solid but grout is loose, remove the loose grout and regrout the area. [add LINK to Repairing Grout”] If only one or two tiles sound hollow and the rest are solid, remove and replace just the bad tiles. Large hollow-sounding areas usually indicate a more serious job failure caused by either an improper substrate, too much movement in the substrate, or improper use of tile-bonding adhesive. This is a much greater problem that may be resolved only by complete removal of the tile work and installation of new tiles. If you’re in doubt, it’s best to contact a tile professional to evaluate the situation.
|
 Excerpted from Tiling Complete, 2nd Edition by Robin Nicholas and Michael Schweit.
Available in the Taunton Store and at Amazon.com.
