FHB Logo Facebook LinkedIn Email Pinterest Twitter X Instagram Tiktok YouTube Plus Icon Close Icon Navigation Search Icon Navigation Search Icon Arrow Down Icon Video Guide Icon Article Guide Icon Modal Close Icon Guide Search Icon Skip to content
Subscribe
Log In
  • How-To
  • Design
  • Tools & Materials
  • Restoration
  • Videos
  • Blogs
  • Forum
  • Magazine
  • Members
  • FHB House
  • Podcast
Log In

Fine Homebuilding Project Guides

Tiling

Guide Home
  • Selecting Tile
  • Tools & Techniques
  • Installation Materials
  • Preparation
  • Tiling Floors
  • Tiling Walls & Backsplashes
  • Tiling Showers
  • Grouting, Sealing & Caulking
  • Maintenance & Repair
How-To

Repairing Grout

For a long-lasting repair, remove as much of the old grout as possible in the damaged areas, then replace and reseal.

By Robin Nicholas, Michael Schweit

Grout that’s cracked, heavily discolored, or missing in small areas is unsightly, even if the surrounding tile is in perfect shape. It’s tempting to touch up these areas by simply adding a little new grout over the problem. But to perform a longer-lasting repair, you should remove as much of the old grout as possible in the affected areas. This is because new grout doesn’t stick well to old grout; it needs to adhere to the substrate that supports both the tile and the grout.

Replacing damaged grout

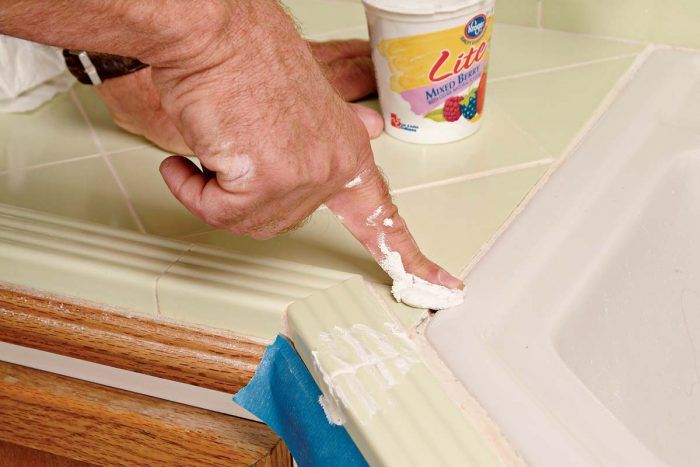
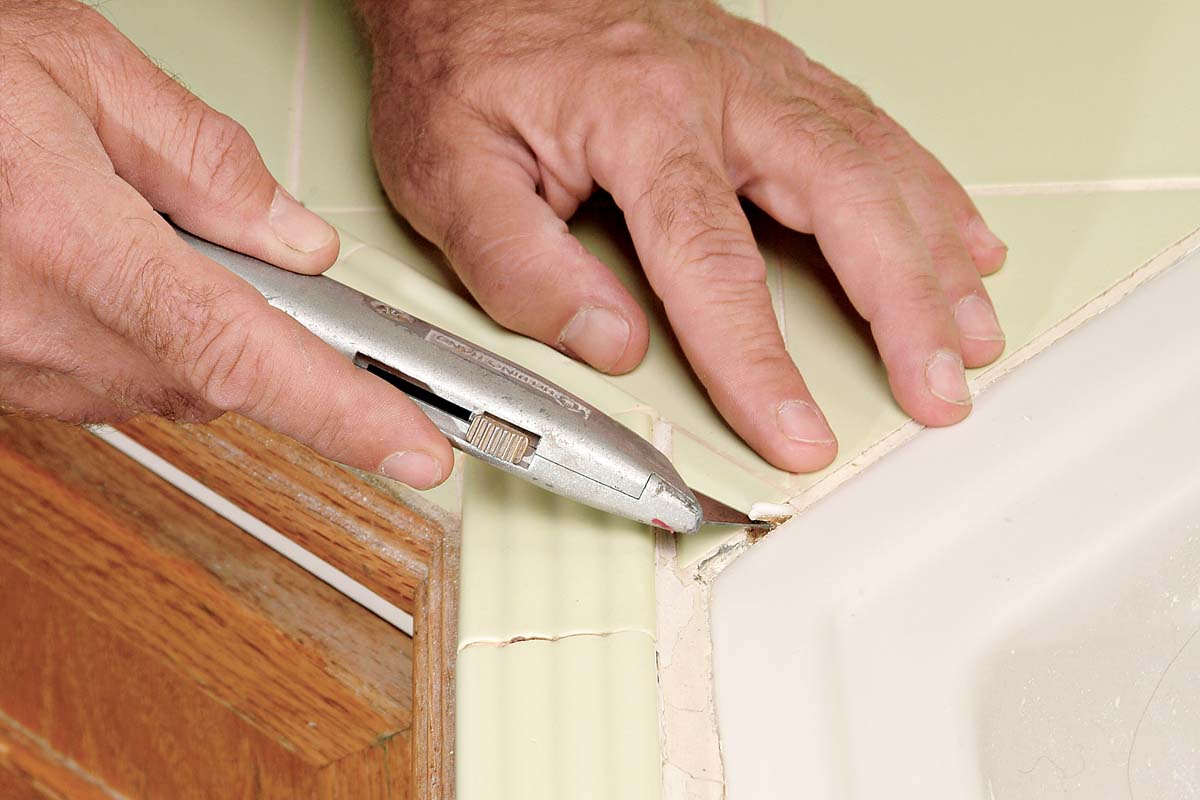
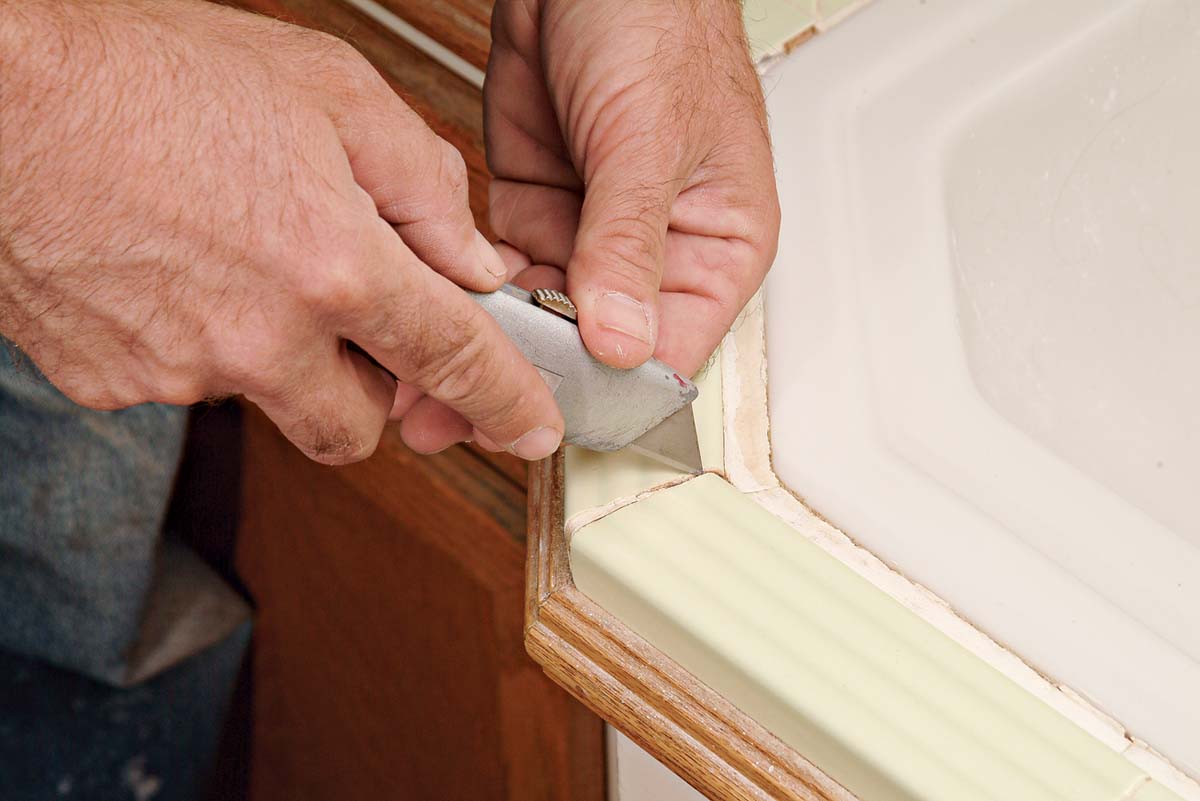
To repair small grout problems on a tiled area, such as this bathroom sink 1, start by lifting any of the old grout using a fresh blade in a utility knife 2. Remove only what comes out easily, as digging too hard might chip adjacent tiles. In joints where most of the grout is already missing, use a utility knife to carefully clean dirt and debris from the gap 3. Cut away any old caulk you find around the sink 4 and sweep the area clean to remove any remaining debris. Mix a small amount of new grout and let it slake.

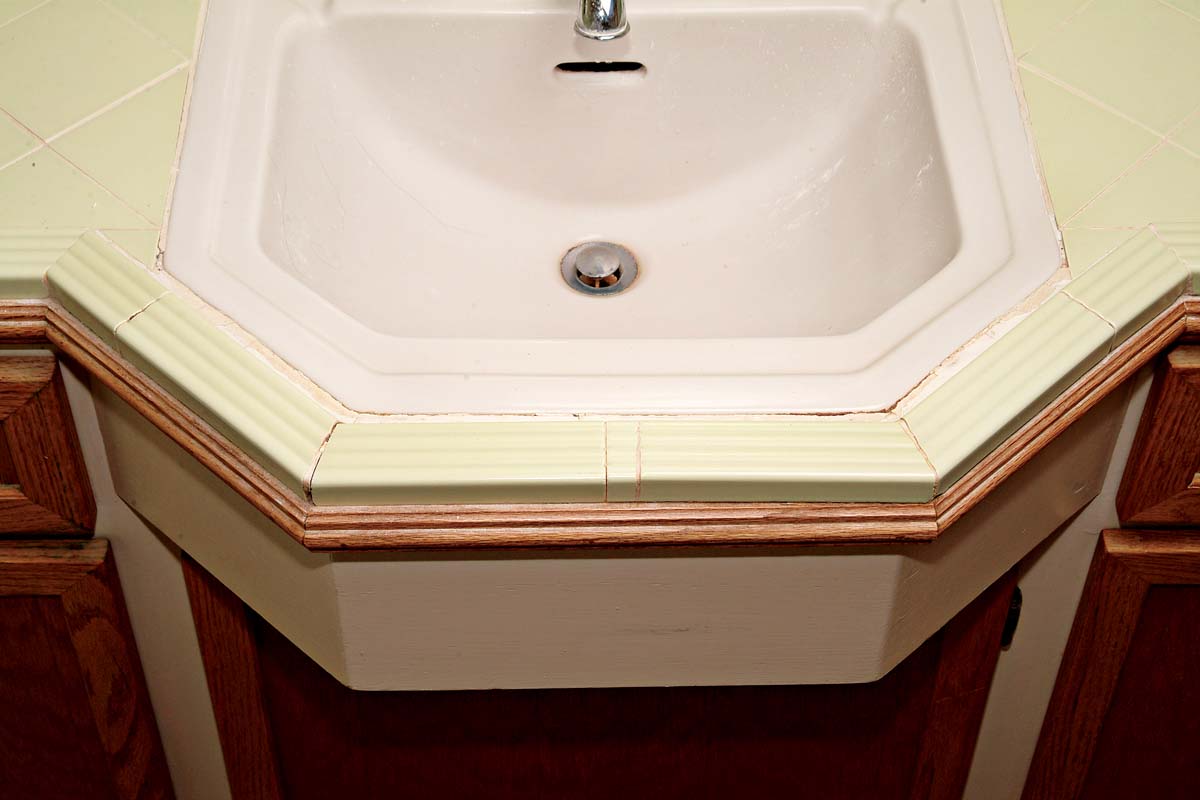
Push the grout into the cleaned-out joints with your fingers 5. Allow the grout to set up for 5 minutes or 10 minutes, then shape and wipe the repaired areas with a sponge, working carefully to blend the new grout in with the old wherever they meet 6. Let the newly grouted areas dry, then do the final polishing and cleaning on those areas. Now you’re ready to apply a new bead of caulk around the sink. In many cases, it’s better to apply new caulk over old grout than to take the risk of digging it out. After applying the caulk 7, smooth the bead with your finger 8. Although the new grout and caulk may not match exactly, you’ll end up with a tiled surface that’s free of cracks and gaps 9.

Small areas of missing grout can easily be repaired. 1.  Small areas of missing grout can easily be repaired.
Check for any loose grout and lift it out carefully. 2.  Check for any loose grout and lift it out carefully.
Use a knife to clean out debris in open joints 3.  Use a knife to clean out debris in open joints.
Pull and peel away any old caulk that comes out with ease. 
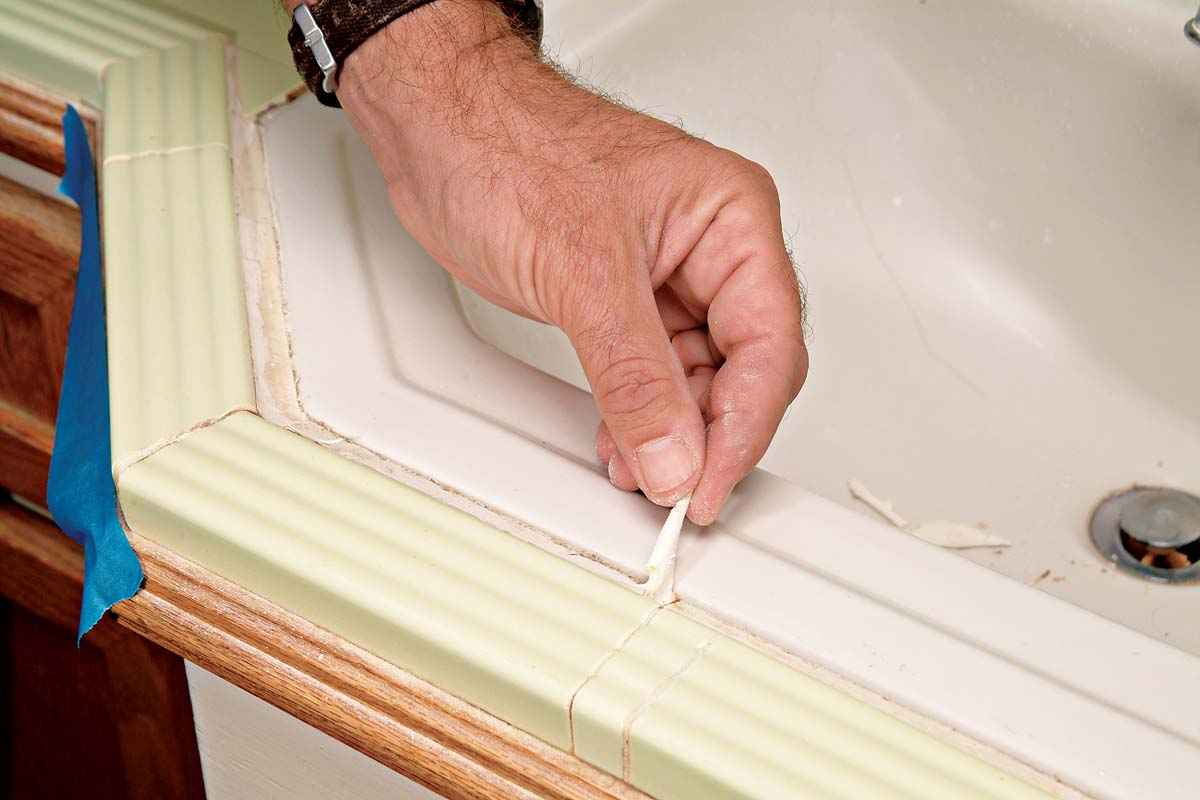
4.  Pull and peel away any old caulk that comes out with ease.
Spread the grout into the joint with a gloved or naked finger. 5.  Spread the grout into the joint with a gloved or naked finger.
Wipe the grout with a sponge, blending the new grout with the old. 
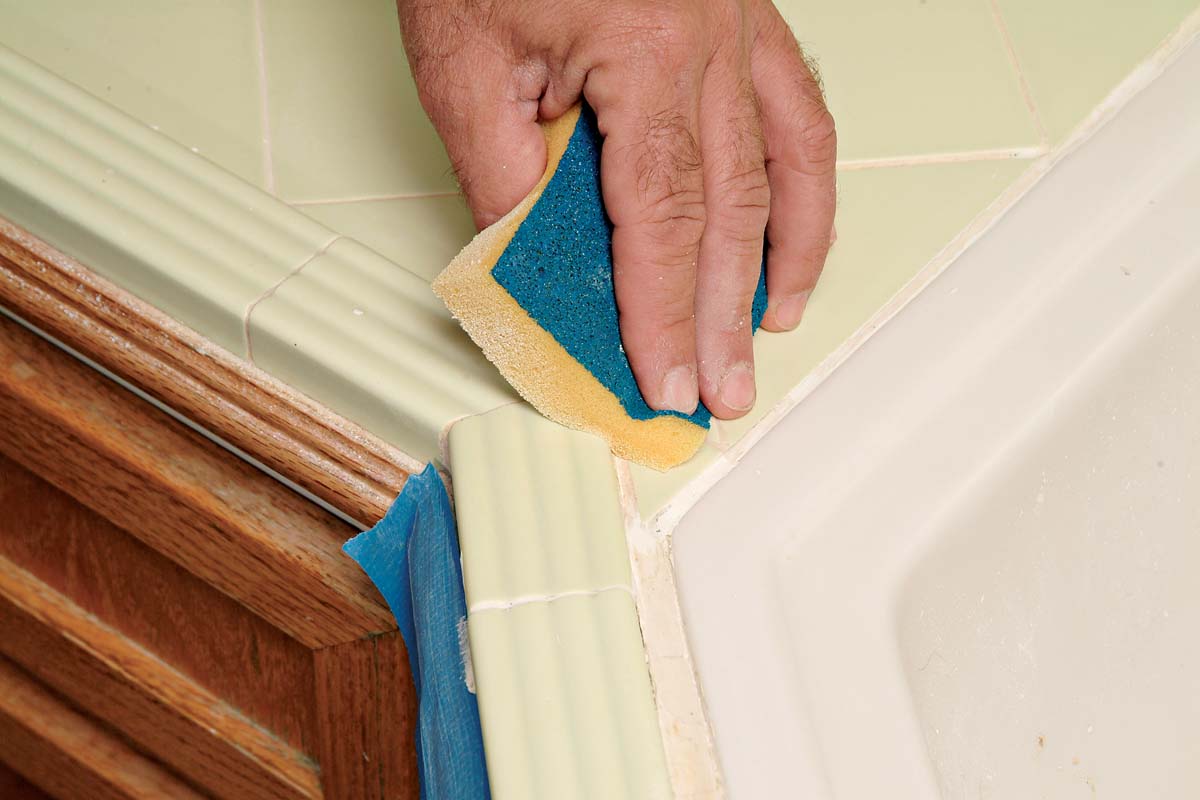
6.  Wipe the grout with a sponge, blending the new grout with the old.
Caulk any areas that typically experience movement, as between sink and tile. 7.  Caulk any areas that typically experience movement, as between sink and tile.
Use your finger to smooth caulk into the joint between the sink and edge tiles. 
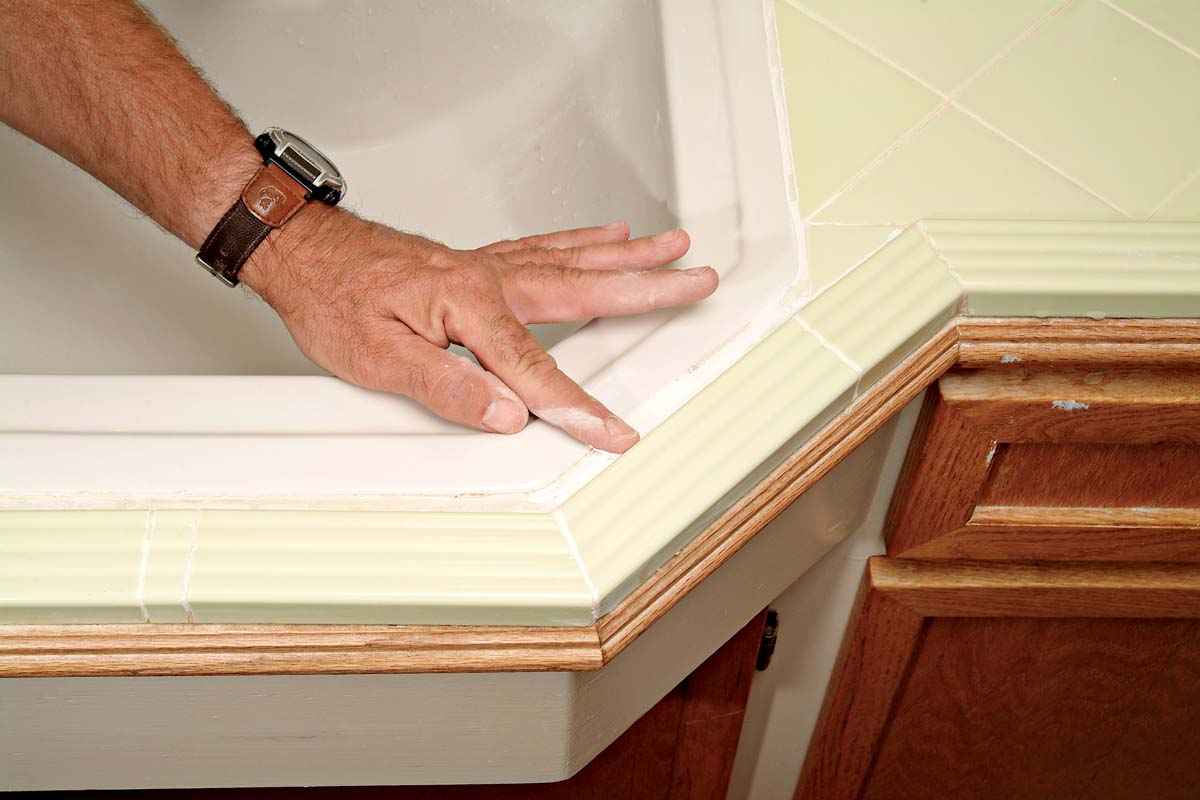
8.  Use your finger to smooth caulk into the joint between the sink and edge tiles.
New grout and caulk refresh a classic countertop. 
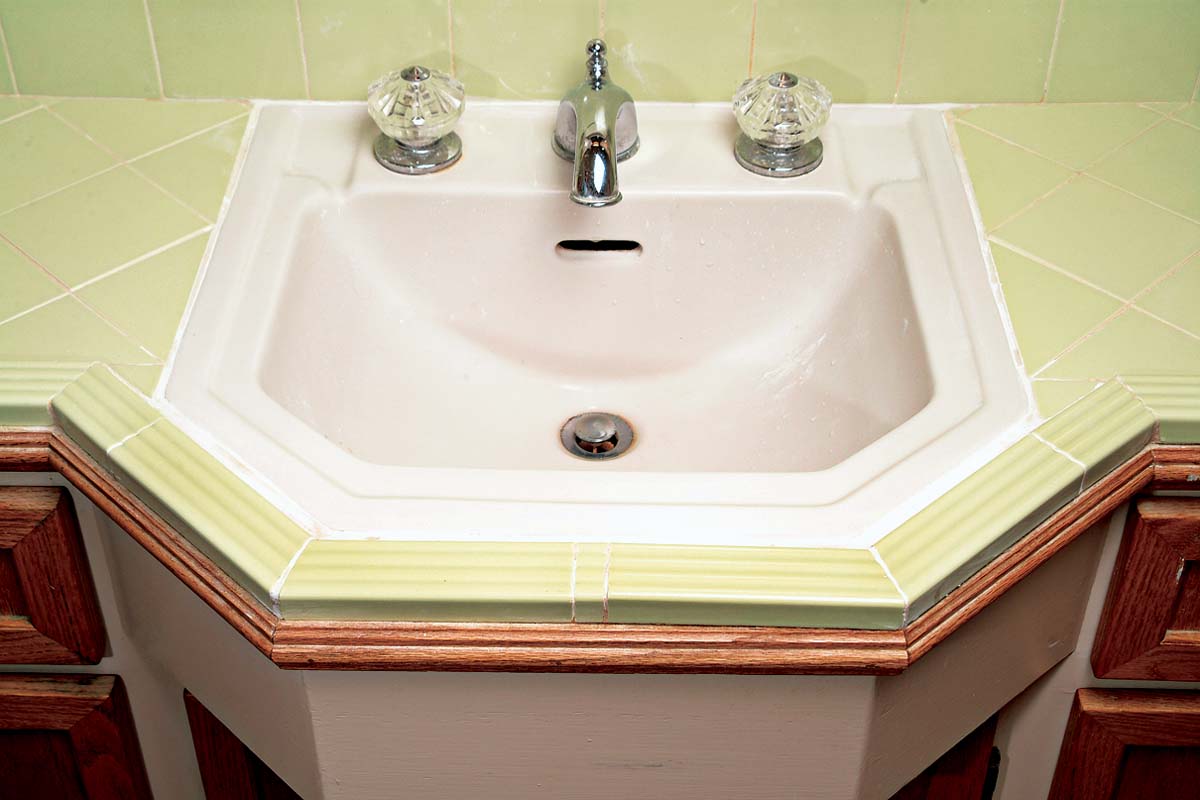
9.  New grout and caulk refresh a classic countertop.


Replacing Old Grout with Caulk

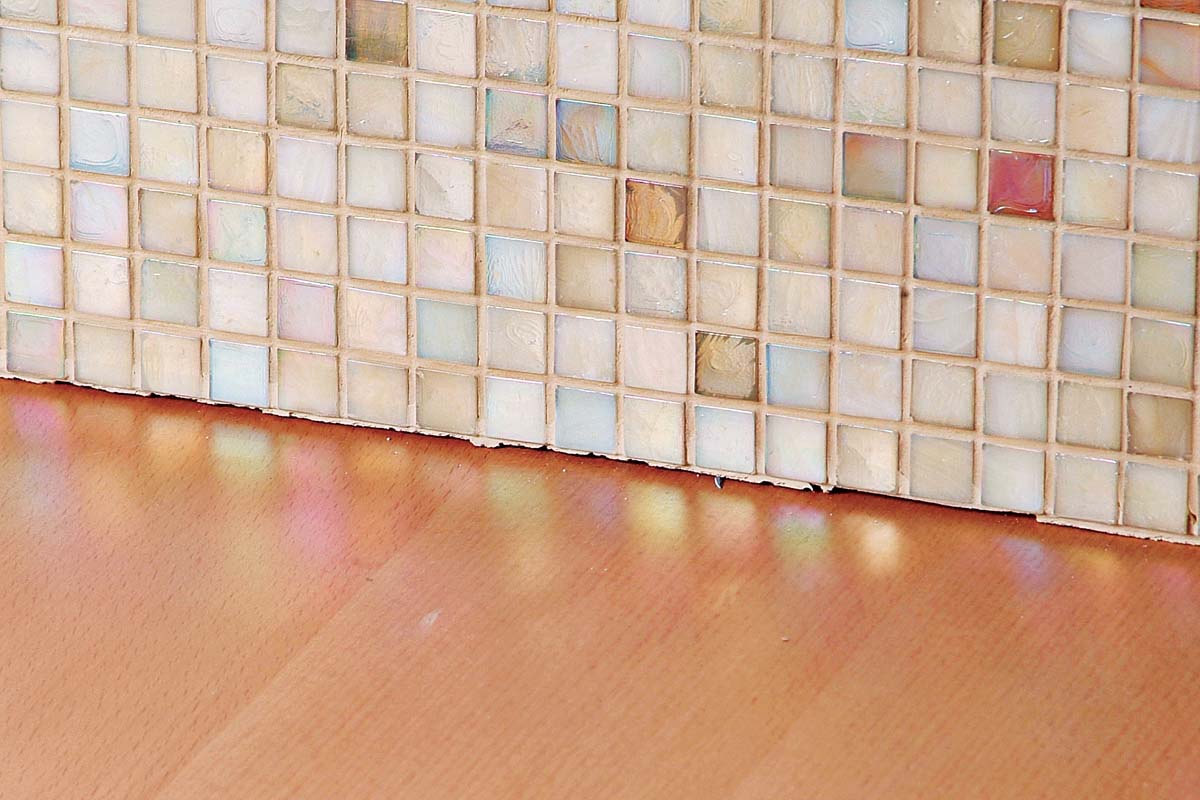
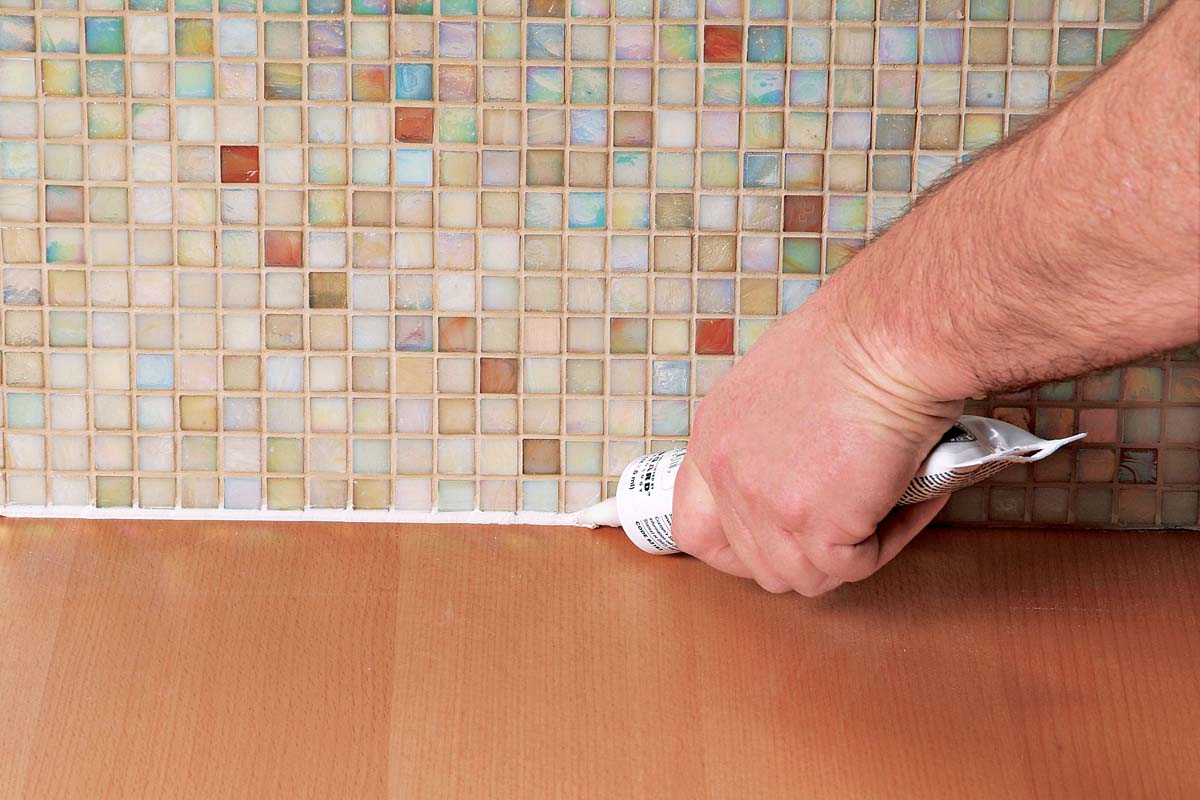
It’s not uncommon to find missing or cracked grout in areas like the junction between sink and tile, counters and backsplashes, edges between tiled walls, and where a tiled surface meets another material (a wood floor) 1. Grout problems in these areas are due to naturally occurring movement between surfaces, which will always cause the grout to crack. You can repair these areas by simply replacing the grout with flexible caulk. Carefully remove as much of the damaged grout as possible.

Clean out the joint, then run a bead of caulk 2. This will stay flexible and eliminate any future cracking.

A tile splash should always be caulked at the wood and tile juncture. 1.  A tile splash should always be caulked at the wood and tile juncture.
A small bead of caulk, color matched to the grout, will keep that joint flexible. 2.  A small bead of caulk, color matched to the grout, will keep that joint flexible.


Resealing grout

If you’ve sealed your grout with a penetrating sealer, it can last up to 20 years, depending on usage. In a kitchen or other high-use area, you might need a stronger defense against stains and dirt. For this purpose, there are products on the market that reseal as you clean. These are great time-savers and provide additional protection.

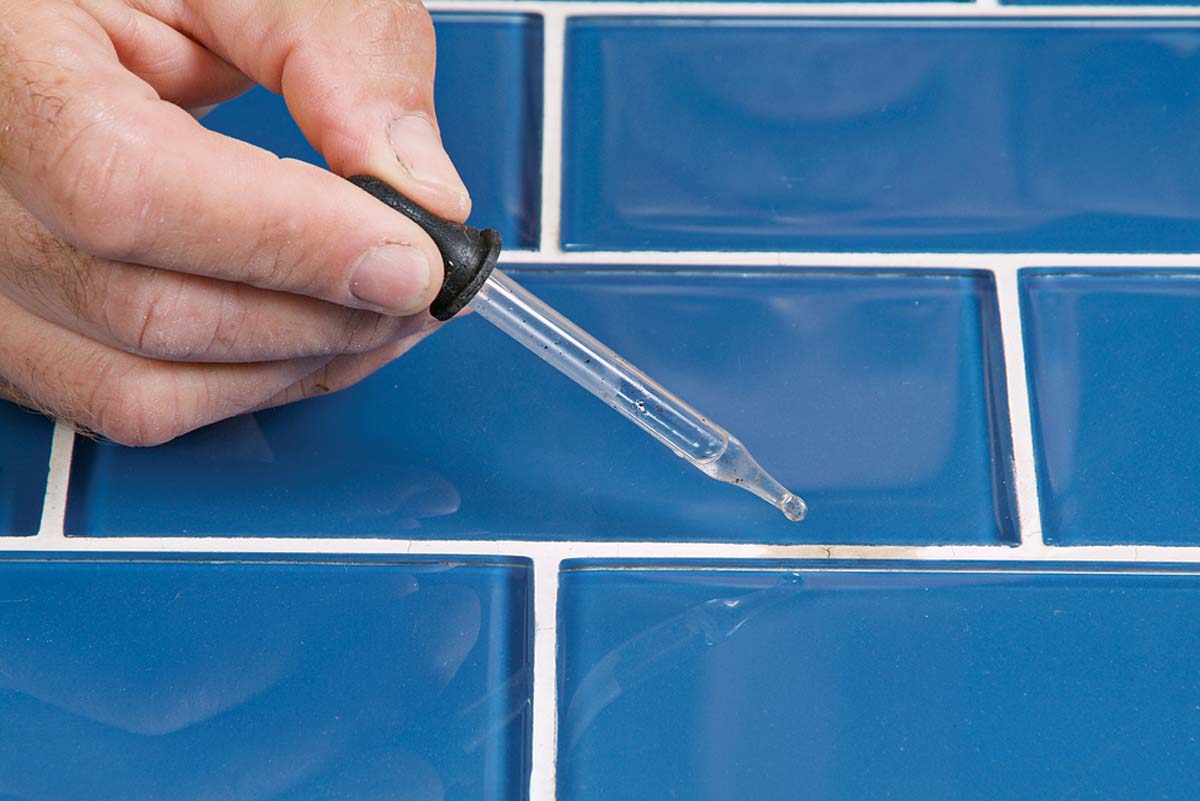
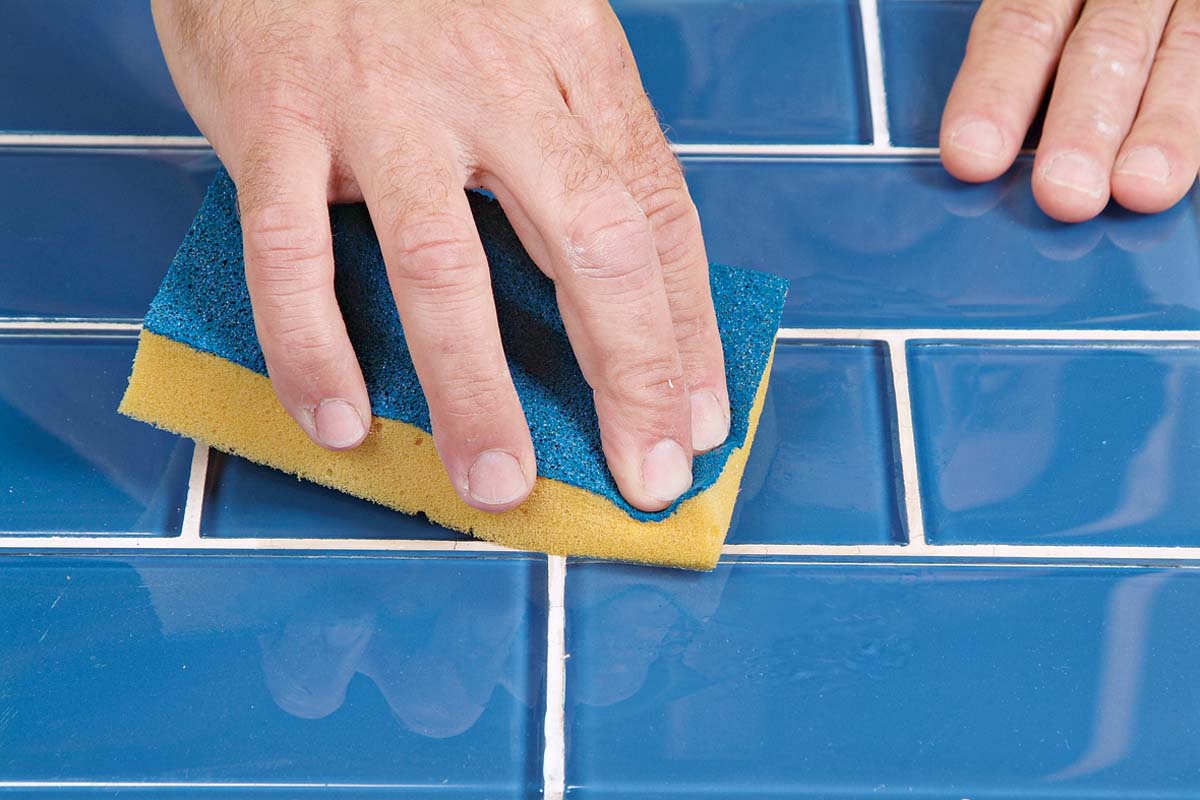
You can easily check the integrity of the sealer on any job by putting a few drops of water on the grout 1. If it beads up right away, your grout is still adequately sealed. If the water is absorbed quickly, it’s time to reseal the grout. Before you reapply sealer to the old grout, you’ll want to clean the entire area thoroughly and let it dry 2. Apply the sealer just as you would to a new tile installation 3.

Drops of water will bead up on the grout if it’s still sealed. 1.  Drops of water will bead up on the grout if it’s still sealed.
Clean area thoroughly before resealing. 2.  Clean area thoroughly before resealing.
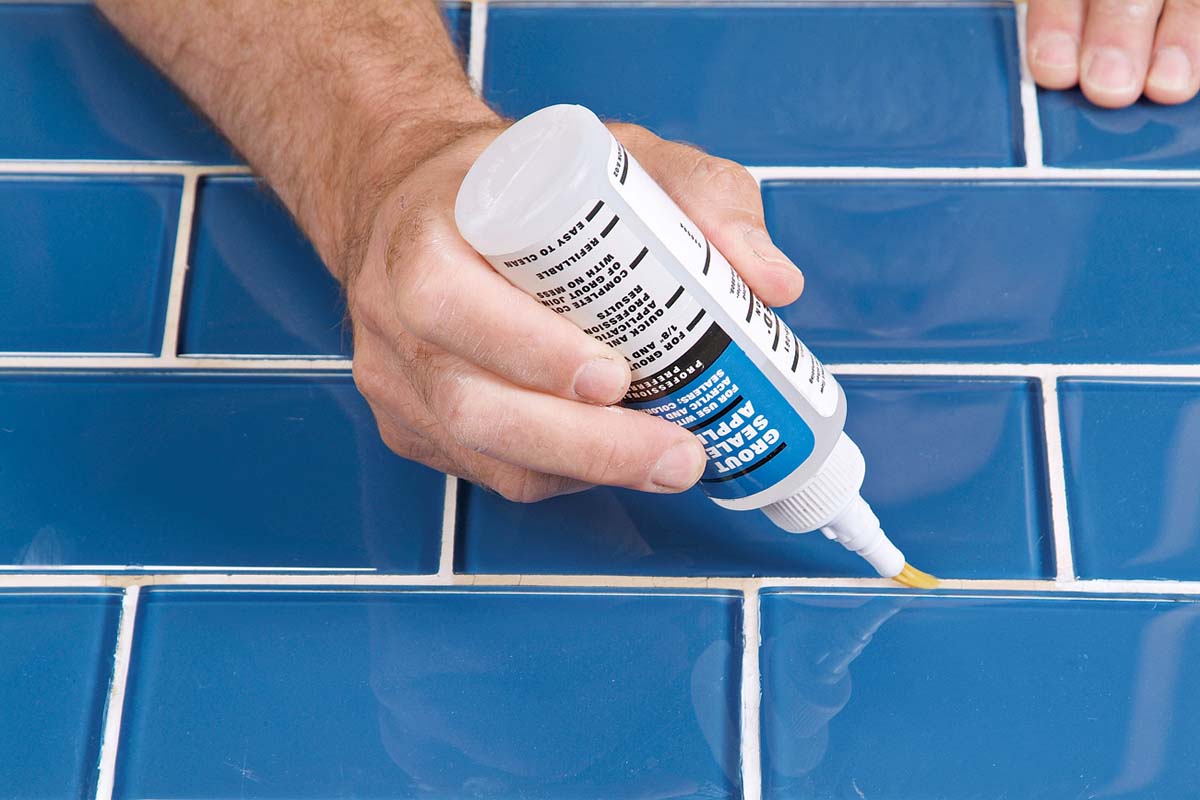
Reapply sealer. 3.  Reapply sealer.

Tiling Complete, 2nd EditionExcerpted from Tiling Complete, 2nd Edition by Robin Nicholas and Michael Schweit.

Available in the Taunton Store and at Amazon.com.

Sign up for eletters today and get the latest how-to from Fine Homebuilding, plus special offers.

Signing you up...

This site is protected by reCAPTCHA and the Google Privacy Policy and Terms of Service apply.
See all newsletters
See all newsletters
Previous: Replacing Tile around a Shower Valve Next: Regrouting with Epoxy

Guide

Tiling

Chapter

Maintenance & Repair

Log in or create an account to post a comment.

Sign up Log in

Become a member and get full access to FineHomebuilding.com

Tiling

Tiling

Trusted, comprehensive guidance from the pros for a great-looking tile job in any room of the house

View Project Guide

View All Project Guides »

Become a member and get unlimited site access, including the Tiling Project Guide.

Start Free Trial

Selecting Tile
  • The Basics
  • Tile Options
Tools & Techniques
  • Job-Preparation Tools
  • Cutting Tiles
  • Setting & Grouting Tools
Installation Materials
  • Membranes & Substrates
  • Adhesives & Mortars
  • Grout
  • Sealers & Caulk
  • Spacers, Hardware & Trim
Preparation
  • The Prep Job
  • Repairs & Surface Prep
  • Installing Backerboard
Tiling Floors
  • Layout & Installation
  • Setting Specialty Tiles
Tiling Walls & Backsplashes
  • Preparation
  • Backsplashes
  • Walls
Tiling Showers
  • Tile Shower Basics
  • Waterproofing
  • Shower Pans
  • Shower Drains
  • Shower Niches
  • Video Series: Tile a Shower
  • Video Series: Tile a Barrier-Free Bathroom
Grouting, Sealing & Caulking
  • Grouting
  • Caulking
  • Sealing
Maintenance & Repair
  • Maintenance
  • Tile Repair
  • Grout Repair

Fine Home Building

Newsletter Sign-up

  • Fine Homebuilding

    Home building tips, offers, and expert advice in your inbox.

  • Green Building Advisor

    Building science and energy efficiency advice, plus special offers, in your inbox.

  • Old House Journal

    Repair, renovation, and restoration tips, plus special offers, in your inbox.

Signing you up...

This site is protected by reCAPTCHA and the Google Privacy Policy and Terms of Service apply.
See all newsletters

Follow

  • Fine Homebuilding

    Dig into cutting-edge approaches and decades of proven solutions with total access to our experts and tradespeople.

    Start Free Trial Now
    • Facebook
    • Instagram
    • X
    • LinkedIn
  • GBA Prime

    Get instant access to the latest developments in green building, research, and reports from the field.

    Start Free Trial Now
    • Facebook
    • YouTube
  • Old House Journal

    Learn how to restore, repair, update, and decorate your home.

    Subscribe Now
    • Facebook
    • Instagram
    • X

Membership & Magazine

  • Online Archive
  • Start Free Trial
  • Magazine Subscription
  • Magazine Renewal
  • Gift a Subscription
  • Customer Support
  • Privacy Preferences
  • About
  • Contact
  • Advertise
  • Careers
  • Terms of Use
  • Site Map
  • Do not sell or share my information
  • Privacy Policy
  • Accessibility
  • California Privacy Rights

© 2025 Active Interest Media. All rights reserved.

Fine Homebuilding receives a commission for items purchased through links on this site, including Amazon Associates and other affiliate advertising programs.

X
X
This is a dialog window which overlays the main content of the page. The modal window is a 'site map' of the most critical areas of the site. Pressing the Escape (ESC) button will close the modal and bring you back to where you were on the page.

Main Menu

  • How-To
  • Design
  • Tools & Materials
  • Video
  • Blogs
  • Forum
  • Project Guides
  • Reader Projects
  • Magazine
  • Members
  • FHB House

Podcasts

  • FHB Podcast
  • ProTalk

Webinars

  • Upcoming and On-Demand

Podcasts

  • FHB Podcast
  • ProTalk

Webinars

  • Upcoming and On-Demand

Popular Topics

  • Kitchens
  • Business
  • Bedrooms
  • Roofs
  • Architecture and Design
  • Green Building
  • Decks
  • Framing
  • Safety
  • Remodeling
  • Bathrooms
  • Windows
  • Tilework
  • Ceilings
  • HVAC

Magazine

  • Current Issue
  • Past Issues
  • Magazine Index
  • Subscribe
  • Online Archive
  • Author Guidelines

All Access

  • Member Home
  • Start Free Trial
  • Gift Membership

Online Learning

  • Courses
  • Project Guides
  • Reader Projects
  • Podcast

More

  • FHB Ambassadors
  • FHB House
  • Customer Support

Account

  • Log In
  • Join

Newsletter

Get home building tips, offers, and expert advice in your inbox

Signing you up...

This site is protected by reCAPTCHA and the Google Privacy Policy and Terms of Service apply.
See all newsletters
See all newsletters

Follow

  • X
  • YouTube
  • instagram
  • facebook
  • pinterest
  • Tiktok

Join All Access

Become a member and get instant access to thousands of videos, how-tos, tool reviews, and design features.

Start Your Free Trial

Subscribe

FHB Magazine

Start your subscription today and save up to 70%

Subscribe

We hope you’ve enjoyed your free articles. To keep reading, become a member today.

Get complete site access to expert advice, how-to videos, Code Check, and more, plus the print magazine.

Start your FREE trial

Already a member? Log in