
Restore a Wood Window Sash
When repairs are in order, a steam box, an easel, and two-part epoxy are your best friends.
There’s a debate among preservationists and energy nerds, traditionalist and modernist, about what to do with old single-pane, divided-lite, weighted window sashes. They have lots of character and history, but also a big energy penalty compared to replacement options.
I won’t try to convince you to restore your old windows. But if you do need to repair a window sash, or a whole house worth of window sashes, I can help you get it done right and with as little frustration as possible. I learned a lot of lessons while tackling the restoration of a historic municipal building that is to become a museum for the city of Yankton, S.D., my hometown—a project for which I repaired, reglazed, and restored hundreds of wood sashes and their window frames. The work prepared me well for the job you see here, which was restoring the windows in my own 1920s bungalow.
Repairs take time
Restoring a 100-year-old window sash so it will last another 100 years means removing the old glazing putty and glass, stripping the frame back to bare wood to make any necessary repairs, priming, reinstalling the glass and glazing, and finally, applying a couple coats of paint. Though no one part of this process takes too long, there is a lot of downtime.
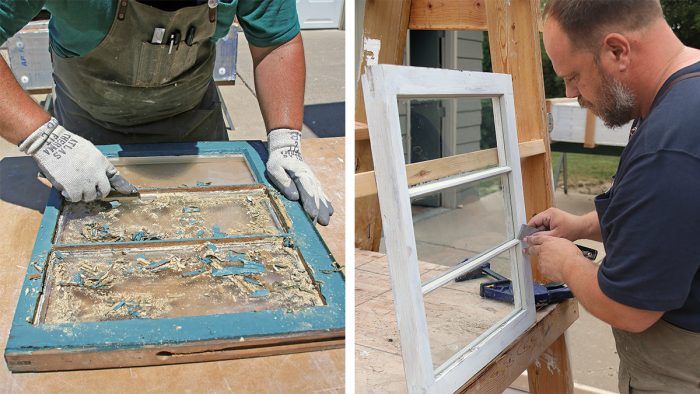
For example, I use a steam box to soften the glazing putty, which allows me to easily remove the glass without breaking it (though I’ve learned to expect to break about 20% of the glass on a bigger job). The steam will also soften the paint, but don’t be tempted to try to scrape it off along with the glazing. The steam will not only soften the glazing and paint, but the wood itself, making it more susceptible to damage from the scraping tools.
Even if I can manage to remove the softened paint without damaging the wood, the tools will leave the surface fuzzy and in need of a lot of sanding. Too much sanding changes the dimensions of the sash, which can result in a sloppy fit when it’s reinstalled in the frame. Rather than risk damaging the wood frame or the window not working right, I wait 24 hours for the wood to dry before scraping.
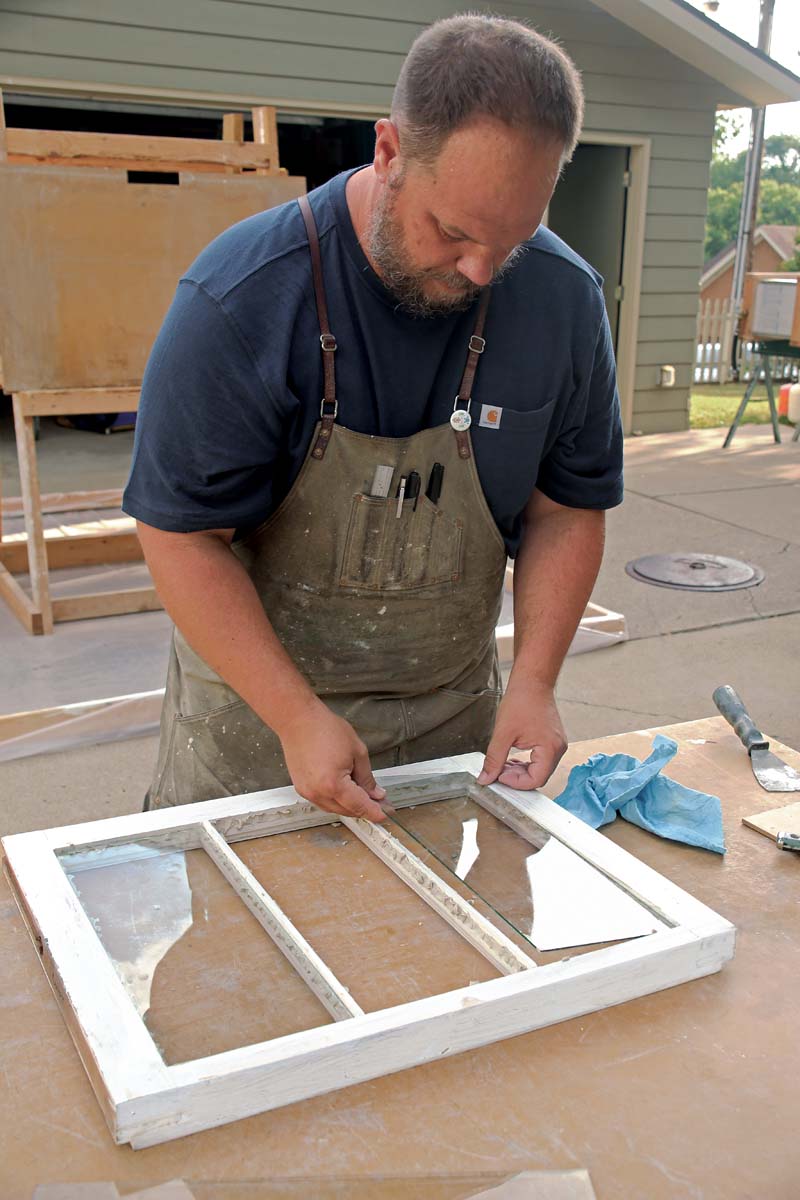
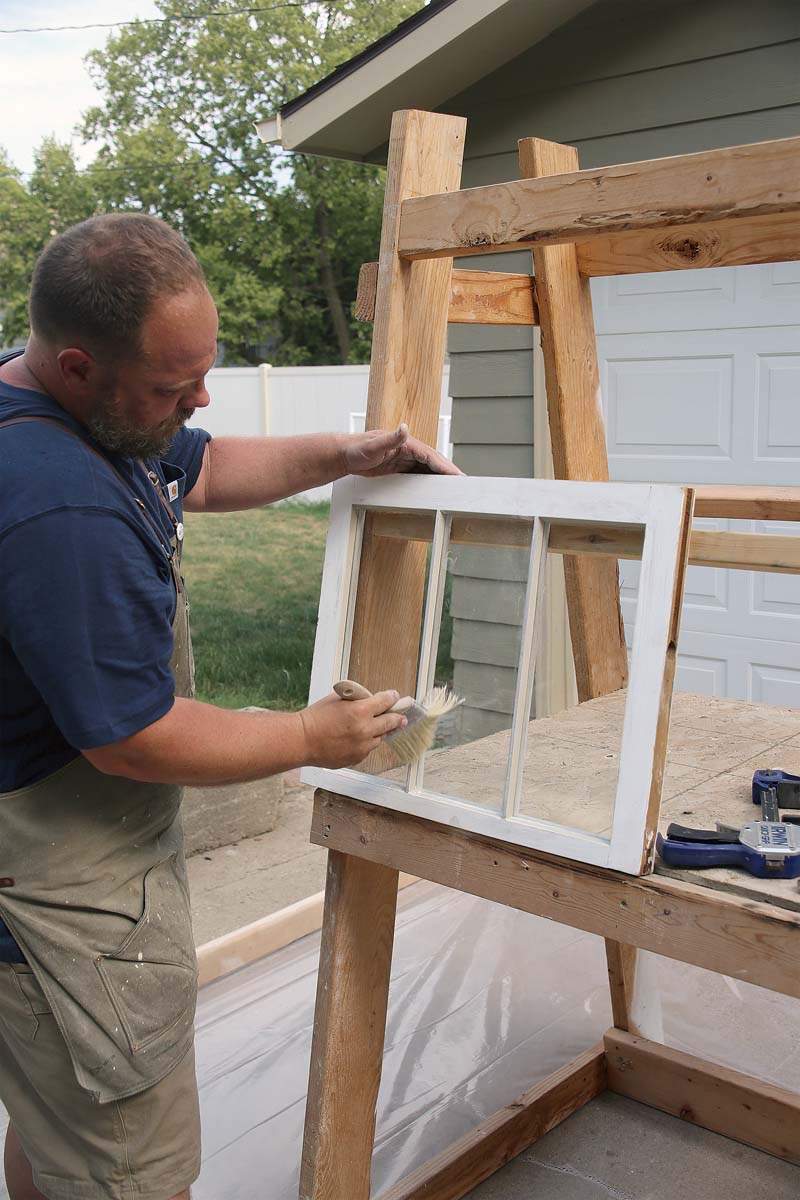
The steam box isn’t the only tool that makes this tedious job much more tolerable. I also use a shopmade easel to hold the sash upright while I scrape paint and apply glazing putty. One clamp holds the sash in any number of helpful orientations and the easel’s shelf and hook offer a handy home for putty, chalk, scrapers, sanders, and any other tools and materials that I want to have nearby.
It takes about 24 hours for any epoxy repairs to be ready for sanding and two weeks for the glazing putty to cure enough to be painted. This means that I’ve had to find a way to close up the window openings for a considerable length of time. I found a pretty slick and secure method that uses a couple strips of 7/16-in. OSB fit into the parting-bead groove and a larger piece to fill the opening. A few drywall screws lock everything into place. The beauty of this method is that no screws are driven into the window frame.
Lead is likely
If you are working on a house like mine, with single-pane wood windows—or, according to the Environmental Protection Agency (EPA), any house built before 1978—there’s a good chance that the window sashes will have been finished with lead paint at some point. Following the EPAs Renovation, Repair, and Painting program (RRP) to the letter is quite involved and also necessary if you are working on a client’s home. But you don’t have to assume that there is lead paint present. You can test the windows, as I did.
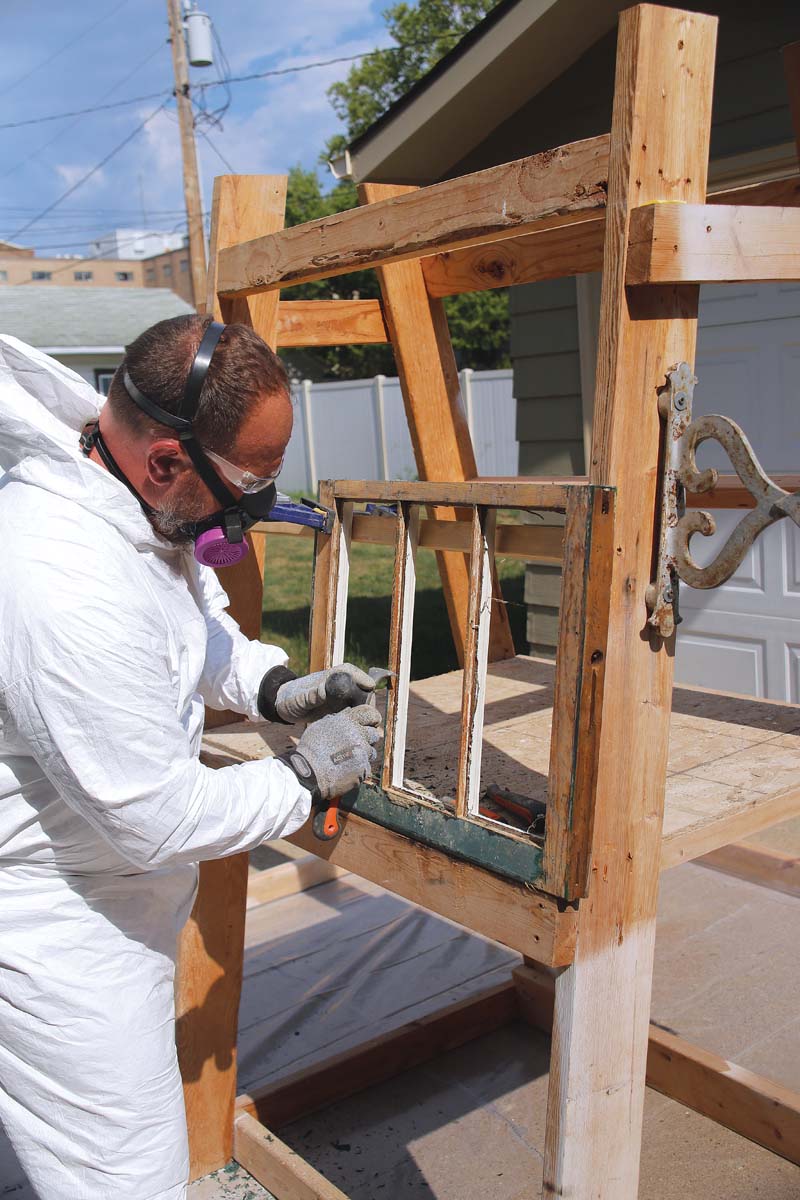
I found that my window sashes were finished with lead paint outside, but not inside. Because I am doing the work for myself, I was not required to follow the RRP rules. Since I am tackling a few sashes at a time and can work slowly and methodically, I took some precautions, but not enough to satisfy the EPA. For example, I did not set up a perimeter around the area when I was removing the window sashes. I did close off the door to the room and took care to vacuum with a shop-vac fitted with a HEPA filter as soon as the sashes were out. And I set up a wide perimeter of plastic sheeting under my easel while scraping. I wore a Tyvek suit, which never left the work area, as well as gloves and a respirator, and I used a spray bottle to mist the sashes as I scraped. I’m not suggesting that this is best practice. It was an amount of protection that I felt comfortable with at my own home. If I had been working at a client’s house, I would have followed the RRP rules.
While most of the products that I use to do this work are not harmful, I do recommend painting the sashes with an oil-based primer before glazing. This step should be done safely—either outside or in an area with excellent ventilation, while wearing proper respirator.
Not all old wood windows are in good enough shape to be restored. Sometimes replacement is the best option. But, if you decide yours are worth saving, it’s a job you should only do if you’re going to do it right.
Take Care When Removing The Sash
Old weighted-sash wood windows were built to be easily disassembled and repaired. Knowing how these windows were built before you start is helpful, but don’t assume parts are universal or even interchangeable from one window to the next. Label all the parts so you know where they go to make it easier to reinstall the sash later.
|
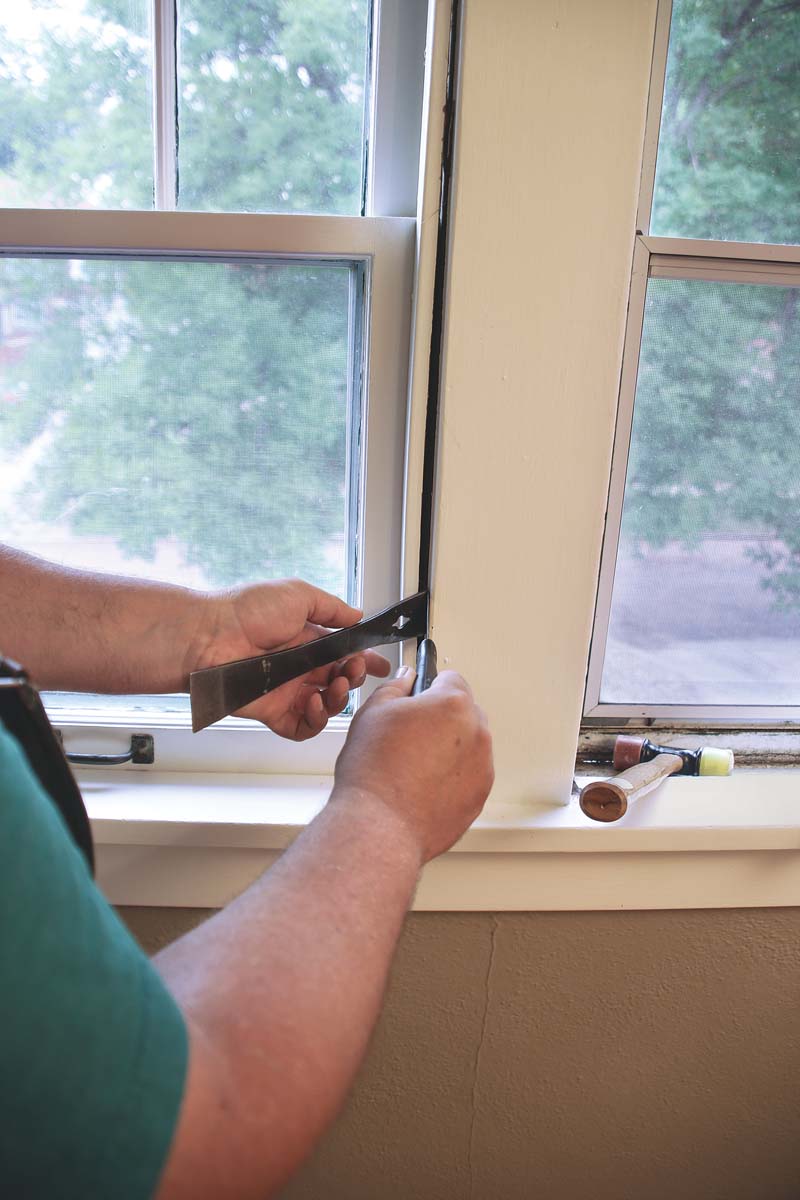
1.Dent Prevention Cut any paint or caulk between the interior stop and window frame with a utility knife. Then, pry the stop free using a putty knife to protect the frame. If there is a nail near the top miter, cut it with an oscillating multitool before trying to pull out the stop. |
2.Remove And Inspect The Cord The sash cord is easy enough to remove, but it’s worth inspecting its condition and, if necessary, replacing it with new sash cord (not rope, which will degrade in sunlight). |
 |
 |
|
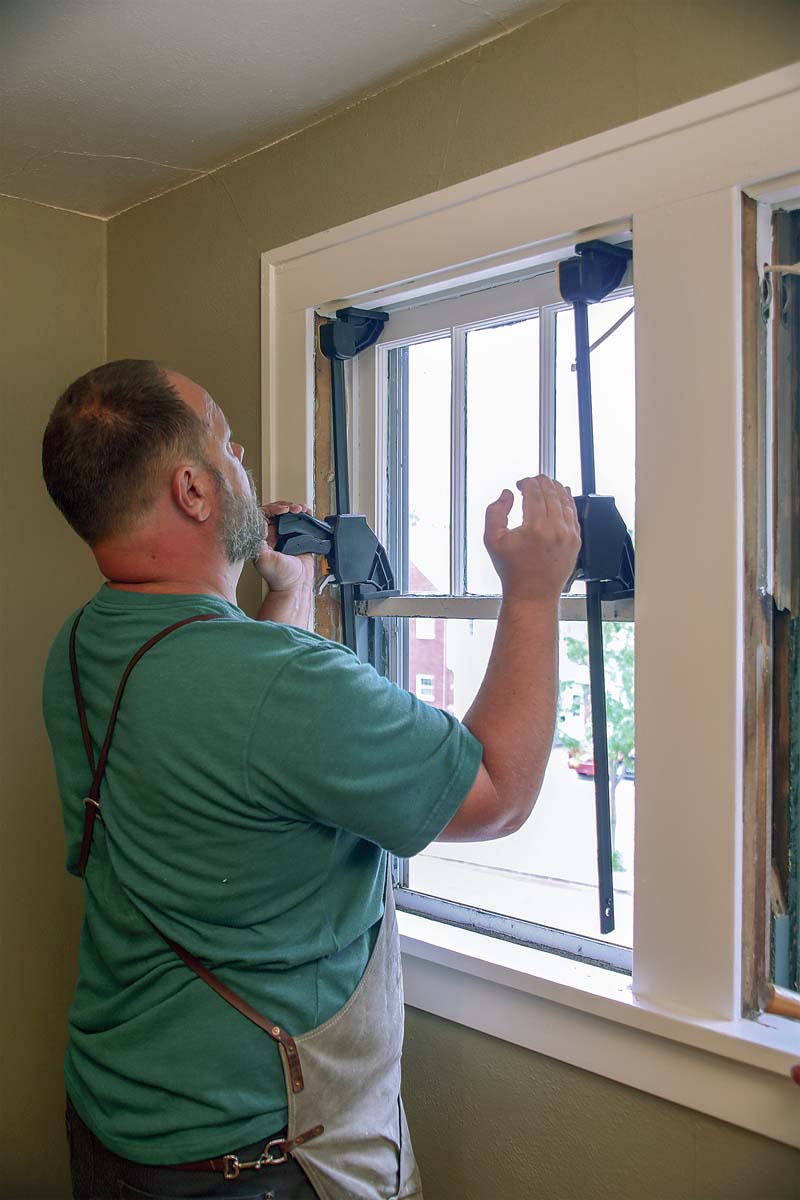
3.Upper Sashes Are Often Stuck Though upper sashes are meant to be mobile, they’re often painted shut over the years. Use a pair of bar clamps, reversed to spread apart, to ease the sash free. Place the clamps wide, at the edges of the meeting rail. Otherwise, you may just bend and possibly damage the rail and the pinned bridle joints used to assemble these sashes. |
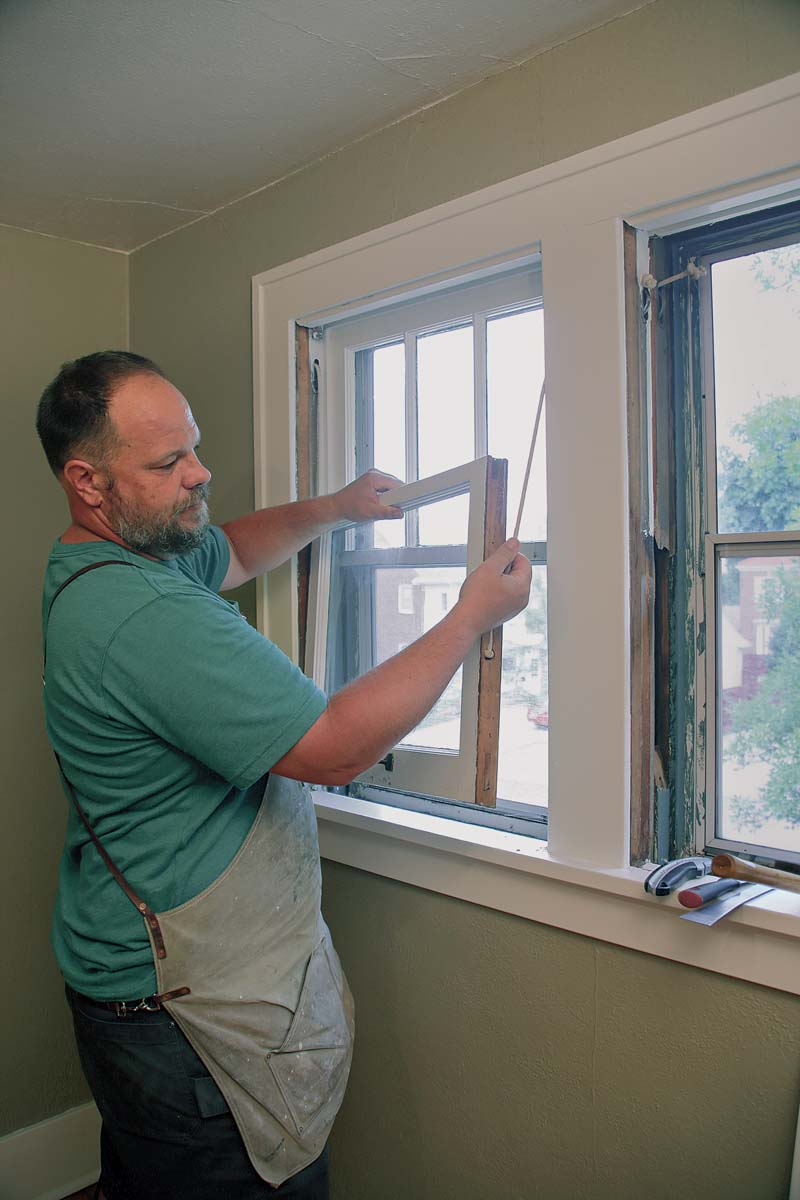
4.The Parting Bead Is Tricky The shape of the upper sash’s meeting rail makes it impossible to remove the parting bead by pulling it to the side. Instead, you have to lower the upper sash all the way. Then, starting at the top, use a pair of sheet-metal pliers to pull the parting bead from the groove. Once most of the parting bead is out of the groove, pull the top end inward so it clears the window frame, and then pull up, tapping the pliers with a mallet if necessary. |
 |
 |
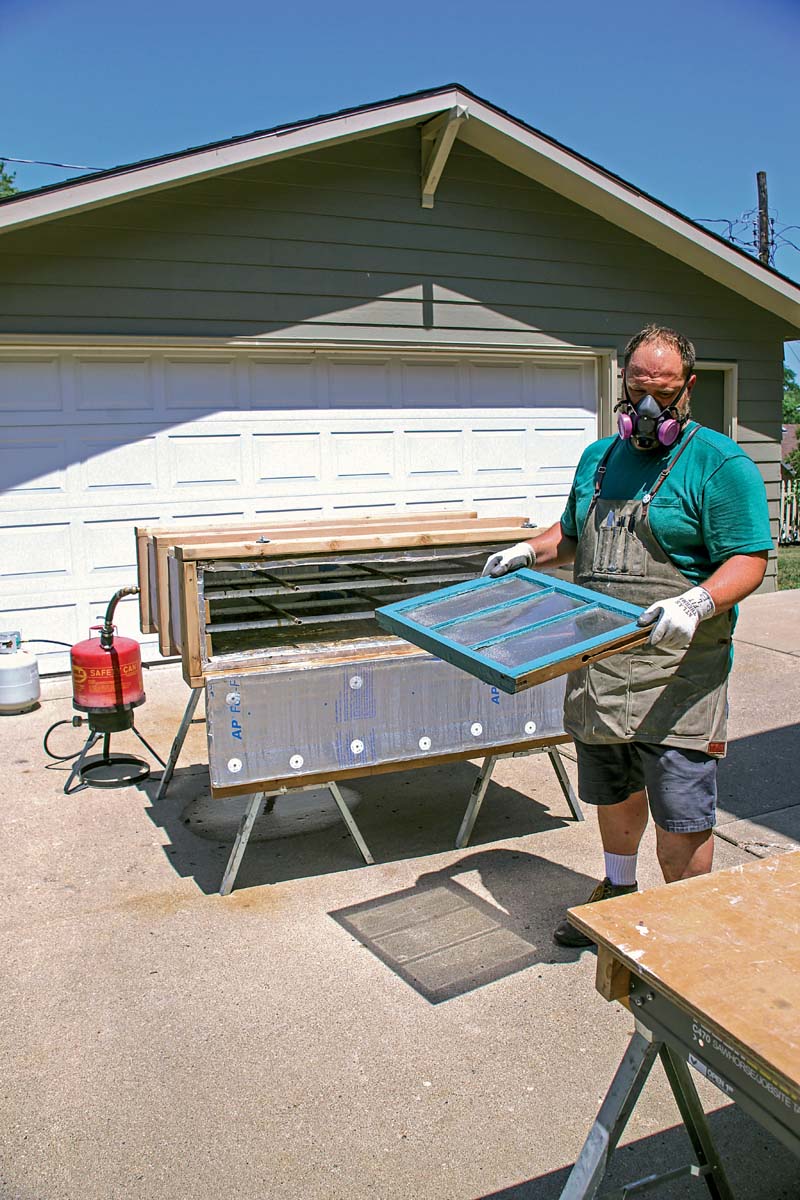
Steam The Sash To Remove The Glass
Use a steam box to soften the old glazing putty. To avoid thermal shock, which can break the glass, either put the sash in the steam box before firing it up, or leave the door open for a few minutes before inserting the sash. Put the sash in with the outside of the window facing up so the glass doesn’t fall out and break when the glazing putty softens usually in about 45 minutes to an hour.
|
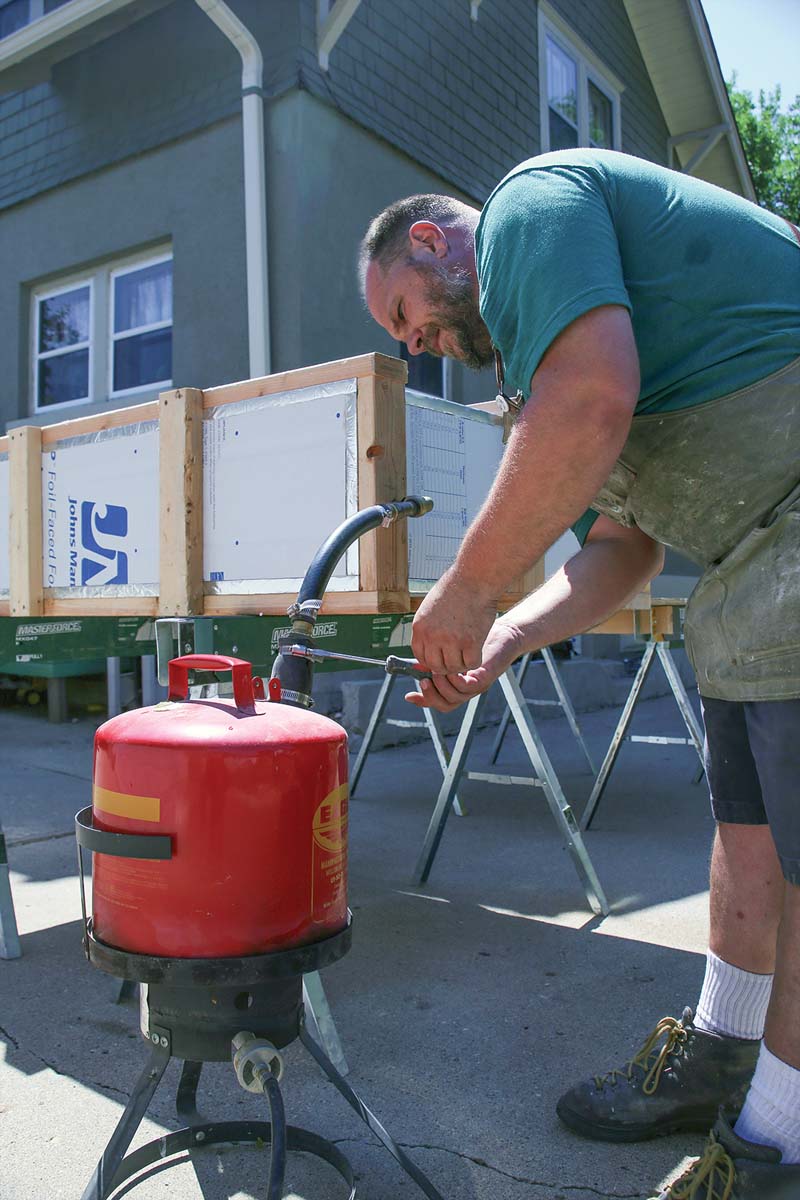
1.Make A Simple Steam Box A steam box is a fairly straightforward and very helpful tool for this job. The box, based on a design by my friend Dave Bowers, creates steam by heating water in a metal gas can (that has never held gasoline!) set on a propane-fired turkey fryer. Steam enters the box through a common rubber hose and is distributed evenly inside through copper pipe drilled through with holes. The box itself is foil-faced rigid foam seams caulked with fire-rated silicone with a wood frame for durability. You can make the steam box the right size for your project and create shelves inside with copper pipe or electrical conduit. |
 |
|
2.Be Ready To Go Stand back when first opening the door and let the steam clear. Wear gloves with thermal protection (like these Therma-Fit gloves from Atlas) and quickly move the sash to a flat work surface. |
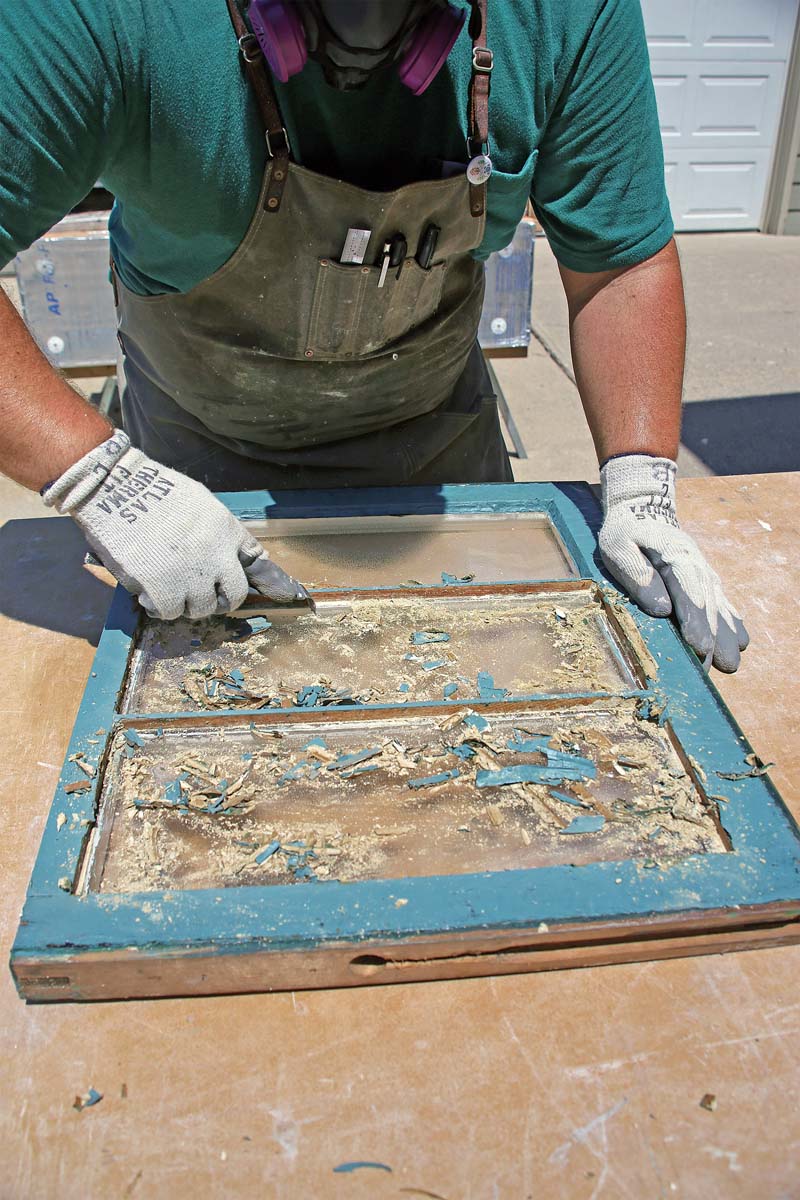
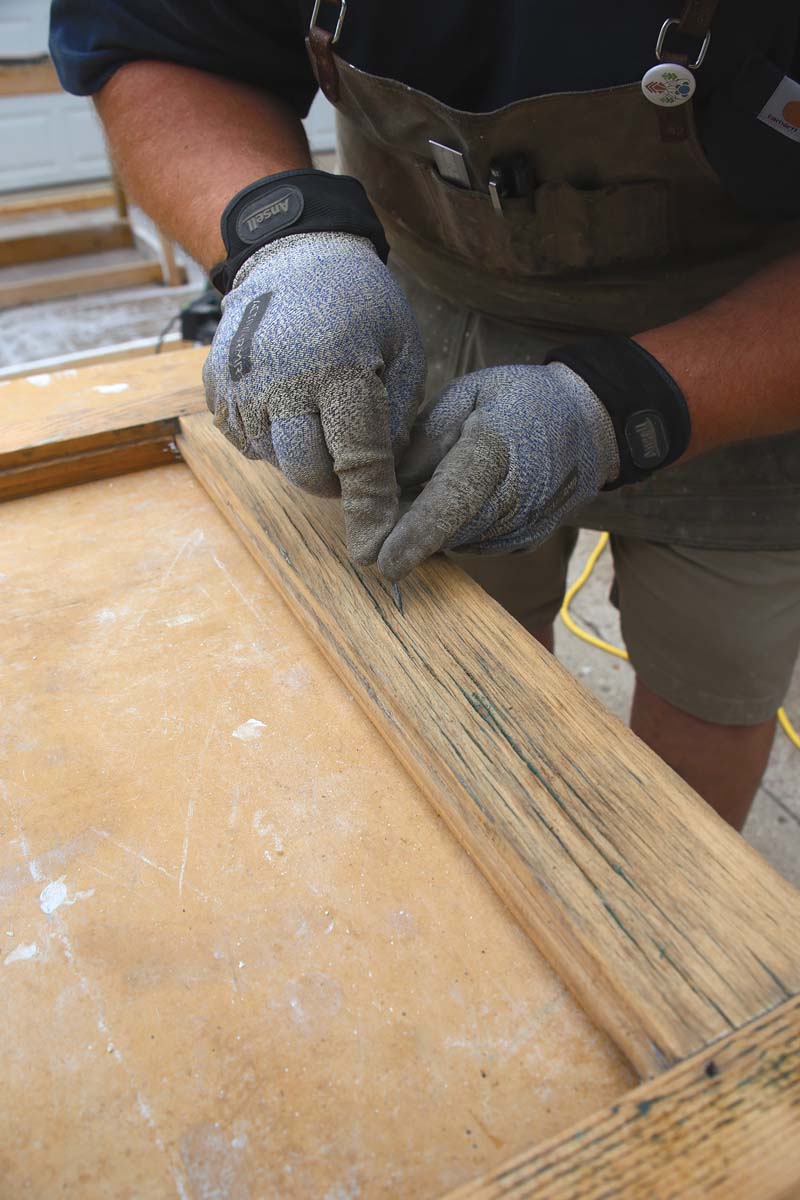
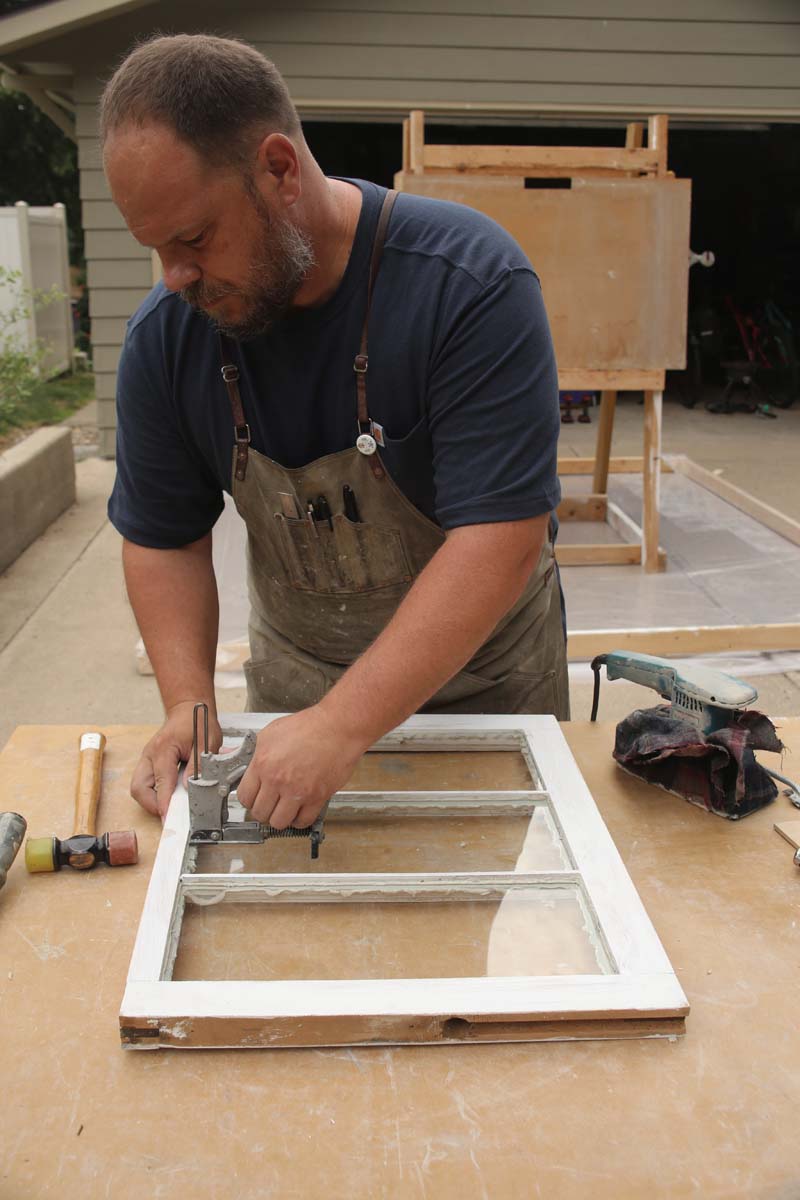
3.Free The Glass Use a putty knife to scrape away the old glazing. Before attempting to remove the glass, make sure all the glazing points are out of the sash. If the putty knife didn’t get them out, use a screwdriver or pliers to pry or pull them. Finally, lift the glass from underneath and carefully set it aside. |
 |
 |
|
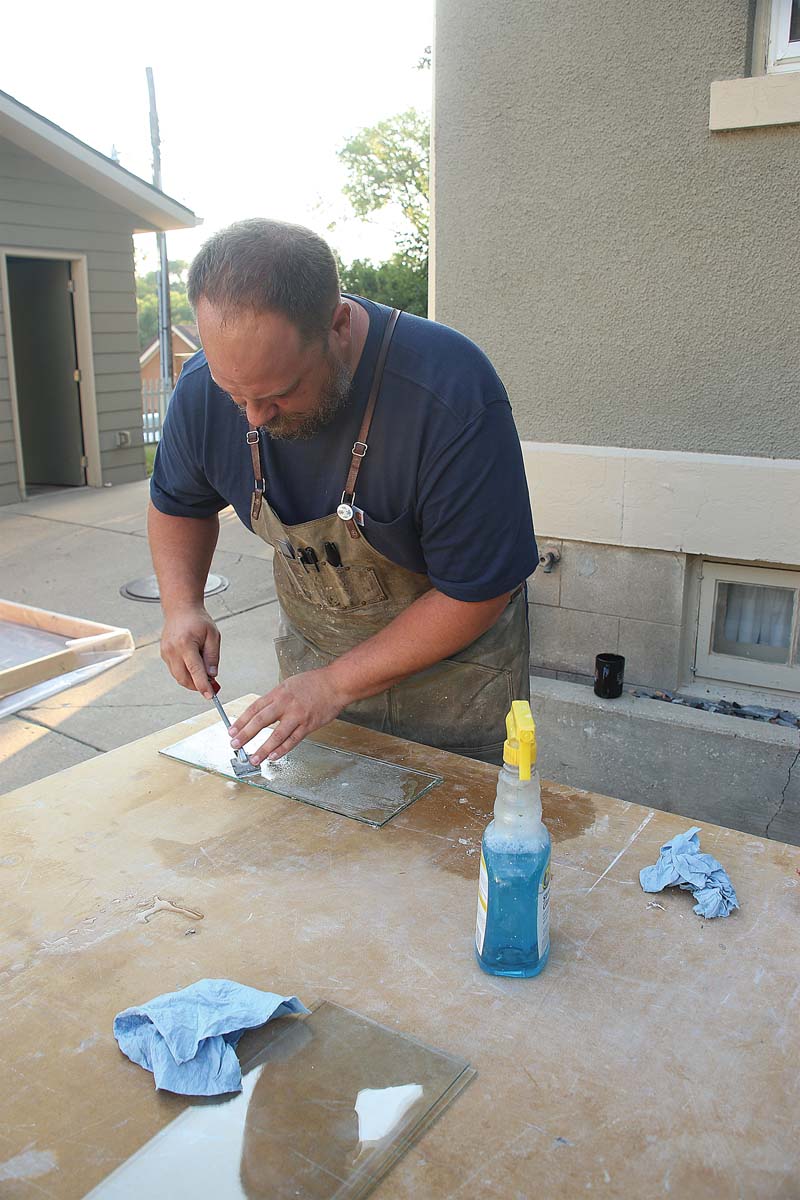
4.Clean The Glass With the glass removed, you have access to its edges and corners. So, now is a good time to clean it up. Use glass cleaner and new razor blades. Old or jagged blades can scrape the glass, so change blades often. Once clean, label the glass with a piece of tape. The panes tend to be irregular and will likely only properly fit the opening they came from. |
 |
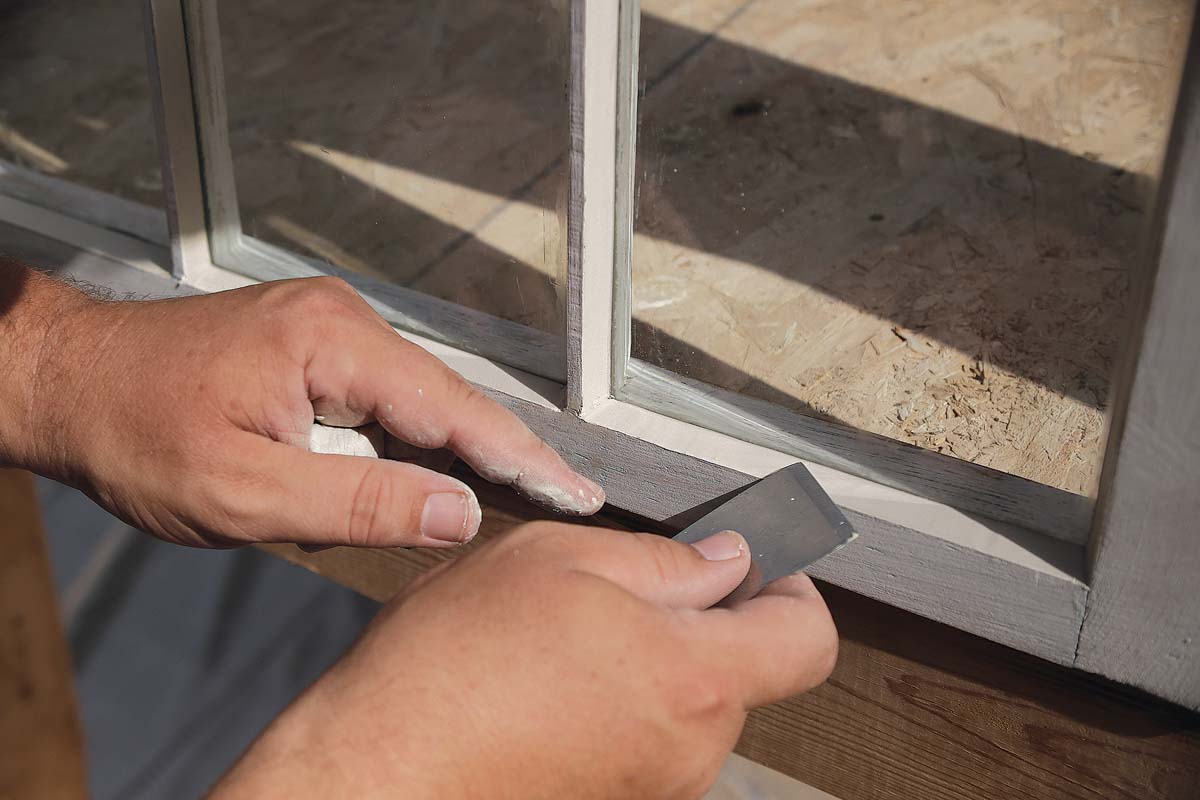
Scrape It Bare, Then Repair
Let the sash dry for about 24 hours after steaming. Then scrape it down to bare wood to get it ready for repairs. In this case, the only issue was minor checking in the wood along the meeting rails. To contain paint chips and dust, set up plastic sheeting on the ground and mist the sash with water to keep dust down while scraping.
|
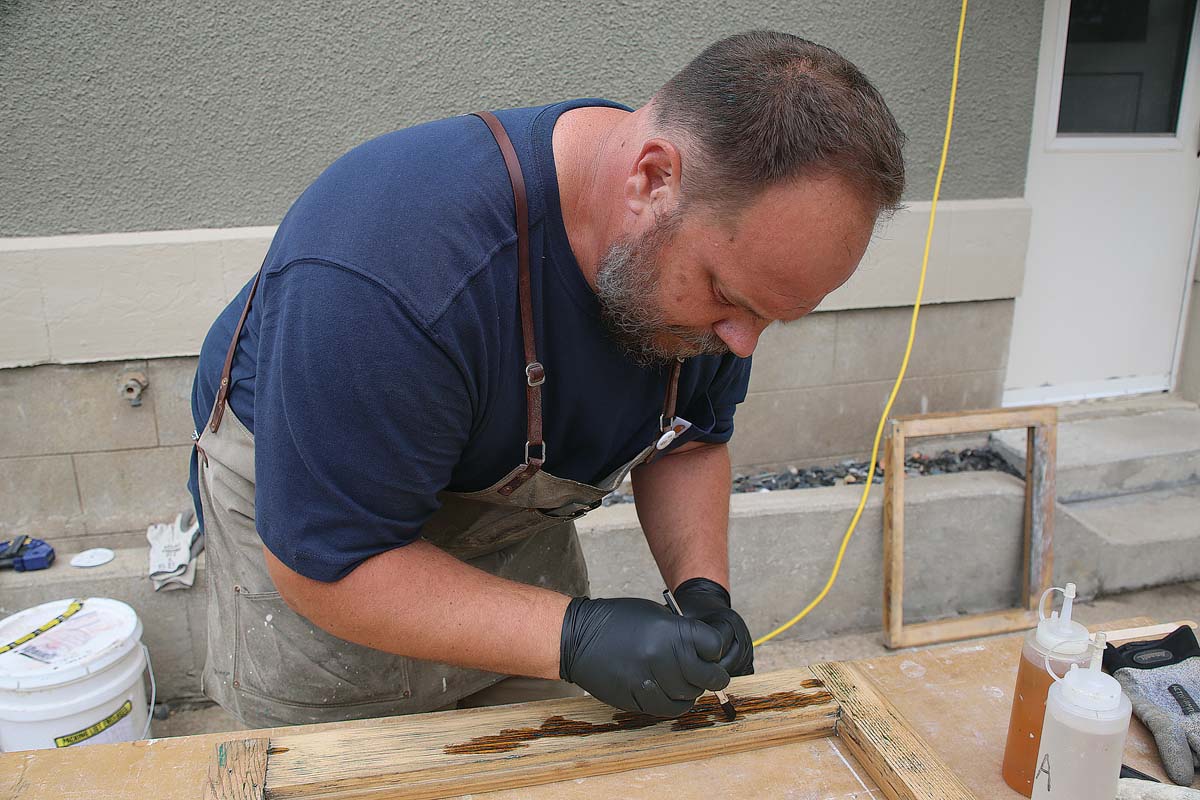
1.Clean It Out Use a pick or knife to remove any rot, paint, dust, or other debris from the areas to be repaired and to open up the checks to allow the epoxy to penetrate and fill the repair. |
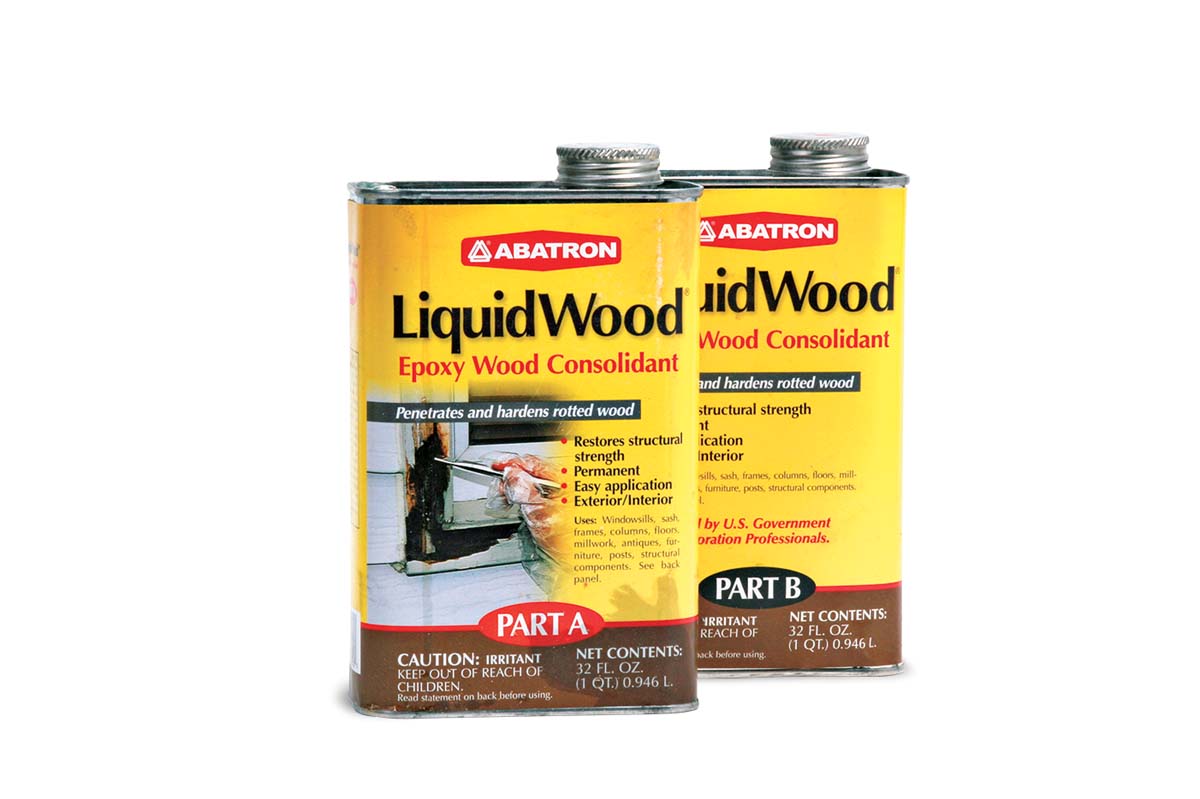
2.Penetration, Not Puddles Brush on the LiquidWood epoxy liberally, but only in the area in need of repair. Wait for it to penetrate the wood. The area should look wet, but there should not be puddles. |
 |
 |
|
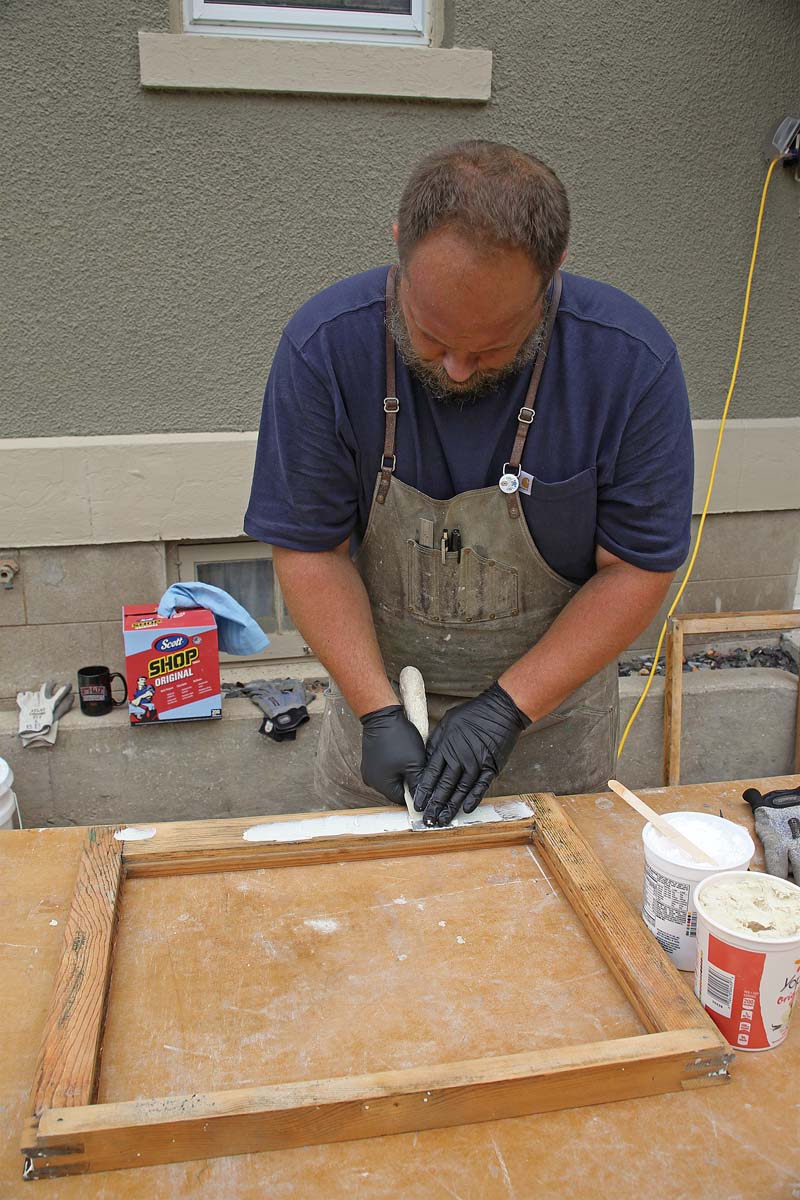
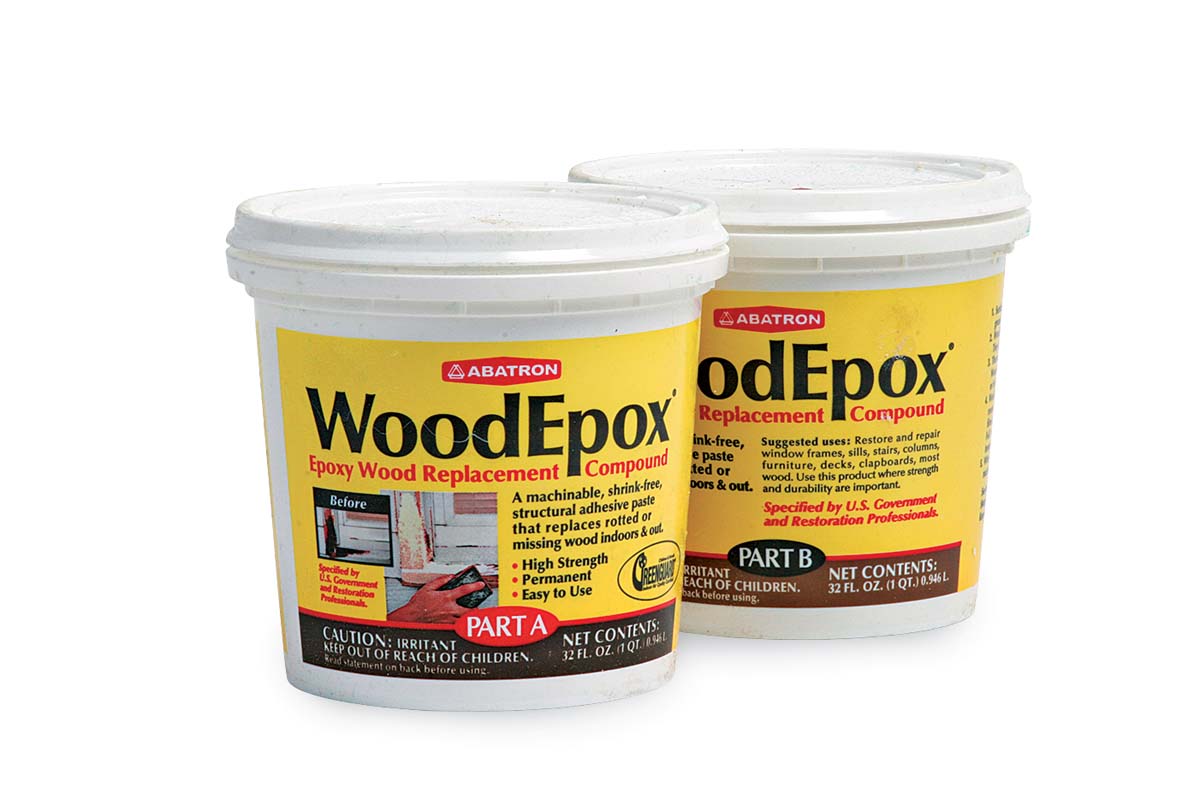
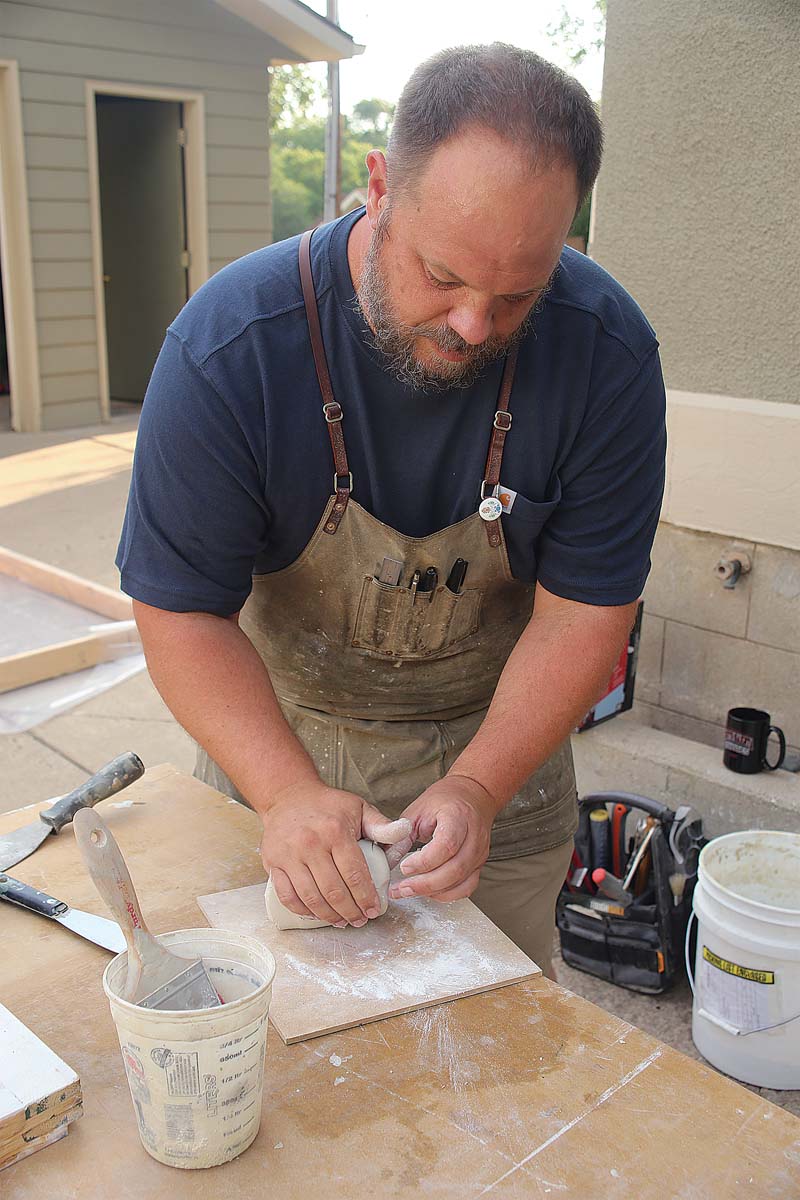
3.Fill The Damaged Areas Mix the WoodEpox and work it into the repairs with a wide putty knife. |
4.Sand It Smooth Allow the epoxy to set for about 24 hours and then sand it smooth with an orbital sander. Run the sander over the entire sash at this point to prepare it for primer. |
 |
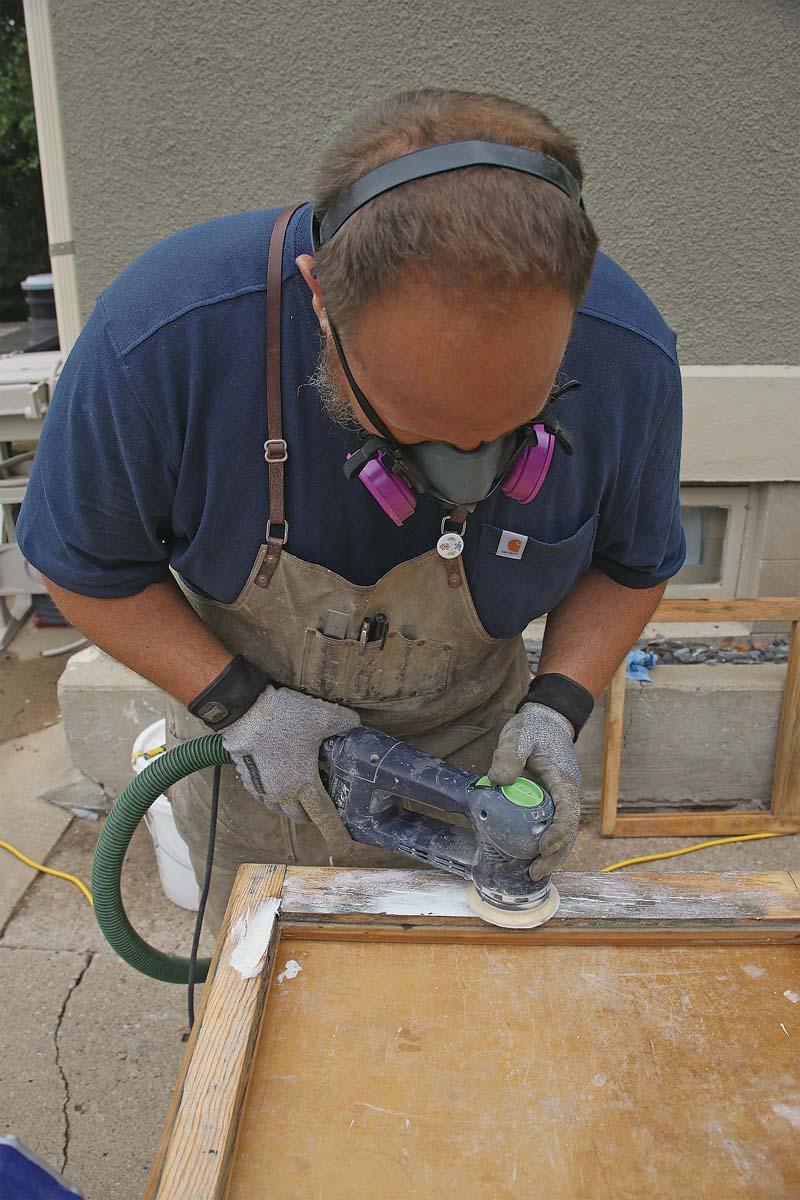 |
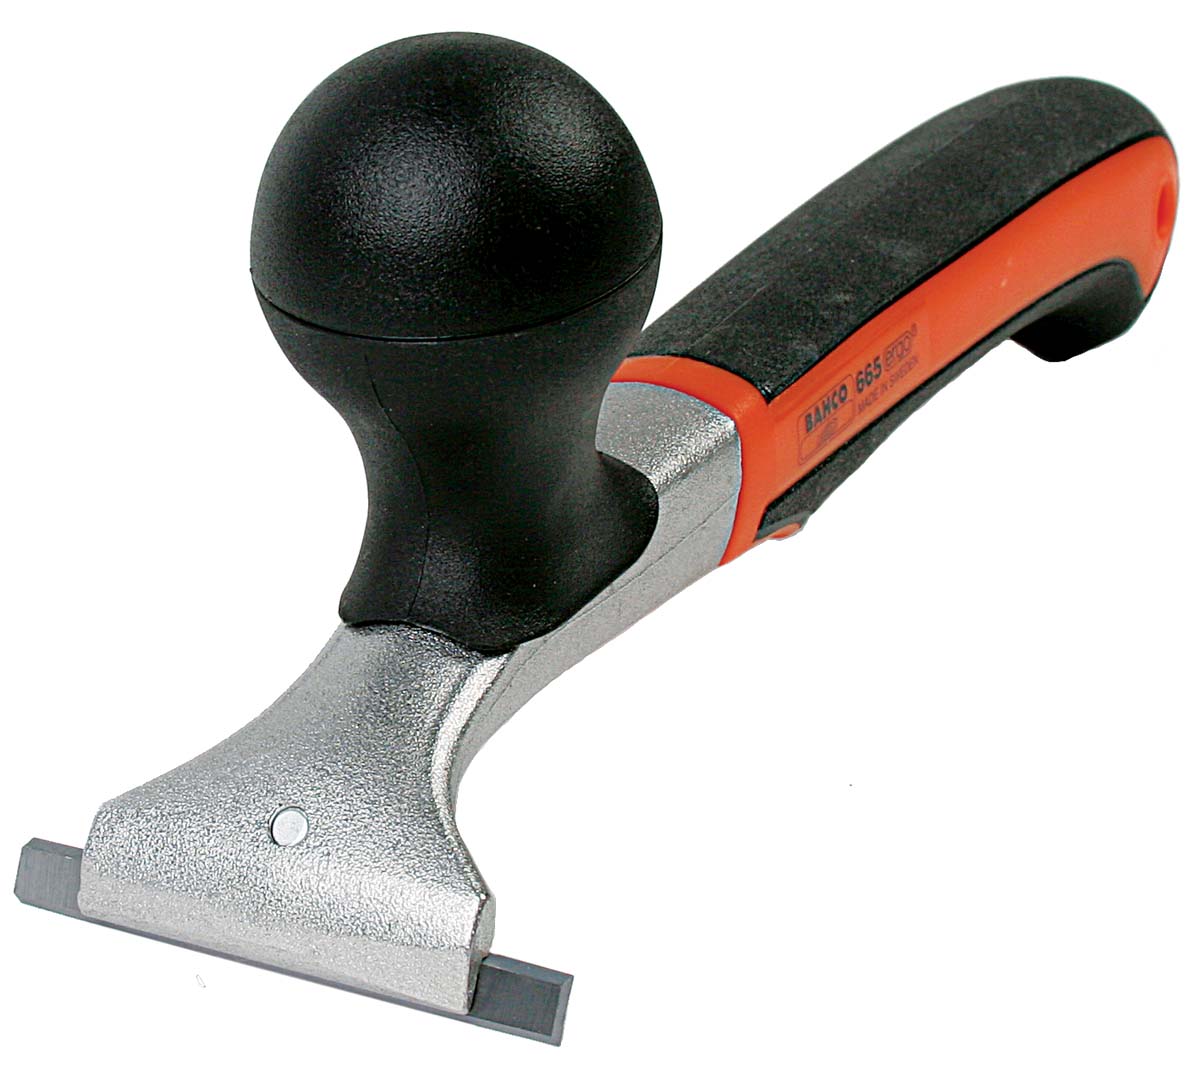
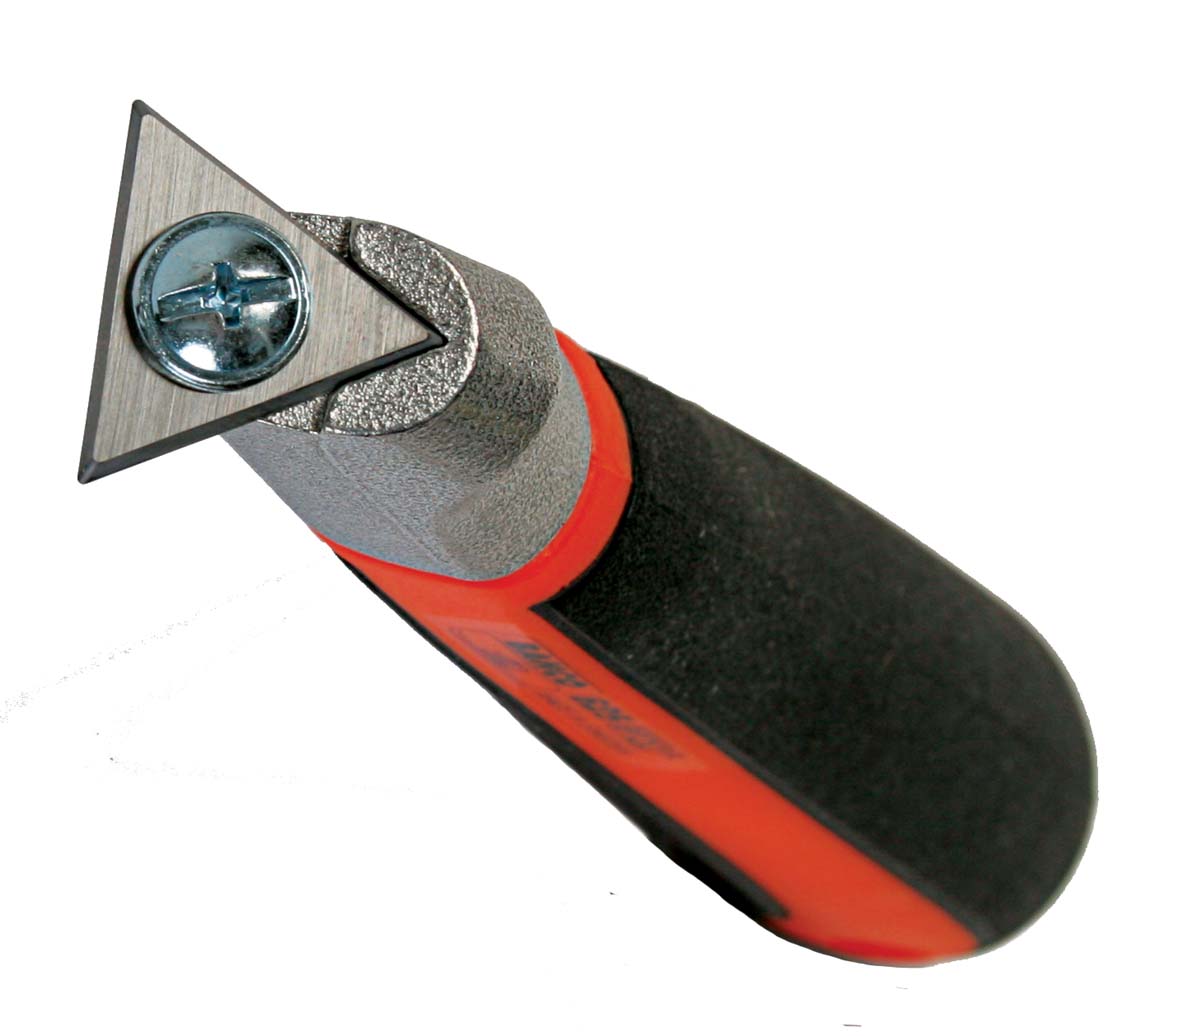
One Easel, Four Scrapers, And Two Epoxies
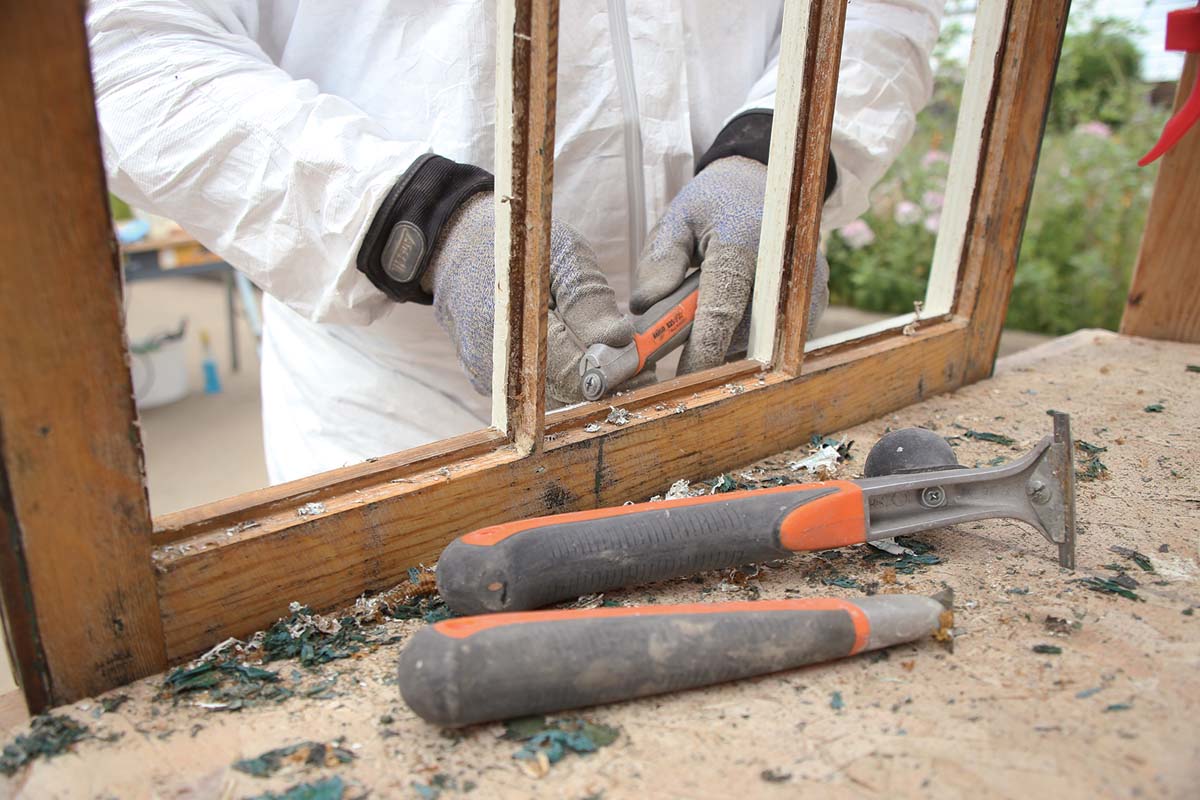 The right tools help you do the job quickly and well, and the right materials make the repairs durable. Take an hour to make an easel from framing lumber and not only will you be able to work standing comfortably upright, but you’ll be able to position the sash in all different ways to get the best angles for scraping (and later for glazing). Bahco makes excellent scrapers. They’re comfortable to use and the replaceable carbide blades come in many different profiles, allowing you to scrape paint from a sash’s numerous shapes and profiles without damaging the wood. Finally, two epoxy products from Abatron make long-lasting repairs: LiquidWood, which is applied first and penetrates the area in need of repair, and WoodEpox, which adheres to the LiquidWood and fills the damaged areas. Both are two-part epoxies mixed in a 1:1 ratio.
|
|
|
|
|

|
|
|
Reinstall The Glass
 After coating the sash with oil-based primer, it’s time to reinstall the glass, bedding it in glazing putty. Glazing putty is linseed oil and chalk, so it’s helpful to have some extra chalk on hand to help make the putty workable and for cleanup. Any calcium-carbonate chalk, such as that used for lines on athletic fields, will work. You can find it at most hardware stores.
|
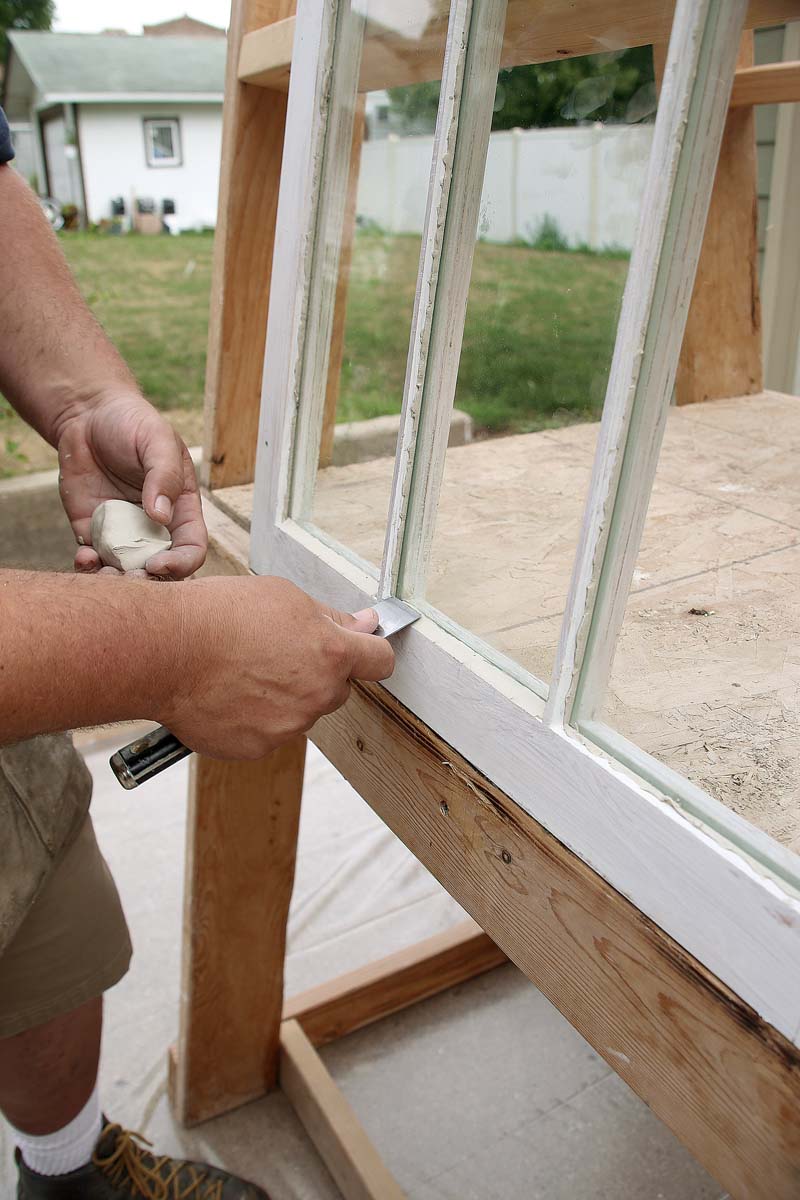
1.Prepare The Putty Knead the putty to an even consistency. Mix in as much additional chalk as necessary to make the putty feel tacky but workable without sticking to your fingers. |
2.Bed The Glass Put a thin layer of glazing putty into the glazing rabbet before inserting the glass. Then use a palm sander with a soft cloth wrapping the base to vibrate the glass into place. Flip the sash over and scrape away the squeeze-out with a putty knife. |
 |
 |
|
3.Install The Points Shoot the glazing points into the sash to secure the glass. If the points don’t penetrate enough to be completely covered by the glazing, or if you don’t have a glazing-point driver, tap them |
 |
Glaze It, Then Leave It Alone
It’s important to tool the glazing so that it pitches away from the glass, but the amount and angle of the glazing will be determined by the size of the rabbet the glass fits into. If you go higher than the top of the rabbet, the glazing will be visible from inside the house. If you are too far below the top of the rabbet, there won’t be adequate pitch.
Work in the order shown here and when finished, keep the sash in its upright position until it is reinstalled. This will keep the glass from shifting and the most important glazing—at the bottom of the window—from being disturbed. Allow the glazing to set for about two weeks before painting, and wax the sides of the sash before reinstalling.
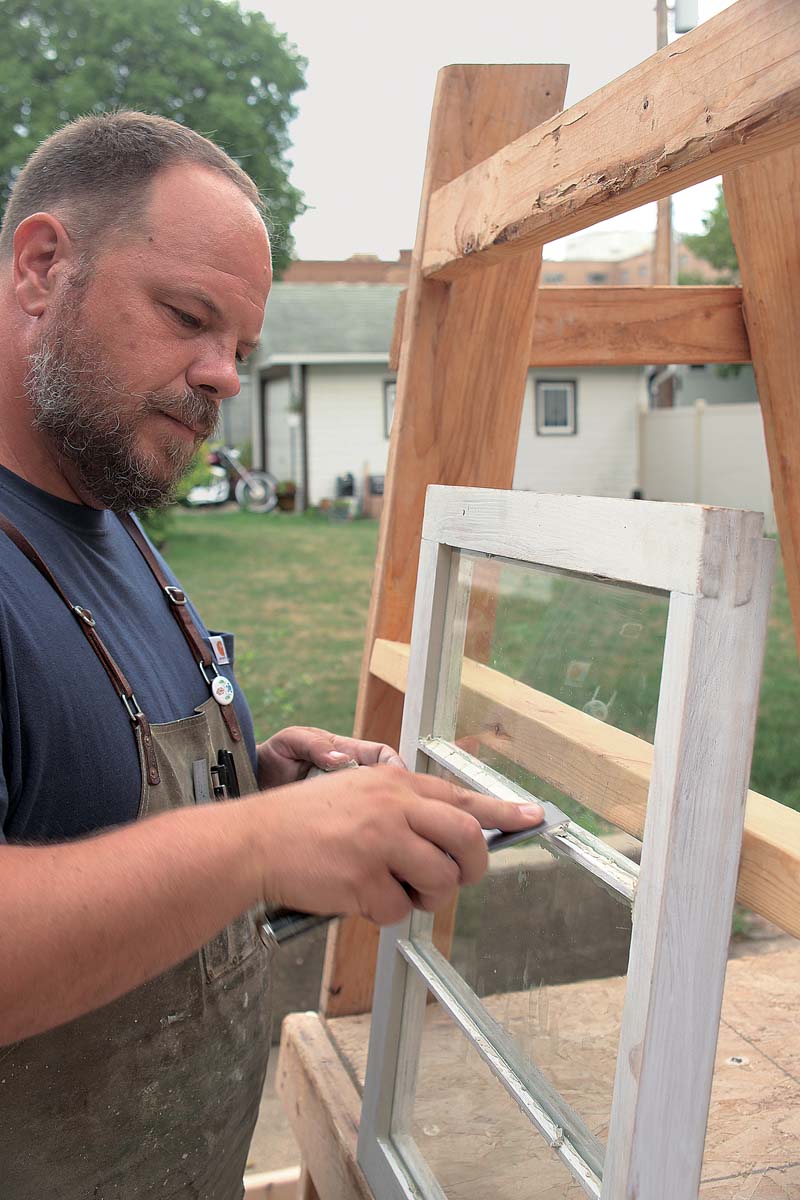
| 1.Upside Down
First, glaze the top of each pane. |
2.Sideways Next, glaze both sides of each pane. |
 |
 |
|
3.Right-Side Up Finally, glaze the bottom of each pane. |
4.Clean The Glass Again Brush the glass with chalk to remove any oil residue from the glazing putty. |
 |
 |
To see the process in action, check out these three related videos:
- How to Protect a Window Opening During Sash Restoration
- Use a Steam Box for Window Restoration
- How to Glaze a Wood Window
For more detail, including step-by-step photos on removing, steaming, scraping, repairing, reinstalling, and glazing a historic sash, click the View PDF button below.

View Comments
Some readers may not want to build a steam box. Plus, Steamboxing, drying, and sanding take lots of time, risks damaging the old wood, and don't work on interior trim. A low heat and handheld Speedheater™ can handle softening glazing and stripping paint with low infrared heat. No damaging the wood, releasing lead fumes, and applying it only once for glazing and once for paint stripping. Immediate removal of paint and glazing and ready for repainting and reglazing. 22 oz model or 4.4 lb model.
I'm planning to restore more than a dozen double hung sash windows in our 100-year-old stucco bungalow. They all are single-light, which is an opportunity to swap in dual pane glass, with commensurate increase in the counterweights. I realize I'll need to route the sashes to fit the thicker glass structures, but I've seen several YouTube vids doing just this. Any reason you opted not to try this? Did you attempt this with any of the hundreds of sash windows you've renovated? Any words to the wise? I much appreciate your easel idea! I'll likely build one that holds three sashes! Great article!