FHB Logo Facebook LinkedIn Email Pinterest Twitter X Instagram Tiktok YouTube Plus Icon Close Icon Navigation Search Icon Navigation Search Icon Arrow Down Icon Video Guide Icon Article Guide Icon Modal Close Icon Guide Search Icon Skip to content
Subscribe
Log In
  • How-To
  • Design
  • Tools & Materials
  • Restoration
  • Videos
  • Blogs
  • Forum
  • Magazine
  • Members
  • FHB House
  • Podcast
Log In

Fine Homebuilding Project Guides

Tiling

Guide Home
  • Selecting Tile
  • Tools & Techniques
  • Installation Materials
  • Preparation
  • Tiling Floors
  • Tiling Walls & Backsplashes
  • Tiling Showers
  • Grouting, Sealing & Caulking
  • Maintenance & Repair
How-To

Sealing Tile and Grout

Learn how to protect porous tile and grout with water-based sealers.

By Robin Nicholas, Michael Schweit

Sealers for tile and grout perform slightly different functions but are each indispensable for a quality, long-lasting tile installation. Sealers protect porous tile, such as terra-cotta, and grout from the cold (or hot) cruel world of spilled coffee, red wine, grape juice, and other food. Sealers are not a cure-all but rather a preventative measure. For example, if you drip hot coffee across the counter, a good sealer will allow the drip to bead up until you sponge it away. But even the best sealer won’t keep food spills left to dry from permanently staining your tile job.

Sealing Tile

While glazed or high-fired tiles generally do not require sealing, unglazed tiles, crackle-glazed tiles, and stone tiles must be sealed before grouting to prevent color in the grout staining the tile. The best way to seal the tile is to coat it with a penetrating sealer (also known as an “impregnator”). The exception is paver tiles, which require a special finish involving multiple coats.

The only tools you need for the sealing process are a small plastic bucket, a clean sponge or lint-free cloth, a pair of rubber gloves, and—if you’re sealing a floor—kneepads. Most sealers we recommend are water based and safe and easy to use for home tile installations. If you choose a solvent-based sealer, you must wear breathing protection.

Begin by pouring a small quantity of sealer into your bucket. A little goes a long way and you can always refill the bucket. Dip your sponge or cloth into the sealer and wring it out, leaving it wet but not dripping. Start applying the sealer to the farthest corner of your tile job and work your way out. Wipe the sealer onto the faces of the tiles, striving to apply an even coat. Cover each tile completely, but try not to get any into the grout joints. Don’t be overly concerned if you dampen a few joints; just try to keep them clean and dry for the grout. After the application is complete, let the sealer dry completely (follow the manufacturer’s recommendations) before you begin grouting. Stone tiles, which are not fired with a protective glaze, should be sealed a second time for protection after you have grouted.

Sealing Grout

After your tile is grouted and dry, it’s time to apply a grout sealer. As with tile sealers, we prefer water-based products because they’re safer to use and less odorous. One of the easiest ways to apply sealer to grout joints is with a commercially available plastic applicator bottle that has a brush or roller tip.

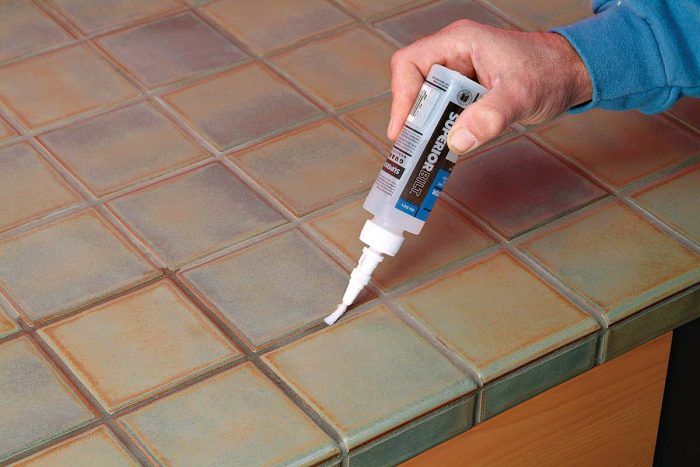
Simply fill the bottle and adjust the twist top so that the right amount flows onto the joint. As it flows out, the sealer is absorbed by the grout and disappears, evidenced by the temporary darkening of the grout color 1. If the sealer puddles on the grout, reduce the flow slightly by adjusting the applicator tip. Use the applicator tip to move the excess sealer onto dry joints or use a cloth to mop it up. If a small amount of sealer flows onto the tile, just wipe it up with a clean cloth or paper towel. 2.

Brush sealer on with the applicator until the joints darken. Adjust the flow to avoid puddles of sealer. 1. Brush sealer on with the applicator until the joints darken. Adjust the flow to avoid puddles of sealer.
Sealer will penetrate through the grout. Wipe any excess sealer from the face of the tile. 
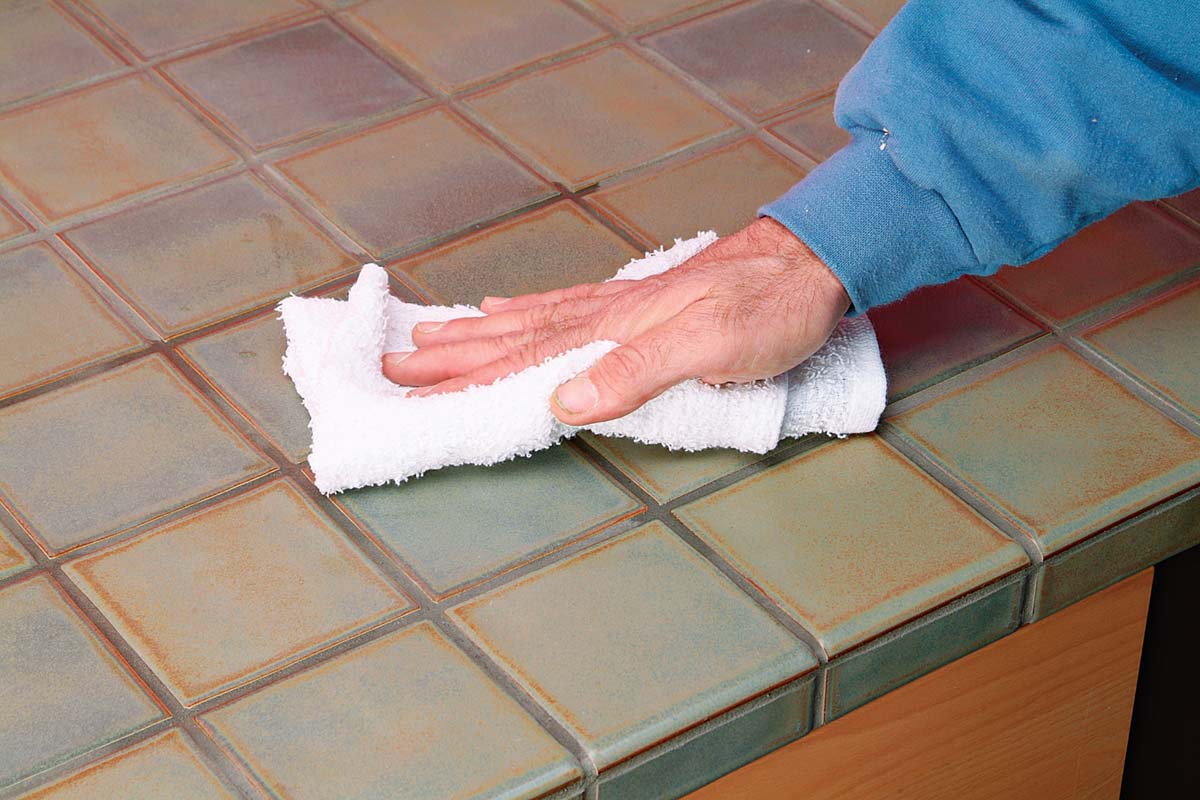
2.  Sealer will penetrate through the grout. Wipe any excess sealer from the face of the tile.

Tiling Complete, 2nd EditionExcerpted from Tiling Complete, 2nd Edition by Robin Nicholas and Michael Schweit.

Available at Amazon.com.

Sign up for eletters today and get the latest how-to from Fine Homebuilding, plus special offers.

Signing you up...

This site is protected by reCAPTCHA and the Google Privacy Policy and Terms of Service apply.
See all newsletters
See all newsletters
Previous: Expansion Joints in Tile Floors Next: Sealing Terra-Cotta Pavers

Guide

Tiling

Chapter

Grouting, Sealing & Caulking

Log in or create an account to post a comment.

Sign up Log in

Become a member and get full access to FineHomebuilding.com

Tiling

Tiling

Trusted, comprehensive guidance from the pros for a great-looking tile job in any room of the house

View Project Guide

View All Project Guides »

Become a member and get unlimited site access, including the Tiling Project Guide.

Start Free Trial

Selecting Tile
  • The Basics
  • Tile Options
Tools & Techniques
  • Job-Preparation Tools
  • Cutting Tiles
  • Setting & Grouting Tools
Installation Materials
  • Membranes & Substrates
  • Adhesives & Mortars
  • Grout
  • Sealers & Caulk
  • Spacers, Hardware & Trim
Preparation
  • The Prep Job
  • Repairs & Surface Prep
  • Installing Backerboard
Tiling Floors
  • Layout & Installation
  • Setting Specialty Tiles
Tiling Walls & Backsplashes
  • Preparation
  • Backsplashes
  • Walls
Tiling Showers
  • Tile Shower Basics
  • Waterproofing
  • Shower Pans
  • Shower Drains
  • Shower Niches
  • Video Series: Tile a Shower
  • Video Series: Tile a Barrier-Free Bathroom
Grouting, Sealing & Caulking
  • Grouting
  • Caulking
  • Sealing
Maintenance & Repair
  • Maintenance
  • Tile Repair
  • Grout Repair

Fine Home Building

Newsletter Sign-up

  • Fine Homebuilding

    Home building tips, offers, and expert advice in your inbox.

  • Green Building Advisor

    Building science and energy efficiency advice, plus special offers, in your inbox.

  • Old House Journal

    Repair, renovation, and restoration tips, plus special offers, in your inbox.

Signing you up...

This site is protected by reCAPTCHA and the Google Privacy Policy and Terms of Service apply.
See all newsletters

Follow

  • Fine Homebuilding

    Dig into cutting-edge approaches and decades of proven solutions with total access to our experts and tradespeople.

    Start Free Trial Now
    • Facebook
    • Instagram
    • X
    • LinkedIn
  • GBA Prime

    Get instant access to the latest developments in green building, research, and reports from the field.

    Start Free Trial Now
    • Facebook
    • YouTube
  • Old House Journal

    Learn how to restore, repair, update, and decorate your home.

    Subscribe Now
    • Facebook
    • Instagram
    • X

Membership & Magazine

  • Online Archive
  • Start Free Trial
  • Magazine Subscription
  • Magazine Renewal
  • Gift a Subscription
  • Customer Support
  • Privacy Preferences
  • About
  • Contact
  • Advertise
  • Careers
  • Terms of Use
  • Site Map
  • Do not sell or share my information
  • Privacy Policy
  • Accessibility
  • California Privacy Rights

© 2025 Active Interest Media. All rights reserved.

Fine Homebuilding receives a commission for items purchased through links on this site, including Amazon Associates and other affiliate advertising programs.

X
X
This is a dialog window which overlays the main content of the page. The modal window is a 'site map' of the most critical areas of the site. Pressing the Escape (ESC) button will close the modal and bring you back to where you were on the page.

Main Menu

  • How-To
  • Design
  • Tools & Materials
  • Video
  • Blogs
  • Forum
  • Project Guides
  • Reader Projects
  • Magazine
  • Members
  • FHB House

Podcasts

  • FHB Podcast
  • ProTalk

Webinars

  • Upcoming and On-Demand

Podcasts

  • FHB Podcast
  • ProTalk

Webinars

  • Upcoming and On-Demand

Popular Topics

  • Kitchens
  • Business
  • Bedrooms
  • Roofs
  • Architecture and Design
  • Green Building
  • Decks
  • Framing
  • Safety
  • Remodeling
  • Bathrooms
  • Windows
  • Tilework
  • Ceilings
  • HVAC

Magazine

  • Current Issue
  • Past Issues
  • Magazine Index
  • Subscribe
  • Online Archive
  • Author Guidelines

All Access

  • Member Home
  • Start Free Trial
  • Gift Membership

Online Learning

  • Courses
  • Project Guides
  • Reader Projects
  • Podcast

More

  • FHB Ambassadors
  • FHB House
  • Customer Support

Account

  • Log In
  • Join

Newsletter

Get home building tips, offers, and expert advice in your inbox

Signing you up...

This site is protected by reCAPTCHA and the Google Privacy Policy and Terms of Service apply.
See all newsletters
See all newsletters

Follow

  • X
  • YouTube
  • instagram
  • facebook
  • pinterest
  • Tiktok

Join All Access

Become a member and get instant access to thousands of videos, how-tos, tool reviews, and design features.

Start Your Free Trial

Subscribe

FHB Magazine

Start your subscription today and save up to 70%

Subscribe

We hope you’ve enjoyed your free articles. To keep reading, become a member today.

Get complete site access to expert advice, how-to videos, Code Check, and more, plus the print magazine.

Start your FREE trial

Already a member? Log in