FHB Logo Facebook LinkedIn Email Pinterest Twitter X Instagram Tiktok YouTube Plus Icon Close Icon Navigation Search Icon Navigation Search Icon Arrow Down Icon Video Guide Icon Article Guide Icon Modal Close Icon Guide Search Icon Skip to content
Subscribe
Log In
  • How-To
  • Design
  • Tools & Materials
  • Restoration
  • Videos
  • Blogs
  • Forum
  • Magazine
  • Members
  • FHB House
  • Podcast
Log In

Fine Homebuilding Project Guides

Kitchens

Guide Home
  • Kitchen Planning & Design
  • Featured Kitchen Projects
  • Cabinets, Built-Ins, & Pantries
  • Kitchen Islands
  • Countertops & Flooring
  • Appliances, Fixtures, & Lighting
How-To

Templating Techniques for Countertops and Floating Shelves

Fit finished parts into tricky spaces, with no gaps and no risk.

By Stefan Straka Issue 312 - Dec 2022/Jan 2023
Photos: left, Aasta Thielke; right, Asa Christiana

Synopsis: Finish carpenter Stefan Straka shows how to build a template with one piece or with strips to suit different situations. In this article, he goes through three projects and the templating techniques used in each situation: a countertop with overhangs and a sink cutout, floating shelves that fit between three edges, and shelves that meet two edges.


When a finished part needs to be fit to a single surface—be it a crooked wall or a bumpy fireplace—a carpenter or cabinetmaker will “scribe” the part, transferring the contours of the adjoining surface directly onto the part before removing the waste for a gap-free junction. I covered this topic in a recent article, Perfect Scribing for 5 Types of Tasks, in FHB #310.

But when that part bumps up against two or more surfaces at once, it’s risky to transfer their shapes directly to the workpiece and start removing waste from that valuable material, hoping all of the edges end up perfect at once and that the part lands where you want it to. The classic example is a countertop being fit into an enclosed three-sided space.

In these cases, finish carpenters make a template—using cheap, thin materials—and first fit the template into the space before transferring its shape to the part being installed. This usually incorporates scribing as well, which is why I covered that topic first. Getting all of the fitting done on the template before committing to your finished material removes most of the risk. Once the template fits perfectly, you can transfer its shape to the workpiece and cut away the waste with confidence, knowing you’ll get a seamless fit. In many cases, the templating process also helps me identify problem areas I might have otherwise missed.

Strip templates for countertop overhangs and cutouts

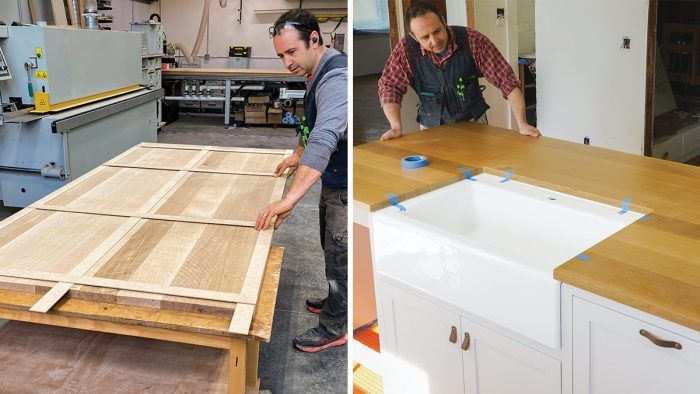
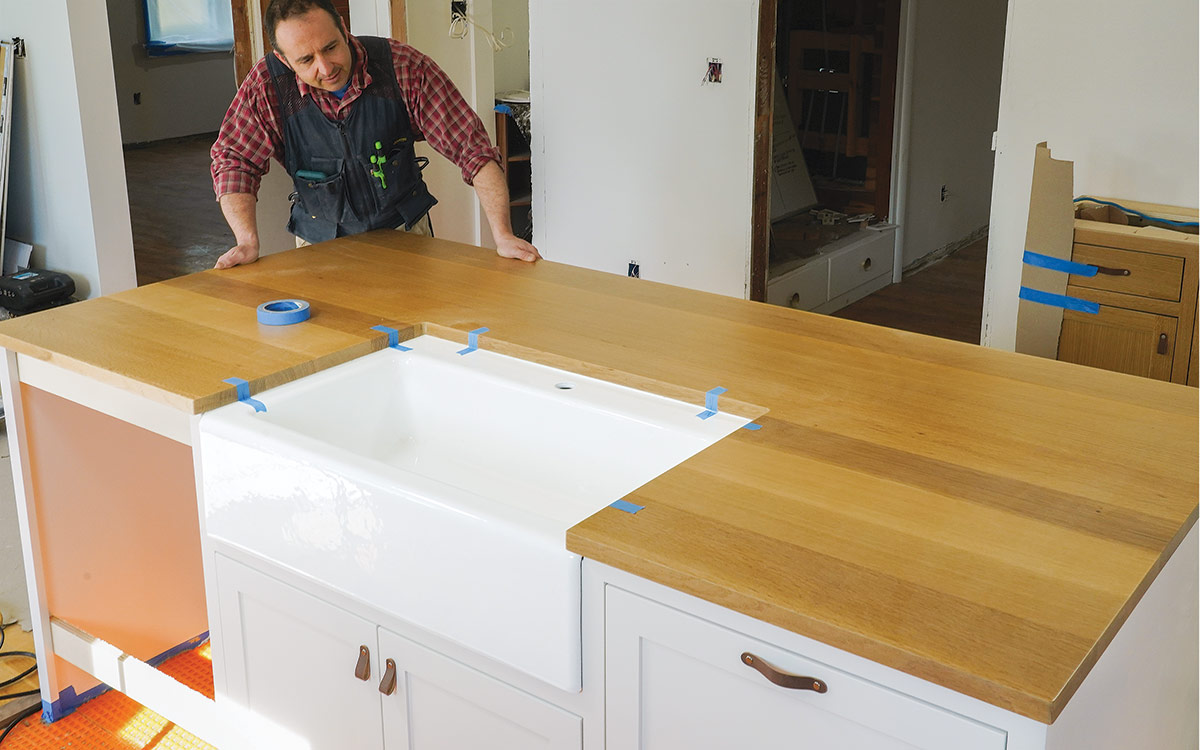
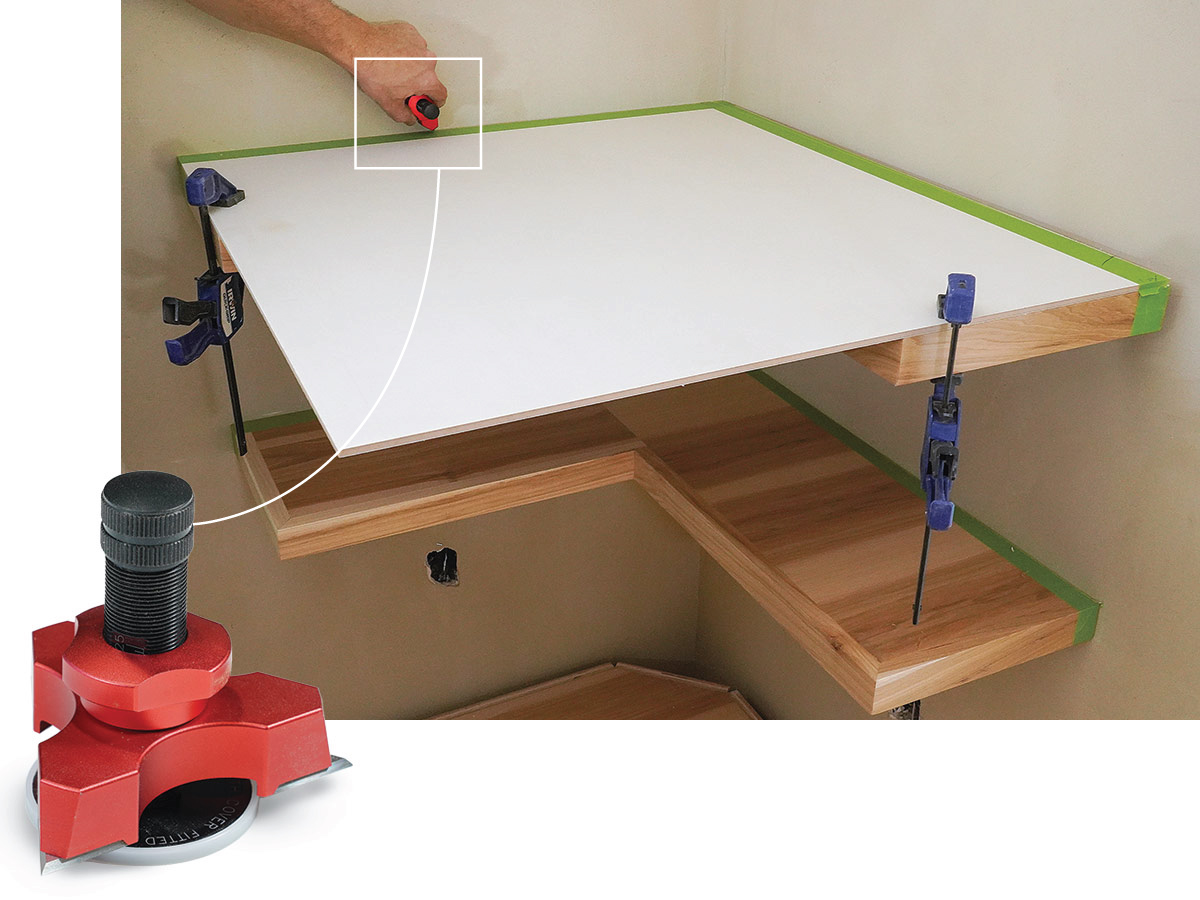
Even with seemingly straightforward finishes like island countertops, a template can help dial in overhangs and offsets while accurately positioning cutouts—for a sink, rangetop, or other penetrations. Here, I used a strip template to lay out the sink opening and lock in the overhangs on a white-oak countertop, which I then cut and finished in the shop.

marking strip template for countertop sink cutout
Build the template. After assembling the island cabinets and temporarily installing the sink, build a strip template that marks the countertop perimeter with overhangs and the sink cutout, making notes and location marks on the strips.
cutting the perimeter of the countertop with a track saw
Cut the perimeter. Transfer the perimeter shape to the countertop slab, and trim the edges with a track saw.

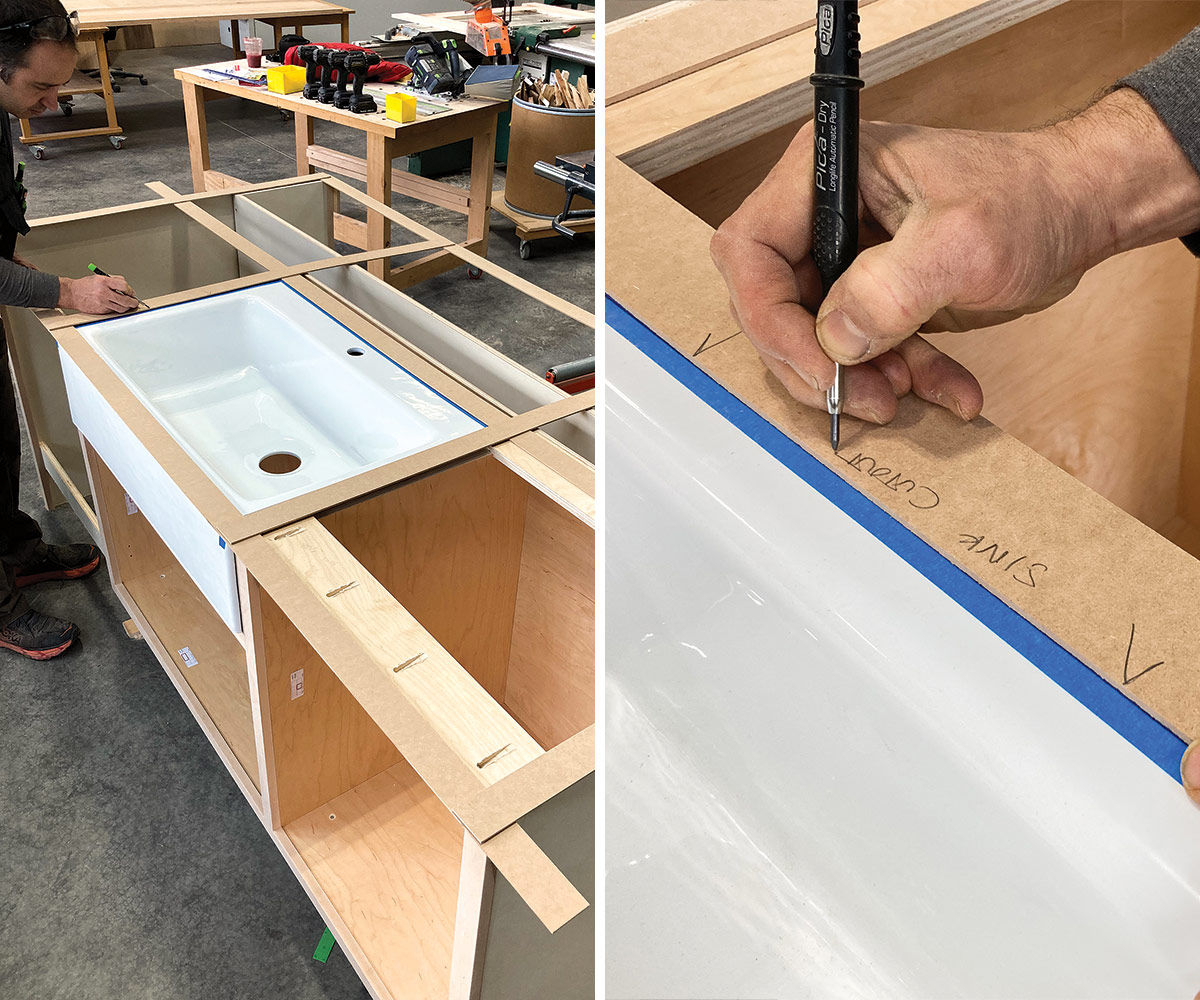
I start by measuring and cutting template strips to length. I chop the ends of the strips at a slight angle so they meet at a point to create sharp inside and outside corners. It’s important to exercise care when gluing the strips together, as the shape you create is the one you will be cutting out on your finished parts. Hot-melt glue cools to a semirigid state in just a few seconds, and any tension or movement after the glue goes on can weaken the joints, rack the template, or pull the strips away from their mating surfaces. On the most important intersections, I hold the strips in place a bit longer after gluing to ensure they don’t shift.

marking the sink cutout on the countertop
Mark the sink location. Clamp the strip template to the countertop and mark the edges of the sink cutout on the slab.
routing the finished sink opening
Cut out the sink. Begin by cutting away the waste with a jigsaw before attaching temporary fences at the layout lines and routing the finished opening with a bearing-guided bit.

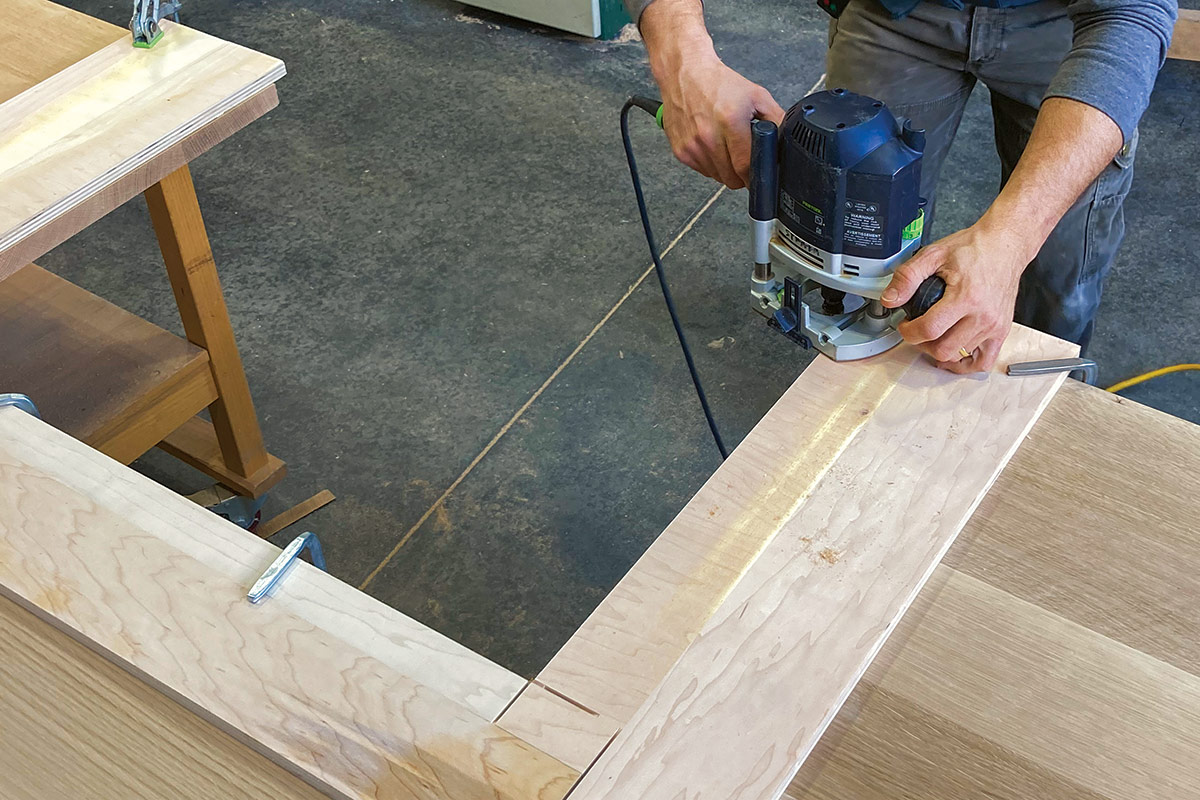
Working on top of the cabinets, I templated the perimeter of the countertop and then added more strips to stiffen the assembly and mark the sink cutout. I included location marks for aligning the finished countertop, and I marked the corner-radius dimensions on the template. After a once-over to confirm that the template was accurate, I transferred the outline to the countertop; cut it, routed it, and sanded it to size; and applied a finish before bringing it to the site for installation.

installing the finished countertop
Easy install. The countertop can be finished in the shop and then brought to the job site for installation. Transferring the location marks on the countertop and sink from the strip template ensures an accurate reveal around the sink and even overhangs around the island.

Two ways to build a template

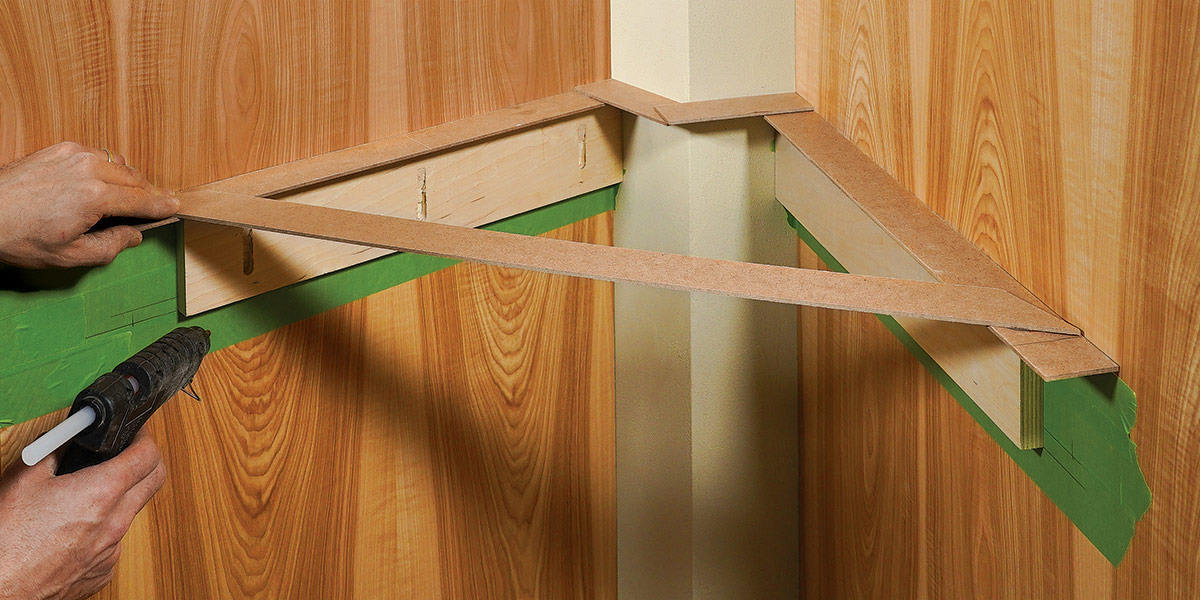
When the finished part needs to fit against more than two surfaces or overhang an object perfectly, or if it includes multiple cutouts, I form a template from strips, pressing them against the outside of the space and hot-gluing them together at the corners. If the surfaces are curved or otherwise irregular, you can scribe and fit the strips independently before gluing them together. With just two adjoining edges to fit—which is the case with the floating shelves shown below—I generally use a single panel of thin material as a template, scribing its edges individually.

For both strip and one-piece templates, you can use whatever thin sheet goods you have lying around—anything from 1/8-in. door skin to 1/4-in. MDF. There are packs of templating strips available for purchase, but I make mine from waste pieces of the same types of material, ripping 2-in.-wide strips that I bundle up for later use. For gluing, an inexpensive craft hot-glue gun will do the job, but I’ve recently started using a cordless construction-grade gun for convenience.

Strip templates for fitting three or more edges

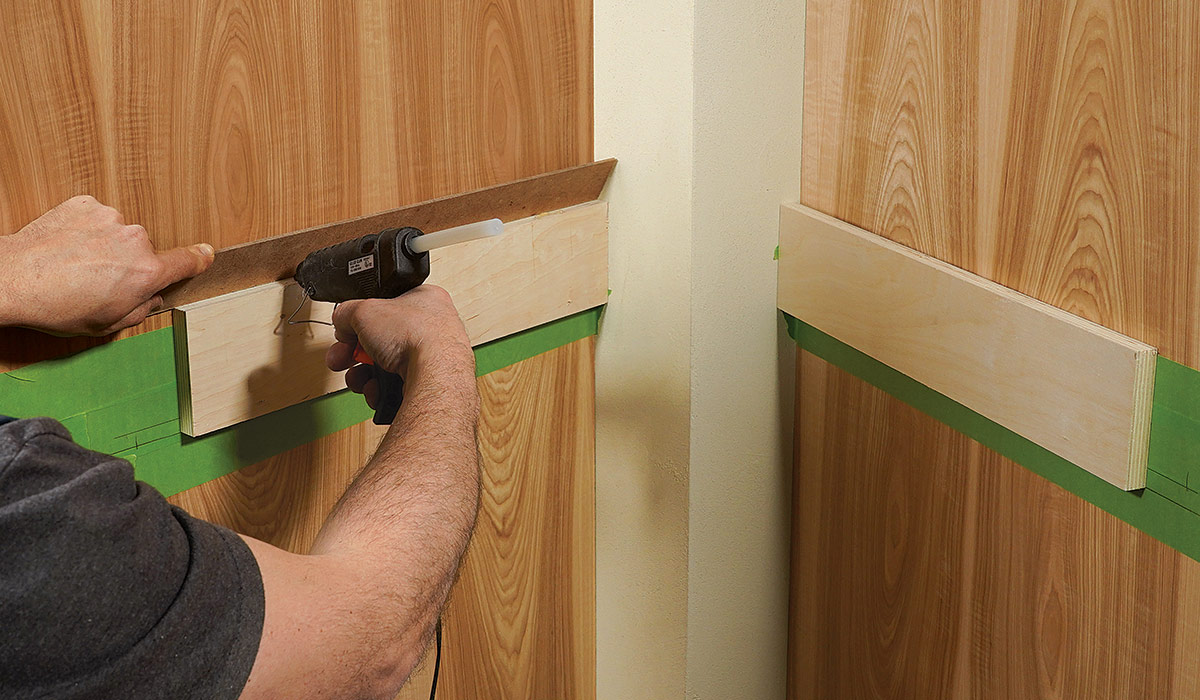
This set of floating shelves needed to fit into a very irregular space where two cabinets meet a drywall corner and create four surfaces for fitting. This was a perfect situation for a strip template. Because these shelves were attached by screwing through the sides of the cabinet, rather than being placed on brackets, there was no built-in way to hold the template strips at the right level, so I attached temporary cleats to the cabinets to support the strips as I assembled the templates. I attached them from the back side of the cabinet sides, using the same screw holes I would later use to attach the shelves.

attaching template to temporary cleats
Start with the outer strips. Attach the template’s outer strips to the temporary cleats with a few dabs of hot glue, holding them firmly against the cabinets as the glue sets. For curved surfaces, the strips can be scribed and fit individually.
gluing together the rest of the template
Add the other sides. Apply a liberal amount of hot glue to the joints, and hold them firmly together as the glue hardens. Give the glue an extra minute or so to set before popping the template off of the dots of glue holding it on the cleats.
cutting painters tape to transfer template shape to the shelf material
Transfer the shape. Apply painter’s tape to the shelf material in the areas where it will be cut, align and clamp the template in place, and use a sharp knife to cut through the tape, being careful to keep it tight to the template edges.
using a Japanese-style pullsaw to cut out the shelf shape
Cut the inside corners. Make fine, accurate cuts with a Japanese-style pullsaw (a jigsaw or bandsaw would also work), making sure to keep the cuts square—or just slightly back-beveled—as you follow the tape lines.
trimming the edges of the shelf
Saw to the lines. Peel away the tape on the waste side of each line, and start trimming the outside edges of the shelf.
check the fit of the shelf
Check the fit. Sit the shelf on the temporary cleats to check the fit along all four surfaces. Refine the fit as needed, using a power planer, belt sander, or sanding block.
finished shelf in place
Perfect results. The finished shelves fit tightly with no gaps. They are attached to the cabinet sides using the same holes used to attach the temporary cleats.

Templating includes scribing

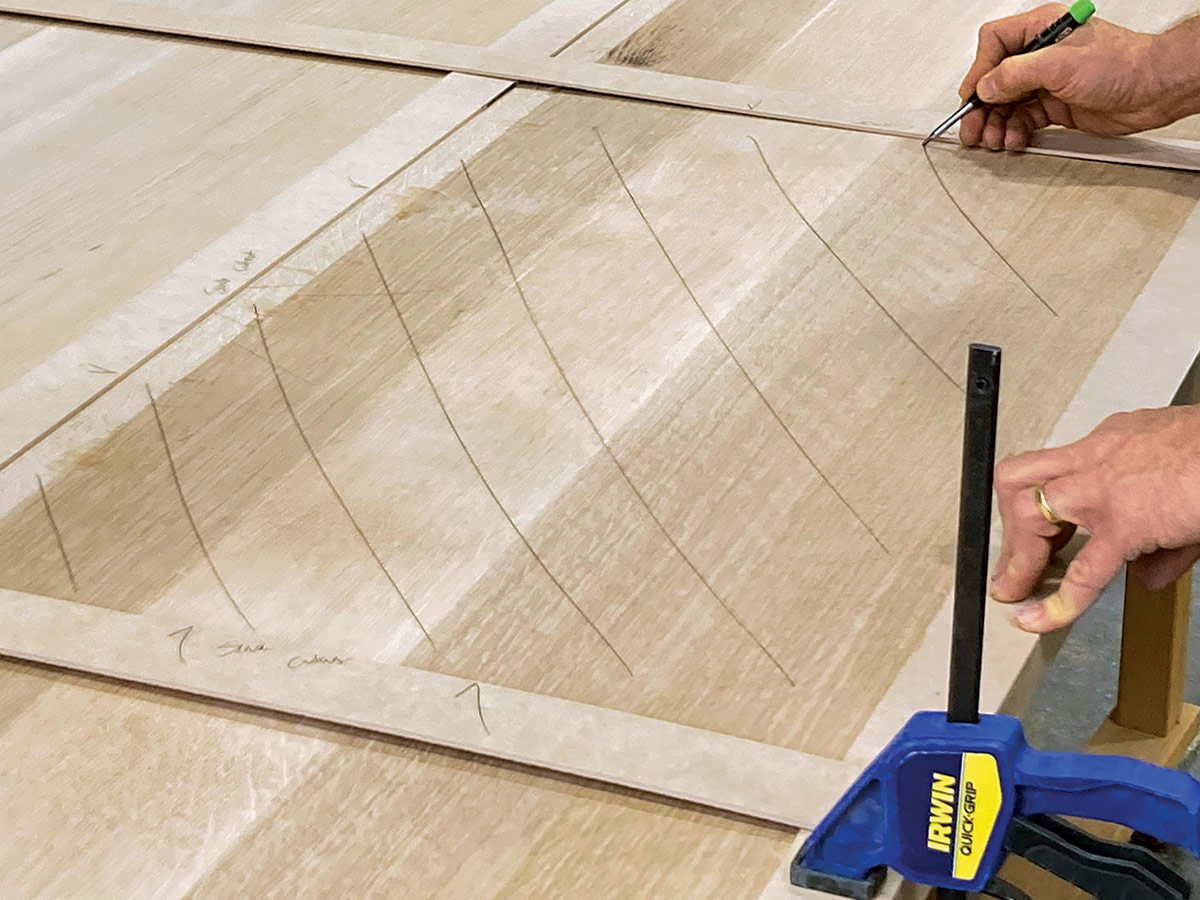
To capture irregularities on the mating surface, you usually have to scribe the template stock so you can transfer the profile to the finished material later. I use a few different scribing tools, but my favorite is the Thingamejig from Specialty Tools. While other tools will work, the Thingamejig marks with a built-in knife, creating a more precise line.

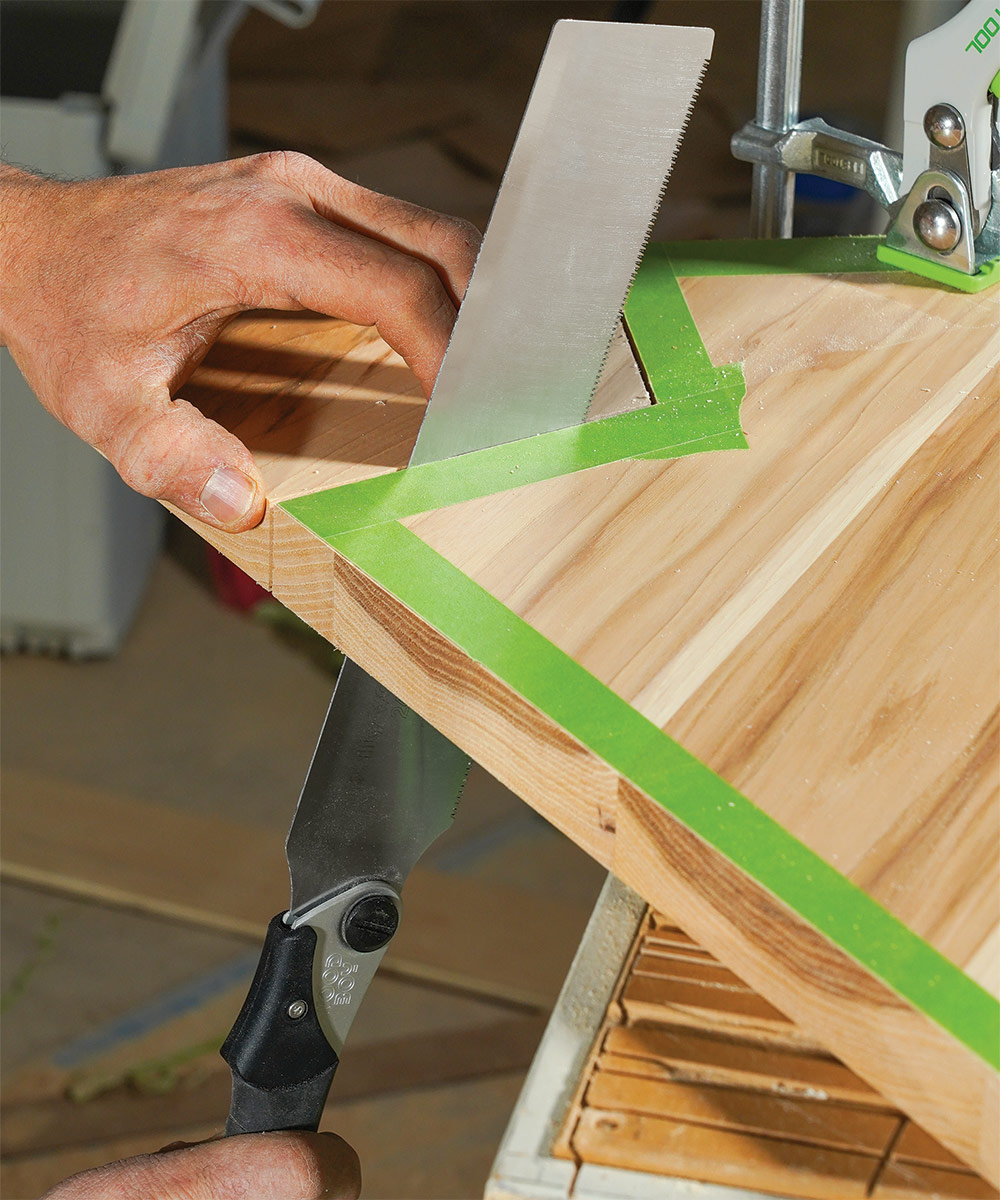
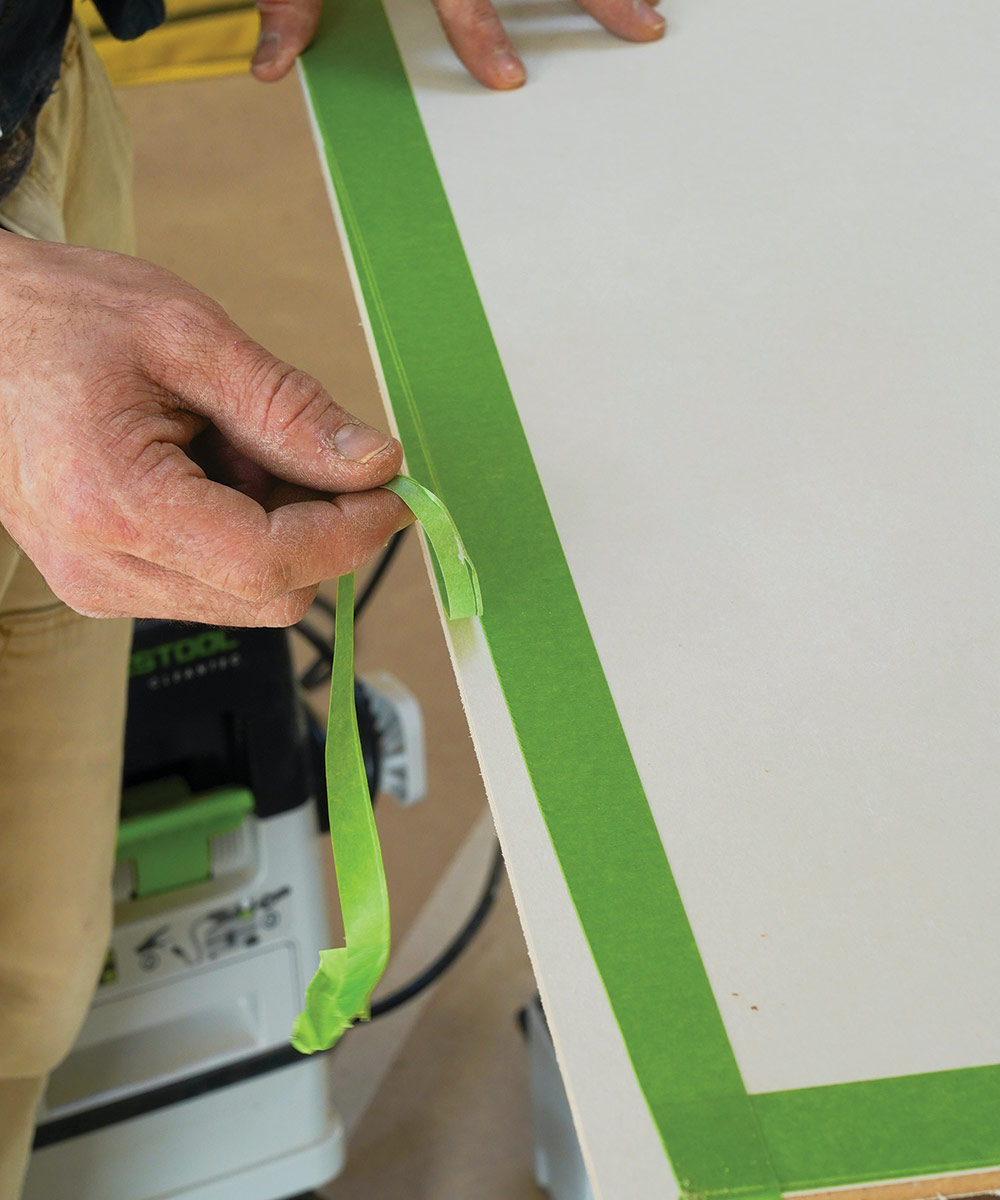
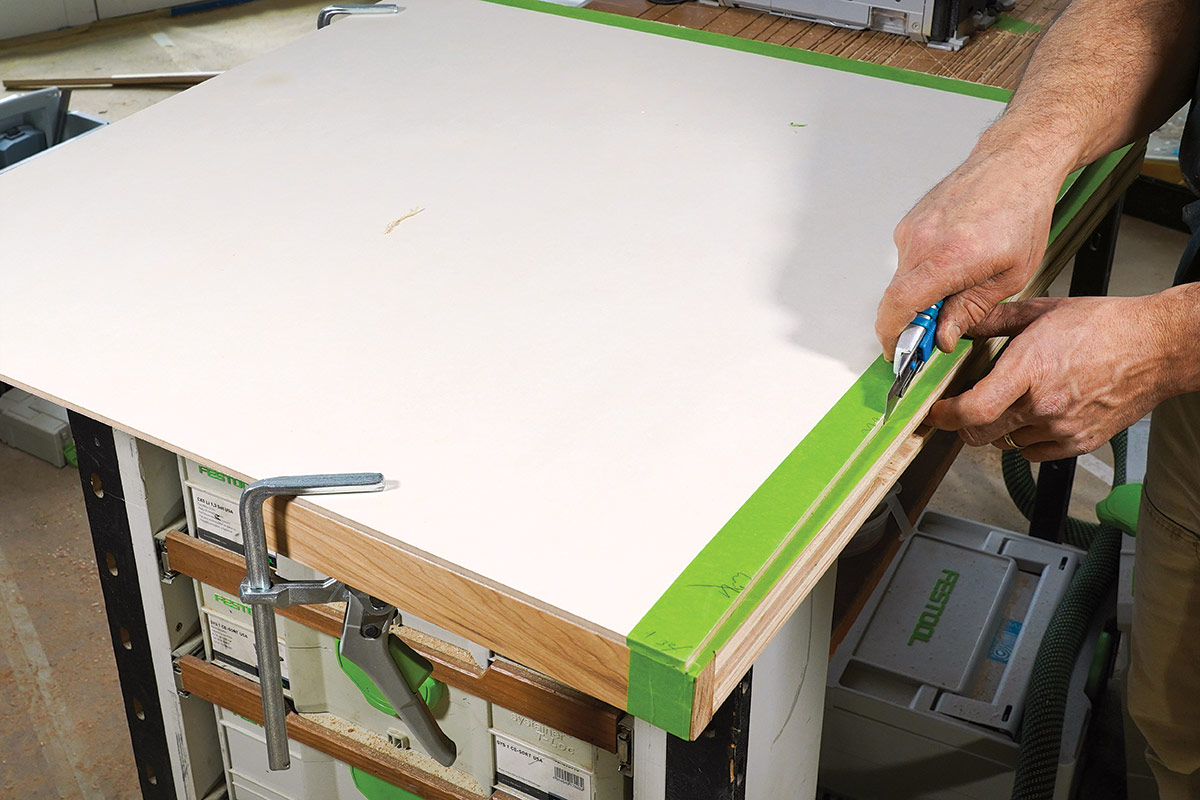
To make that knife line much more visible, I first apply brightly colored painter’s tape to the edge of the template (and the finished workpiece), then slice the tape with the Thingamejig and peel away the waste. Once the template is fit perfectly to the space, it’s easy to position it on the finished piece and transfer the shape for cutting. I often add notes or marks to the template to indicate things such as its proper location on the finished piece, the radius of a corner, or an area for back-beveling. To transfer the shape of the template to the workpiece, I also use bright-green painter’s tape and a sharp cutter. In this case, it’s a utility knife, run against the edge of the template. Apply just enough pressure to cut the tape. Pushing down too hard can cause it to follow the grain of the part below and pull away from the template.

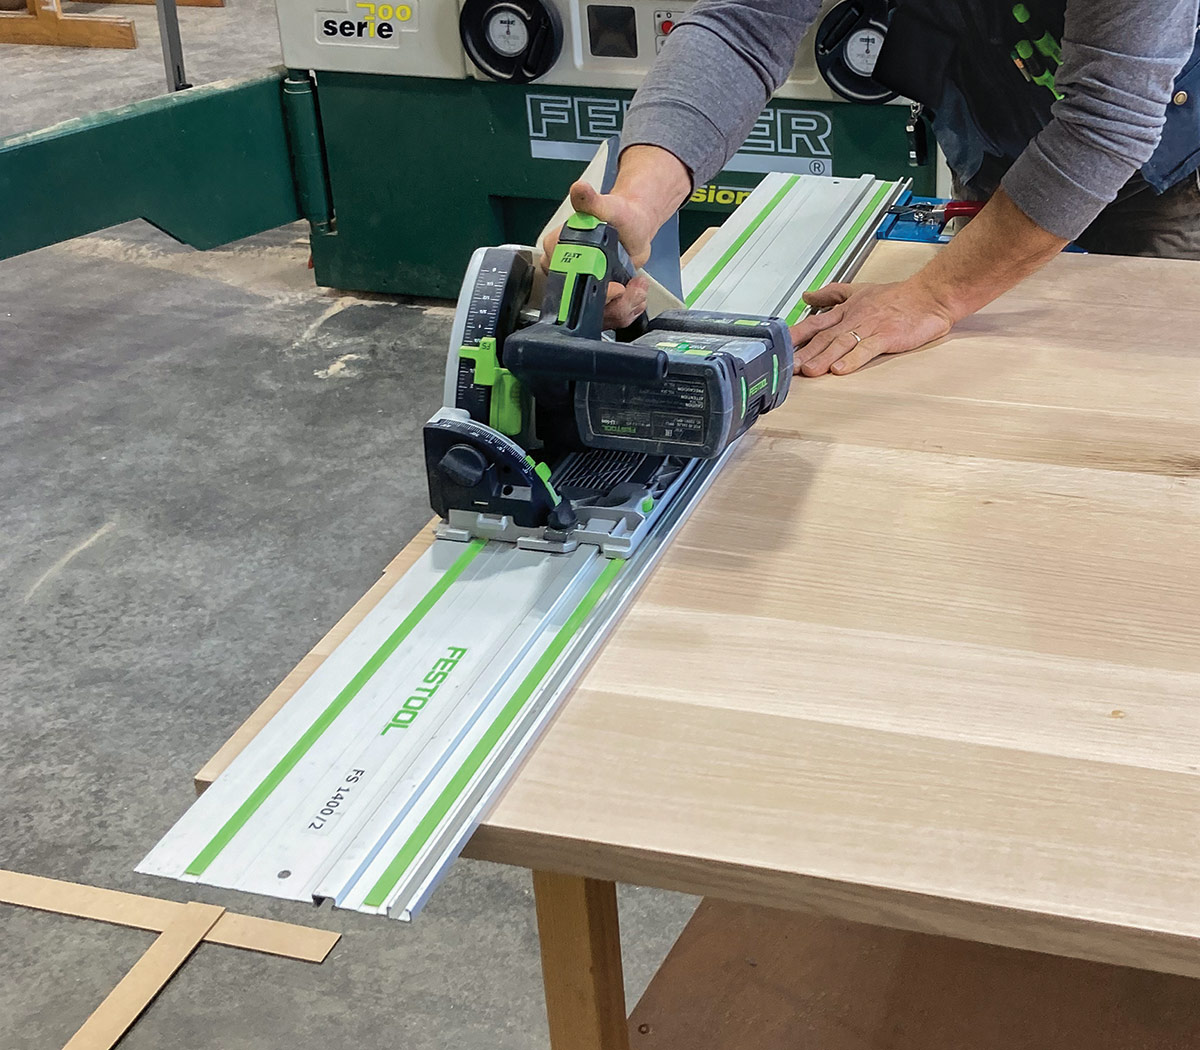
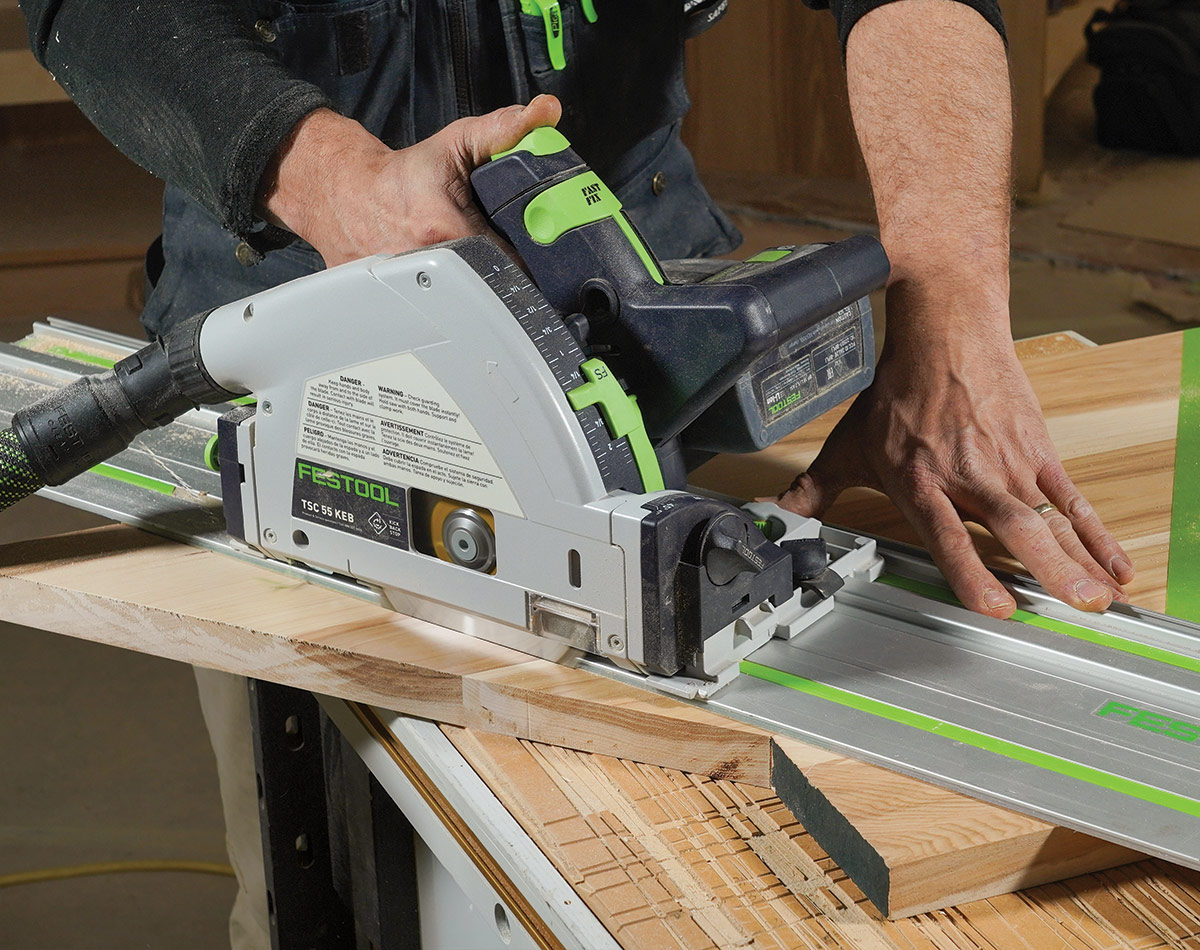
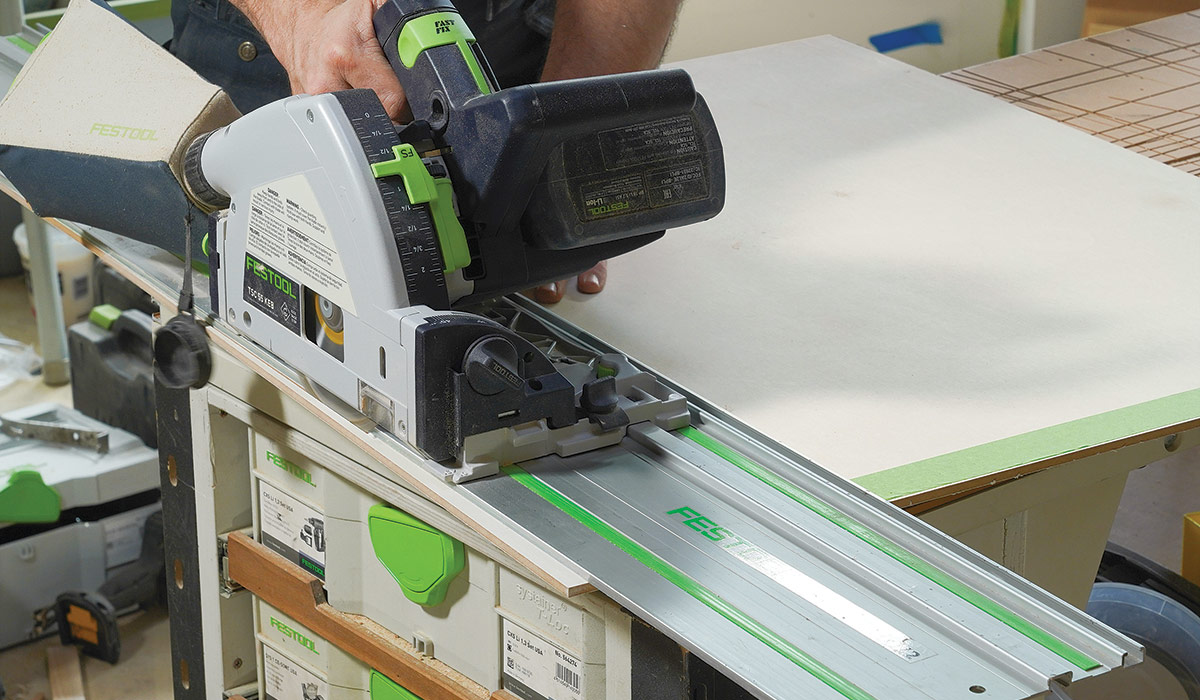
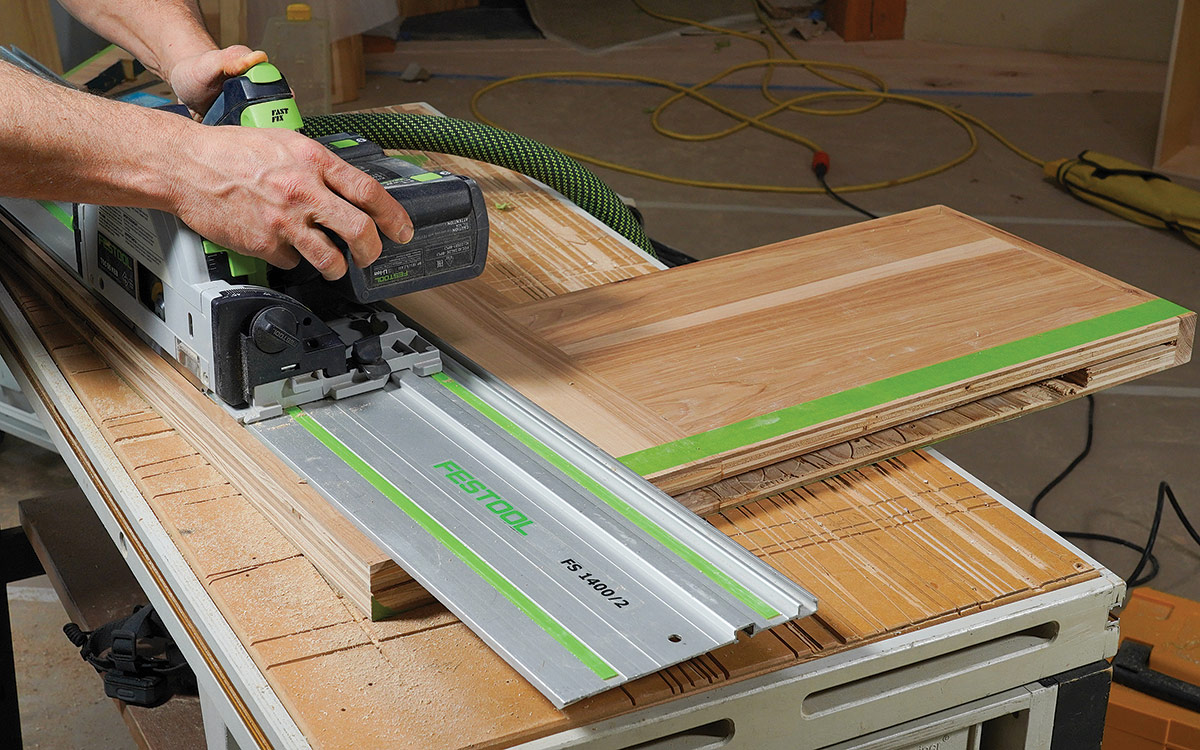
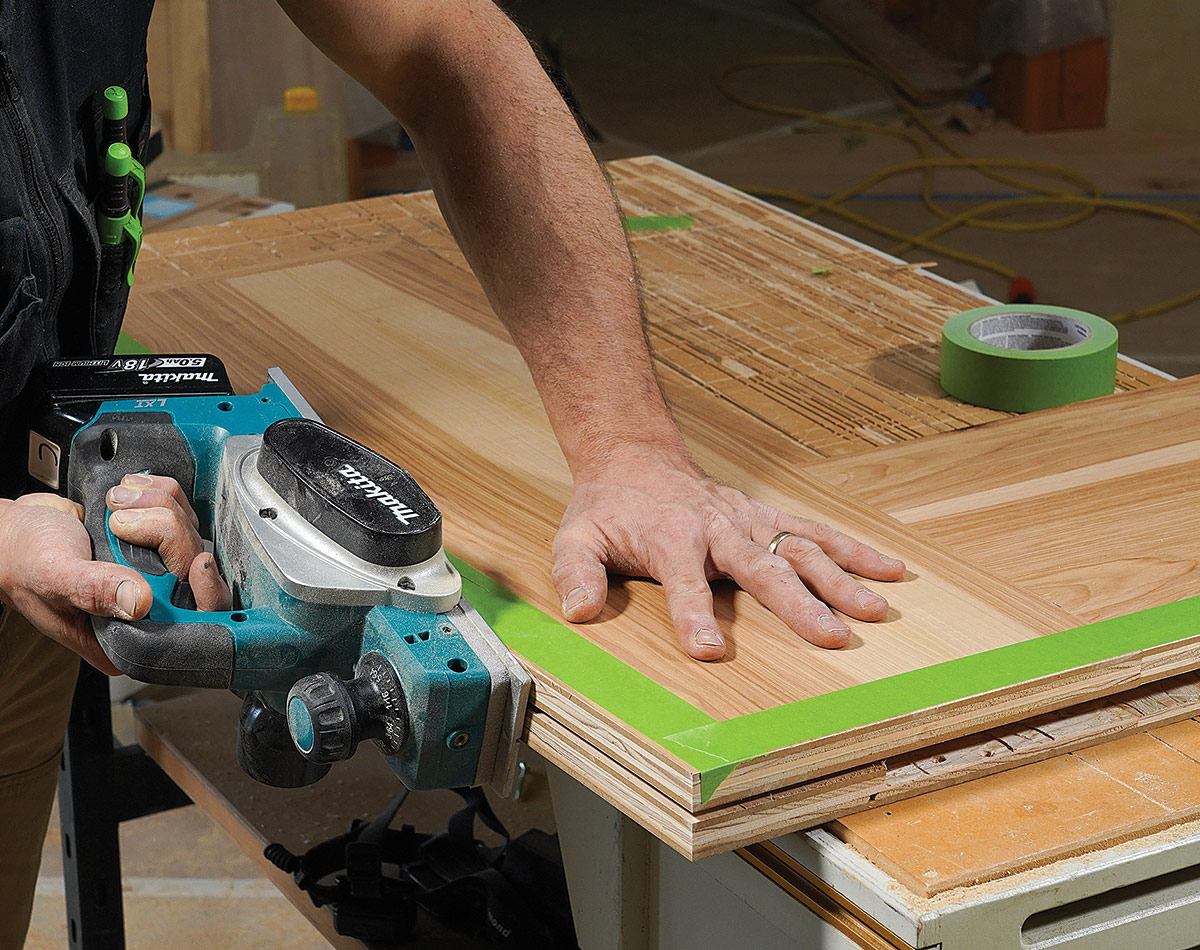
To trim both the template and the finished part, I tend to use similar tools. I generally start with a track saw for the main cuts, as a belt sander tends to create too much dust, making it hard to see the line. On thick finished workpieces, I often follow with a power planer to get even closer to the line. After that I use a block plane or sanding block to adjust for fine irregularities. Once the final piece is shaped, I do a dry fit and occasionally remove a little more material. You can even re-scribe individual edges at this point. But be careful not to remove too much material here. Once your reference lines are gone, it’s easy to create compounding problems with the fit or to accidentally move the piece away from its desired position. Even at relatively straightforward junctions, I find myself templating rather than measuring. It’s almost always faster in the end, and I get peace of mind and perfect results.

Simple one-piece templates for fitting two edges

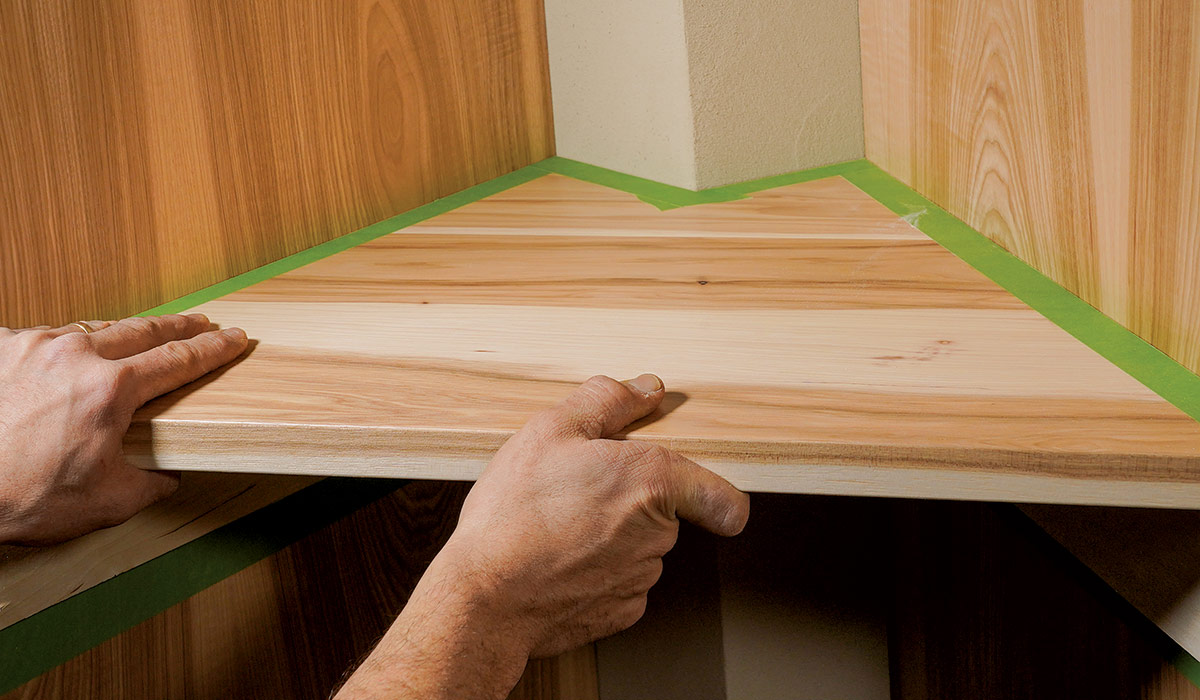
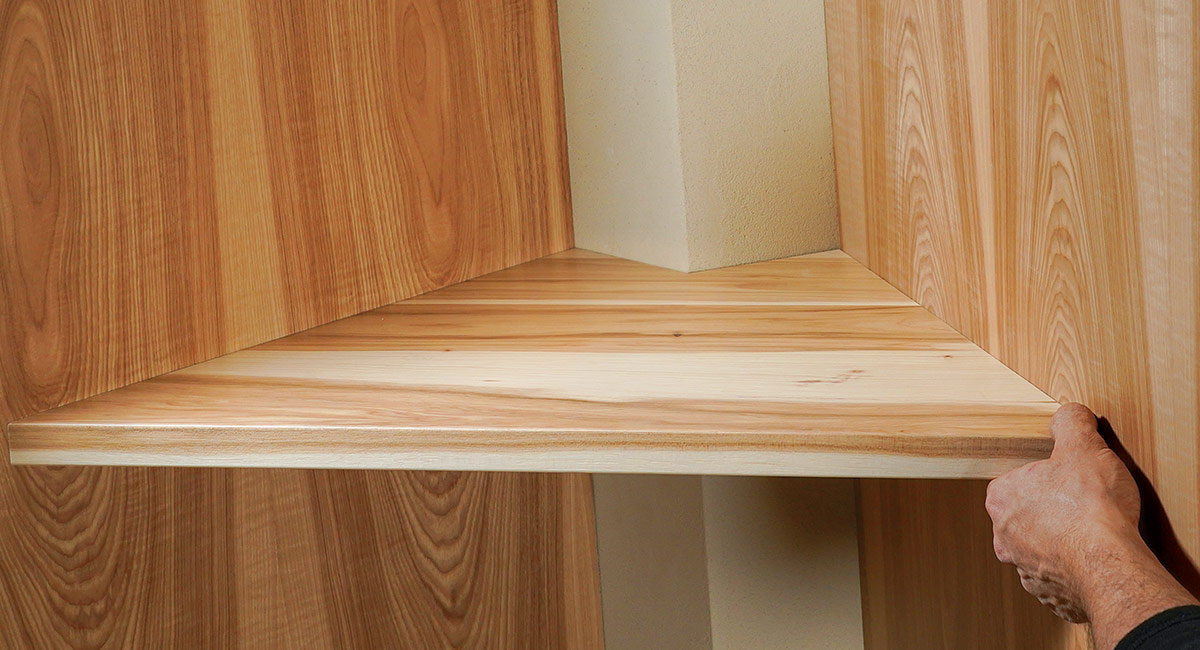
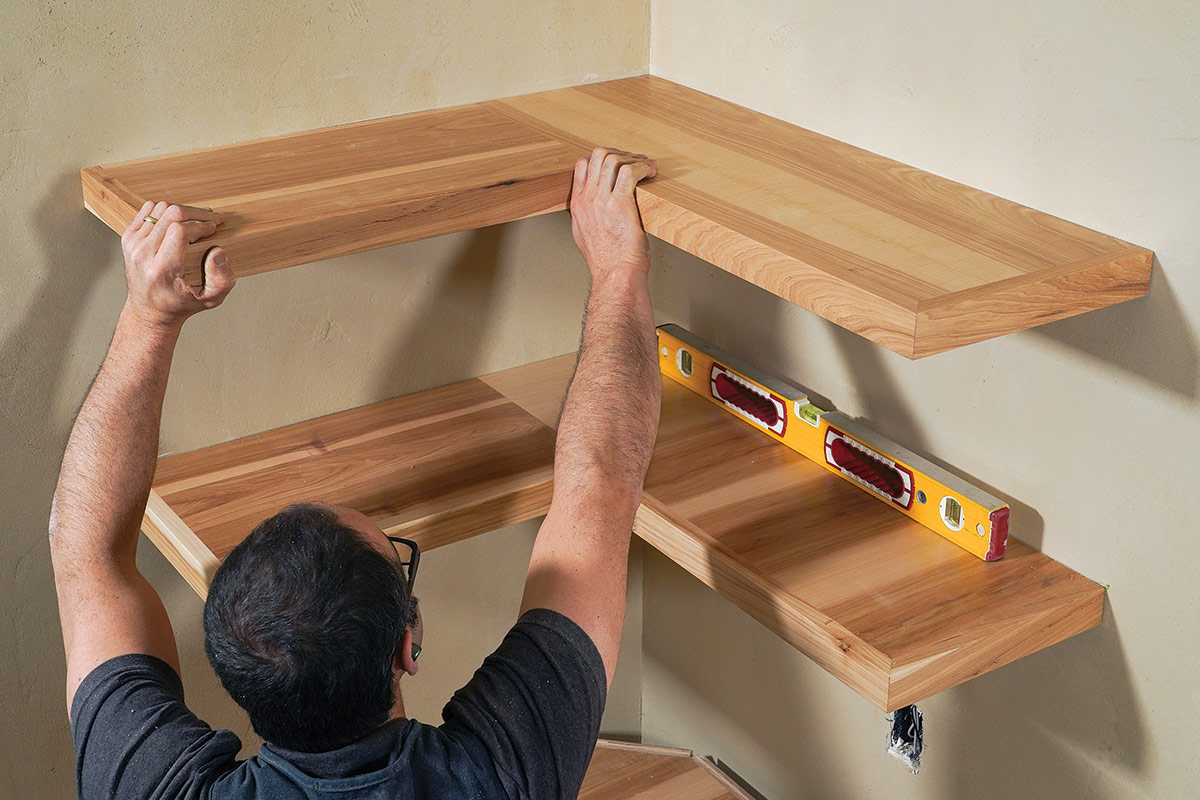
One common templating situation is when a countertop or shelf touches two walls. Between framing irregularities and drywall mud, such “square” corners are usually anything but. The floating corner shelves here needed to be fit to two walls, so I made a one-piece template out of a single panel of 1/4-in. MDF—the perfect material for templates. The first step is making the templates the same dimensions as the shelves.

scribing template clamped to shelf
Attach the template and scribe. After pushing the shelf onto its supports as far as it will go, align the template with the outer edges, clamp it, and then scribe the wall-facing edges, setting your scribing tool for the largest gap. While a pencil-based scribing tool will work, here I’m using my preferred tool, the Thingamejig by Specialty Tools ($73), which marks with a sharp knife.
peeling away the waste side of the tape
Precise, highly visible line. After cutting a fine line in the tape, peel away the waste side to make the line easy to see on any surface.
cut the template to size with a track saw
Cut to the line. I use a track saw to cut close to the tape line, repositioning the track and making multiple cuts to follow slight curves, before switching to a variety of other tools to creep up to the line. I finish up with a sanding block.
Check the templates fit
Check the template’s fit. Place the template back in position to look for gaps at the walls, and refine the fit as needed.
transferring the template shape to the edges of the shelf
Transfer the shape. Realign the template with the outside edges of the shelf, and clamp it in place. Run a sharp utility knife along the edges to cut through the painter’s tape on the shelf below. To hug the template closely, keep the knife vertical and don’t press harder than you have to.

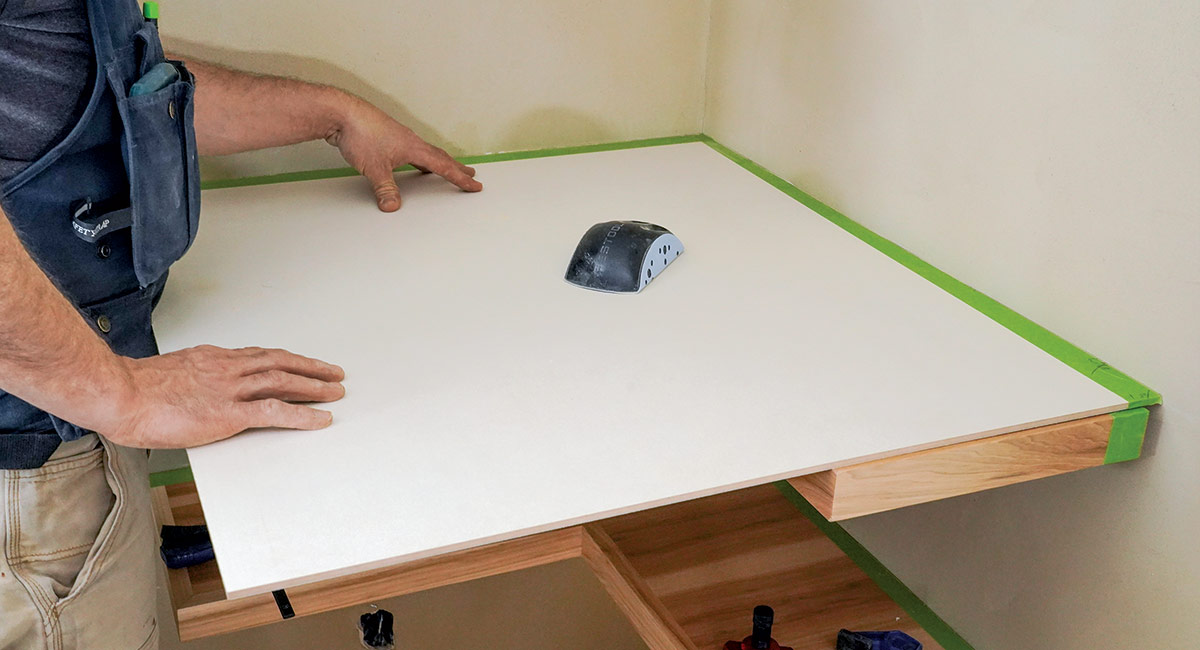
With any templating job, you want to scribe or build the template as close as possible to the position of the finished piece to be sure you’re capturing the irregularities at that specific location. For countertops, this is straightforward: The template rests on the cabinets below. It was easy for these corner shelves, too; I just slid the shelves temporarily onto their brackets and clamped the template panels on top of them to scribe their back edges. The brackets, made from welded steel, are hidden behind the drywall (Floating Countertop Wall Bracket from IronSupports.com).

trim the shelf with a track saw
Trim the shelf. Peel away the waste side of the tape, and then use a track saw to work your way up to the line.
using a power planer to refine the fit
Refine the fit. A variety of tools work for refining the fit; I typically switch over to a power planer (shown here), a belt sander, and/or a sanding block. On parts like these, with their ends visible, keep your scribed cuts square to avoid obvious gaps.
installing the shelf
Check the fit and install the shelf. Make any additional refinements before permanently installing the shelf; individual edges can even be rescribed lightly if necessary.

floating shelves on display spread

To create the slots hidden inside these thick shelves, I routed cavities in each of the plywood layers before gluing them together and edging them with solid wood. A similar technique was covered in Floating Shelves on Display (FHB #247).


Stefan Straka is a cabinetmaker and finish carpenter. Originally based in Bellingham, Wash., he recently emigrated with his family to Nelson, New Zealand.

Photos by Asa Christiana, except where noted.

From Fine Homebuilding #312


RELATED STORIES

  • Scribing Made Simple
  • Templating Countertops
  • Making Wood Countertops

Sign up for eletters today and get the latest how-to from Fine Homebuilding, plus special offers.

Signing you up...

This site is protected by reCAPTCHA and the Google Privacy Policy and Terms of Service apply.
See all newsletters
See all newsletters
View PDF
Previous: Guide to Countertops: Wood Next: Guide to Countertops: Concrete

Guide

Kitchens

Chapter

Countertops & Flooring

View Comments

  1. Mickelr345 | Apr 01, 2023 10:41am | #1

    https://packstrack.com/

Log in or create an account to post a comment.

Sign up Log in

Become a member and get full access to FineHomebuilding.com

Kitchens

Kitchens

A complete resource for designing, building, or remodeling the kitchen of your dreams

View Project Guide

View All Project Guides »

Become a member and get unlimited site access, including the Kitchens Project Guide.

Start Free Trial

Kitchen Planning & Design
Featured Kitchen Projects
  • Kitchen Remodels
Cabinets, Built-Ins, & Pantries
  • Choosing Kitchen Cabinets
  • Installing Kitchen Cabinets
  • Cabinet Hardware
  • Breakfast Nooks
  • Pantries
Kitchen Islands
Countertops & Flooring
  • Countertops 101
  • Concrete Countertops
  • Kitchen Flooring
Appliances, Fixtures, & Lighting
  • Appliances
  • Range Hoods
  • Sinks & Faucets
  • Kitchen Lighting

Fine Home Building

Newsletter Sign-up

  • Fine Homebuilding

    Home building tips, offers, and expert advice in your inbox.

  • Green Building Advisor

    Building science and energy efficiency advice, plus special offers, in your inbox.

  • Old House Journal

    Repair, renovation, and restoration tips, plus special offers, in your inbox.

Signing you up...

This site is protected by reCAPTCHA and the Google Privacy Policy and Terms of Service apply.
See all newsletters

Follow

  • Fine Homebuilding

    Dig into cutting-edge approaches and decades of proven solutions with total access to our experts and tradespeople.

    Start Free Trial Now
    • Facebook
    • Instagram
    • X
    • LinkedIn
  • GBA Prime

    Get instant access to the latest developments in green building, research, and reports from the field.

    Start Free Trial Now
    • Facebook
    • YouTube
  • Old House Journal

    Learn how to restore, repair, update, and decorate your home.

    Subscribe Now
    • Facebook
    • Instagram
    • X

Membership & Magazine

  • Online Archive
  • Start Free Trial
  • Magazine Subscription
  • Magazine Renewal
  • Gift a Subscription
  • Customer Support
  • Privacy Preferences
  • About
  • Contact
  • Advertise
  • Careers
  • Terms of Use
  • Site Map
  • Do not sell or share my information
  • Privacy Policy
  • Accessibility
  • California Privacy Rights

© 2025 Active Interest Media. All rights reserved.

Fine Homebuilding receives a commission for items purchased through links on this site, including Amazon Associates and other affiliate advertising programs.

X
X
This is a dialog window which overlays the main content of the page. The modal window is a 'site map' of the most critical areas of the site. Pressing the Escape (ESC) button will close the modal and bring you back to where you were on the page.

Main Menu

  • How-To
  • Design
  • Tools & Materials
  • Video
  • Blogs
  • Forum
  • Project Guides
  • Reader Projects
  • Magazine
  • Members
  • FHB House

Podcasts

  • FHB Podcast
  • ProTalk

Webinars

  • Upcoming and On-Demand

Podcasts

  • FHB Podcast
  • ProTalk

Webinars

  • Upcoming and On-Demand

Popular Topics

  • Kitchens
  • Business
  • Bedrooms
  • Roofs
  • Architecture and Design
  • Green Building
  • Decks
  • Framing
  • Safety
  • Remodeling
  • Bathrooms
  • Windows
  • Tilework
  • Ceilings
  • HVAC

Magazine

  • Current Issue
  • Past Issues
  • Magazine Index
  • Subscribe
  • Online Archive
  • Author Guidelines

All Access

  • Member Home
  • Start Free Trial
  • Gift Membership

Online Learning

  • Courses
  • Project Guides
  • Reader Projects
  • Podcast

More

  • FHB Ambassadors
  • FHB House
  • Customer Support

Account

  • Log In
  • Join

Newsletter

Get home building tips, offers, and expert advice in your inbox

Signing you up...

This site is protected by reCAPTCHA and the Google Privacy Policy and Terms of Service apply.
See all newsletters
See all newsletters

Follow

  • X
  • YouTube
  • instagram
  • facebook
  • pinterest
  • Tiktok

Join All Access

Become a member and get instant access to thousands of videos, how-tos, tool reviews, and design features.

Start Your Free Trial

Subscribe

FHB Magazine

Start your subscription today and save up to 70%

Subscribe

We hope you’ve enjoyed your free articles. To keep reading, become a member today.

Get complete site access to expert advice, how-to videos, Code Check, and more, plus the print magazine.

Start your FREE trial

Already a member? Log in