
Time-Tested Approach to Chimney Flashing
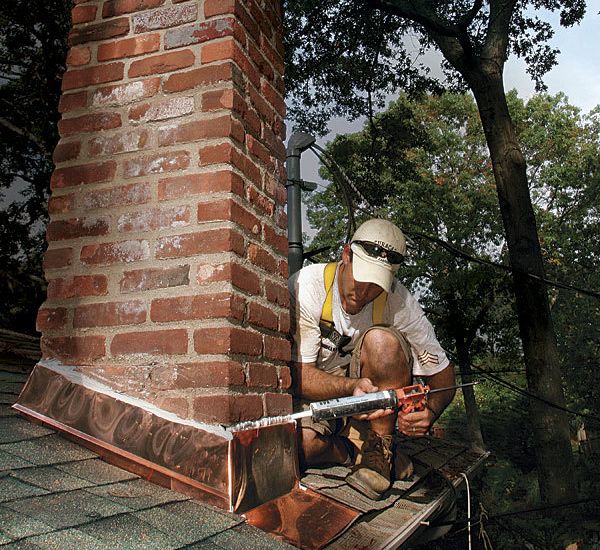
Roofing contractor Dyami Plotke demonstrates how to prepare a chimney for flashing and how to bend, install, and seal metal flashing for a durable, weatherproof, and beautiful job.
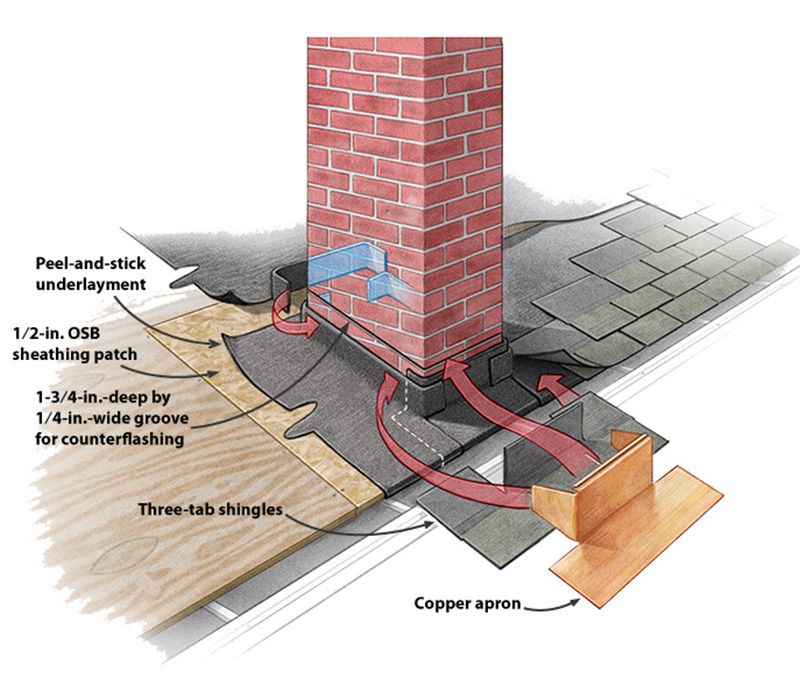
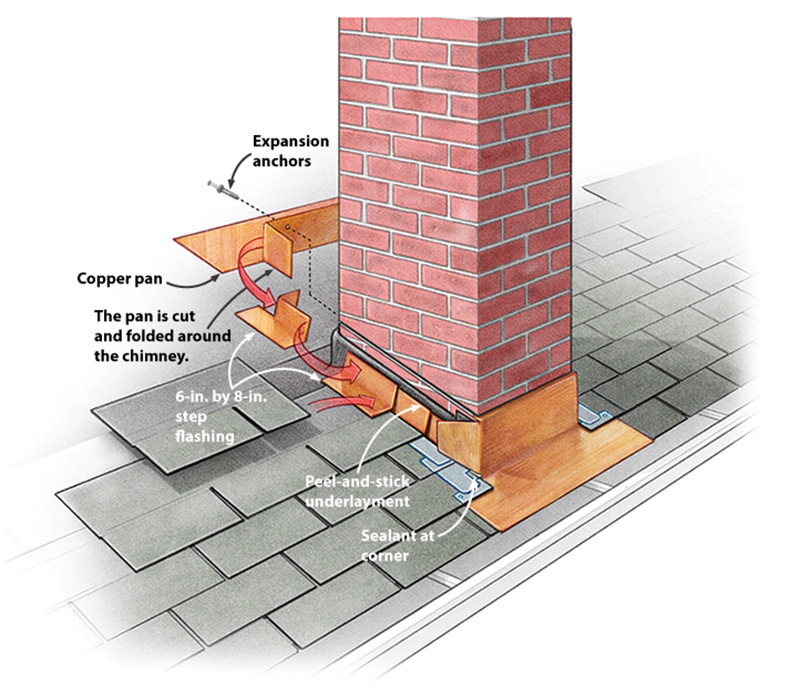
Synopsis: Flashing a chimney correctly involves two layers of metal: flashing and counterflashing. In this article, roofing contractor Dyami Plotke explains how he tackles each step in the flashing process. He almost always chooses copper for chimney-flashing jobs because of its appearance, endurance, receptiveness to soldering, and malleability. A series of three detailed drawings demonstrates Plotke’s steps. The first shows where to cut a groove in the masonry for the counterflashing, how to apply a peel-and-stick underlayment over the OSB sheathing patch and up the sides of the chimney, and how to install the apron. The second shows how to install the step flashing and the pan and includes Plotke’s methods for cutting and folding the copper at transition points to make the tightest fit. The third shows how to install the counterflashing. Before sealing the counterflashing to the brick, Plotke uses wedges of folded copper to hold the counterflashing in its groove, and copper pop rivets to connect the counterflashing on the up-slope edge to the counterflashing on the sides. On the up-slope side of large chimneys, he installs a copper cricket to shed water and snow.
By the time my roofing company was called to take a look at the leaking chimney featured here, the sheathing around the chimney was rotten, and the roof rafters beneath were showing signs of water damage.
When the asphalt shingles on this roof were replaced several years ago, the roofer put a new layer of architectural shingles on top of the existing three-tab shingles and reused the house’s original aluminium chimney flashing. He patched several small leaks in the flashing corners with roofing cement, but didn’t touch the flashing otherwise. Had the roofer done a better job with the chimney flashing, the customer would have been spared the headache and expense of replacing the chimney flashing and patching the roof a few years later.
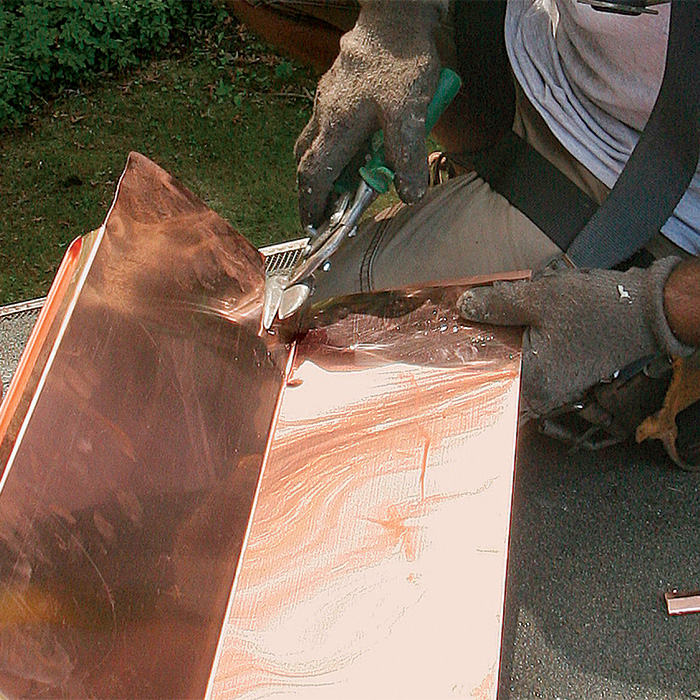
Copper flashing is worth the money
We almost always replace aluminium flashing with copper. Of course, copper costs more than aluminium, but it’s the superior material for several reasons. For starters, it looks good, it lasts almost forever, and it solders great. More important, though, it’s more malleable than aluminium. The flashing pieces can be formed by eye at the metal brake and can be adjusted easily by hand on the roof. When it’s time for new shingles, the flashings and counter flashings can be bent out of the way and repositioned without damage.
Underlayment and apron
The first piece of metal chimney flashing, the apron, is placed on the down-slope side of the chimney. Here, it laps over one three-tab shingle to match the two layers of existing roofing. This shingle is unnecessary when there is only one shingle layer.
 |
 |
 |
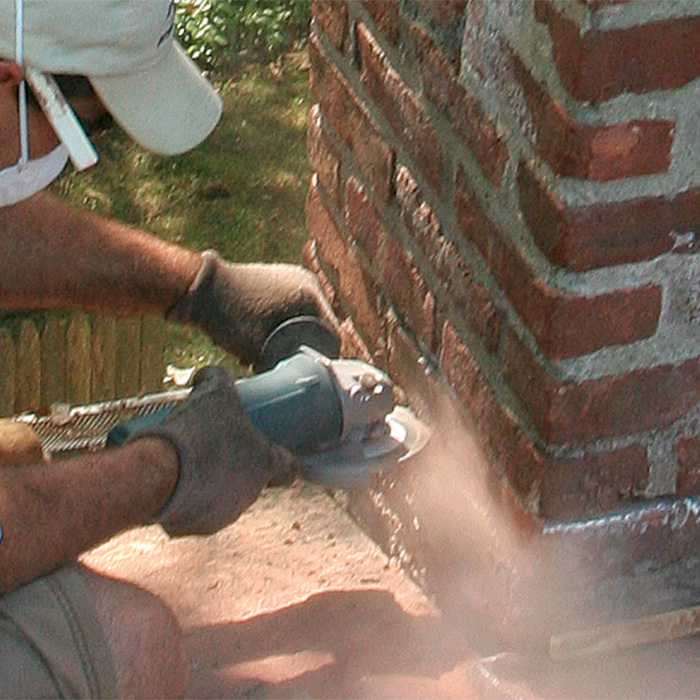
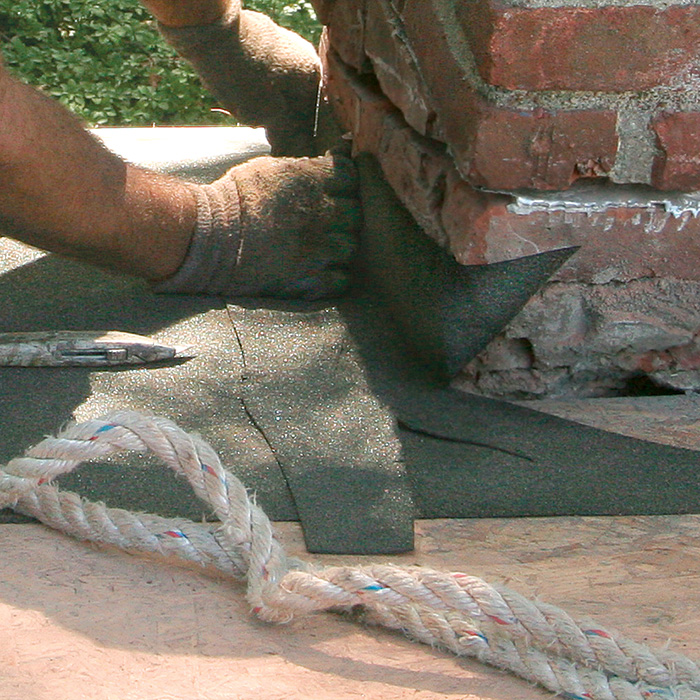
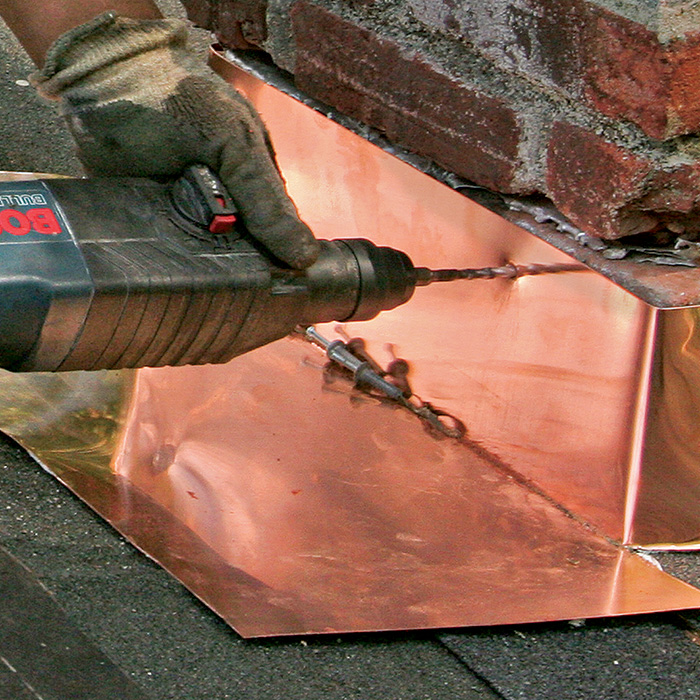
| 1. Make a cut for counter flashing. Cut the groove for the apron and counterflashing with a 1 ⁄ 4-in.- thick diamond tuck-point blade on a 4-1 ⁄ 2-in. grinder. Making the groove before reshingling prevents staining the new shingles with brick dust. The dust is slippery, so sweep the sheathing right after cutting. | 2. Install peel-and-stick. A layer of mineral-surfaced underlayment installed over the OSB sheathing patch and under the shingles provides a second layer of defense against water intrusion. Lap the underlayment onto the chimney sides, then wrap it around the chimney corners. | 3. Fit the apron. Install the apron on the downslope side of the chimney. Tuck the vertical leg’s top edge into the groove cut around the chimney, then lap the horizontal leg onto the shingles in front of the chimney. |
Flashing and counter flashing work together
Flashing a chimney correctly involves two layers of water-shedding metal: flashing and counterflashing. The front of the chimney has a single piece of flashing, the apron, as the first layer; the back has a similar piece called the pan. The step flashing, which is the first layer on the sides of the chimney, is made from L-shaped pieces of copper lapped so that they shed water running down the roof. The horizontal leg goes under the shingles, and the vertical goes up the sides of the chimney. Ideally, neither leg is fastened; nail or screw holes compromise the water tightness of the flashing.
Because there are no nails or screws to hold the vertical leg tight to the chimney, water running down the masonry can get past the step flashing and leak into the house. To prevent this, the flashing’s vertical legs are covered with counterflashing. The counterflashing directs falling rain and water running down the chimney over the first layer of flashing. This creates a finished assembly that looks good and, more important, is watertight.
As was the case on this job, original counter flashings are often installed in a stepped pattern following the mortar lines of the brick. We generally don’t install new flashing in mortar joints. Instead, we cut a 1-3 ⁄ 4-in.-deep groove about 6 in. above the roof deck all the way around the chimney with an angle grinder. Then we install a single piece of counter flashing into the groove.
With this method, there are fewer seams, which translates into fewer potential leaks. It’s also faster and, therefore, less expensive to do it this way. To hold the counterflashing in the groove, we tuck the V-shaped bend at the top into the groove and use small folded pieces of copper to spread the bend, locking the counterflashing in place.
We also rivet the corners with copper pop rivets. These mechanical connections help to hold the counterflashing in place, which in turn helps the sealant at the top of the counterflashing to last up to 20 years.
Step flashing and pan
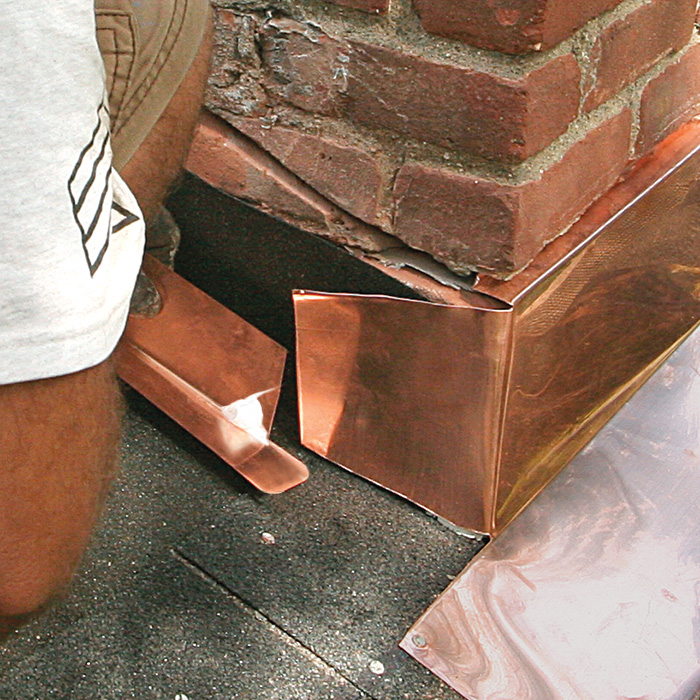
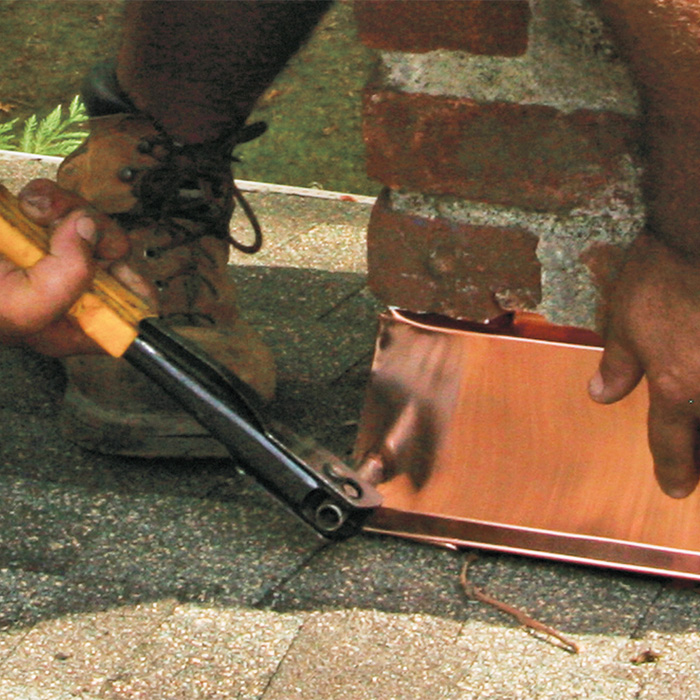
The apron is cut where it transitions from horizontal to vertical. Then it’s folded around the chimney to prevent winddriven rain and snow from getting behind the step flashing and finding their way into the building. The first piece of step flashing is trimmed so that its bottom leg laps onto the apron.
 |
 |
 |
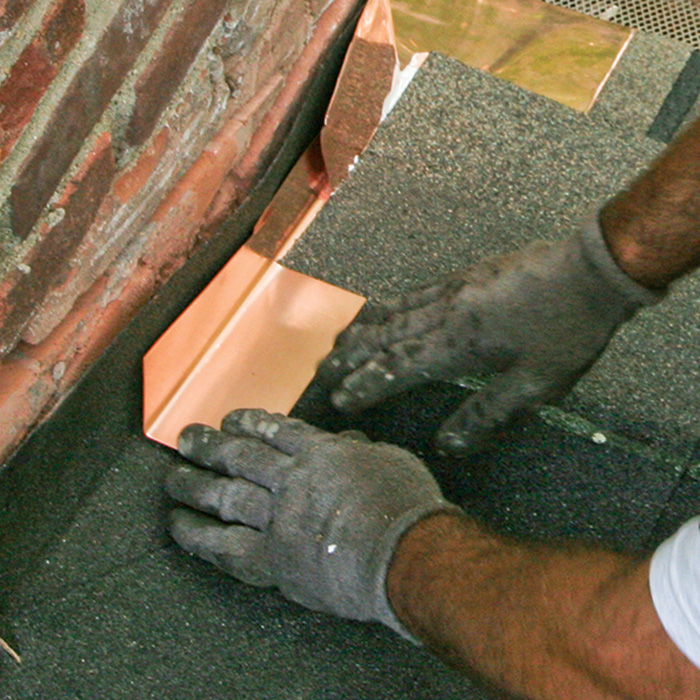
| 1. Turn the corner. Trim the vertical leg on the first piece of step flashing so that the horizontal leg can lap onto the apron. Tuck the vertical leg behind the apron to keep out wind-driven rain and snow. Fill the small hole where the two parts meet with a dab of solvent-based elastomeric sealant. | 2. Continue up the sides. Install step flashing between the chimney and every course of shingles, ideally without fastening. You can use a single fastener in the uppermost corner of the vertical face to keep the flashing in place if necessary, but fasteners should never be placed in the horizontal leg. | 3. Install the pan. Once the shingles are even with the up-slope side of the chimney, install a pan made from a single piece of copper to direct water around the chimney. Attach the pan to the masonry using expansion anchors near the top of the vertical leg. |
A quality job is in the details
We give our counterflashing two bends at the bottom, which makes it look and perform better. The lowest bend is called the strength hem. It stiffens the metal and provides a clean, even edge. The upper bend, which also adds strength, is called the kick. The kick breaks surface tension, preventing water from working its way under the counterflashing.
We also make our step flashing from 6-in. by 8-in. pieces instead of the 5-in. by 7-in. pieces commonly found on low-budget roofs. These bigger pieces of step flashing mean fewer leaks from wind-driven rain and heavy snow.
Counterflashing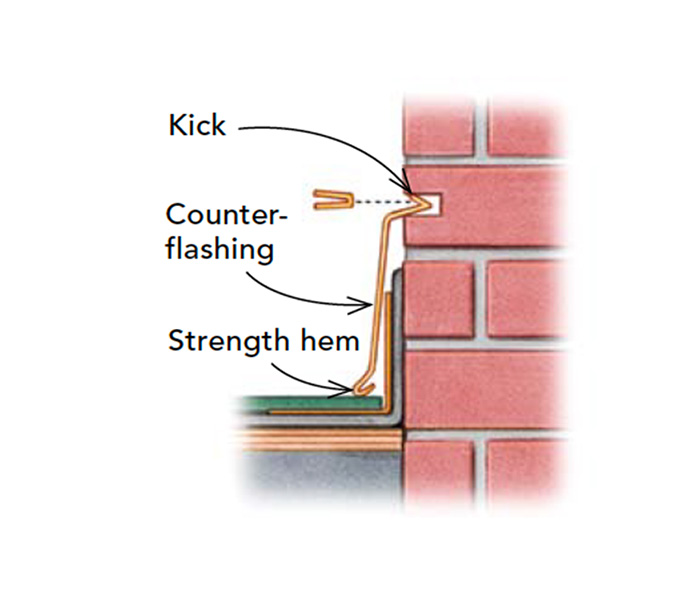
Counterflashing is what makes step flashing work. The counterflashing pan and apron are made in oversize lengths ahead of time and then cut to length on the roof. A bead of water-block mastic is run under the pan, and a bead of M-1 polyether sealant (chemlink.com) is applied to the top edge of the pan for secondary waterproofing.
 |
 |
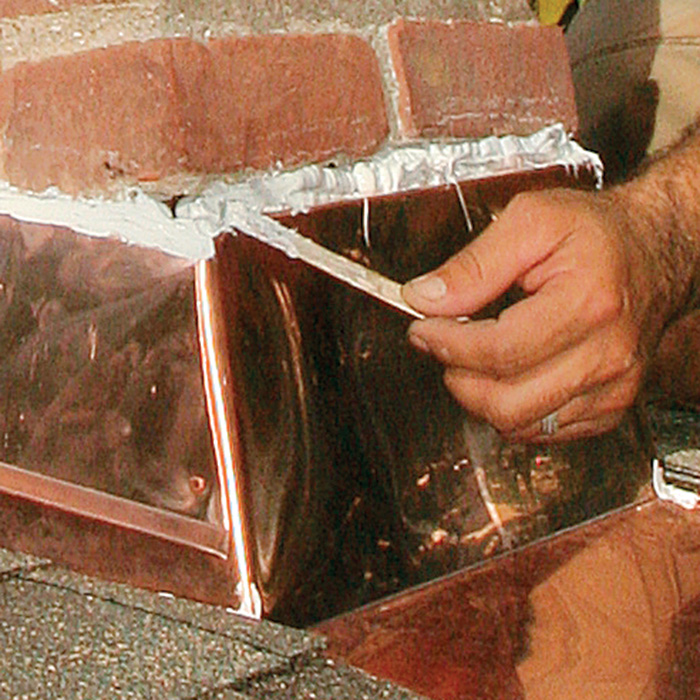 |
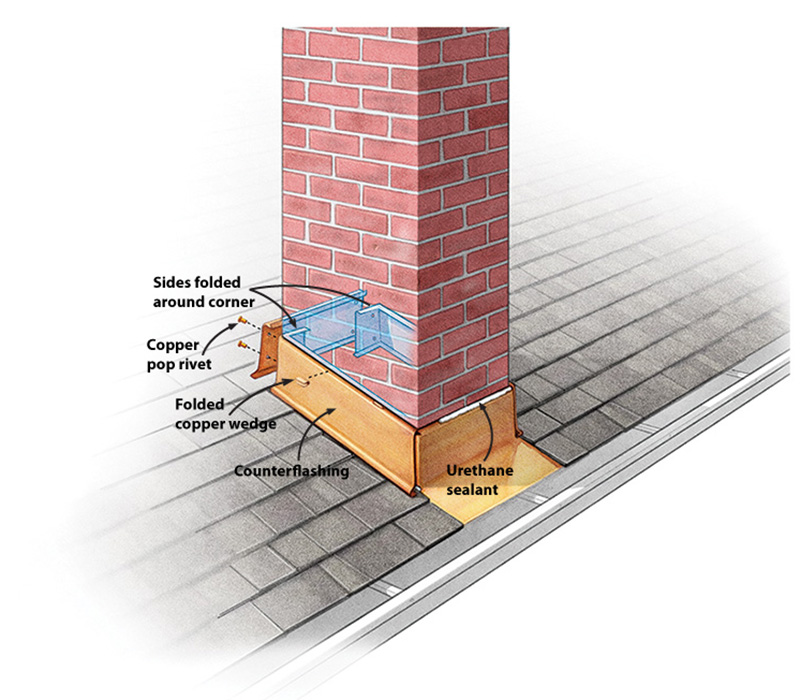
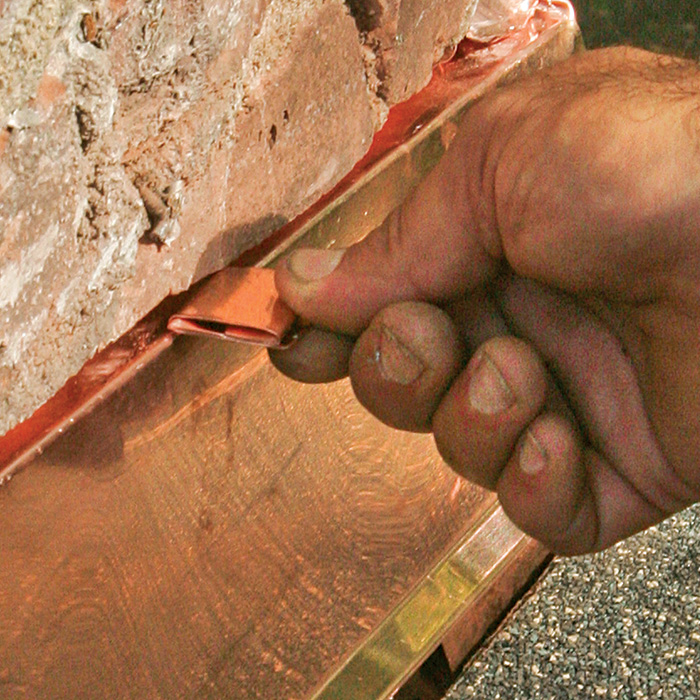
| 1. Make a mechanical connection. Rather than rely solely on caulk or sealant, use wedges of folded copper spaced every 8 in. to 12 in. to hold the counterflashing in its groove. Spread the folds in the wedges with a screwdriver to lock the flashing in place. | 2. Secure the corners. Rivet the counterflashing on the up-slope edge to the counterflashing on the sides, which wraps behind the up-slope counterflashing. Any water that gets through the rivets is caught by the underlying copper pan, which directs it around the chimney and down the roof. | 3. Seal the deal. Once the counterflashing is complete, fill the cut in the brick with M-1, a flexible moisture-cure polyether sealant that bonds to both masonry and copper. When the sealant is visible, as with this chimney, tool it carefully with a tongue depressor. |
Where’s the cricket?
Chimneys that are built anywhere along the rain-carrying parts of a pitched roof (not at the ridges) create a dam that can stop water from draining and allow it to pool behind the chimney. The dam that is created by the chimney can be especially problematic in cold climates, where the chimney can become a collector for snow and ice.
Behind large chimneys, we install a cricket. Shaped like a tiny hip roof, a cricket diverts water and snow around the chimney for better drainage. We install crickets when the chimney is wider than 24 in. (perpendicular to the slope), which is consistent with the shingle manufacturers’ instructions. For smaller chimneys like the one pictured here, a one-piece copper pan is all that’s necessary to carry the roof water around the chimney.
Dyami Plotke is a roofing contractor on Long Island, N.Y.
Photos by Patrick McCombe.
Drawings: John Hartman
From Fine Homebuilding #233
For more photos, drawings, and details, click the View PDF button below:
Fine Homebuilding Recommended Products
Fine Homebuilding receives a commission for items purchased through links on this site, including Amazon Associates and other affiliate advertising programs.
Flashing Boot

Peel & Stick Underlayment
Flashing Boot Repair

View Comments
I was wondering if there is any slope to the copper pan that is installed behind the chimney? My house has a small chimney and I was under the impression that I should install a cricket. After reading this article, I'm now second guessing that. Any advice on the pan would be greatly appreciated. Would it be okay to install a small diverter right above the chimney to help direct water away even more? Thanks so much.